This article provides a step-by-step guide for creating a work order template. It walks through the process of building a template that includes general work order details along with a few supporting tables.
Step 1: Set the base table
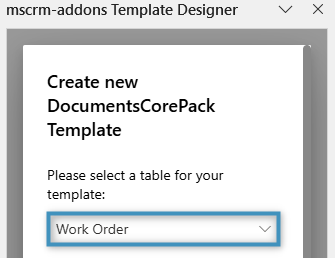
Before you start designing your template, the first step is to define the base table. This selection determines which fields will be available in the Template Designer. Please note that once a field is added, the base table cannot be changed. For this walkthrough, click on the Insert Fields button located in the Fields group under the DocumentsCorePack tab. Once the Template Designer opens, we will select Work Order as the base table.
Step 2: Adding our text and general structure
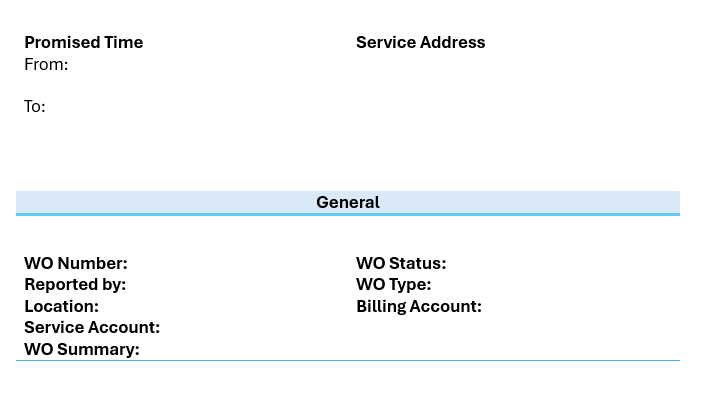
We will start by adding our text and basic layout to our template. For this example, here is what our initial structure of the template looks like.
Step 3: Adding our standard fields
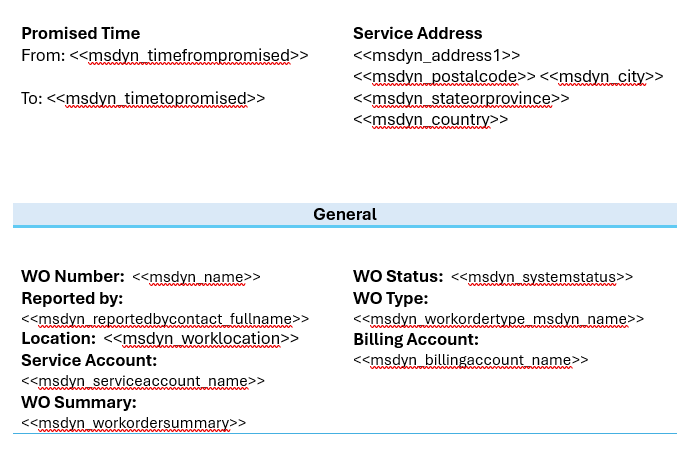
To build our work order template, we will include fields that capture the essential details of the work order. These standard fields will come either directly from the Work Order entity or through its related lookup fields (e.g. Billing Account).
Step 4: Creating tables for tasks, services and products
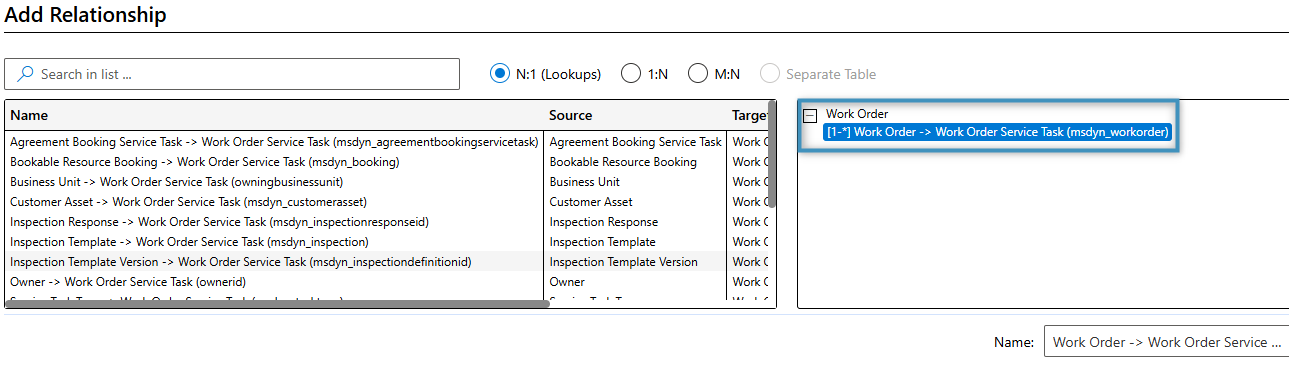
Under our General section of the template, we will create three tables corresponding to the Work Order Service Task, Work Order Service, and Work Order Product entities. To do this, we first have to Add the Relationships using the Relationship Designer from the “Insert Fields” Taskbar.
For our first table, we will create a relationship with the Work Order Service Task entity.
Once added, fields from the Work Order Service Task table can be added to the document.
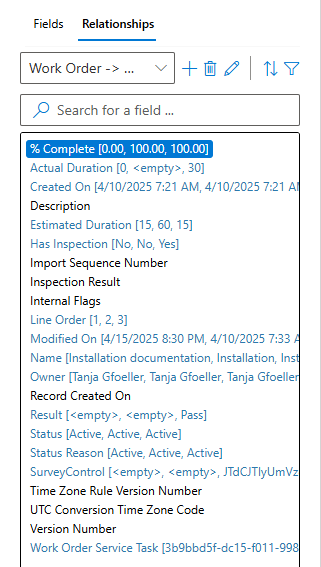
Each table will have the same general structure. We will start by creating a table based on the Work Order Service Tasks relationship, which we initiate by double-clicking the Name field in the fields list. The table will be configured using the following settings:

After creating the table, we can add the % Complete and Estimated Duration fields alongside the existing Name field. We will also assign clear and descriptive column headers.

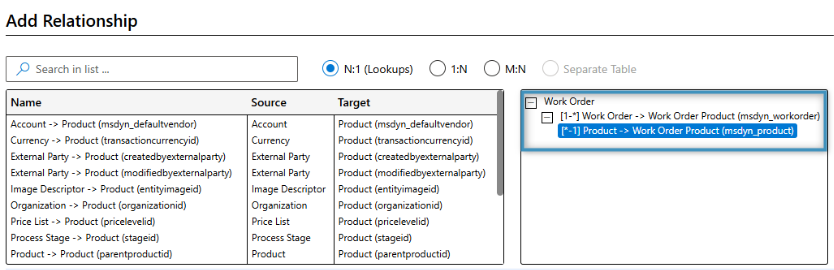
For our second table, we will create a relationship with the Work Order Product entity. As with the previous step, we will use the Relationship Designer to select the appropriate relationship. We will also add the N:1 relationship to the Product table since we will group items in our table based on product category later on.
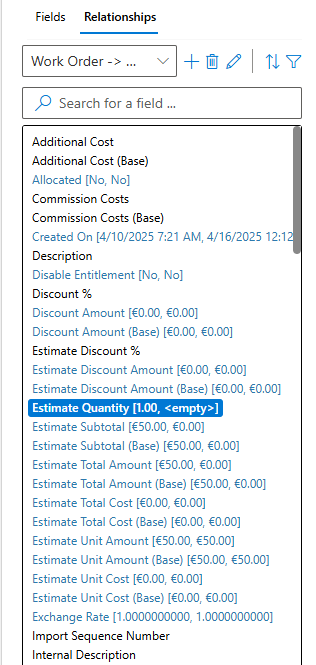
Next, we will choose the Estimate Quantity, Line Status, and Name fields.
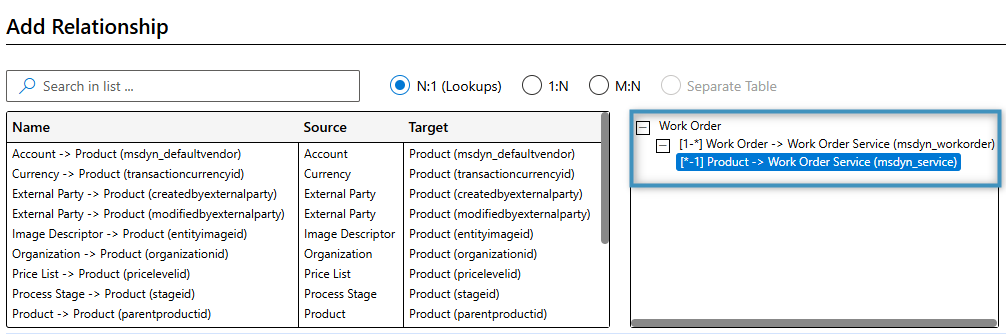
For our last table, we will need to create a relationship with the Work Order Service entity. Here we will also establish a relationship to the Product entity just like before and add the Product field, which we will need for grouping later.
For this table, we will choose the Estimate Duration, Line Status, and Name fields.
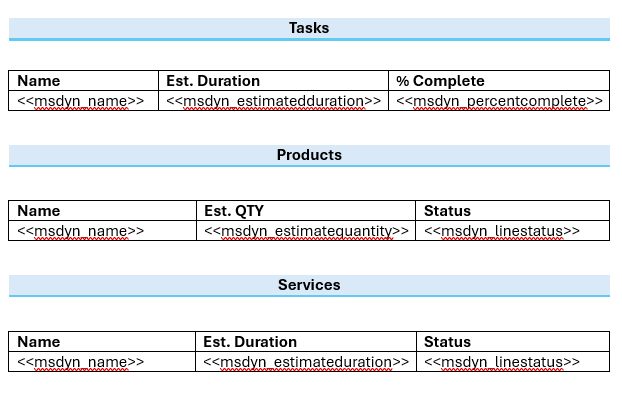
With the fields configured, we can proceed to create the remaining two tables: Products and Services. At this point, our tables should look like this:
Step 5: Grouping
Applying grouping to a table allows for the organization of dynamically generated data into distinct categories. This approach is particularly useful in scenarios where, for instance, products need to be classified as “electronics” or “services.”
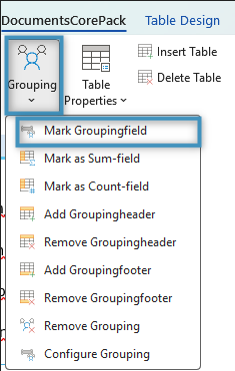
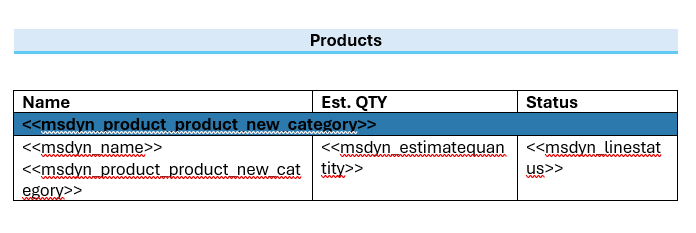
To group data in a table, start by adding the field you want to group by. In our case, we want to add the Category field from the Work Order Product relationship into the table.

After adding the field, click on it, then go to the Grouping dropdown and select Mark Groupingfield.
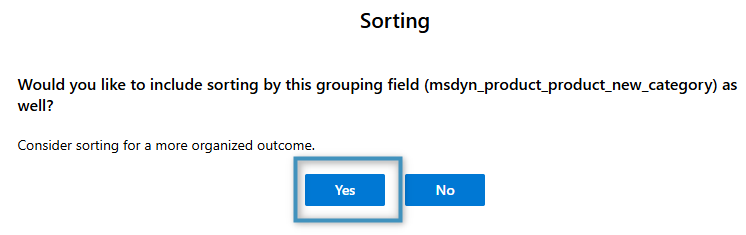
A new window will appear. Click Yes to include sorting by the grouping field that you selected.
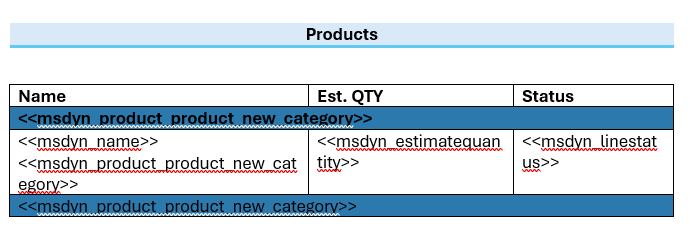
The result should look like this:
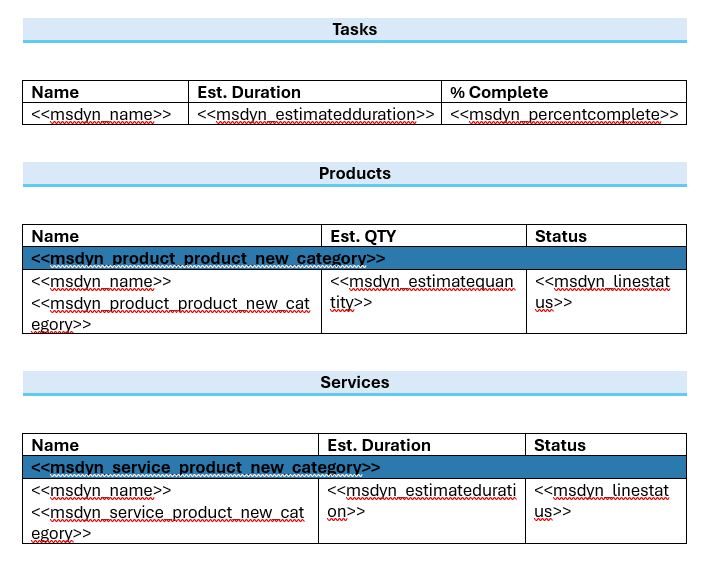
Since the field is not required in our main table row, we can remove it. Additionally, we can delete the grouping footer by selecting it, return to the Grouping dropdown, and selecting Remove Groupingfooter.
We will repeat this process for our Work Order Service table. However, we will not apply it to our Work Order Service Task table.
The final table should appear as follows:
Step 6: The Result
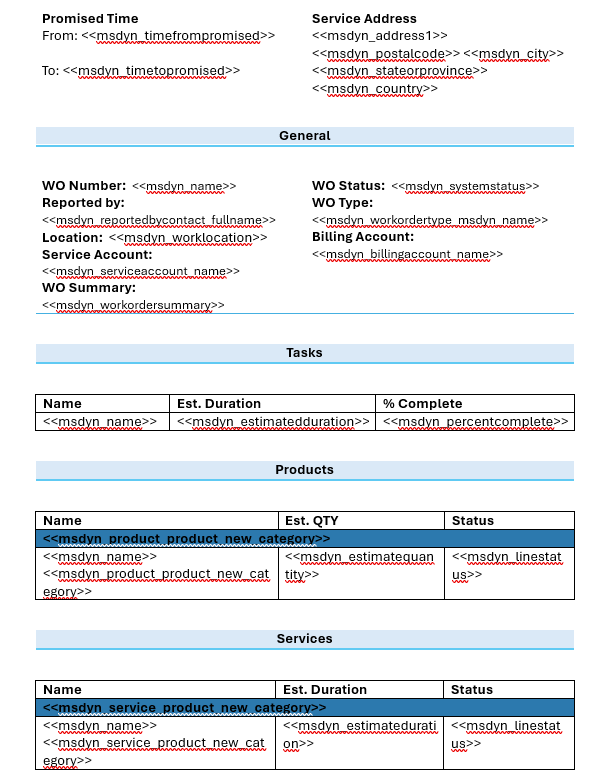
At this point, your template should look something like the following:
When we run the template with some data, we get the following result. Notice the grouping in the last two tables.
