This article provides a comprehensive guide on saving a generated document to SharePoint using two different approaches: the DocumentsCorePack Dialog (DCP Dialog) and a One-Click-Action (OCA) Configuration. It demonstrates how to utilize the “Edit” feature in both methods, ensuring you can make changes to your document before saving it.
Saving a document with the DCP Dialog
Step 1: Opening the DocumentsCorePack Dialog
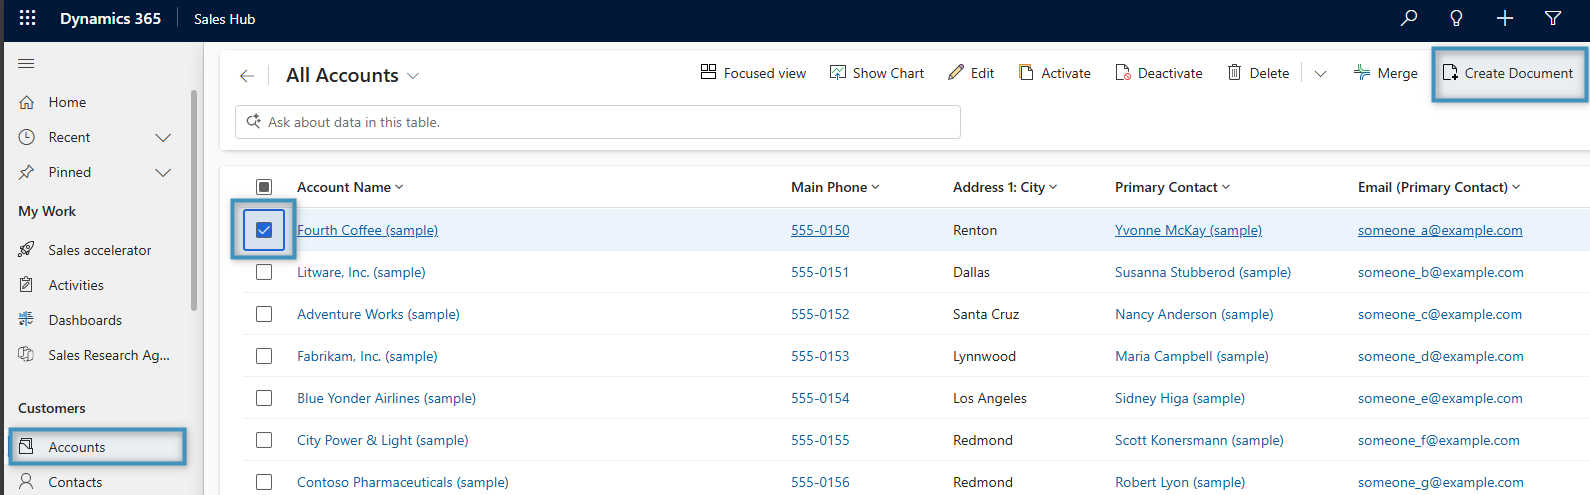
To begin, open your Dynamics 365. For this example, we will use an Account record. Open the Account record and then select the Create Document tab.
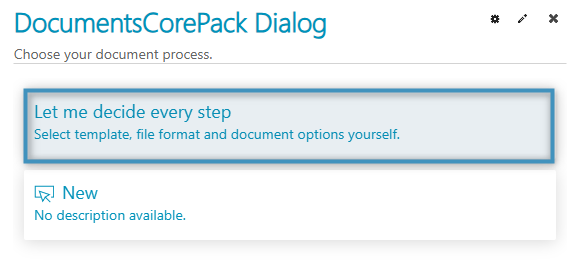
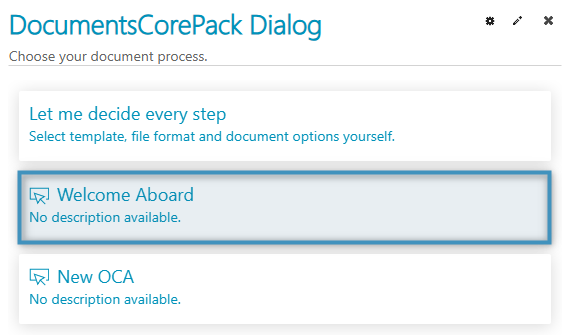
This action opens the DocumentsCorePack Dialog. In the Dialog, select the option Let me decide every step to proceed.
Step 2: Selecting a template
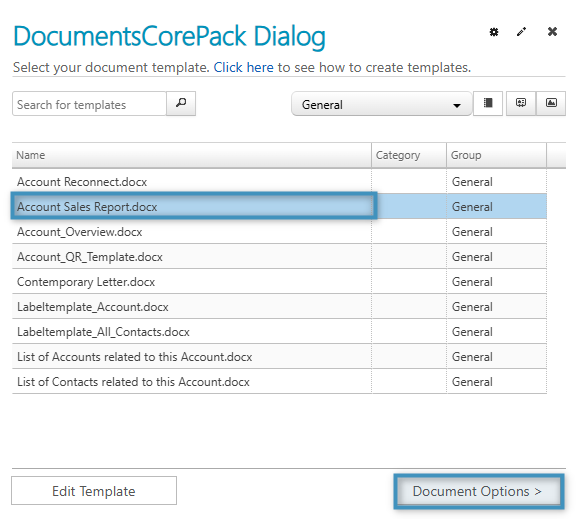
The following window will open. From the list, select your desired template, and then click Document Options to continue.
Step 3: Selecting a Filetype and Saving to SharePoint
In this step, select the Filetype docx to enable editing in the next step. Then select Save to SharePoint and Create Document.
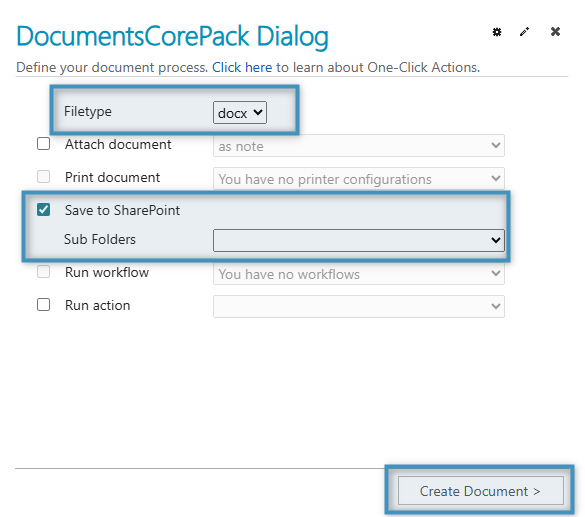
Note: PDFs may also be saved to SharePoint, but they cannot be edited prior to saving
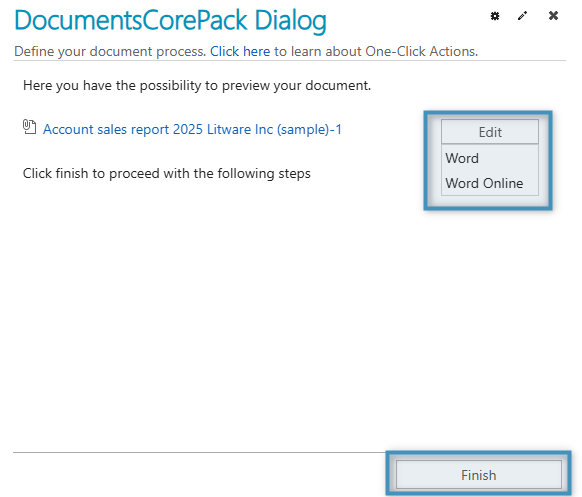
Step 4: Preview and edit your document
Your document will now be displayed as an attachment. Select whether you prefer to edit the document in Word or Word Online, and then click Finish to save the document to SharePoint.
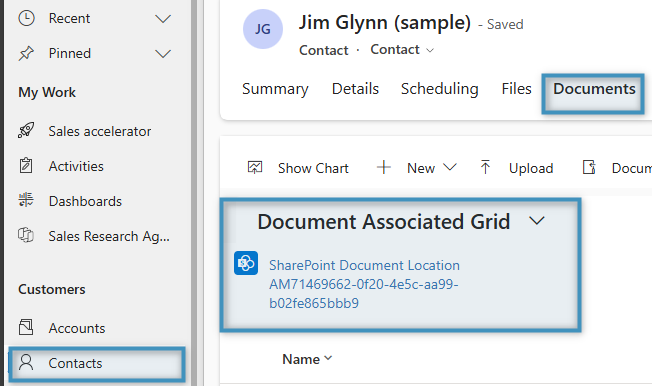
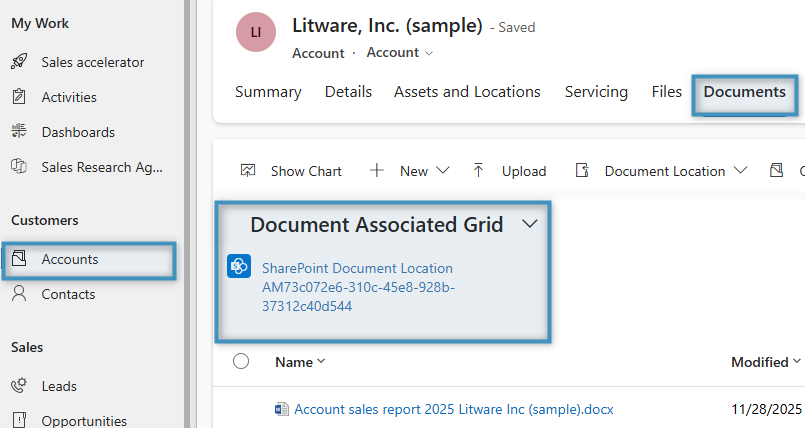
Step 5: Locating your SharePoint documents
To locate your SharePoint document, go to your Dynamics 365 environment, open the desired account record and select the Documents tab. Here, you will see the document’s SharePoint location.
Saving a document via OCA
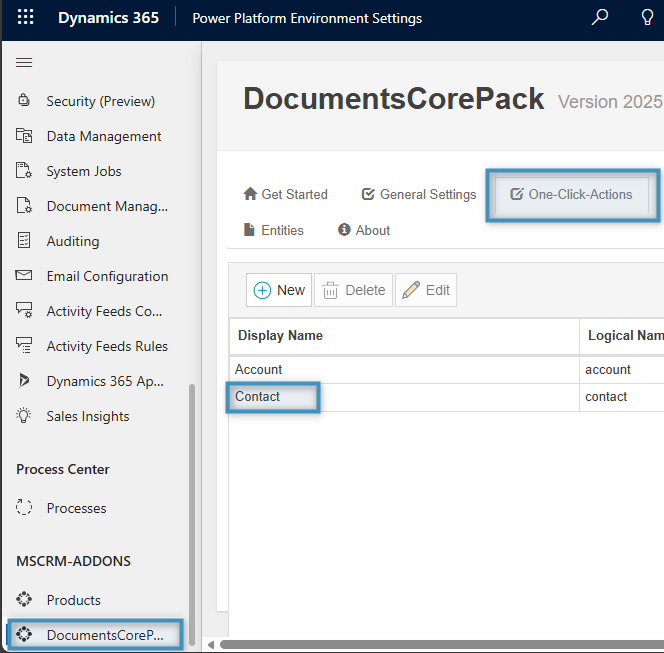
Step 1: Opening the One-Click-Action Configuration
To begin, open the Power Platform Environment Settings. Under MSCRM-ADDONS, select DocumentsCorePack. Then, open the One-Click-Actions tab.
For this example, we will use an OCA from a Contact record, so click Contact.
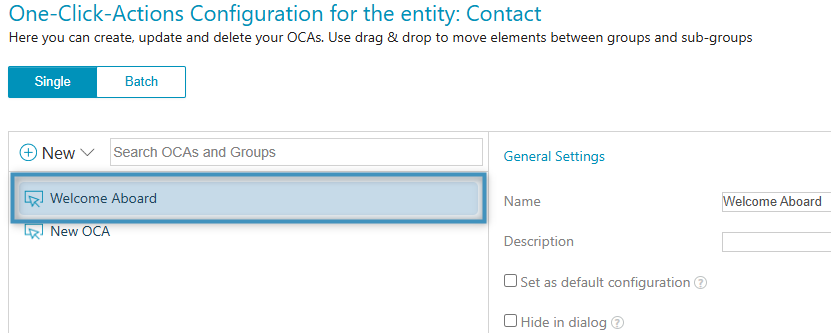
Step 2: Select your OCA in General Settings
In the General Settings window, select your preferred OCA. Once confirmed, proceed by navigating to the next step to continue the configuration.
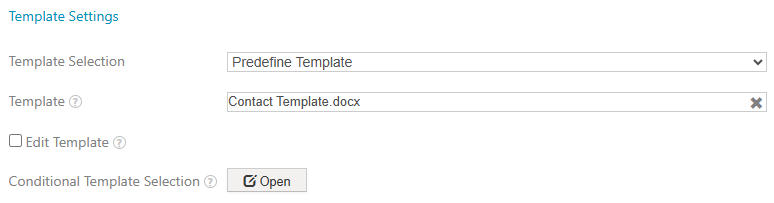
Review the Template Settings window, then click the forward button at the bottom to proceed to the next step.
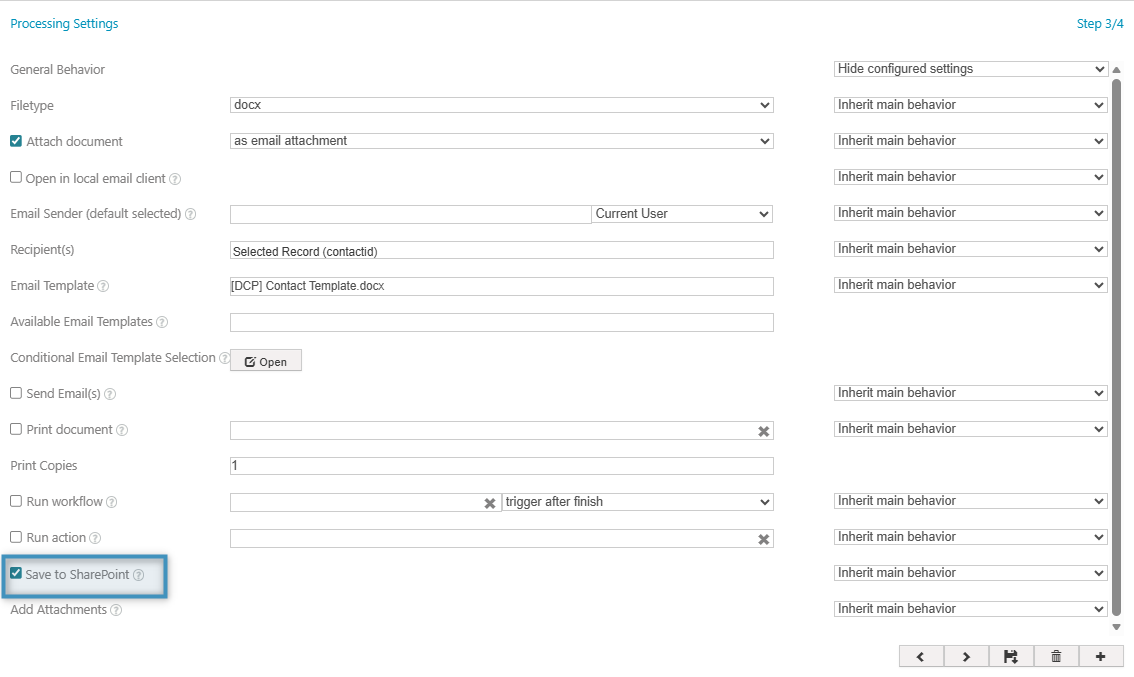
Step 3: Save to SharePoint in Processing Settings
In the Processing Settings window, select the checkbox labeled Save to SharePoint to enable SharePoint integration, and then proceed to the next window.
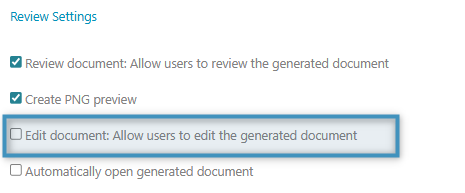
Step 4: Review Settings
In the Review Settings window, you can select the Edit document checkbox, which will allow users to edit the generated document before saving it. If enabled, you can choose to delete the temporary SharePoint document. Additionally, the second dropdown allows you to configure how or if this setting should appear in the DCP Dialog when executing the OCA.
After making your selections, click Save at the bottom of the window to apply the changes.
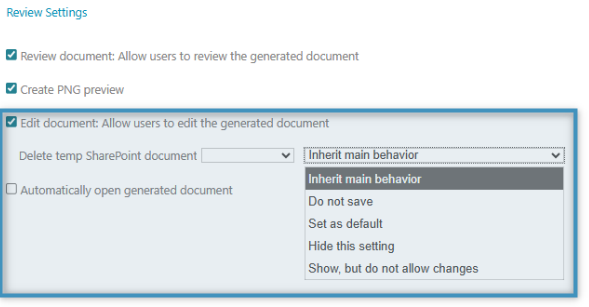
To disable the “Edit” feature, simply clear the checkbox.
Step 5: Execute the OCA
Select your OCA to initiate it. Upon execution, the document is automatically saved to SharePoint.
Step 6: Locating your SharePoint documents
To locate your SharePoint document, go to your Dynamics 365 environment, open the desired contact record and select the Documents tab. Here, you will see the document’s location.