Batch document generation allows users to produce documents for multiple Dynamics 365 records in a single operation. This is helpful for scenarios like sending welcome letters to a list of contacts, generating invoices for multiple accounts, or producing contracts for several opportunities at once.
The DocumentsCorePack (DCP) dialog fully supports batch operations and provides additional options that do not appear during single-record generation. This article walks through the batch process end-to-end and highlights what is different in the dialog.
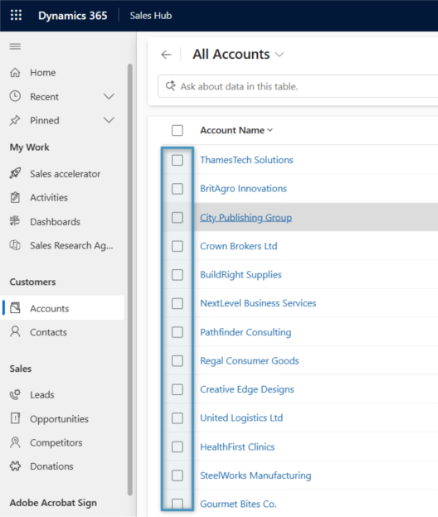
Step 1: Select multiple records
Navigate to Dynamics 365 and select all records you want to include in the batch.
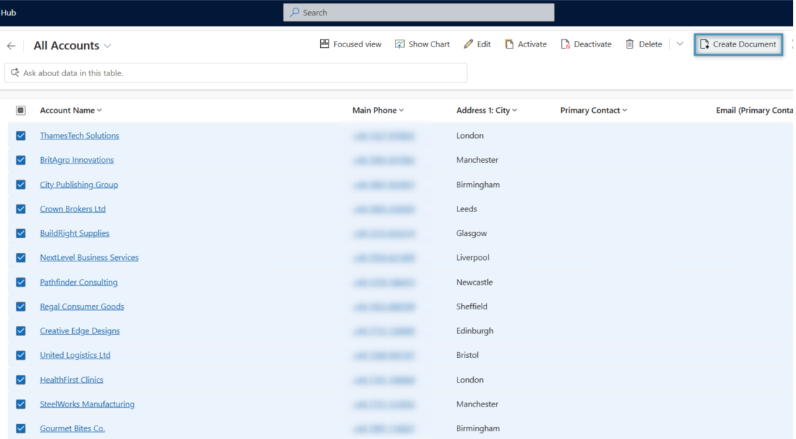
Step 2: Create Document
With the records selected, click the Create Document button in the command bar.
The dialog will automatically detect that you selected multiple records and will enter batch mode.
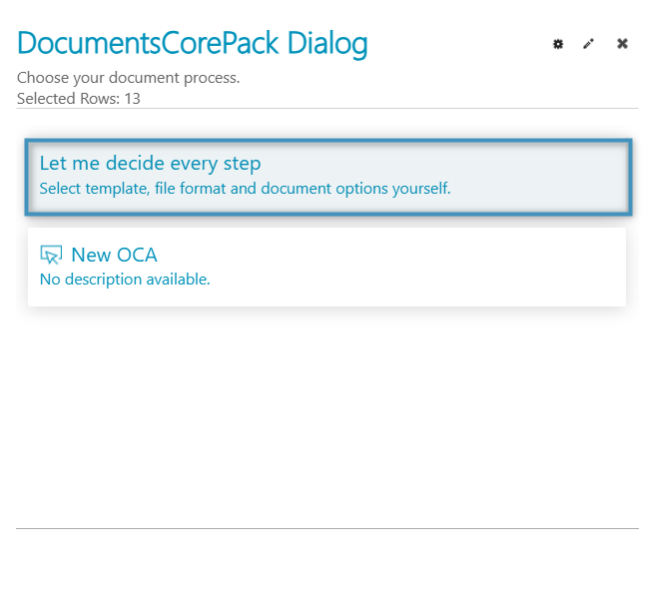
Step 3: Choose how you want to run the process
You can:
- Run the process manually (Let me decide every step)
- OR use a pre-configured One-Click-Action (OCA)
If the OCA is set up for batch execution, it will run the entire batch automatically.
For this example, we will use Let me decide every step.
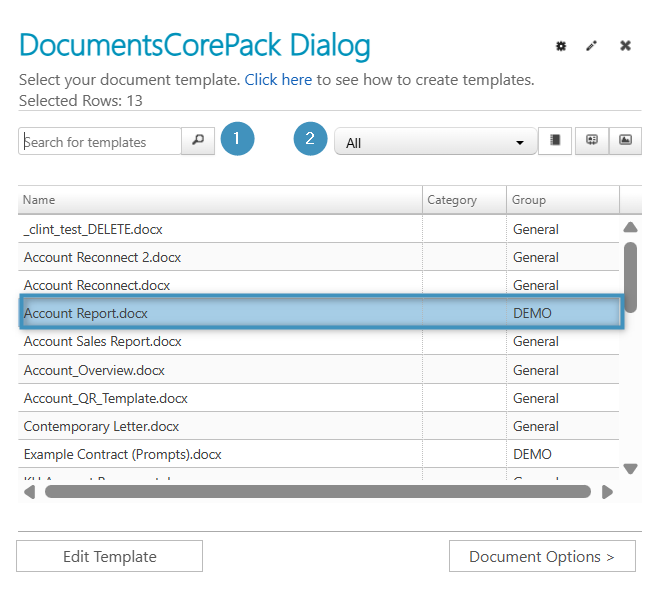
Step 4: Select a template
Choose the DocumentsCorePack template you want to use for your batch job. You can ❶ search or ❷ filter templates, or open the template to review it if needed. For this case, we will be sending an account report for the batch generation.
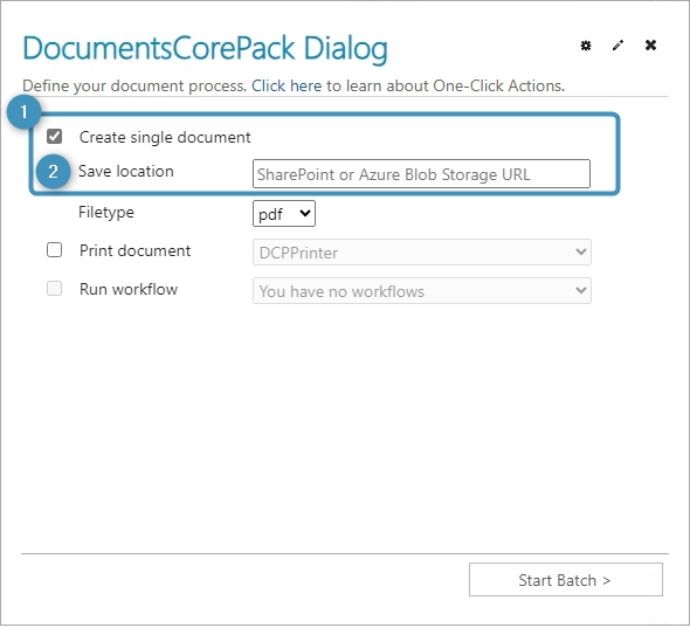
Step 5: Configure batch document options
Once a template is selected, you can choose how you want to process the documents. Here, you can choose to enable the the ❶ Create single document option. When enabled, all generated documents are merged into one consolidated file. This is especially useful for tasks like printing multiple records at once. If selected, you can also choose to save the combined file directly to a ❷ SharePoint folder or an Azure Blob by entering the target URL.
Step 6: Review and download the results
After the batch process is complete, the dialog displays a list of all generated documents: one entry for each record included in the batch. This screen lets you verify the results and take final action before you finish.
Note: If you enabled “Create single document” in the previous step, all documents will be combined into a single document, meaning there will only be one document displayed.
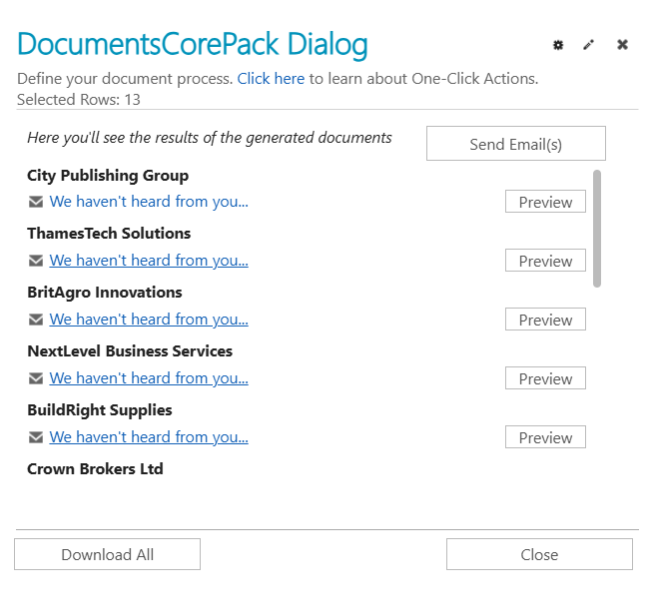
Each record appears with:
- A record name (e.g., City Publishing Group)
- A document link showing the generated file (click to open)
- An optional Preview button that opens the generated document in a preview window
This makes it easy to confirm that each file was created correctly.
On this screen, you can choose to Send Email(s) to email all documents, or you can select Download All to save all documents to your system for local review. When you’re finished, you can close the dialog.
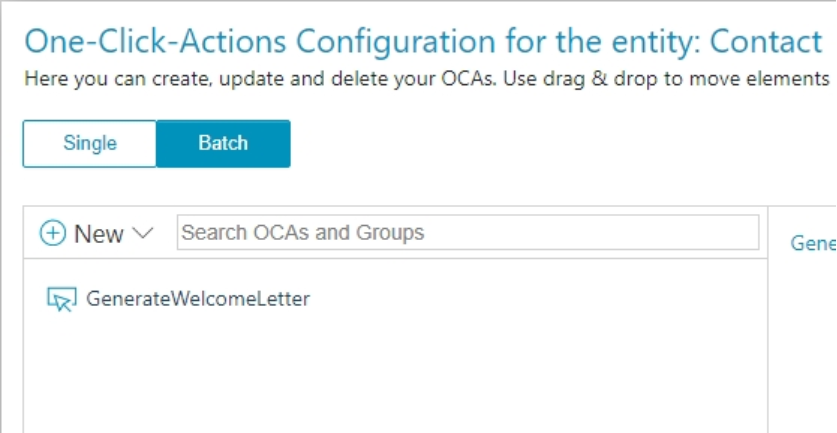
Batch One-Click-Actions
If batch processes will be repeated frequently (e.g., monthly invoices, mailing lists, recurring letters), create an OCA specifically configured for Batch mode. This allows users to run an entire batch generation with one click.