This article provides a step-by-step guide on generating and sending a document using the DocumentsCorePack (DCP) connector for Microsoft Power Automate.
In this example, our goal is to generate a document and send an email to a customer. The email will include an attached file that provides an overview of the customer’s sales report. To achieve this, we will create an on-demand flow that generates and sends a document as an attachment in Dynamics 365. Additionally, we will use a second template to generate the email body.
Step-by-step description
Step 1: Creating a flow by choosing a trigger
Begin by creating a new flow and choosing a trigger. In this example, we are building an instant cloud flow and selecting When a row is selected (legacy) as the trigger.
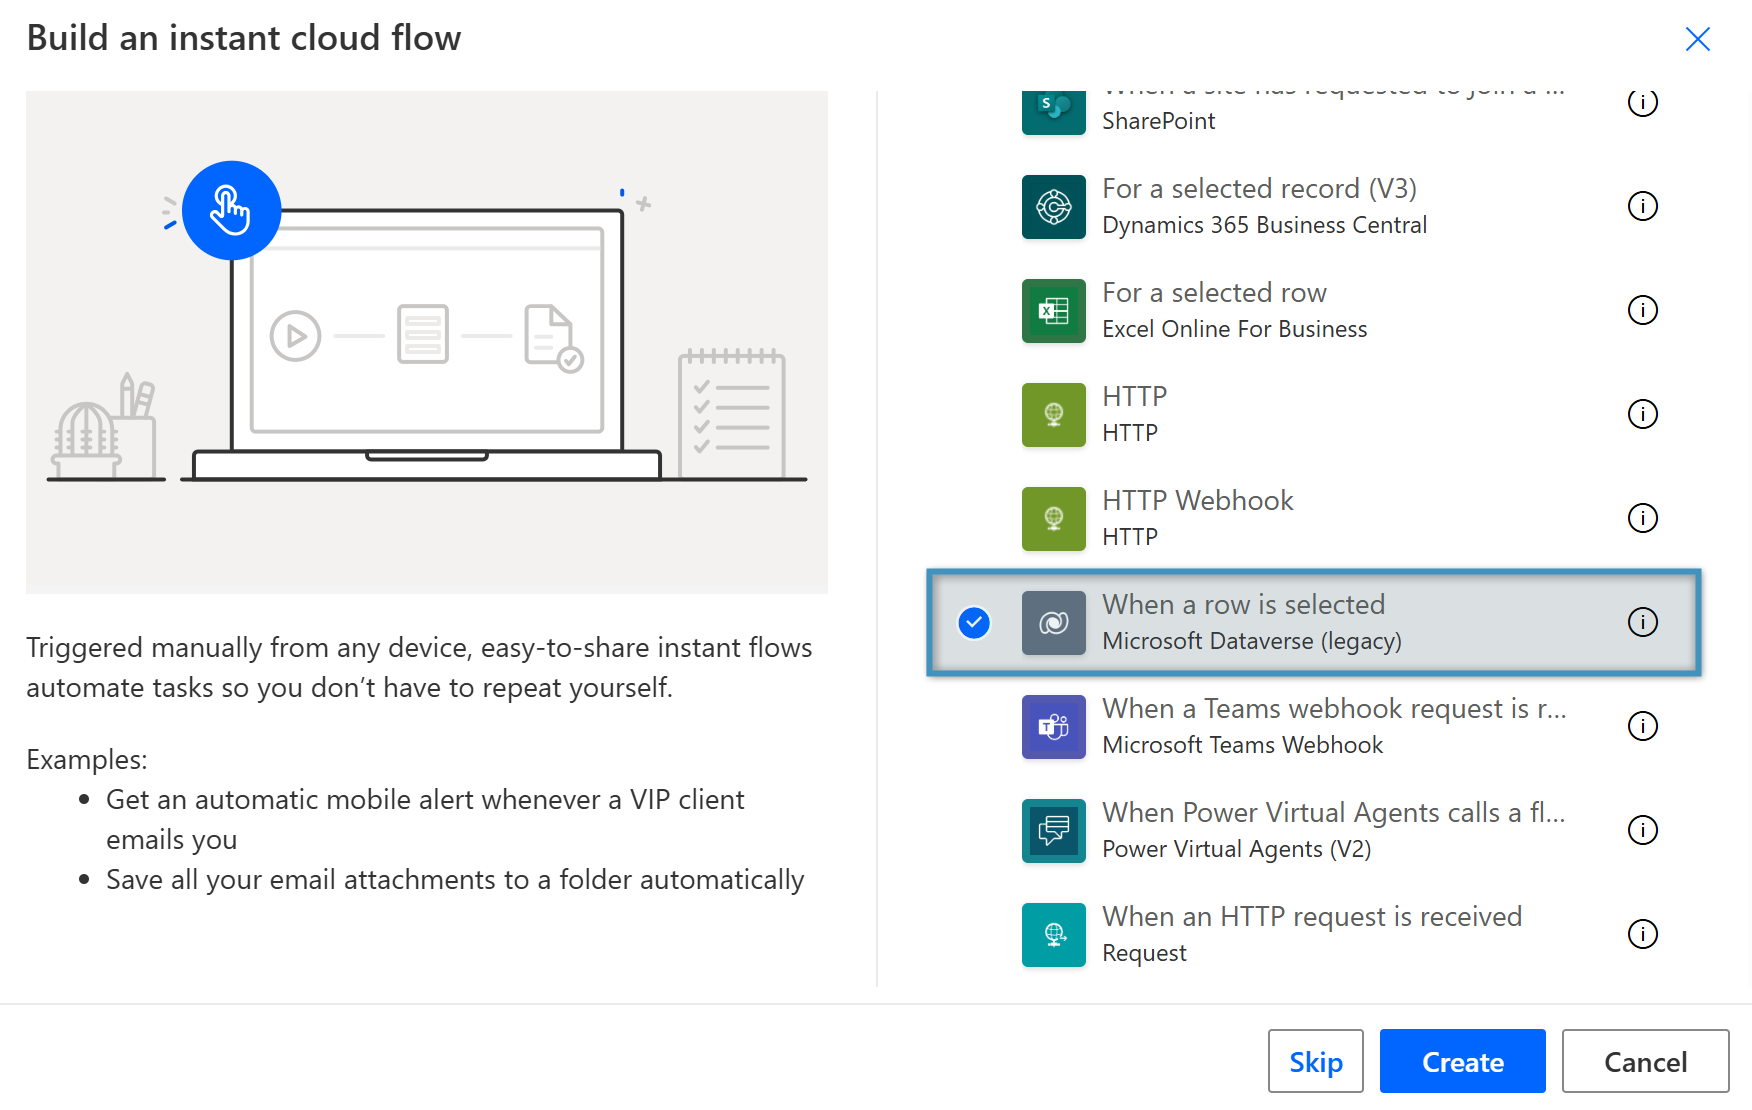
Figure 1: Create an instant cloud flow and select a trigger
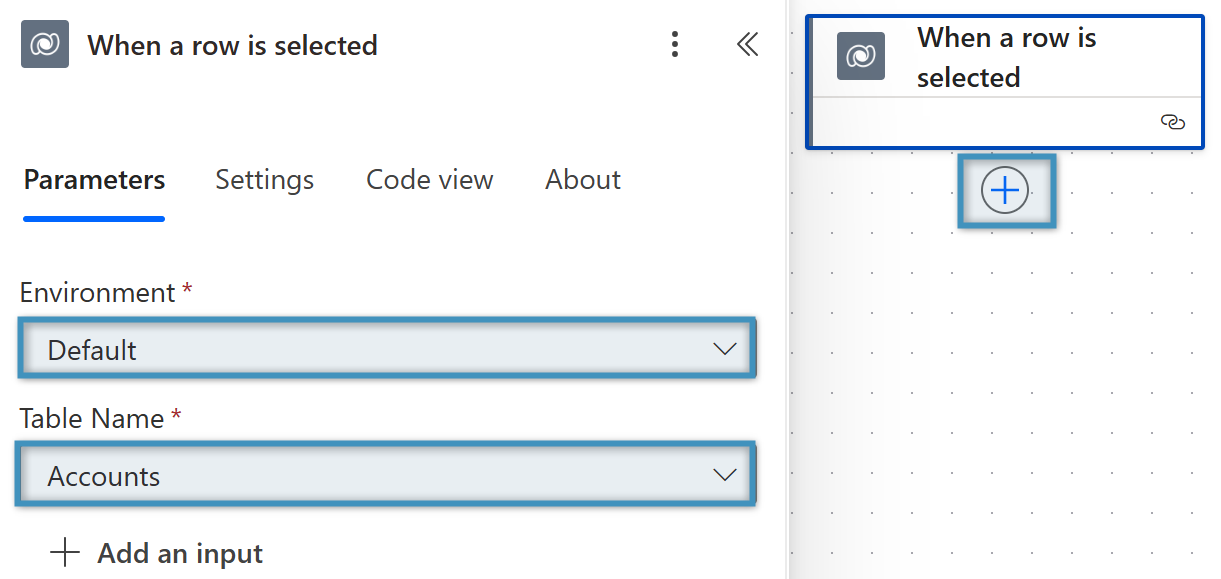
Step 2: Selecting the environment and table name
Select the Environment. For the Table Name, select Accounts. Then, click on the + on the right to add a new action.
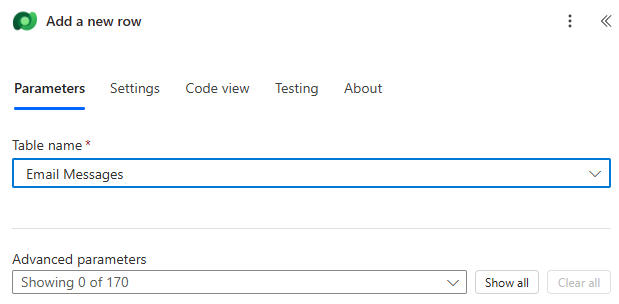
Step 3: Adding the “Add a new row” action
Search for the Add a new row action in Microsoft Dataverse and select Email Messages under Table name, then click on the plus (+) icon on the right to add a new action.
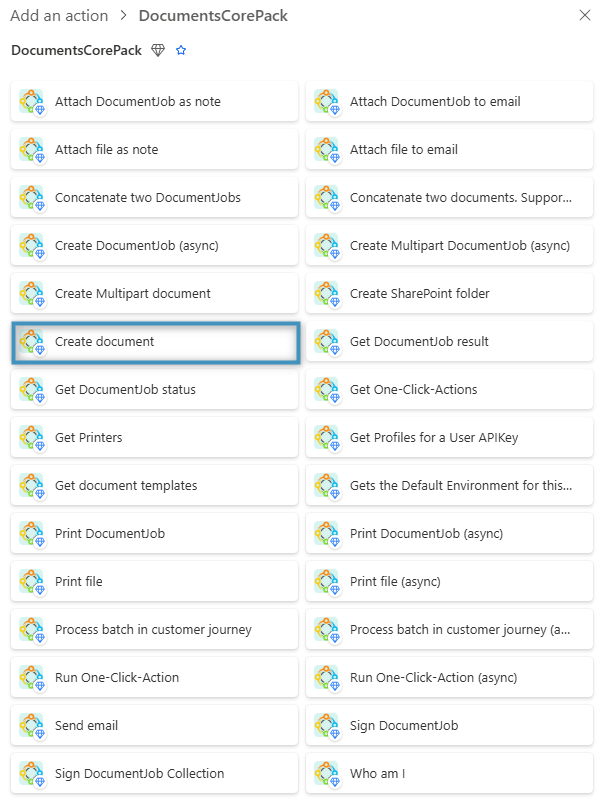
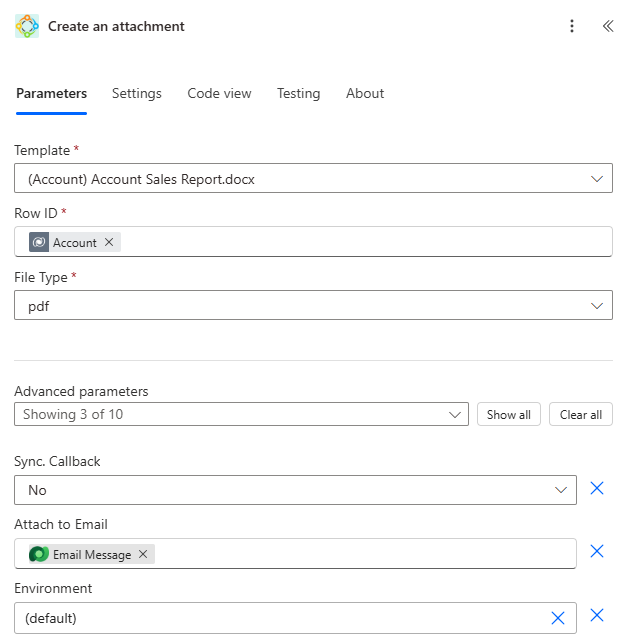
Step 4: Adding the “Create document” action
Search for the DocumentsCorePack connector and select Create document from the list of available actions.
Step 5: Filling out the fields
After selecting the action, the window shown below will appear. With this action, we want to generate an attachment and add it to our email. Fill in the fields as follows:
- Template: Select the DCP template to be used in the document generation process. In this example, we are using the Account Sales Report template.
- Row ID: Add Account from the Dynamic content window.
- File Type: Select PDF as the file type. This will attach the generated document as a PDF to our email.
- Attach to Email: Add Email Message from the Dynamic content window. This will attach our PDF to the email message we created above.
Note: Ensure that the table name of the selected template matches the table name in your trigger.
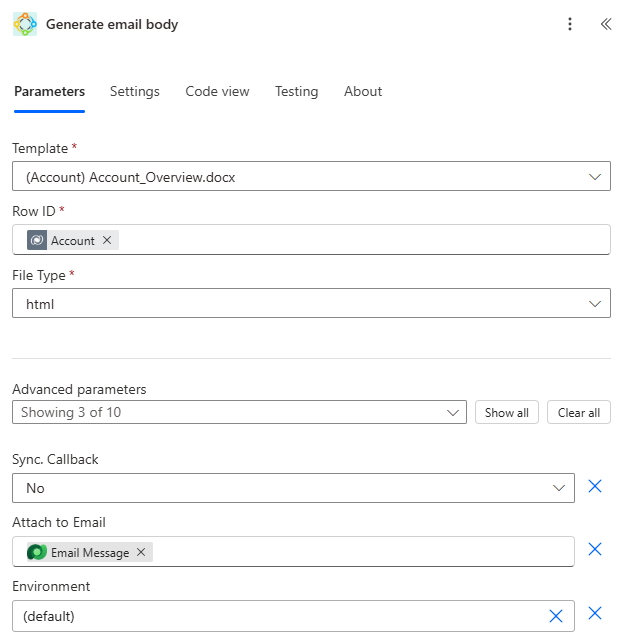
Step 6: Adding the email content document
To add the email content, add another step and select Create document again. This step works the same way as the previous one, except that we will use a different template for the email content, and the file type must be set to HTML.
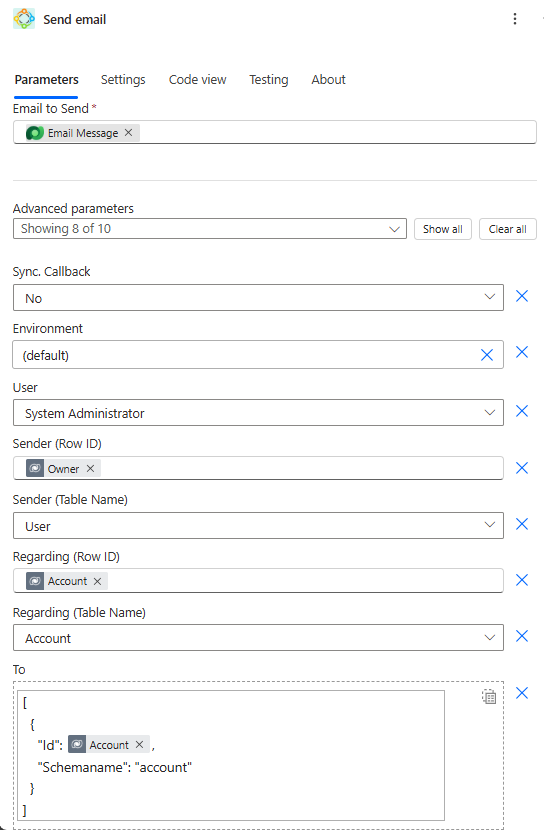
Step 7: Configuring the “Send email” action
Select the (+) plus icon to add a new action and select Send email under the DocumentsCorePack connector. Then provide the email record, sender, and recipient before saving your flow.
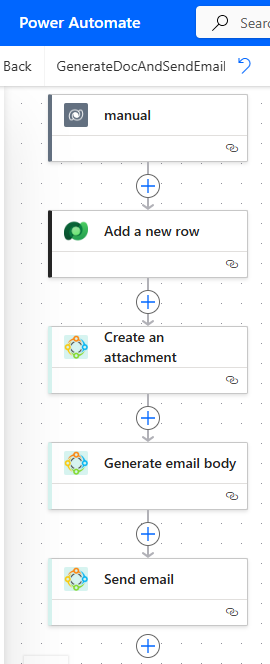
Step 8: Our completed flow overview
Below you can see what our whole flow looks like.
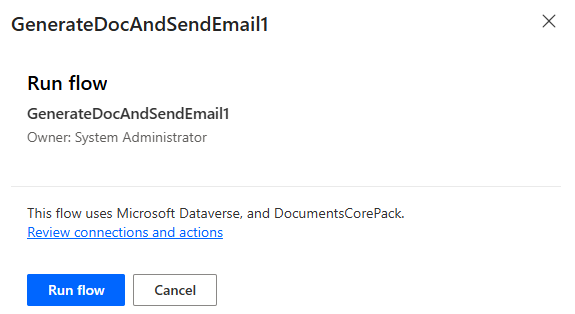
Step 9: Executing your flow
We created our flow for the Account entity, which means it can be run from any Account record. To start it, open an Account record in Dynamics 365, click the Flow button and then Run Flow.
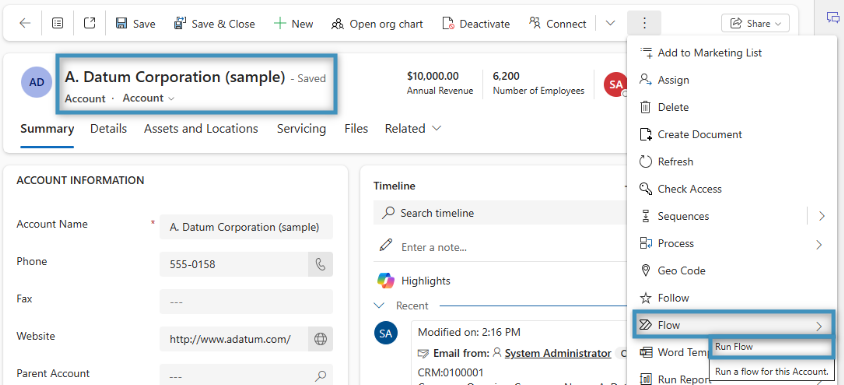
From there, select the flow you created, and then click the Run flow button.
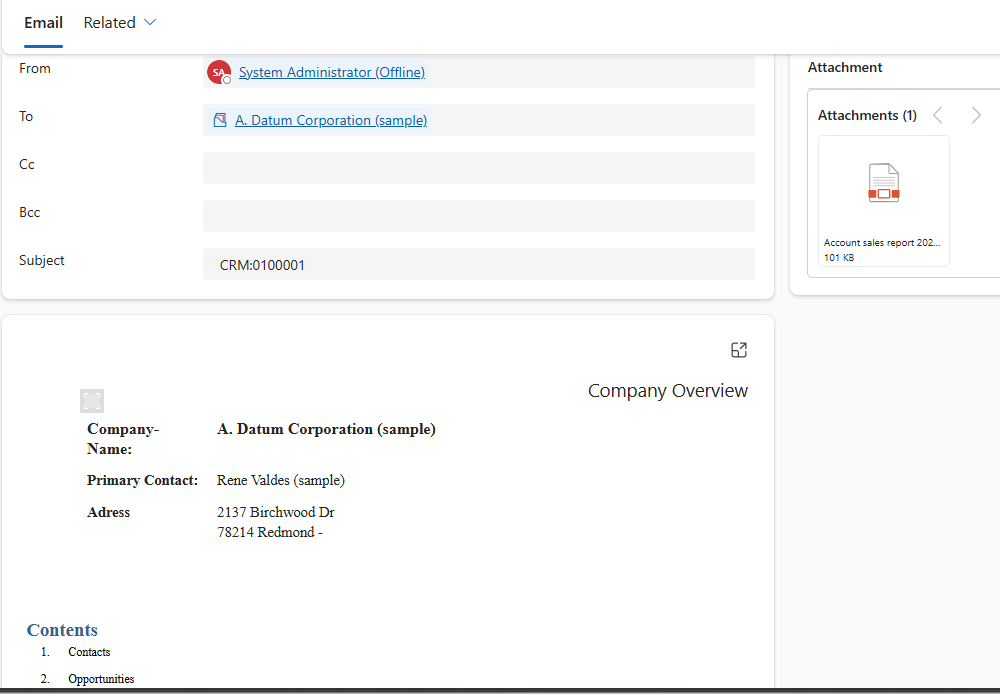
A sample result:
Try it out yourself!
Try generating and sending a document yourself using DocumentsCorePack for Microsoft Power Automate. To test the flow used in this example, download the .zip file from the “Attached Files” section below and follow the steps shown in this article to import it.
Note: The Template and User fields in the Flow must be set to a value from within your own environment. Also note that you will need to create the following connections in Power Automate to import this flow:
-Microsoft Dataverse (legacy)
-Microsoft Dataverse
-DocumentsCorePack