Approvals are actions you can include in flows to ensure that later steps are confirmed before the process continues. In this article, we will explore how to use such approvals together with documents to support sign-off procedures for items that require authorization.
Our use case
We want to automatically send a quote to a customer once a quote is activated. However, if the quote’s total exceeds fifteen thousand dollars, it must first go through a manager approval before being sent. To achieve this, we will need to construct a flow that includes an approval step.
Step 1: Setting up the flow
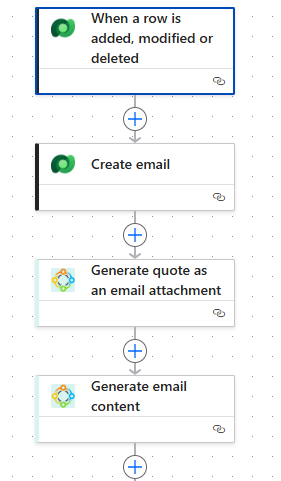
Once we have created our flow, we will start by adding several actions. The flow is already set to trigger when a quote is activated (via the initial “When a row is added…” trigger), so we will build on that by adding an action to create an email record using the Dataverse Add a row action. After that, we use the Create document action from the DocumentsCorePack connector to generate both the PDF attachment for the email and the HTML content that will be included in the message.
Note: The Create document action provides the generated document as an output parameter.
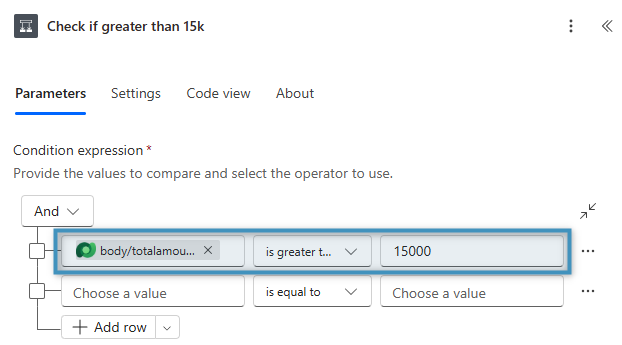
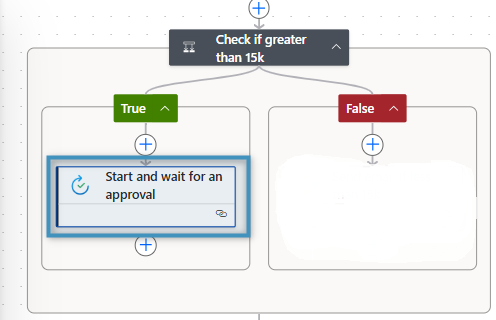
After those steps, we will add a condition that checks whether the quote’s total amount exceeds 15,000. If it does, we will proceed by configuring an approval action before the quote is sent. If not, the email will be sent immediately without requiring approval.
Step 2: Setting up the approval
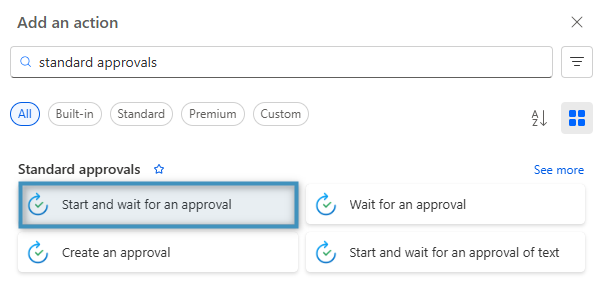
In the True branch, add a new action and search for the Standard approvals connector and select Start and wait for an approval.
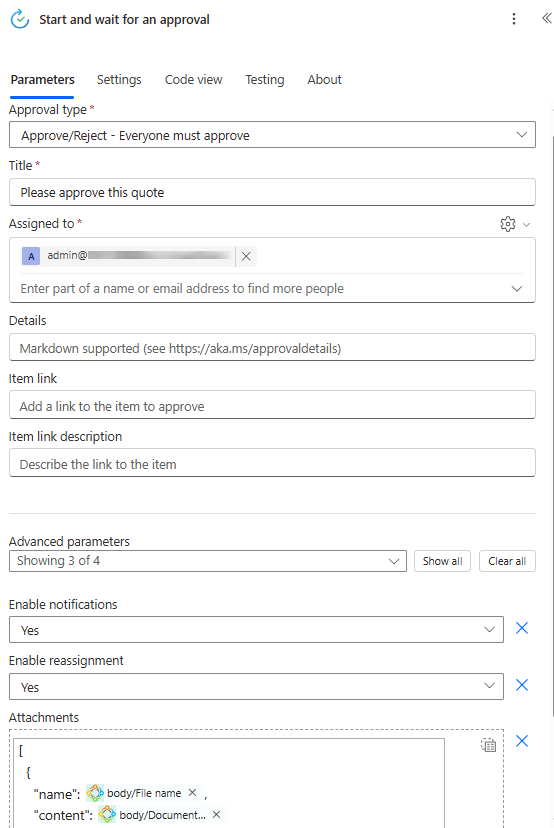
Once the action is added, select Approve/Reject – Everyone must approve for the approval type. Next, enter a Title and specify the email address of the person who should receive the approval request in the Assigned to field. Finally, we can attach the document to the approval. To do this, open the Advanced parameters and add the attachment as shown below:
- Attachments Name: set to File name – the output of the Create document action
- Attachments Content: set to Document content – the output parameter of the Create document action
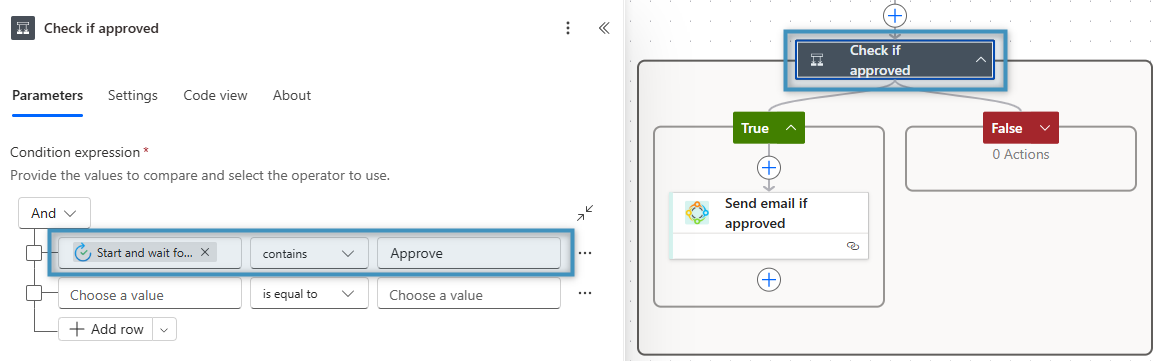
Next, we can add a condition beneath the approval action to evaluate the approval outcome. If the request is approved, the flow continues with the remaining steps – for example, sending the email to the intended recipient. If the request is rejected, the flow stops and no email is sent.
Step 3: Testing our flow
We can test this flow by opening any drafted quote and activating it in Dynamics 365.
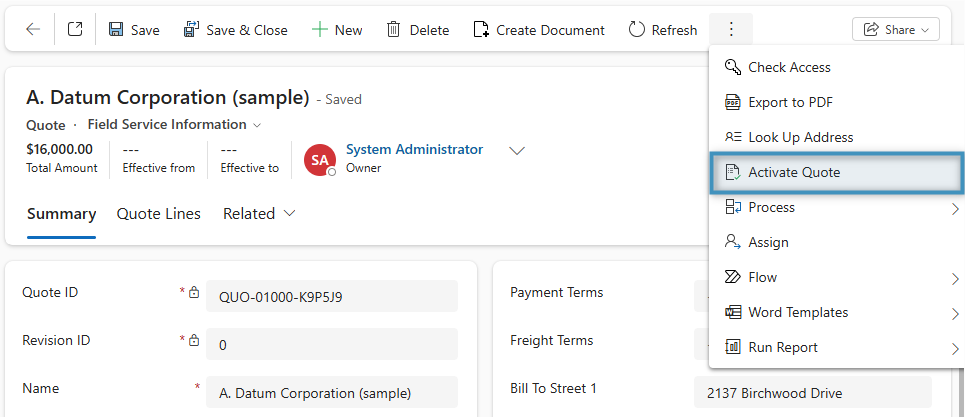
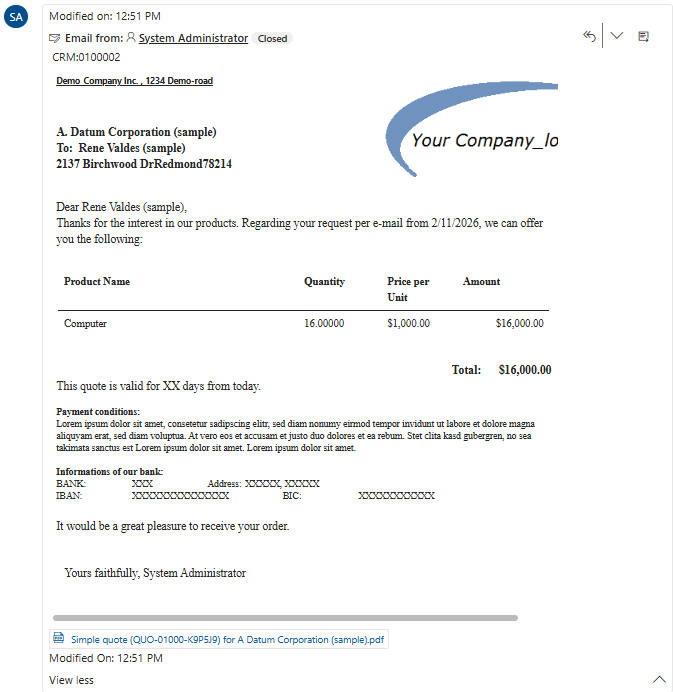
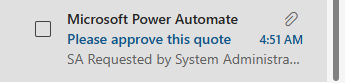
Once the quote is activated, the flow will start running. If everything is configured correctly, the email address assigned in the flow will receive a notification from Microsoft Power Automate requesting approval. The generated document will also be included as an attachment for review.
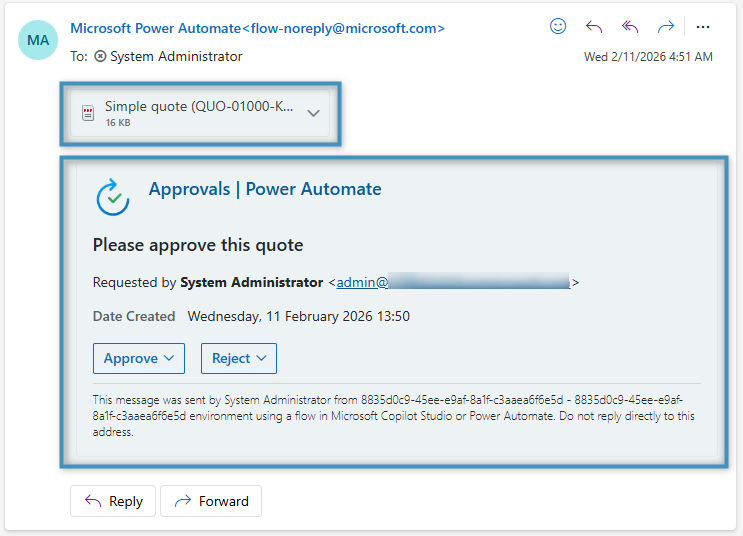
If the user approves the request, the email will be sent. In our scenario, this email goes to the potential customer under our quote record.