This article explains how to create an automated payment reminder using Microsoft Power Automate.
In this step-by-step guide, we create a scheduled flow that runs a DocumentsCorePack (DCP) template on a list of invoice records with due dates on or before today. For each matching invoice, the system sends an overdue notice using a standard email in Dynamics 365.
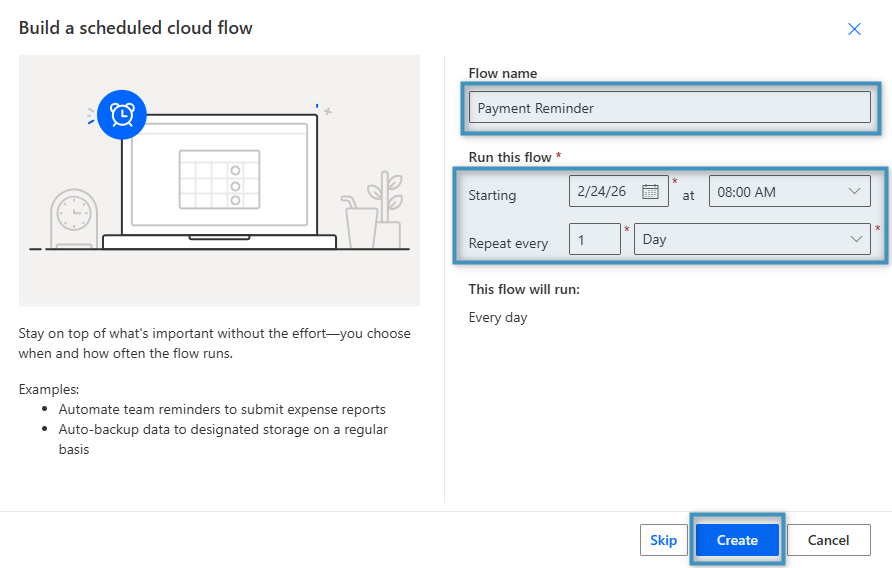
Step 1: Create a scheduled flow
Start by creating a scheduled cloud flow and configuring when it should run – setting the timing, frequency, and recurrence pattern to ensure the automation executes exactly when needed. Once everything is set, click Create.
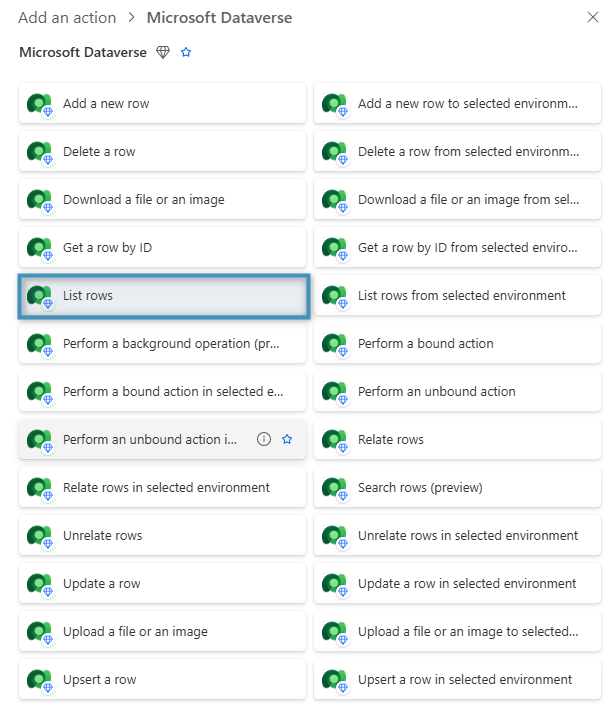
Step 2: Retrieve overdue invoices
Next, search for the Microsoft Dataverse Connector and select List rows from the list of actions.
Under Table name select Invoices, which is the entity(table) we are starting from.
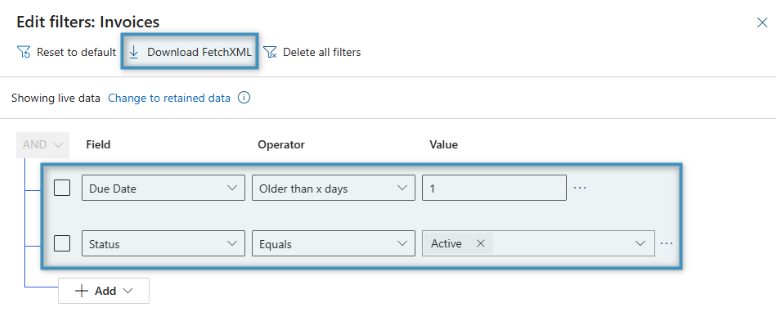
Since we only need Invoice records with a due date on or before today and a status of “active,” we added a filtered FetchXML Query.
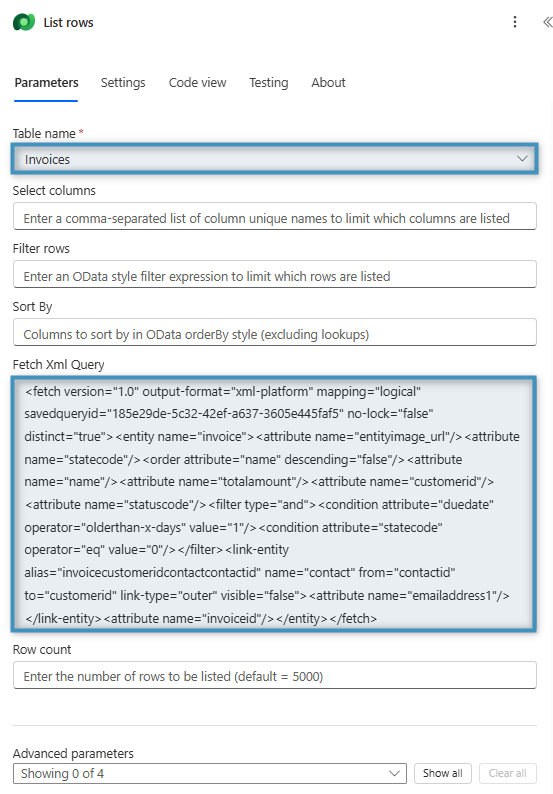
Note: A filtered FetchXML query can be created via Advanced Find in Dynamics 365.
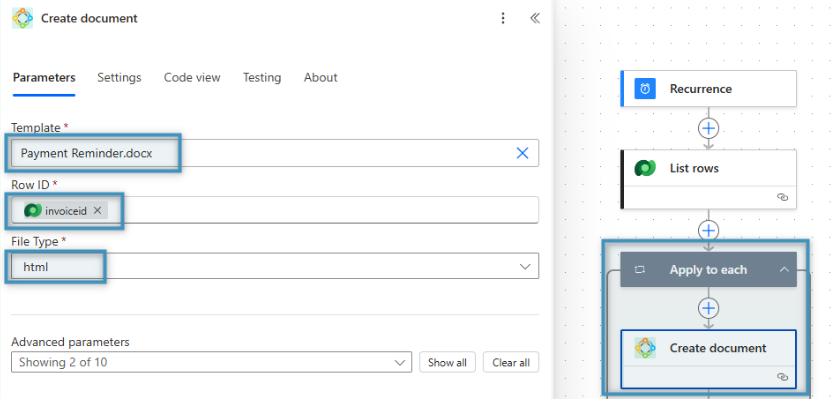
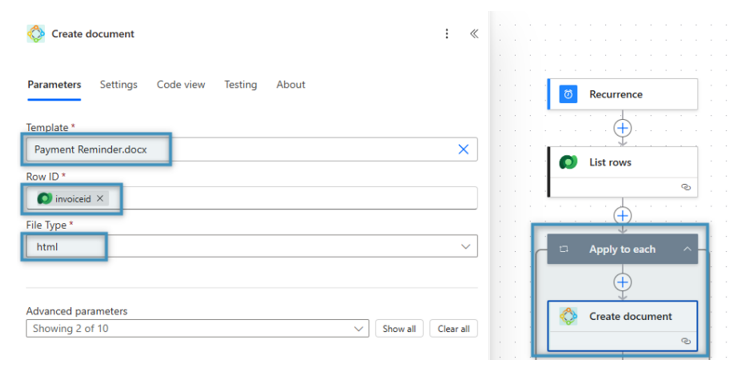
Step 3: Create document
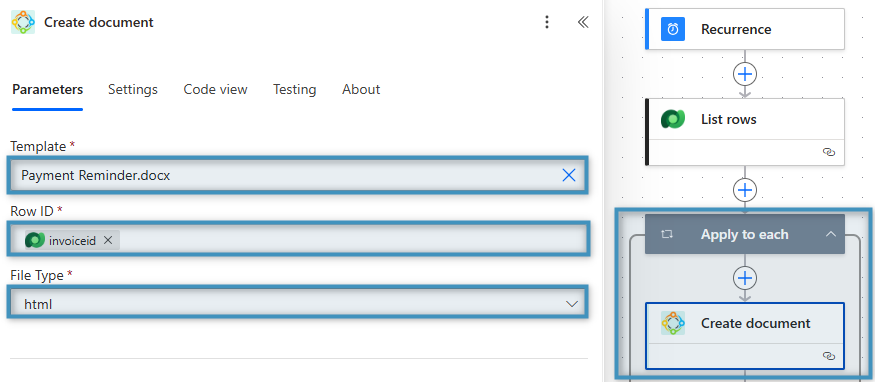
Now add the Apply to each section. Within it, we use the DCP connector to insert a Create document action. Select your invoice payment reminder template under Template and use Invoice as the Row ID. The File Type format must be HTML, as we want the document to appear directly within the body of the email.
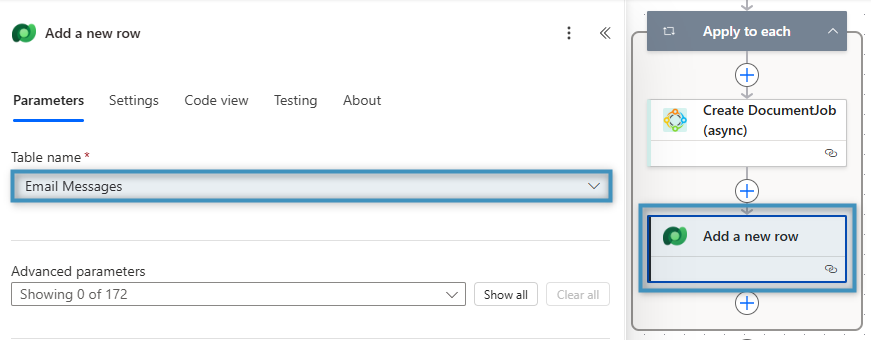
Step 4: Create an email record
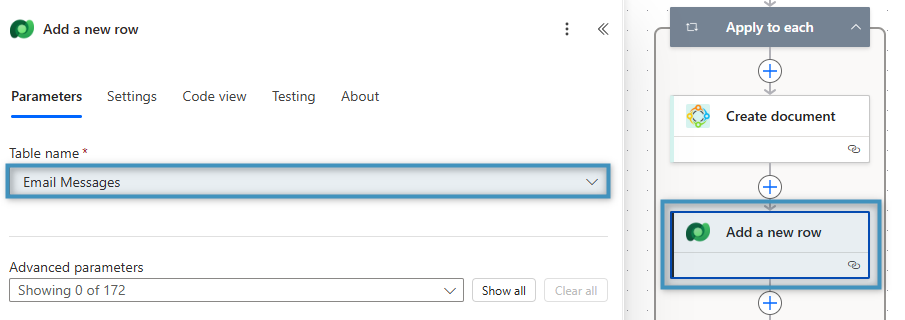
Click on the (+) icon to add a new action. Search for Microsoft Dataverse and select Add a new row to specify it as an email message.
Step 5: Attach the document to the email
Once again click the (+) icon to add a new action. From the DocumentsCorePack Connector select the Attach DocumentJob to Email action.
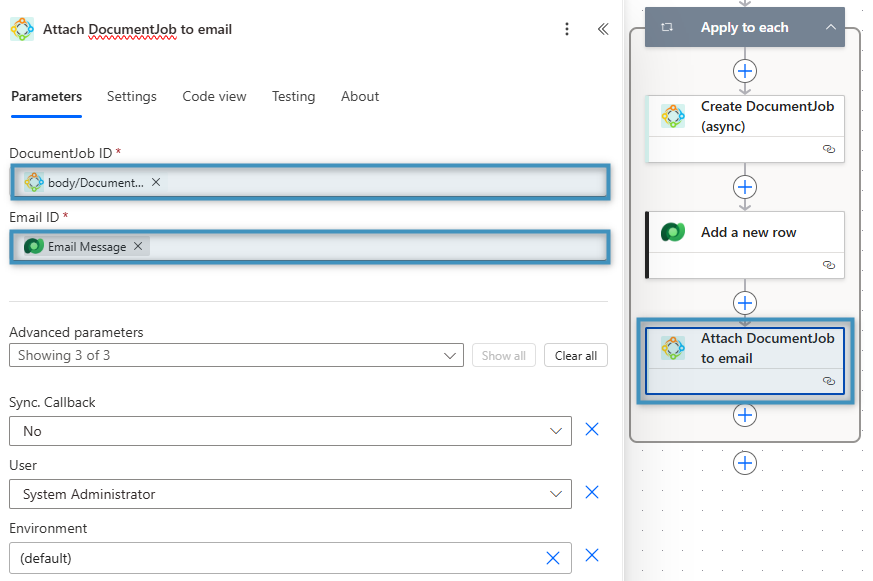
Provide the DocumentJob ID and Email ID to ensure that the generated document is correctly attached to the email.
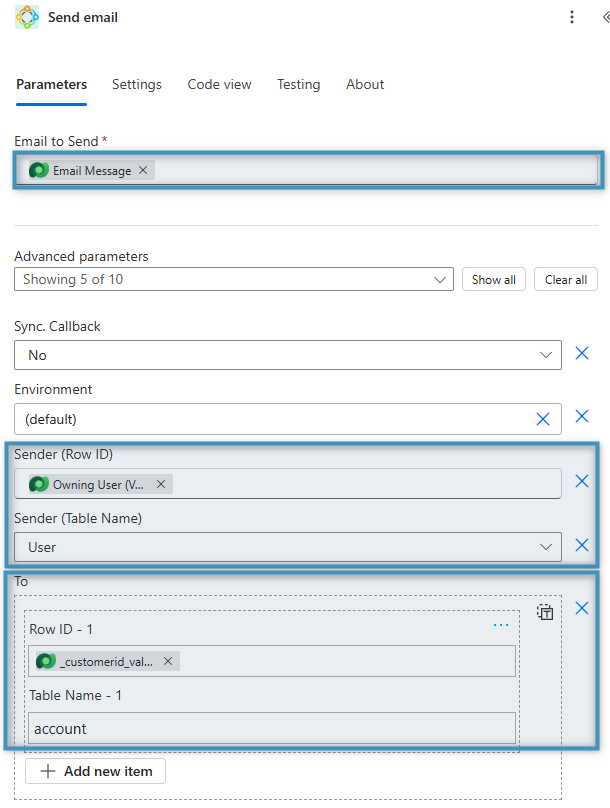
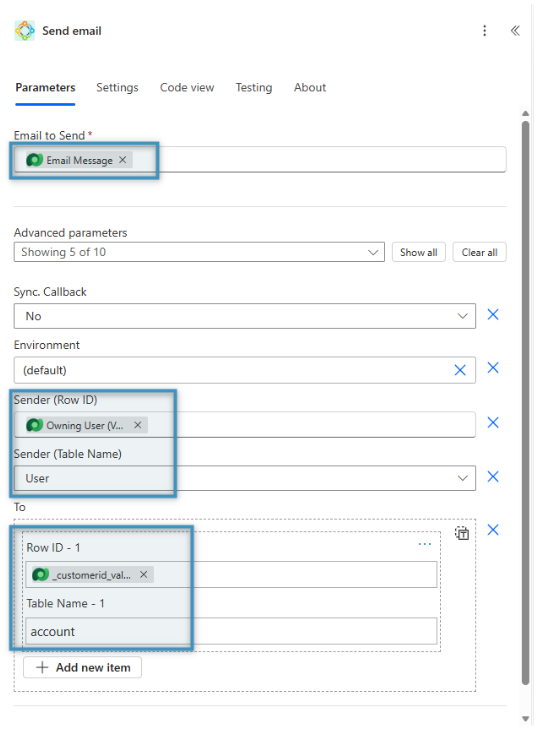
Step 6: Send the email
Next, add the Send email action from the DocumentsCorePack Connector.
Provide the email record, along with both the sender and recipient details before saving your flow.
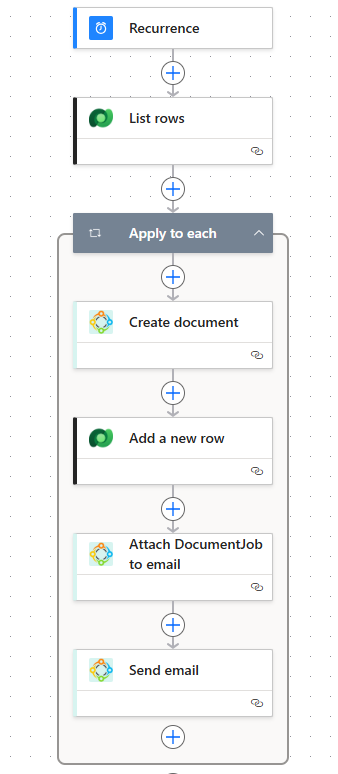
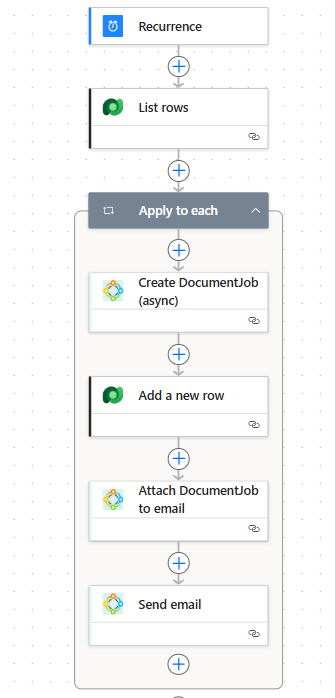
The final version of your flow should look like this, and you can now proceed to test it.
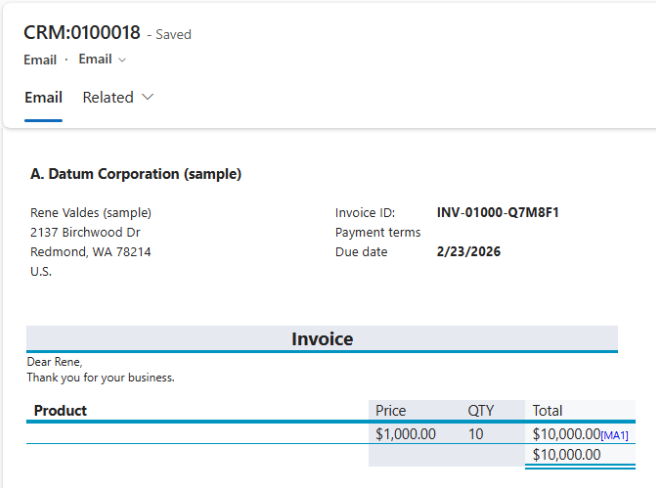
Step 7: The result
Once you’ve tested the flow, you can check your result document. The email in Dynamics 365 should look similar to the following: