One-Click-Actions (OCAs) in DCP are predefined actions (e.g., document generation, delivery, etc.) that users can trigger with minimal clicks. Display rules allow you to control which OCAs are visible to which users or hide irrelevant OCAs entirely. In the sections below, you’ll find how display rules work, and how to configure them via the different supported tabs (Conditions, Security Roles, Business Units, Teams).
How Display Rules Work
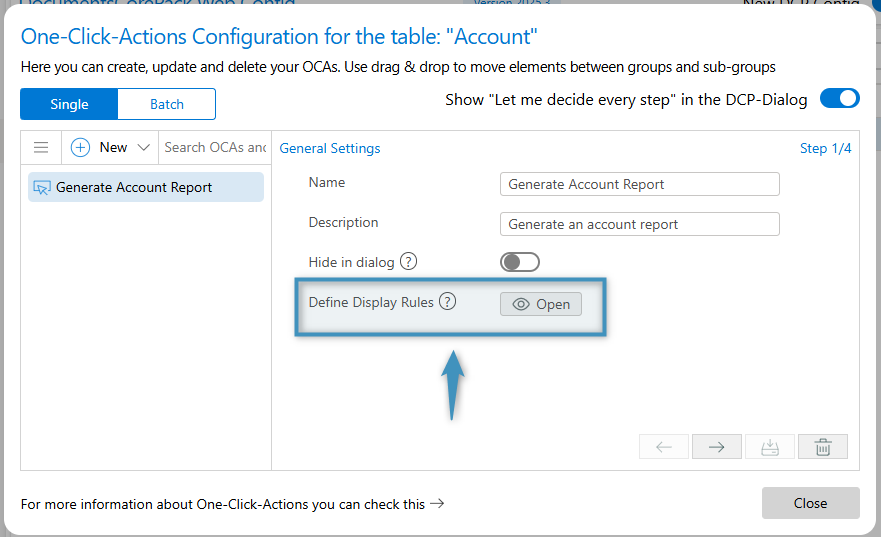
When you open an OCA in the One-Click-Actions Configuration dialog, you will find the Define Display Rules setting. Clicking the Open button will open the corresponding dialog.
The behavior works as follows:
- The display rules are evaluated whenever a user views the DocumentsCorePack Dialog.
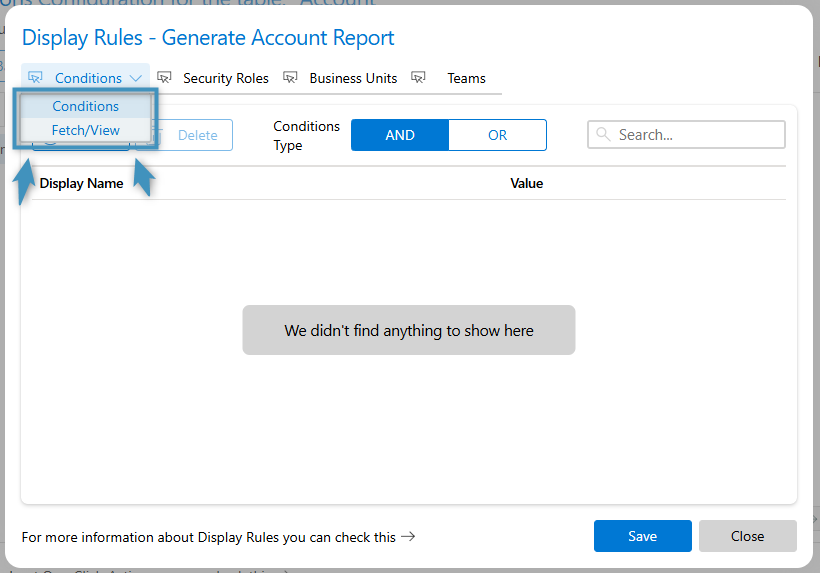
- Up to four different rule types can be used: Conditions, Fetch/XML, Security Roles, Business Units, and Teams.
- If a tab has a display rule configured, the OCA will be displayed if the display rule is met.
- If multiple tabs have settings configured, then at least one rule in each configured tab must apply for the OCA to be visible. In other words: Conditions AND Security Roles AND Business Units AND Teams all must validate (if each tab has entries).
- If a user does not meet the criteria in any one of the configured tabs, then the OCA will be hidden from that user’s view.
Display Rules via Conditions
The Conditions tab offers two modes: simple “Use Conditions” and advanced “Use Fetch/View”.
Use Conditions
This mode allows you to define rules based on standard entity attributes (columns) on the record or context.
Steps:
- In the OCA window, click the Open button to open the Display Rules dialog.
- On the Conditions tab, select “Use Conditions”.
- Click + Add to add a condition row. Choose the attribute (column) from the record, choose operator (e.g., equals, contains, etc), and value.
- Click the Save button at the bottom right to save your changes.
- Once saved, only users viewing records that meet all the condition rows in this tab will pass the Conditions check.
Note: If you have both Conditions and other tabs (e.g., Security Roles) configured, the conditions must pass in addition to the other tabs.
Use Fetch/View
For more complex scenarios where you need to express filtering logic that cannot be captured by simple attribute conditions (e.g., related entities), you can use FetchXML.
Steps:
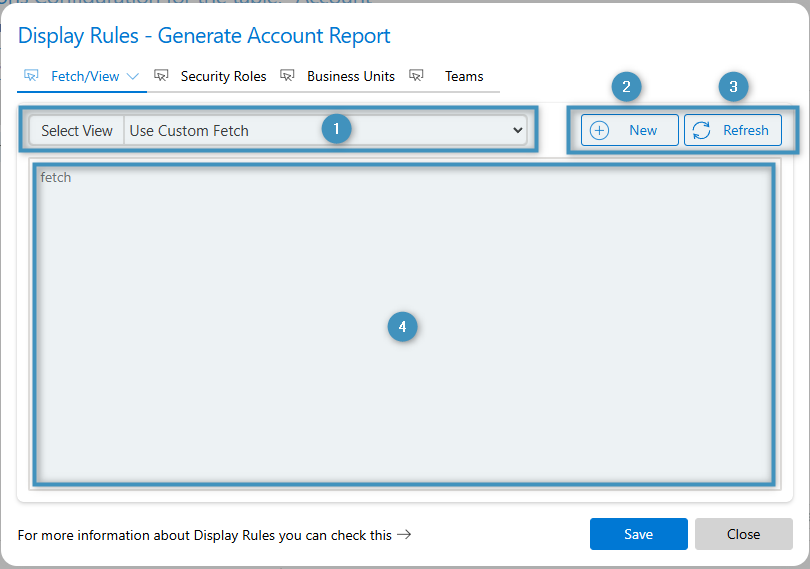
- You can click on the ❶ Select View dropdown to either choose Use Custom Fetch or to select a predefined view.
- Clicking ❷ New will redirect you to view window where you can adjust filters and download a custom FetchXML.
- Clicking ❸ Refresh will refresh the FetchXML.
- If you choose a view in the above dropdown, the ❹ fetch textbox will be populated with the view’s FetchXML. Alternatively, you can paste you own custom FetchXML.
When to use this:
- If you need to evaluate related record conditions (for example: only show the OCA if the record has a related “Invoice” child record in a certain status).
- If you need more than one attribute, or join logic, etc.
Display Rules via Security Roles
In this tab, you define which Dynamics 365 security roles a user must have to see the OCA.
Steps:
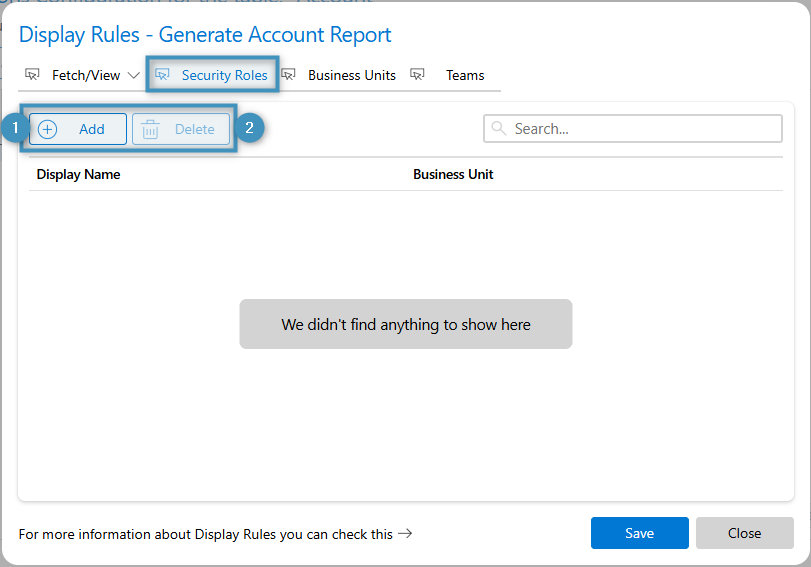
- Go to the Security Roles tab in the Display Rules dialog.
- Click ❶ Add to open search/list of all security roles.
- Select one or more roles.
- Only users who are assigned at least one of the listed roles will pass this check.
- If you would like to delete a role from having security permissions, select the ❷ Delete button.
Tip: If you want to limit the OCA to a specific group (e.g., “Sales Manager” role), list just that role. If multiple roles qualify, list them all.
Display Rules via Business Units
This tab allows you to limit the OCA to users belonging to certain business units. This can be convenient for preventing regional offices from seeing certain OCAs (e.g., a German office will not see OCAs for English invoices).
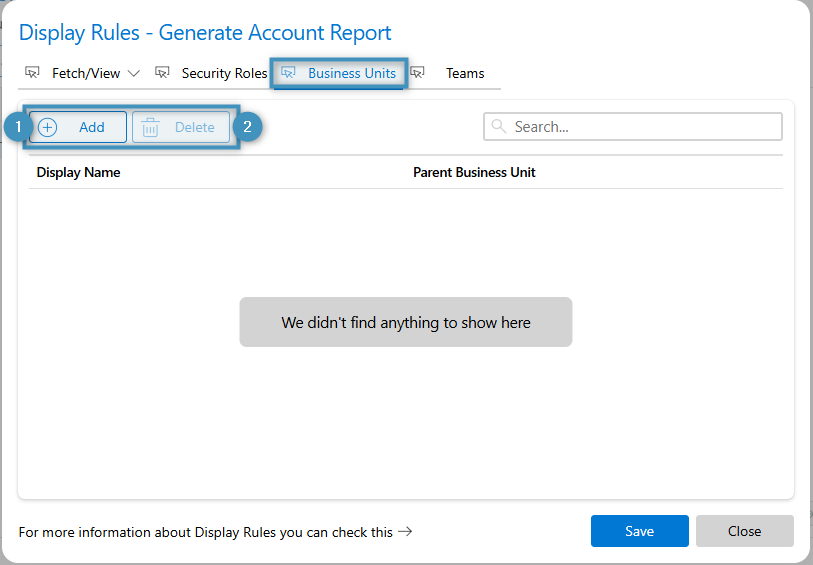
Steps:
- In the Display Rules dialog, go to the Business Units tab.
- Click ❶ Add.
- Select the organization’s business unit(s) that qualify.
- Only users assigned to one of the selected business units will pass this check.
- If you would like to delete a business unit from having permissions, select the unit, then the ❷ Delete button.
Display Rules via Teams
Finally, this tab allows you to restrict visibility by Teams membership.
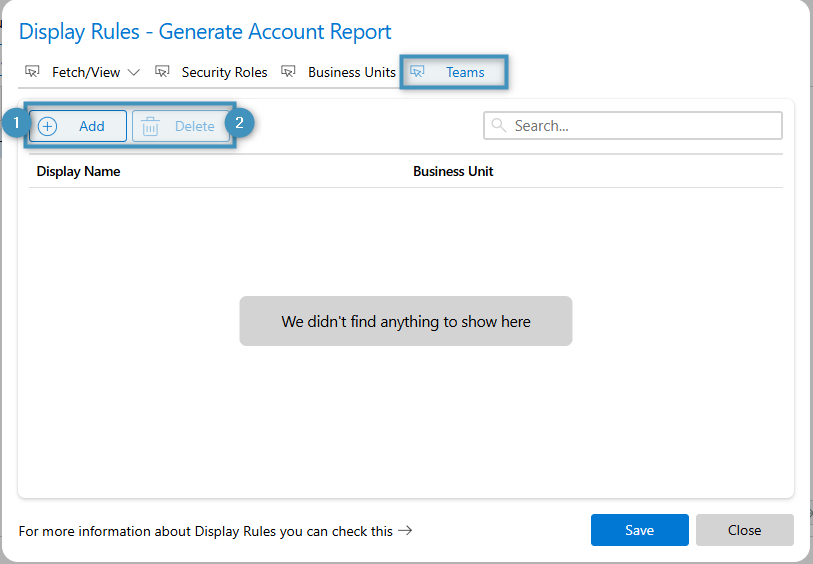
Steps:
- In the Display Rules dialog, go to the Teams tab.
- Click ❶ Add to add one or more Teams.
- Only users who are members of at least one of the selected teams will pass this check.
- If you would like to delete a team from having permissions, select the team, then the ❷ Delete button.