The MultiPart feature in DocumentsCorePack (DCP) enables users to generate and concatenate documents or document packages composed of multiple components. This function is especially useful when assembling document packages from various other documents, such as cover letters, terms and conditions, contracts, and more.
Each component of a document package can originate from a different source, such as:
- Documents generated with DCP templates.
- Files stored as a note in Dynamics 365 (DataVerse).
- Files stored in SharePoint
Additionally, DCP supports the use of conditional logic and user-specific selections for each document element, making the process highly flexible and adaptable.
Use Cases:
- Proposals (consisting of cover letter, company profile, quote, references, terms & conditions, etc.)
- Information material (assembled from brochures, flyers, etc.)
- Employee onboarding packages (company information, offer letter, legal form to fill, etc.)
Use Benefits:
- Eliminates repetitive tasks
- Reduces user errors
- Saves time compared to manual document assembly
Example: The videos below demonstrate how MultiParts work, both in their execution and their configuration.
MultiPart Configuration
MultiParts can be configured when creating a One-Click-Action. In the Template Settings step, you can choose ❶ Use MultiPart under Template Selection. This will allow you to customize the MultiPart and insert document parts, or DocParts for short.

❷ Optionally, a fixed filename for the result document can be defined. If this field is left empty, then the document name will be set from the first template that has a name defined (default logic).
❸ A DocPart can be configured here. Depending on the DocPart’s type, the DocPart could be a Microsoft Word template (docx), a note, or a SharePoint URL pointing to a hosted document. Each DocPart can include a label and description, which are displayed to the user when running the OCA.
❹ The following actions can be performed on selected DocParts.
- A) Add another part
- B) Delete the part
- C) Combine the selected DocParts. To do this, you must select more than one DocPart to combine them.
- D) Disassemble selected combined DocParts.
❺ The following settings can be applied to a DocPart.
- A) Concatenate: Click the “…” button to open a dialog where you can configure how the selected Doc Part will be concatenated to the previous one.
- B) Conditions: Define conditions that determine if a DocPart should be displayed or hidden. The results of these conditions are based on that of the selected record.
- C) Option: Displays a checkbox next to the DocPart in the DCP-Dialog, allowing users to choose whether the DocPart should be included or excluded from the final generated document.
- D) Show: Set whether this DocPart is visible in the DCP-Dialog or not.
- E) Edit: Set whether this DocPart can be edited in the DCP-Dialog or not.
❻ Use these buttons to complete the following steps:
- (A + B) Go to the previous or next wizard-step
- (C) Save the setting made in this step
- (D) Delete the OCA
- (E) Set display rules for this OCA.
When you click the Concatenate button as described in ❺A, an overview window (see Figure 2) will appear. In this window, you can define how the DocParts should be concatenated using the drop-down list and then confirm your selections.

SharePoint Considerations
When incorporating elements from SharePoint, it is important to follow a few key steps to ensure accuracy and functionality.
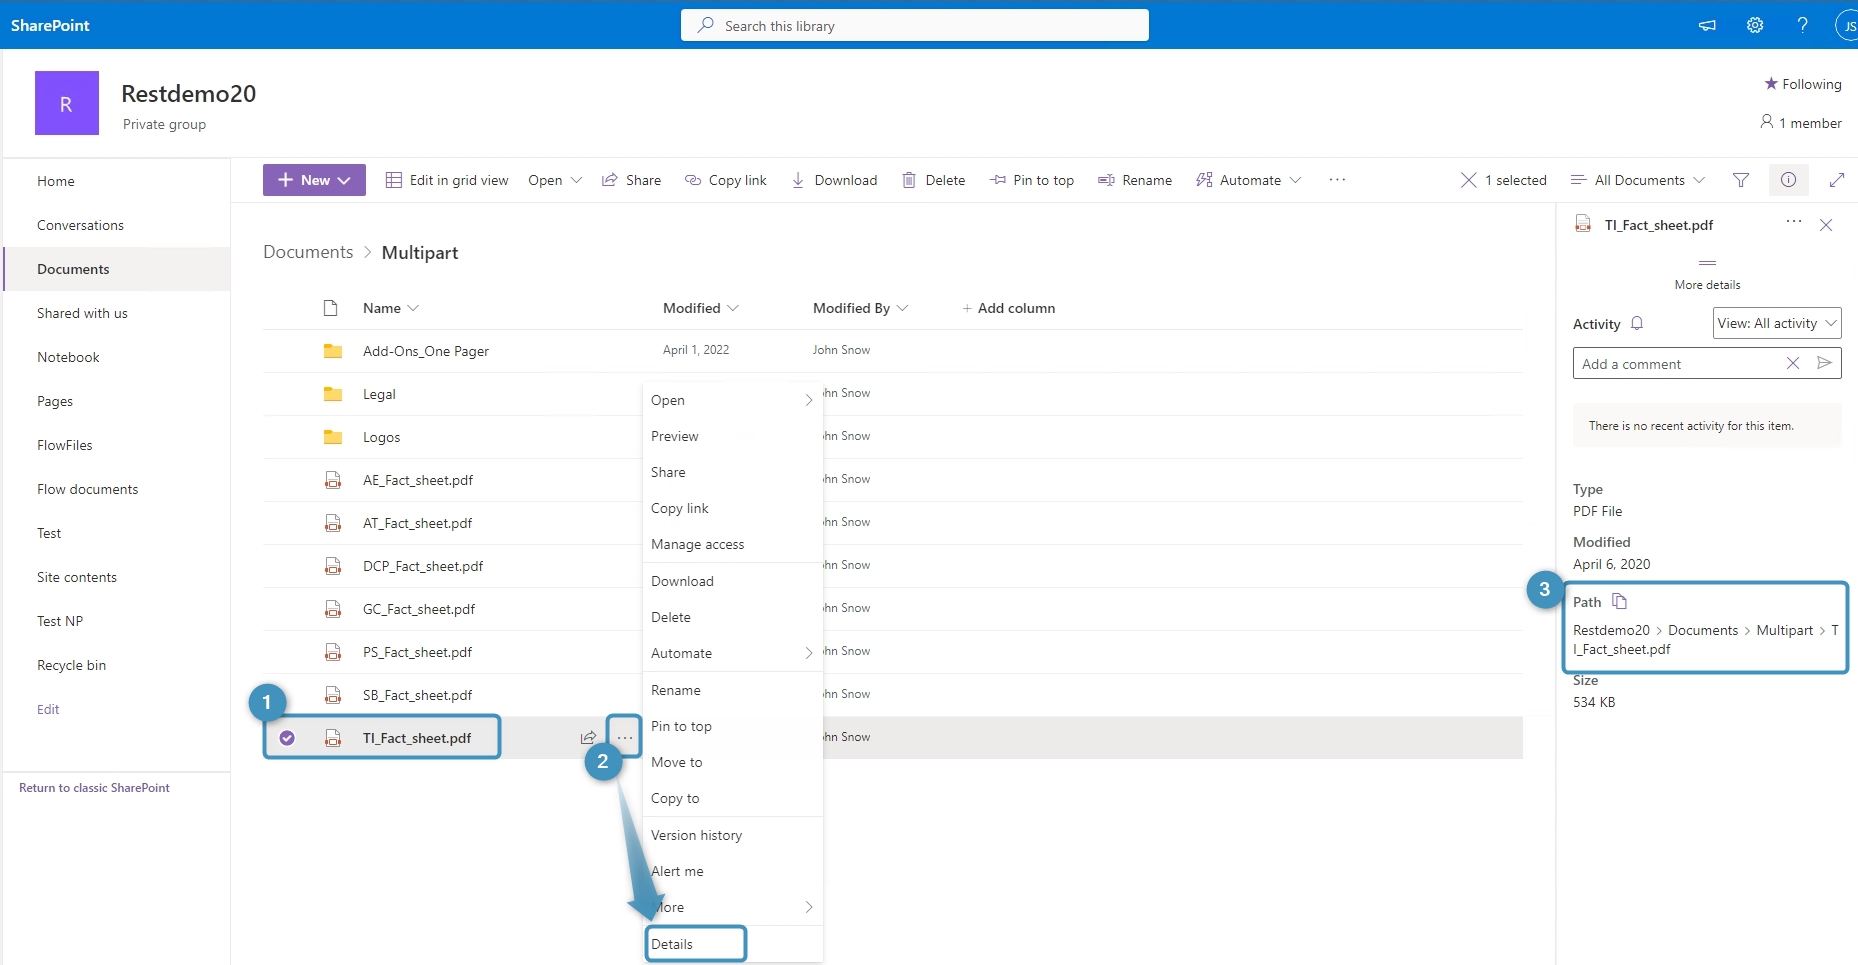
- Retrieve the correct SharePoint URL: Select the specific ❶ document. Click the ❷ three dots to open the details for this document and copy the ❸ direct link (you might need to scroll down in the details pane).
- Dynamic SharePoint URLs: You can incorporate dynamic field values from your system into the SharePoint link. For example: https://MySharePoint.sharepoint.com/sites/<<accountid>>/AccountOverview.pdf
