The DocumentsCorePack Dialog allows users to generate and process documents directly within Dynamics 365. It provides an intuitive, step-by-step interface that guides you through selecting a template, configuring processing options, and reviewing the result, all without leaving the Dynamics 365 record.
This article walks through a simple use case showing how to generate a document using the DCP Dialog.
Launching the Dialog
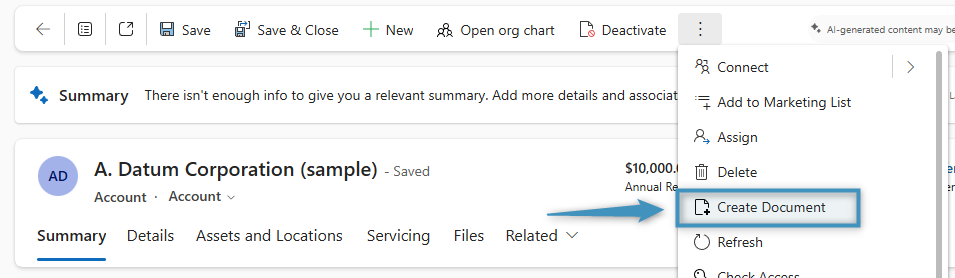
After installing DocumentsCorePack, the Create Document button appears in the Command Bar of any Dynamics 365 record (e.g., Accounts, Opportunities, Contacts, or custom entities).
To begin:
- Open the record you want to generate a document for.
- Click Create Document in the Command Bar.
This opens the DocumentsCorePack Dialog, automatically using the data from the record you’re viewing.
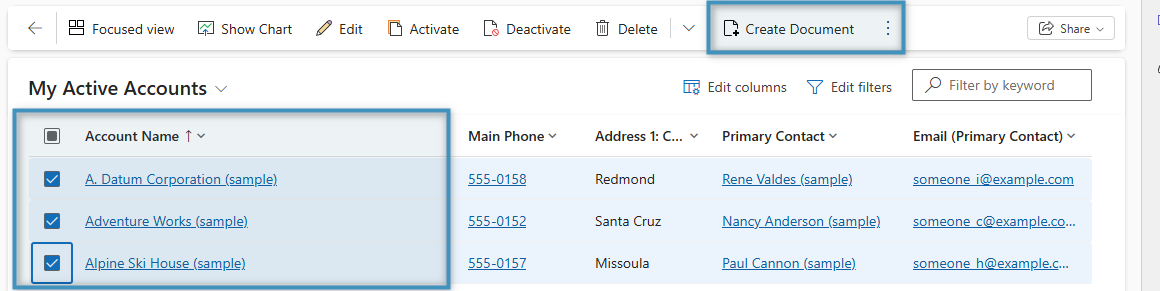
Note: Batch document creation can also be performed in the Dynamics365 Sales hub to save time on creating the same documents for different accounts (see the figure below).
Step 1: Choose your document process
The first screen in the Dialog displays the options for selecting your document process. You can select the “Let me decide every step” option or a pre-configured One-Click-Action if you have one.
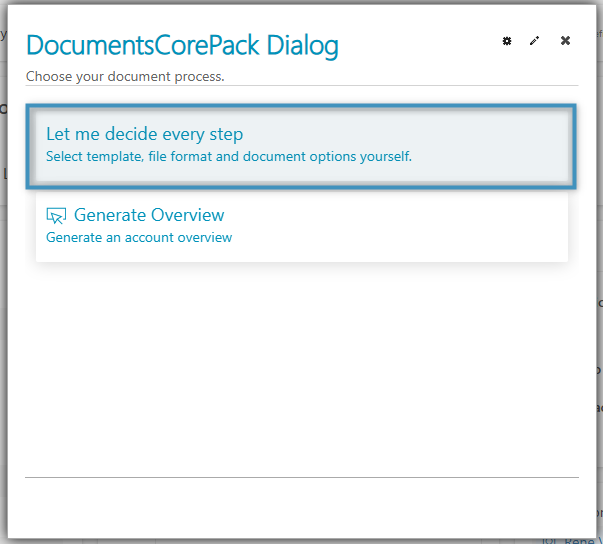
Tip: Please see this article to learn more about One-Click-Actions (OCAs).
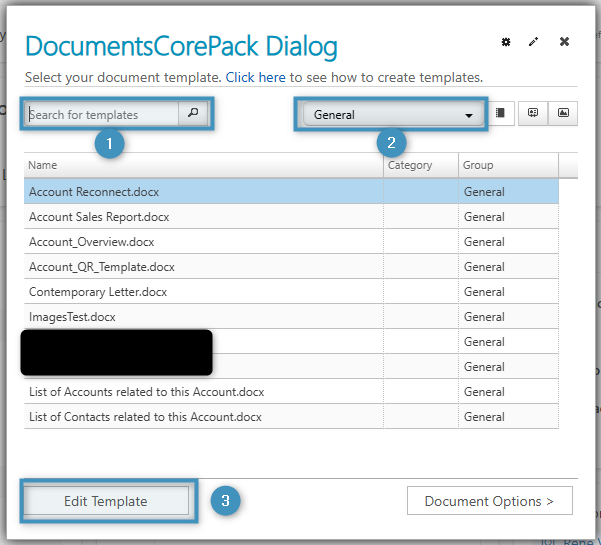
Step 2: Selecting a template
Select the template that you would like to use for the client. Here, you have the options to:
- Search for templates
- Filter templates
- Edit the selected template
Step 3: Document Options
The next step in the Dialog allows you to select from various document processing and delivery options, which are outlined below and described in greater detail here.
3.1 Select the file type for your document
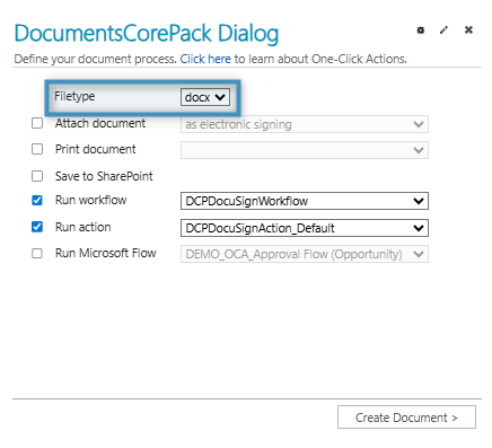
3.2 Attach Document
In this step, you can choose whether to attach the generated document and define how it should be processed. There are multiple options (e.g. note, attachment, content, E-Signing, etc.) for attaching documents, each with different settings.
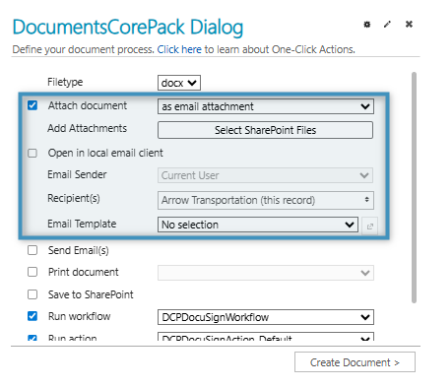
In the example above, the document will be attached as an email, with the recipient automatically populated from the record. The user can then select an email template and decide whether to send immediately or review the message first.
3.3 More options and running flows
After selecting your attachment preferences, you can define additional actions to be performed once the document has been generated.
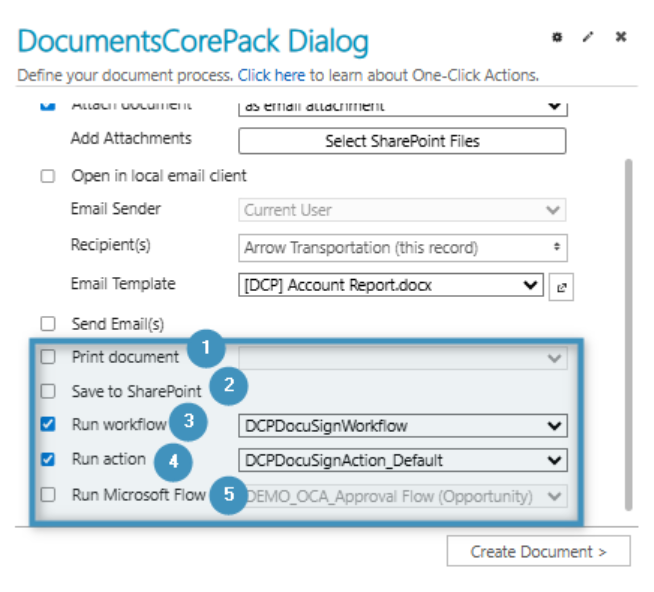
These options help automate post-processing tasks such as printing, storing, or running workflows.
- Print document: Sends the generated document directly to your default printer.
- Save to SharePoint: Automatically uploads the document to the connected SharePoint location configured for the record.
- Run workflow: Executes a predefined Dynamics 365 workflow once the document is created. Use the dropdown to select the desired workflow.
- Run action: Triggers a predefined Dynamics 365 action after document generation (for example, initiating a DocuSign process).
- Run Microsoft Flow: Starts a connected Power Automate (Flow) to handle advanced automation, such as multi-step approvals or custom integrations.
In the example above, the document will trigger both a DocuSign workflow and action once generation is complete. These steps can be customized by your administrator to fit your organization’s automation needs.
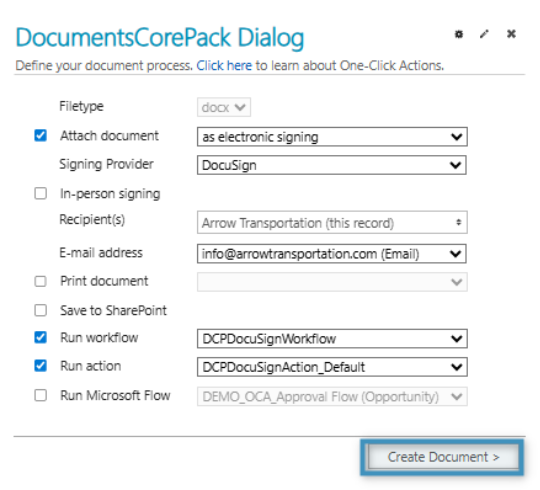
3.4 Create Document
Once you have selected your desired settings in the DCP Dialog, select the Create Document button.
Step 4: Preview and Finish
The Dialog will now merge your Dynamics 365 data into the selected template. Once processing is complete, you’ll see a confirmation message and any follow-up actions (such as opening the email draft or viewing the file in SharePoint).
In the example below, the user has SharePoint Integration configured. Thus, they can:
- Edit the generated document
- Select Finish to send the document off to the client
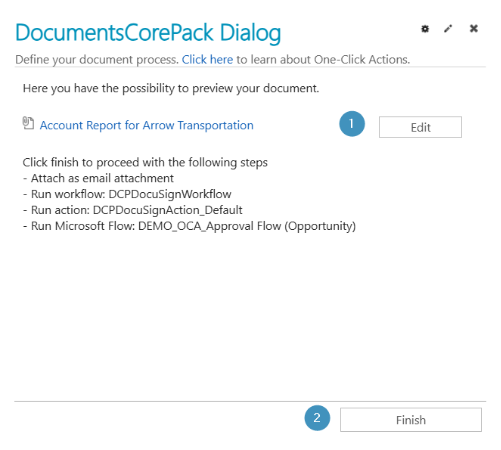
Note: The ability to edit your document is only available if SharePoint Integration enabled. Without it, you can only preview your document.