When creating tables using the Relationship Designer, there may be times when your tables need further structure. It may be convenient to, for example, group products in a quote by product category, or to group employees in a company by job title.
This is where grouping comes into play. Grouping allows you to choose a field within a table to organize by, making your tables easier to read.
Grouping basics
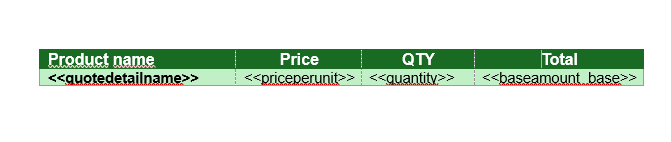
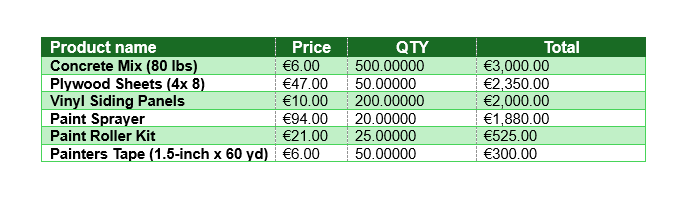
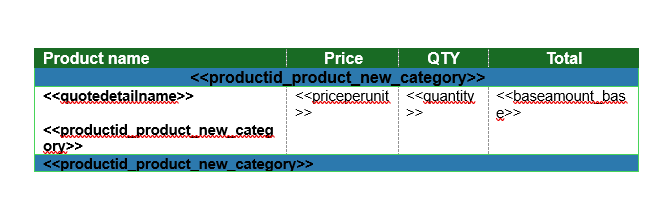
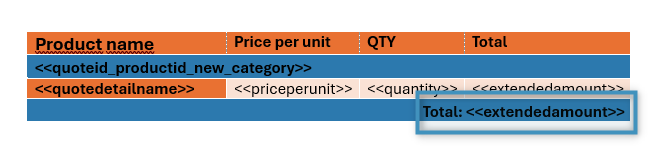
For this article, we’ll be looking at a quote template. We would like to apply grouping to our Quote Products table in order organize our products into defined sections. Our table and its result currently look like this:
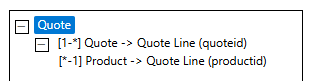
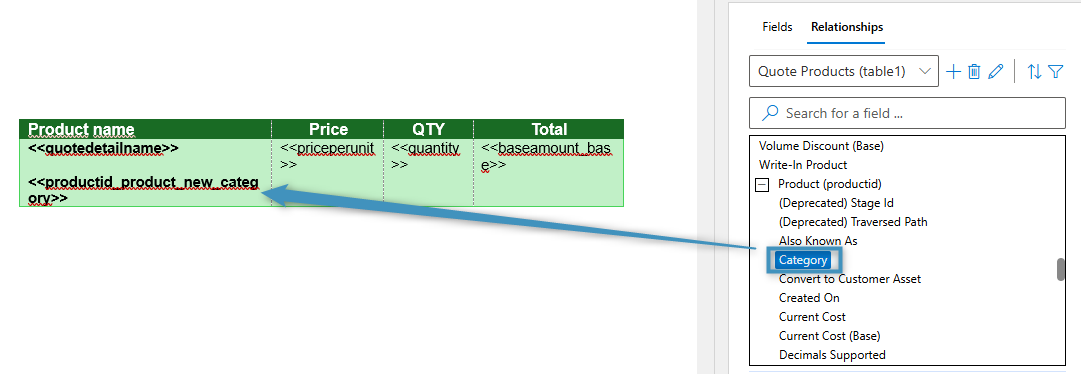
For reference, this is our relationship structure for this table:
Before we apply grouping, we first need to decide which field should be our grouping field. In our case, we want to use the product’s Category field, as that will divide our table into sections depending on the category the product is in.
To group by this field, we will need to locate the field in the Template Designer and add it to our table. Since this field comes from the product, we can find it under the Product lookup near the bottom of the fields list.
This field will not be a permanent addition to the table. We will remove it later.
With the newly added field selected, navigate to the Tables group and click the Grouping button. You will be greeted with the following options:
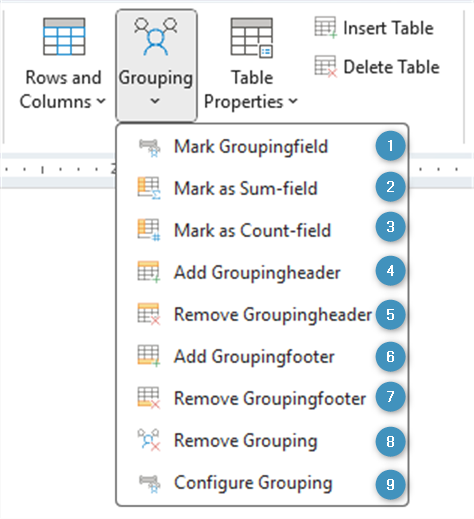
- ❶ Mark Groupingfield: Marks the selected field as a grouping field.
- ❷ Mark as Sum-field: Marks the grouping field
- ❸ Mark as Count-field: Marks the grouping field
- ❹ Add Groupingheader: Adds a grouping header to the table
- ❺ Remove Groupingheader: Removes the grouping header from the table
- ❻ Add Groupingfooter: Adds a grouping footer to the table
- ❼ Remove Groupingfooter: Removes the grouping footer from the table
- ❽ Remove Grouping: Removes grouping from the table
- ❾ Configure grouping: Allows you to configure or remove grouping fields
For now, select Mark Grouping field. You will be prompted to sort by this field. Click Yes.
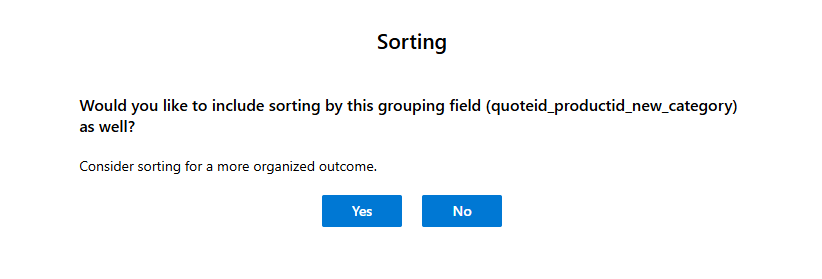
Note: While not necessary, it is highly recommended to sort by the grouping field. Otherwise, the table may be grouped in a disorganized manner in a generated document.
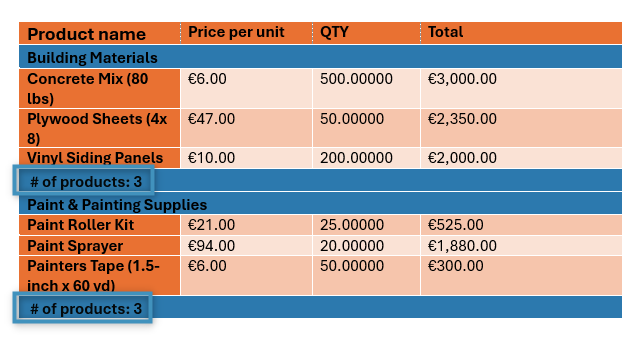
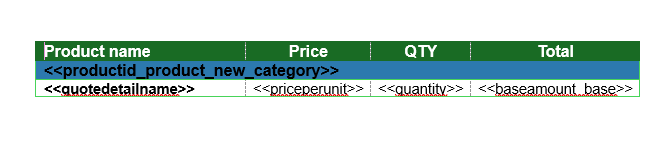
Once confirmed, grouping will be applied to the table. The table should now look like this:
You can remove or re-add the grouping header and footer as needed using the Grouping button. You can also remove the grouping field itself from the main table row at this time. With some minor changes, our table now looks like this:
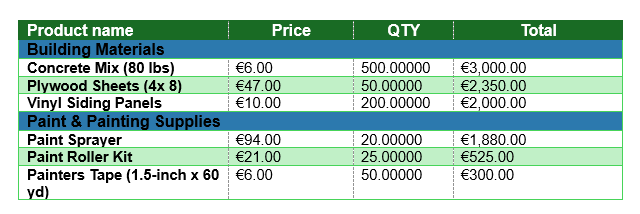
You can generate a document based on this template to see how the grouping appears. The table will now be separated into distinct parts.
Advanced grouping
Beyond simple categorizing, grouping can be used for calculating totals and counting purposes.
Sum fields
For this example, we have a table similar to above with a grouping header and footer.
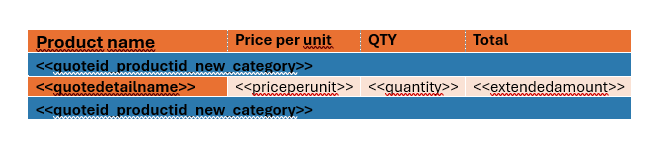
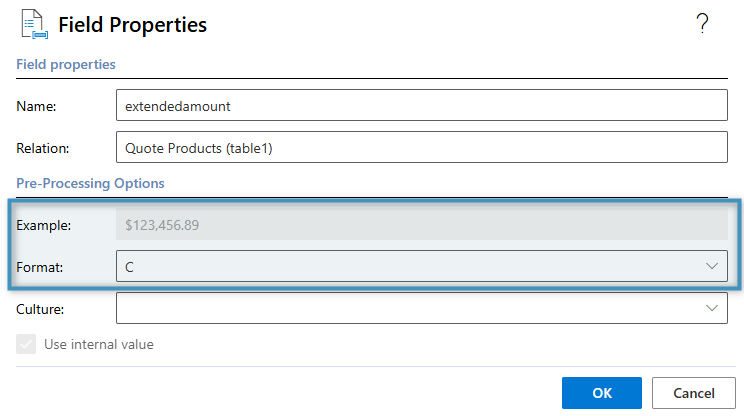
We would like to display the total of each grouped section. We can do this by adding the Extended amount field from our total column to the grouping footer and marking it as a Sum field.
The sum field on its own is not formatted, meaning the value will not be displayed as currency. You can change this by selecting the field and opening the Field Properties dialog.
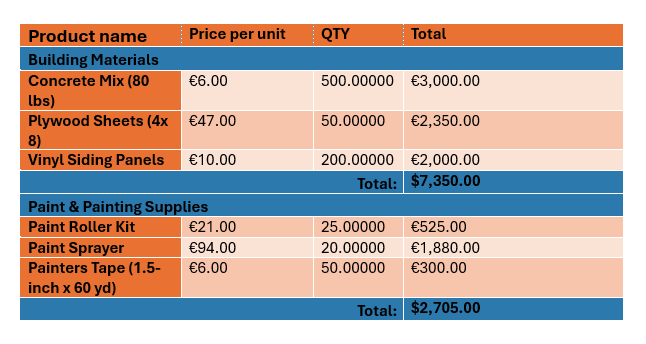
Generating a result document will now display a calculated sum of both groups in their respective footers.
Count fields
In a different example using the same table, we would instead like to display the number of products for each product group.
To do that, we can insert the Name field from our Quote Products relationship into the footer and mark it as a Count field.

In the result, the footer will show the number of products.