Field properties define how a field mapped from Dataverse / Dynamics 365 is rendered in the generated Word document. In DocumentsCorePack, you can set various formatting, display, and transformation options at the field level.
Below is a breakdown of the important field properties, what they do, and links to deeper reference articles.
Accessing Field Properties
To edit field properties in a template:
- Open your DocumentsCorePack template.
- Go to the DocumentsCorePack tab in Word.
- Set your cursor inside of the field that you would like to show properties for and click Field properties to open the formatting options dialog.

Field Type–Specific Options
The available field property options depend on the field type in Dynamics 365 / Dataverse.
Each data type provides its own set of formatting and display options within the Field Properties dialog:
- DateTime fields – Offer options to set date and time formats, including culture-specific formatting (e.g., display dates in US or German format).
- Money fields – Allow selection of currency and numeric display formats (e.g., number of decimals, currency symbol placement).
- Numeric fields – Provide numeric formatting options such as thousand separators or custom decimal precision.
- Text fields – Support transformations like trimming whitespace or converting text case (upper/lower).
- Picture Fields – Provide several options that determine how the image is retrieved, resized, and processed.
- Delete line/row removes empty lines or rows in Word templates by deleting them when a selected field, or all fields in that line, contain no data, ensuring a compact document layout.
Step-by-step examples
Numeric Fields
In this example, we will be inserting a field for <<openrevenue>>.
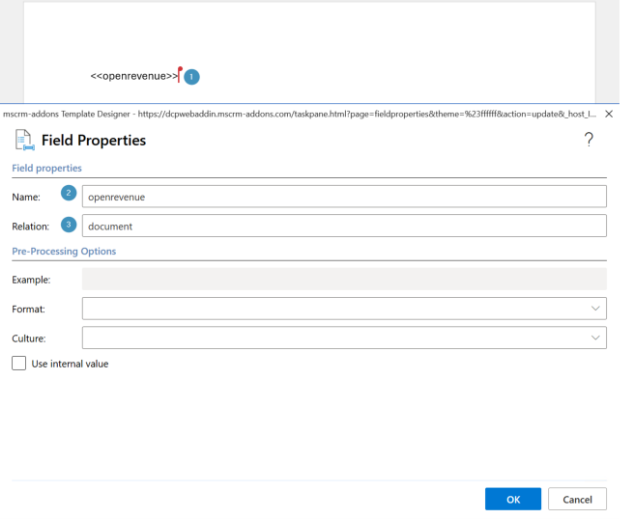
❶ After you have inserted your desired field, place your cursor on the field and open the Field Properties (as dialog) selection from the DCP ribbon. After the dialog opens, you can see the ❷ Field Name and ❸ Relation (i.e. if field is mapped from main table or a related record).
Pre-Processing Options
The pre-processing options allow you to select the format in which the field will be rendered.
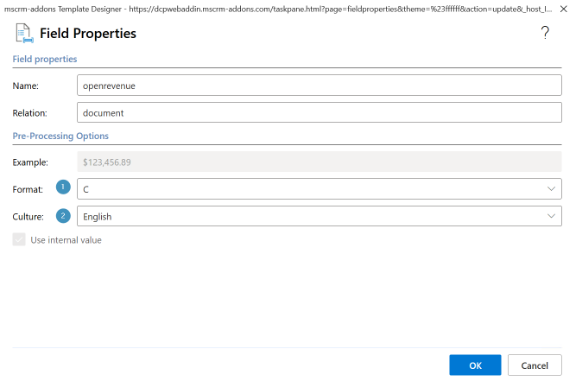
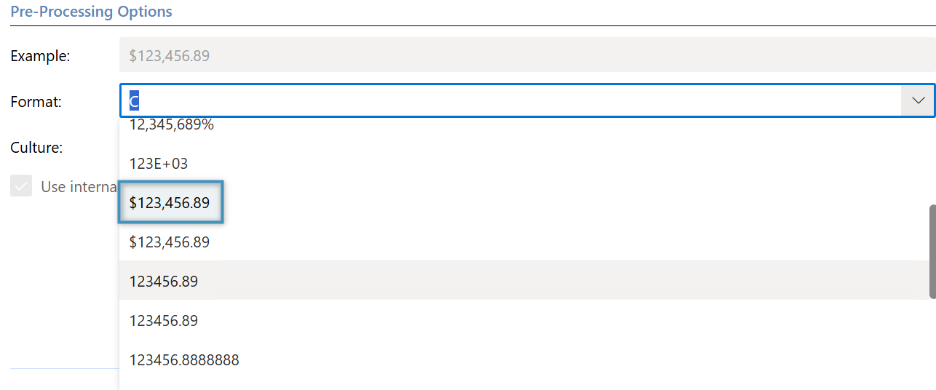
❶ Selecting your numeric format is the first pre-processing option, where you can format the fields display number to your liking. For this example, we will use US Currency, as shown below.
❷ Select your culture so that the respective formats for this culture are displayed. Click on the drop-down to select the one you want to apply.
After making all of your selections, press “OK” to confirm, and your field will now format your desires when documents are created.
Date and Time Fields
In this example, we use the “Expires on” from an invoice. We want to ensure that the field shows in the typical format for UK customers. Place the cursor in the respective field and click the Field properties.

The section ❶ Field properties contains the:
- Name (of the field)
- Relation
The section ❷ Formatting options offers the possibility to display the Date and Time in the respective culture . Learn more about Custom Date and Time Format Strings in DCP here.
After creating your datetime field, selecting the culture is the next step. Selecting the culture will automatically translate field options to align with the selected culture.
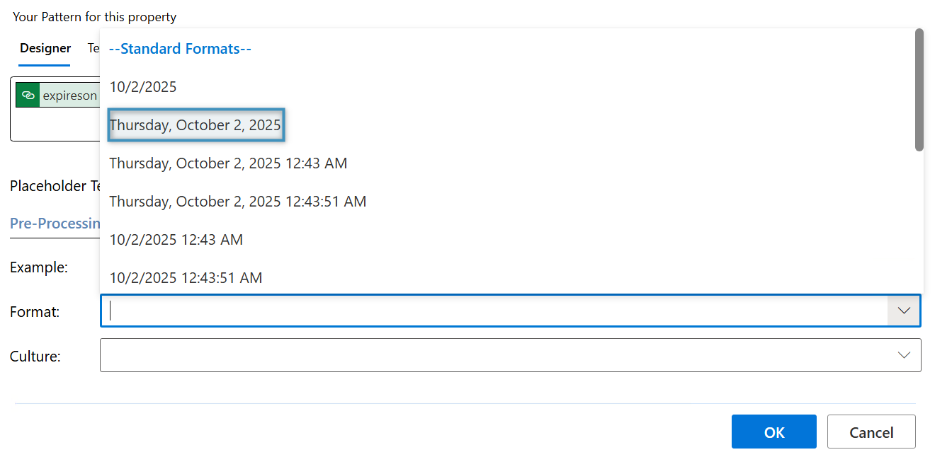
Once you have selected the Culture, we can move into selecting the Format, which will alter the formatting of the field to your liking.
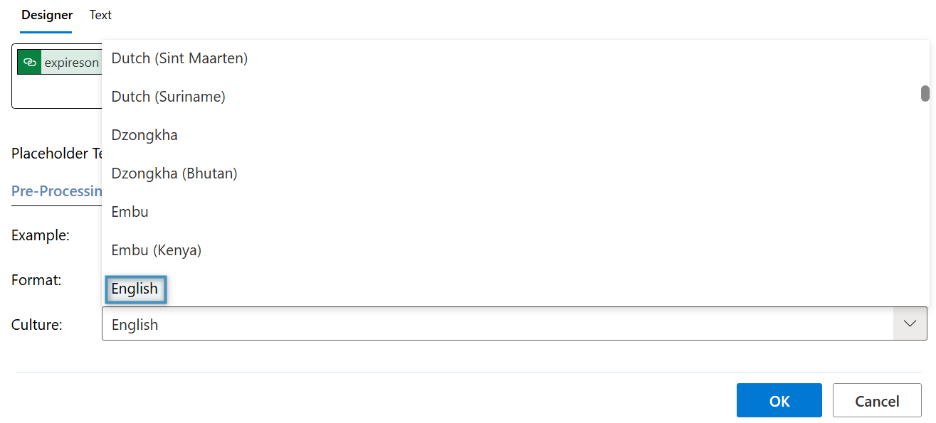
Select OK to save your selections.
Picture Fields
In this example, we will insert a “Default Image” from the insert fields dialog, select it, and then open field properties. When field properties are opened, it will look like this:
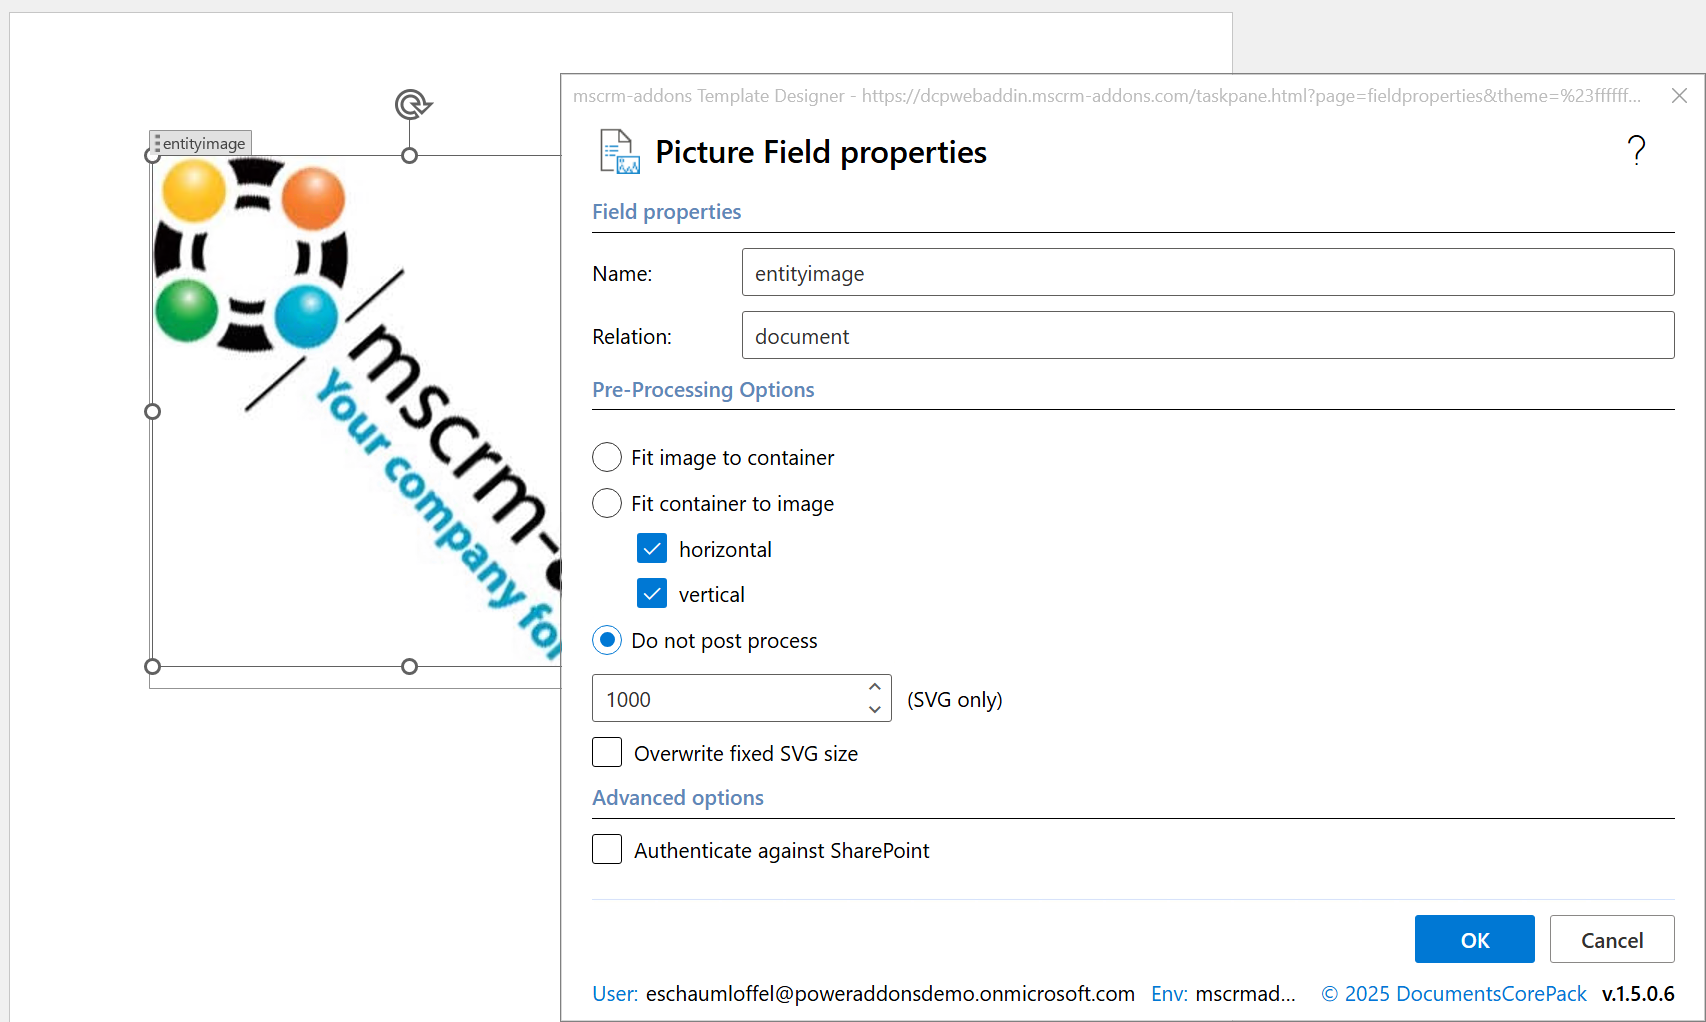
In the field properties for a picture field, users have the ability to adjust:
- Name – Displays the logical name of the field
- Relation – Specifies the record relationship used (typically document unless the image is sourced from a related table).
Pre-Processing Options
These options control how the image is sized before being placed into the template:
- Fit image to container – Automatically scales the image to fit inside the image placeholder in the document.
- Fit container to image – Adjusts the placeholder to match the image’s original dimensions. You can enable fitting for Horizontal or Vertical fitting.
- Do not post process – Inserts the image without applying sizing adjustments.
- SVG Size (SVG only) – When using SVG images, you can define a fixed output size (e.g., 1000px).
The Overwrite fixed SVG size option forces DocumentsCorePack to ignore the SVG’s internal size attributes.
Advanced Options
- Authenticate against SharePoint – Required when the image (typically in a Picture Link field) is stored in SharePoint and access authorization is needed during document generation.
Picture Link Fields
Instead, if you insert your picture field as a Picture Link Field, you will receive the following field properties options:
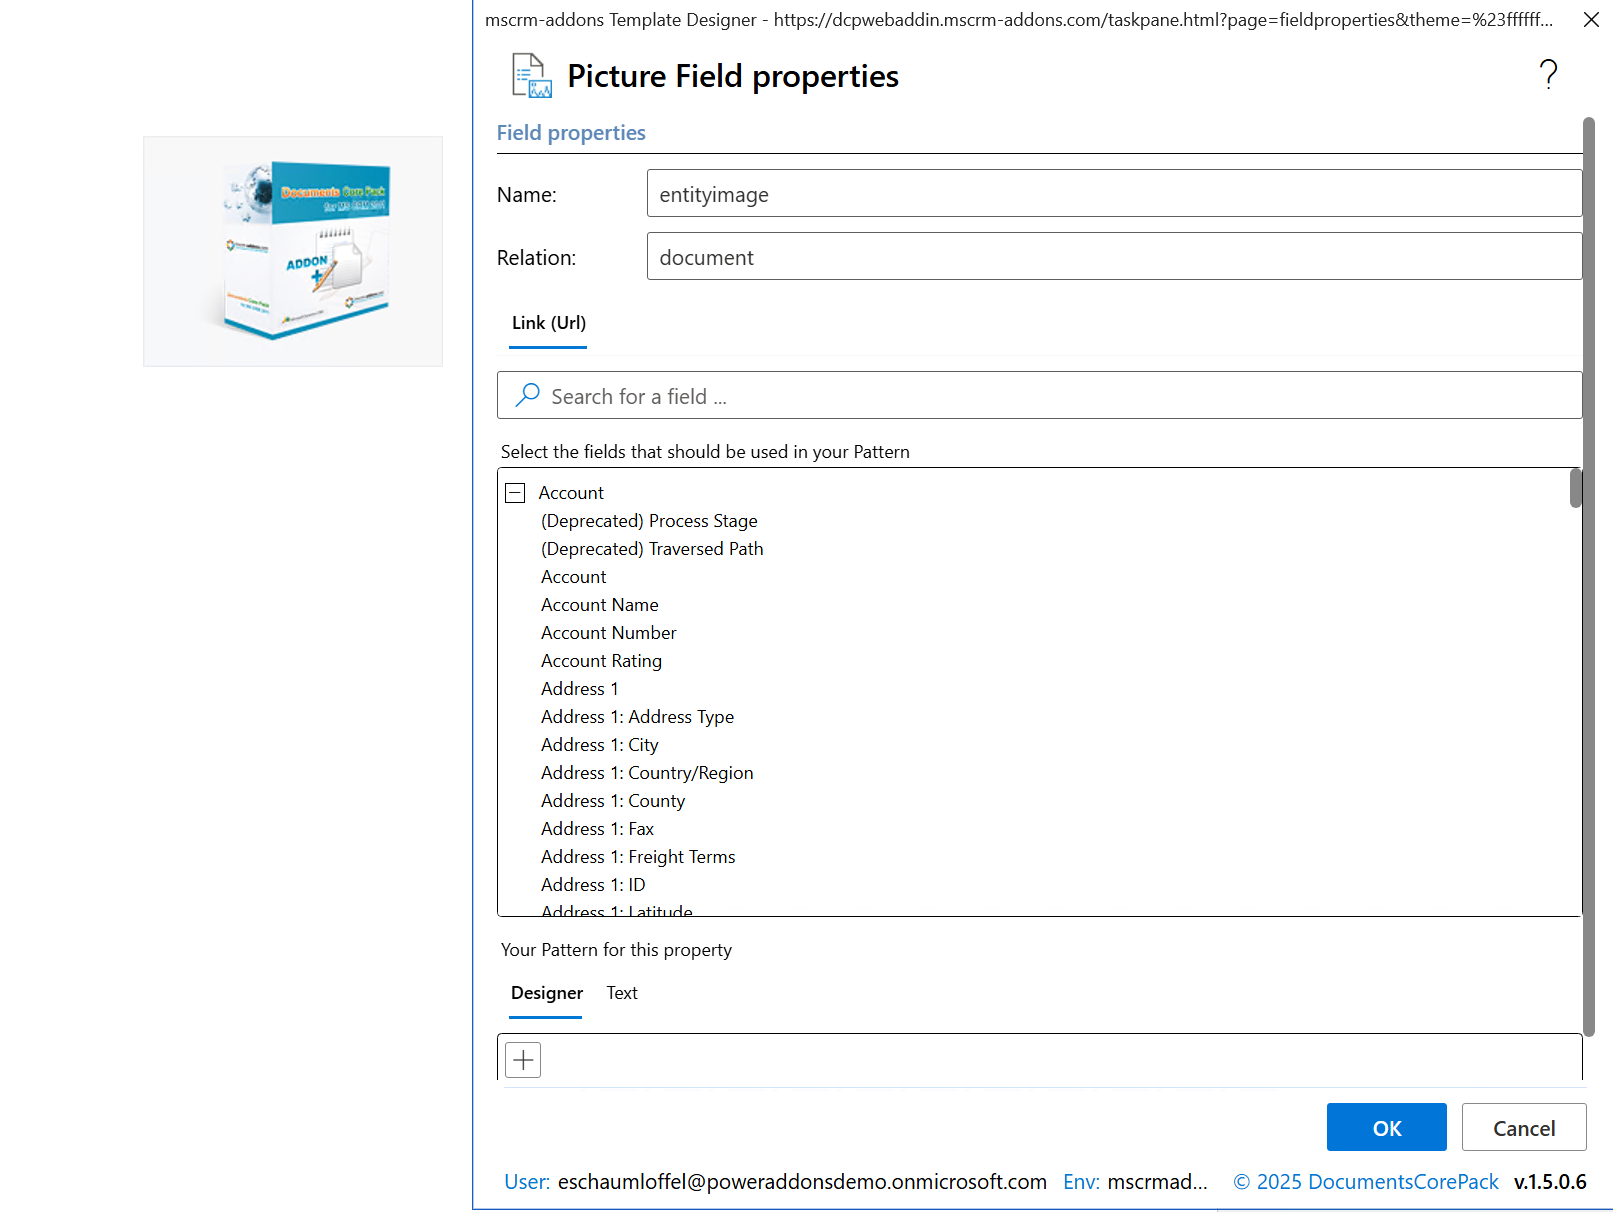
Field Properties
- Name – The logical field name that contains the URL.
- Relation – The record relationship used for retrieving the URL value.
- Link (URL) – In Picture Link Fields, an additional Link (URL) section appears. This allows you to:
- Search for and select fields that contain URLs
- Build a URL pattern using multiple fields (e.g., SharePoint folder + filename)
- Use the Designer/Text tabs to customize the pattern
URL Pattern Builder
The bottom panel (Designer/Text) lets you define how the final URL should be constructed.
This is useful for:
- SharePoint URL patterns
- Multi-part paths (e.g., record ID + file name)
- External content delivery URLs
Image Processing
Picture Link fields use the same image resizing and post-processing engine as Picture Fields. If the URL points to an SVG, SVG options will also apply.
Text Fields
To ensure a clean output, you want to avoid empty lines for fields that may be empty when a document is created.
There are two options available in the DocumentsCorePack Add-In:
- Delete line/row if whole line/row is empty: If the value of the selected field, as well as all other fields within the same line, are empty in Dataverse, the line will be removed.
- Delete line/row if this field is empty: If the value of the selected field is empty, the whole line is removed regardless of other content in the same line.
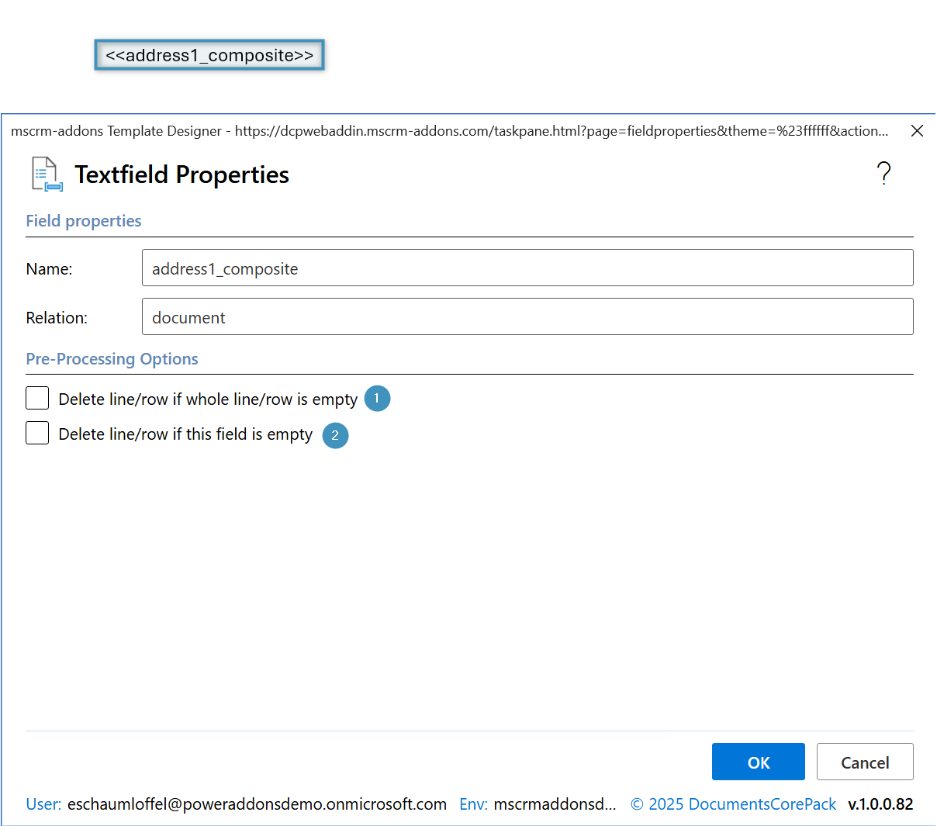
How it works
Open a Word document and navigate to the DocumentsCorePack tab. Place the cursor in the field you want to format, then click Field properties to open the options.
- If the value of the selected field and all other fields within the same row in Dataverse are empty, choose Option 1.
- If you need the entire line removed when only one selected field is empty, choose Option 2.
Select OK to save your preferences.