The DocumentsCorePack add-in provides a range of settings that let you adjust how the Template Designer works and connects to your Dynamics 365/Dataverse environment. These settings are grouped into several tabs for easier navigation:
- Application Settings – Customize dialog messages, behavior, and debugging options.
- Connection Settings – Manage your Dynamics 365/Dataverse connections.
- Template Settings – Define defaults for templates, such as naming and save options
This article provides an overview of the Application settings you can access by hitting the [Settings] -Button, as shown below.

Application Settings
The Application Settings section of the DocumentsCorePack Add-in allows you to customize how the Template Designer behaves, configure default values, and enable tools for troubleshooting. These options are divided into three areas: Message Dialogs, Behavior, and Debugging.
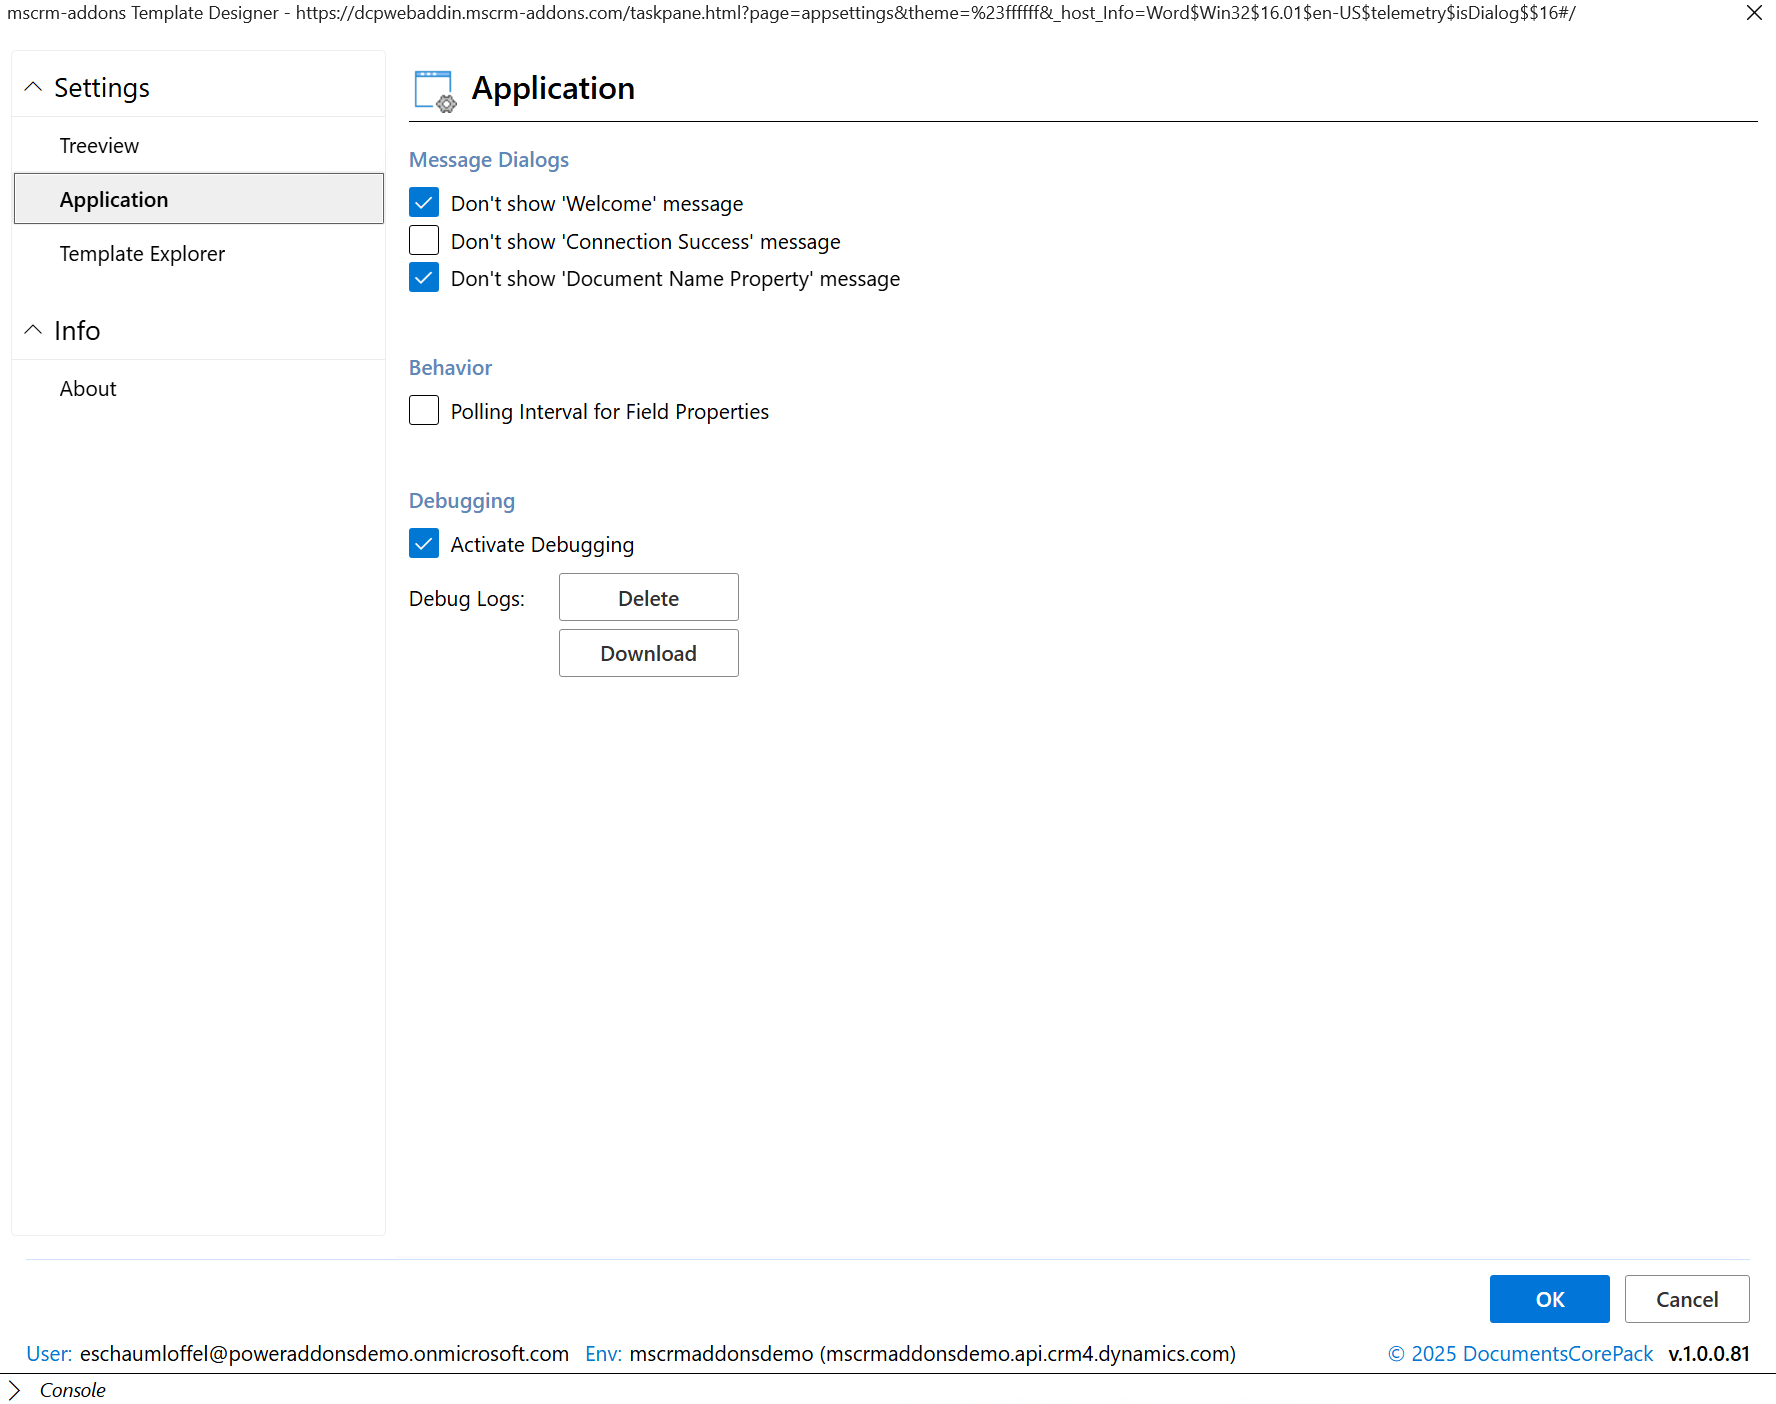
Message Dialogs
Control which system messages appear when using the Template Designer.
- Don’t show ‘Welcome’ message – Suppresses the welcome message when the add-in starts.
- Don’t show ‘Connection Success’ message – Hides the confirmation message after a successful Dynamics 365/Dataverse connection.
- Don’t show ‘Document Name Property’ message – Prevents the prompt about document name properties from appearing.
These options reduce interruptions for experienced users who no longer need these reminders.
Behavior
- Polling Interval for Field Properties – Adjusts how often the add-in checks and updates field properties while working in Word.
This ensures the field values in the designer remain accurate without requiring manual refresh.
Debugging
Enable or disable debugging to generate logs that help identify issues.
- Activate Debugging – Turns on logging for troubleshooting.
- Delete – Removes all previously generated debug logs.
- Download – Exports debug logs for further analysis or for sharing with support.
Debugging is especially helpful when reporting issues to mscrm-addons.com support, as it provides detailed technical information about what occurred during template design.
Treeview Settings
The Treeview Settings control how fields and entities are displayed in the Template Designer’s Treeview, making it easier to browse, search, and configure Dynamics 365/Dataverse fields.
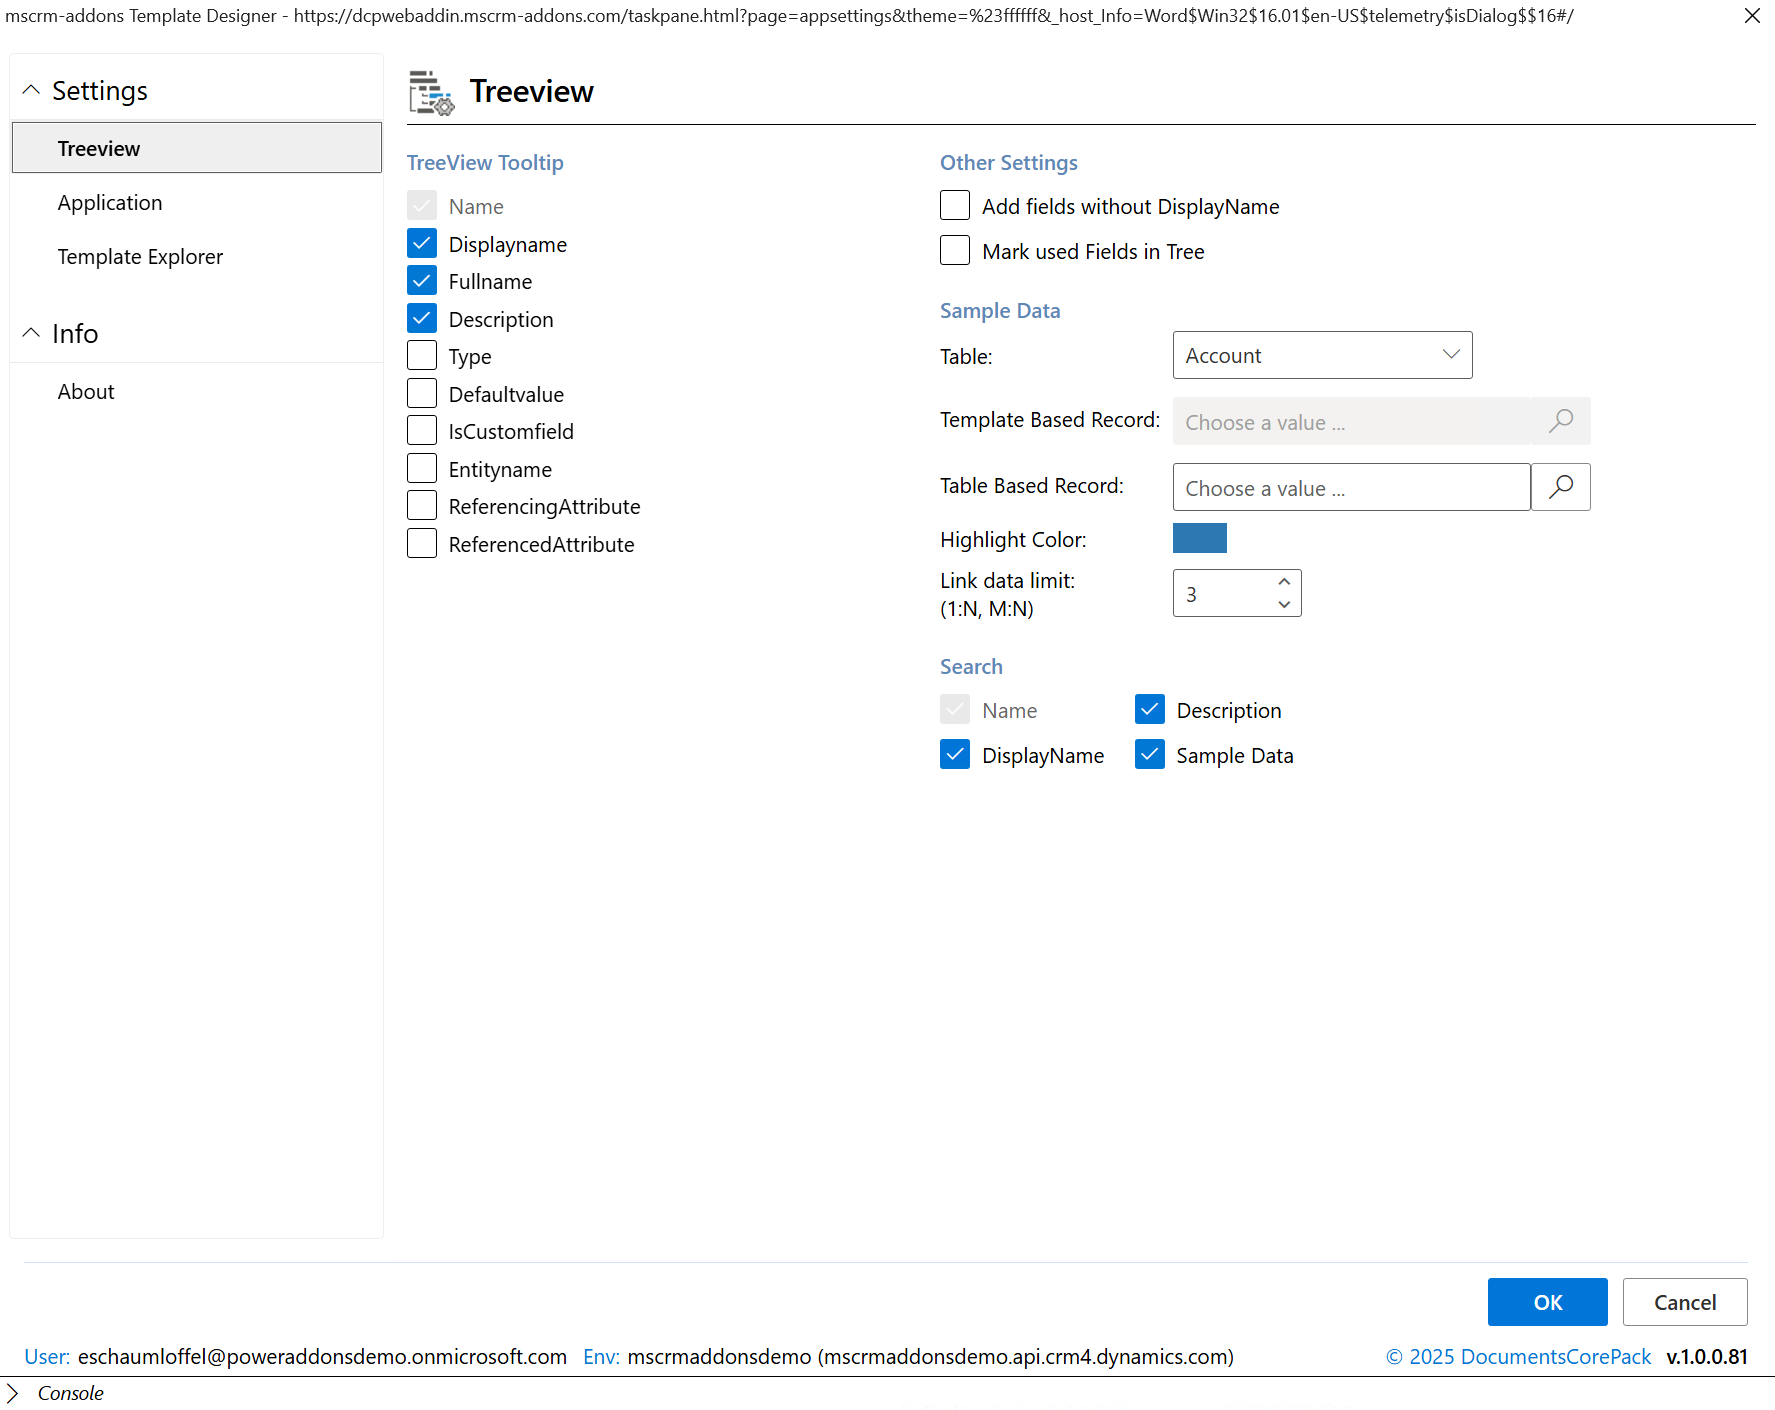
Treeview Tooltip
Choose which field details should appear in tooltips when hovering over items in the Treeview.
- Displayname – Shows the friendly label for the field.
- Fullname – Displays the schema/full name of the field.
- Description – Shows the field’s description, if available.
- Type – Displays the data type of the field.
- Defaultvalue – Shows the default value of the field, if defined.
- IsCustomfield – Indicates whether the field is custom or standard.
- Entityname – Displays the entity name associated with the field.
- ReferencingAttribute / ReferencedAttribute – Shows attribute references for relationships.
Selecting more options provides additional technical detail, while fewer options keep the tooltip simplified.
Other Settings
Additional display and usability options:
- Add fields without DisplayName – Includes fields that do not have a display label. (aka “Hidden fields”)
- Mark used Fields in Tree – Highlights fields already used in the template.
Sample Data
Configure how sample data is used to preview values in templates.
- Table – Select the entity/table to pull sample data from.
- Template Based Record – Choose a record for previewing template fields.
- Table Based Record – Select a record from the chosen table.
- Highlight Color – Define the color used to mark
fieldsvalues in the Treeview.
- Link data limit (1:N, N:N) – Set how many related records are retrieved for preview (default is 3).
These settings help in mapping the correct fields during template design.
Search
Choose which field attributes should be searchable within the Treeview.
- Name – Search by internal schema name.
- DisplayName – Search by field label.
- Description – Search by field description.
- Sample Data – Search sample values displayed in the Treeview.
This makes it easier to quickly locate the right fields when working with large datasets.
Template Explorer Settings
The Template Explorer Settings control which field types, elements, and options are visible in the Template Explorer pane. This allows you to tailor the workspace to your needs, keeping it simple for everyday use or more detailed for advanced template design.

DocumentsCorePack Elements
Select which elements appear in the Template Explorer. You can toggle them individually or use the Select All, Deselect All, or Invert Selection buttons for quick configuration.
Available options include:
- Advanced String
- AssureSign
- Chart
- Calculated Field
- DateTime Field
- Document
- DocuSign
- HTML
- Hyperlink
- Inspection Field
- Normal
- Picture
- Picture Link
- Prompt
- QRCode
- Static Document
Selecting fewer options provides a cleaner view, while enabling all ensures every feature is available during template design.
More information on the Template Explorer can be found here.
Word
Show content elements available in Microsoft Word in the Template Designer.
Others
- Jump to Field on Click – Automatically navigates to the corresponding field in your Word document when you click on it in the Template Explorer. This makes it easier to locate and edit fields directly.
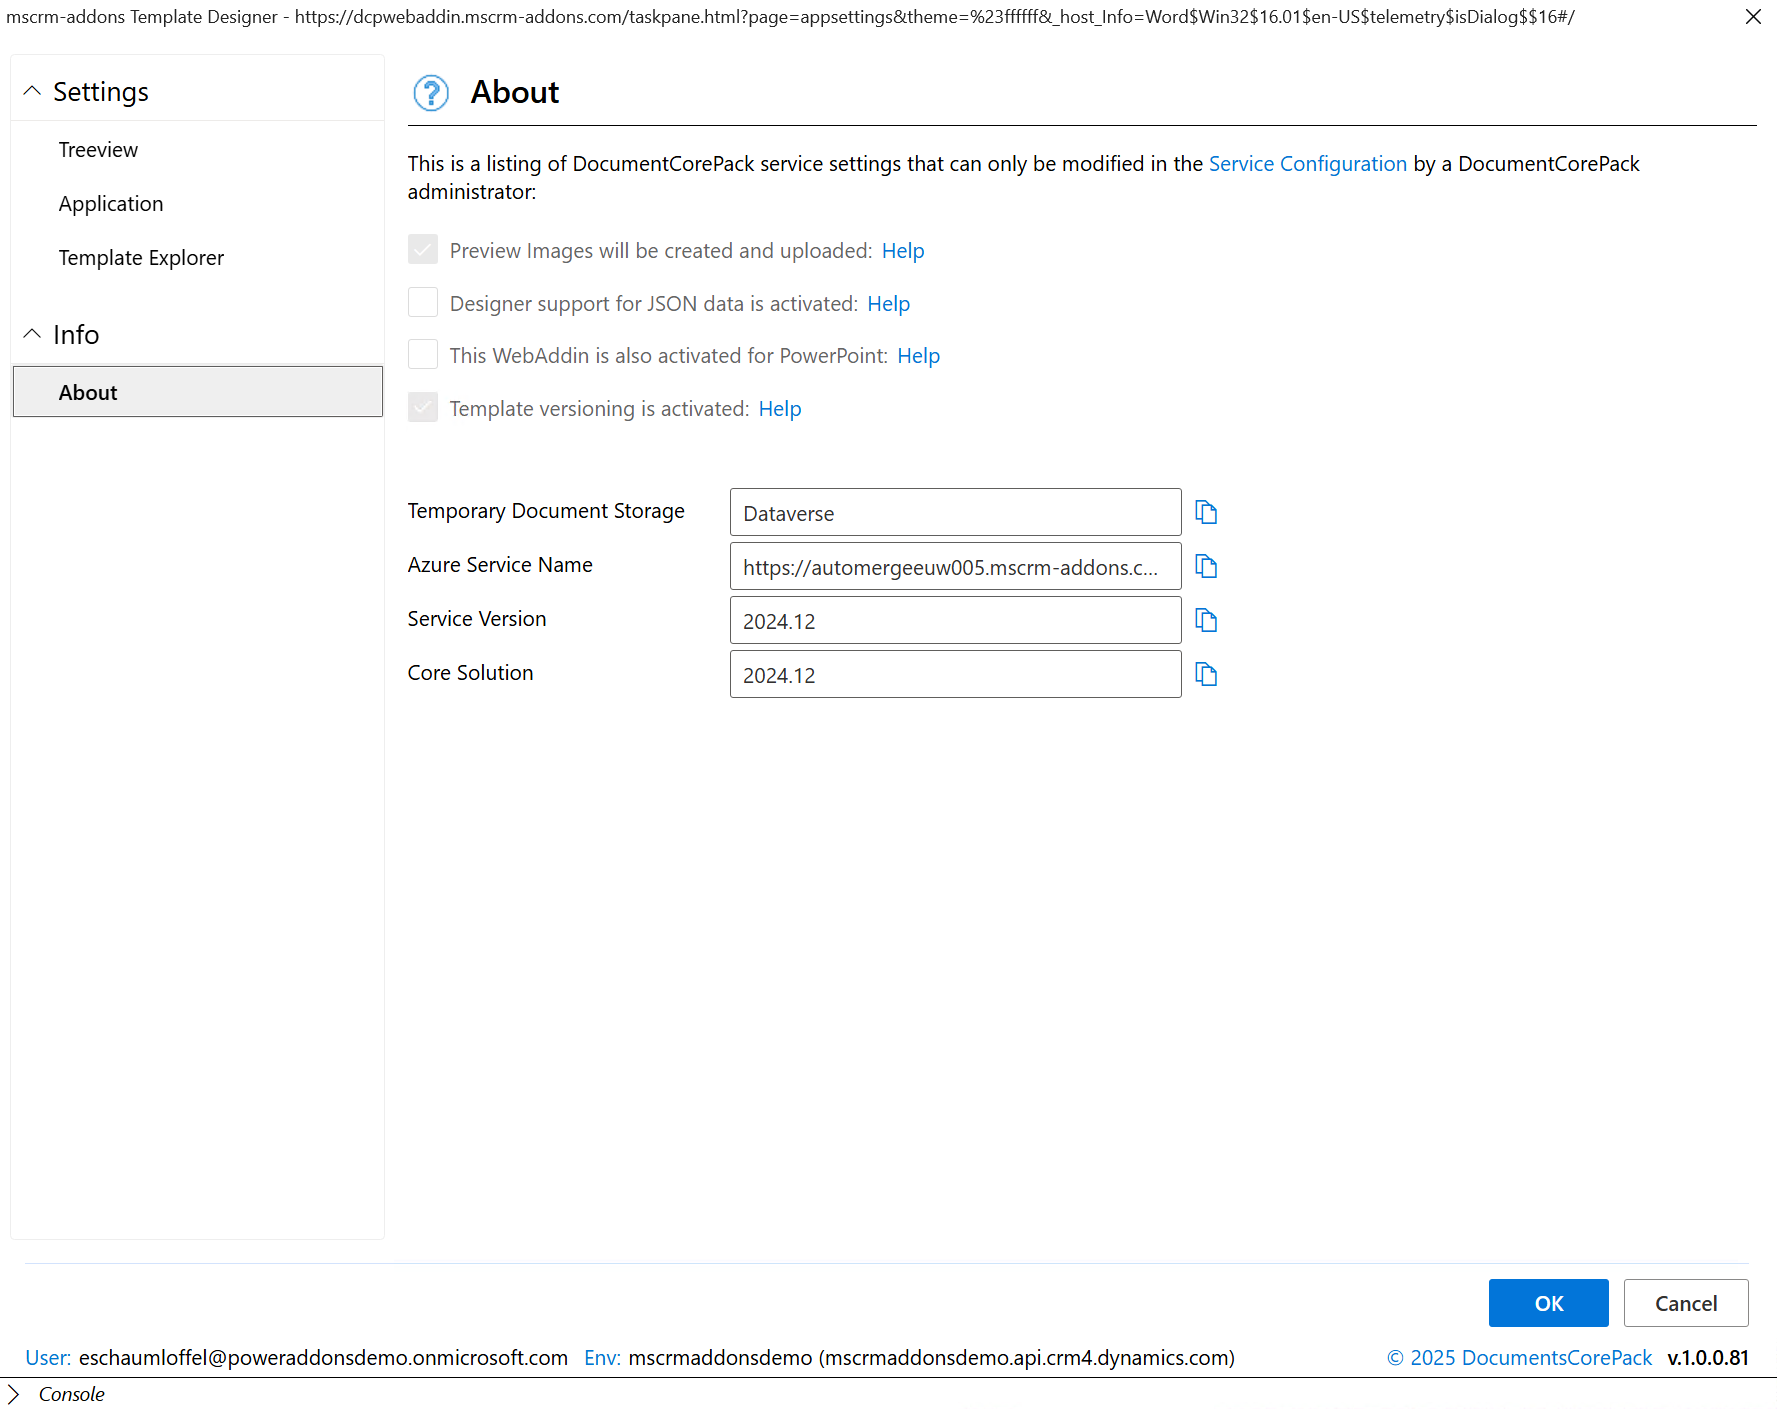
About
The About tab provides version information for the DocumentsCorePack Add-in. This includes details such as the current version number, which is helpful when checking for updates or when contacting support.