This guide walks you through installing the DocumentsCorePack Add-In directly from Microsoft Word using the Office Add-In store.
Note: It’s important to note that a DocumentsCorePack service must be active and deployed before you can start using the Add-in to design templates. For more information on activating your service, please refer to this article.
There are two options to install the Add-In:
- Option 1: Manual installation by the user (recommended for individual users)
- Option 2: Central deployment via the Microsoft 365 Admin Center (recommended for organizations with restricted permissions)
Option 1: Installation by Users in Microsoft Word
Step 1: Open Microsoft Word
- Launch Microsoft Word on your computer.
- Open a blank document (or any document that you would like to use with DCP).
Step 2: Open the Add-Ins Menu
- In the top ribbon under Home, click on “Add-ins.”
- Click “More Add-ins” to open the Add-In store.
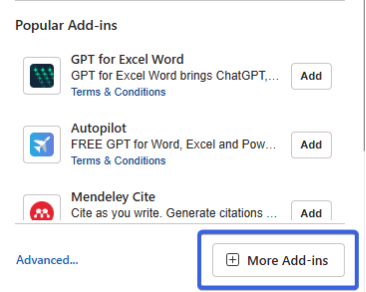
Step 3: Search for the Add-In
- In the search bar, type: “DocumentsCorePack”
- Locate DocumentsCorePack Template Designer by mscrm-addons.com.

Step 4: Install the Add-In
- Click the “Add” button next to the listing.
- Accept the permissions prompt when it appears.
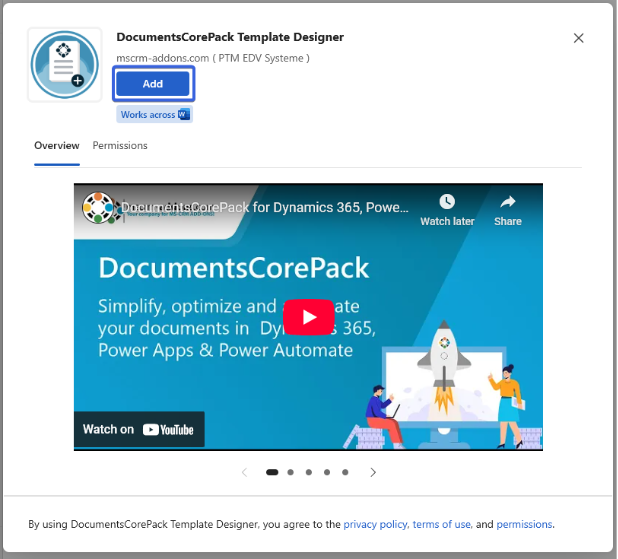
The add-in will now appear in your Word ribbon as a new tab labeled DocumentsCorePack.

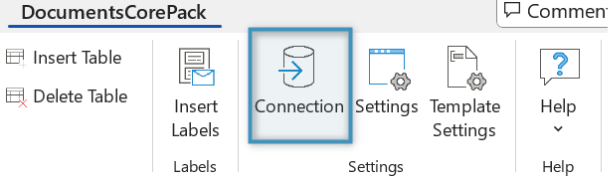
Step 5: Connect to Dynamics365
To begin using the DocumentsCorePack add-in, you must first establish your connection to Dynamics 365.
Select Connection from the ribbon under the DocumentsCorePack add-in, in the settings section.
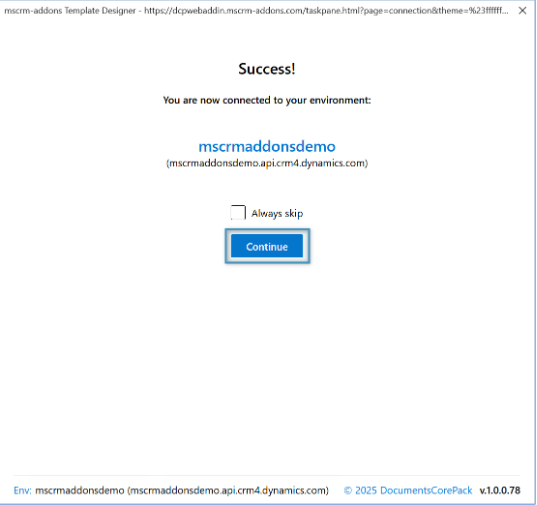
The welcome dialog will open, prompting you to sign into your Microsoft account that you would like to use with Dynamics365/DocumentsCorePack.
After signing in with your desired account, the Your Environments dialog will open for you to select:
- Your username
- The environment that you would like to use with the DocumentsCorePack add-in
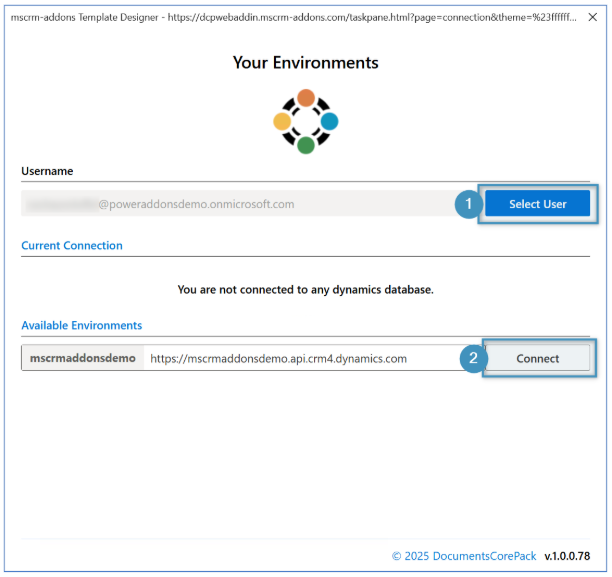
After selecting your environment, you will receive a success message, confirming that you are connected and ready to start using the add-in after you push the Continue button.
Option 2: Deploy via the Dynamics 365 Admin Center
In many organizations, end-users are not allowed to deploy Add-Ins directly. Instead, Add-Ins are centrally maintained via the Microsoft 365 Admin Center. Administrators can deploy the DocumentsCorePack Template Designer for all users or specific groups by following these steps:
Step-by-step deployment
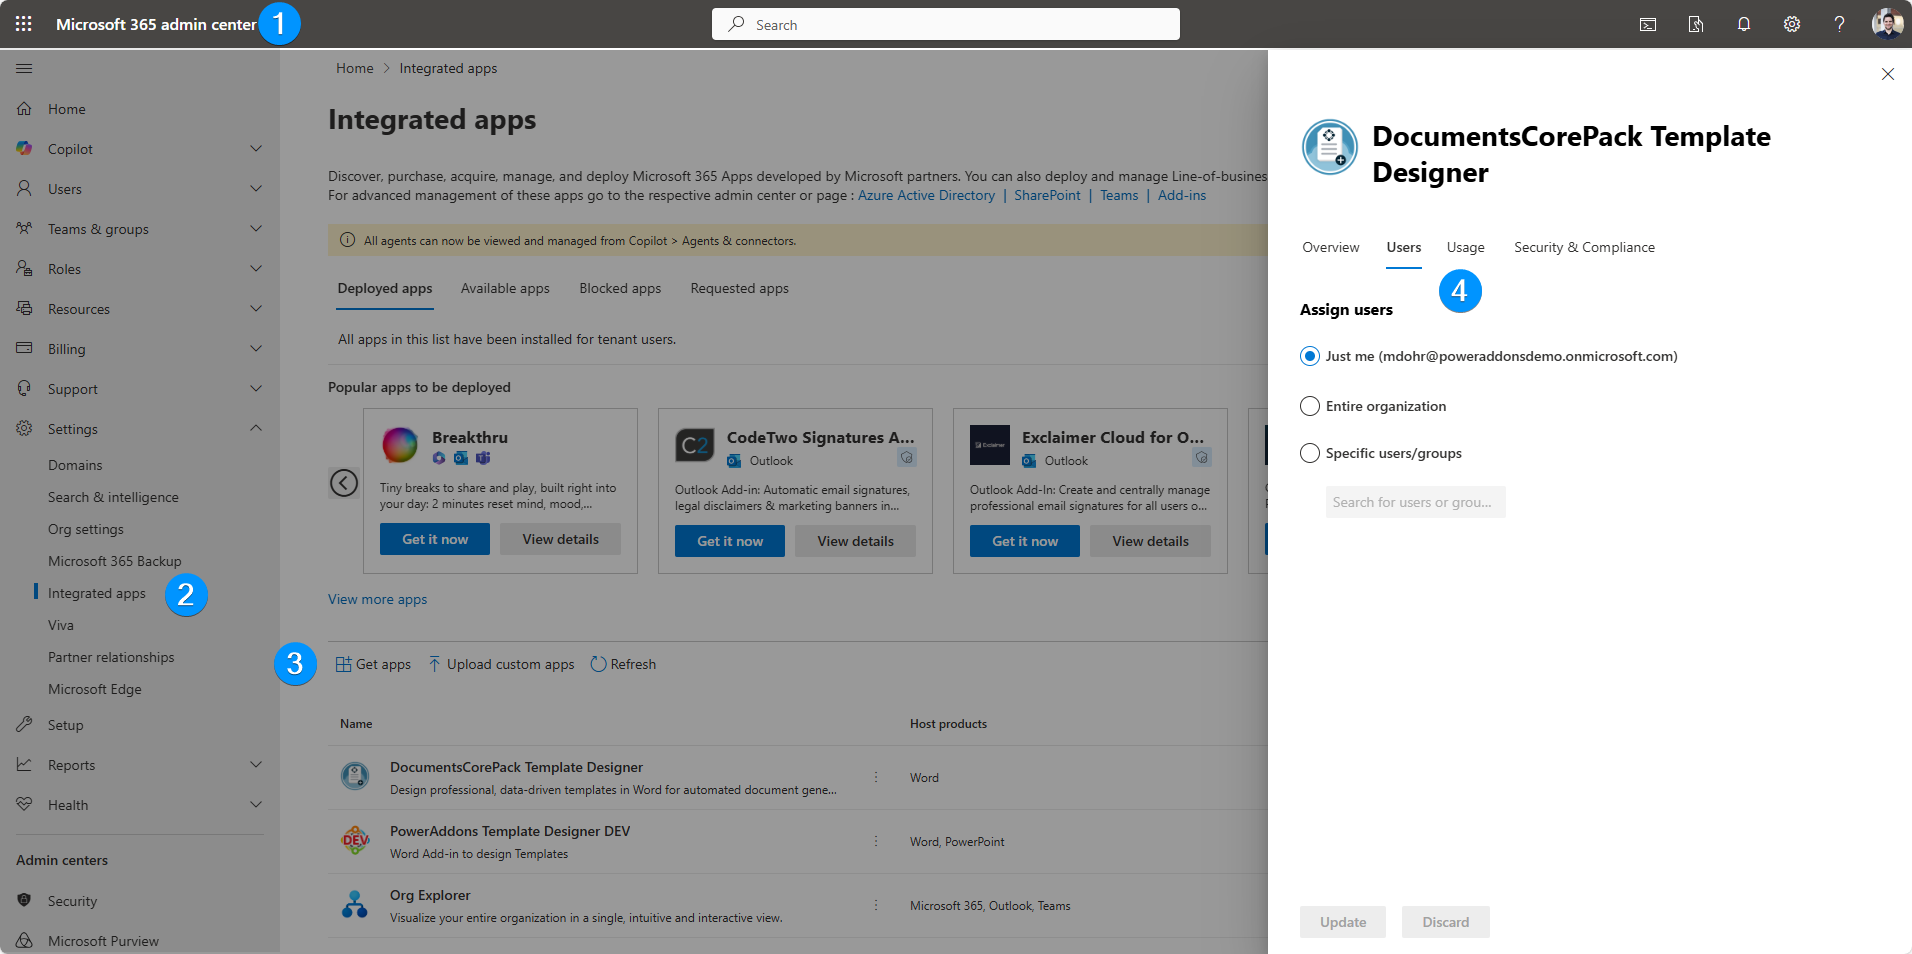
- Open the Microsoft 365 Admin Center
- Go to https://admin.microsoft.com and sign in with your admin account.
- Navigate to Integrated Apps
- In the left navigation menu, select Settings → Integrated apps.
- Add the Add-In
- Click Get apps, search for DocumentsCorePack Template Designer, and select it from the list.
- Assign users
Under the Users tab, choose how the Add-In should be deployed:- Just me – installs the Add-In only for the admin user.
- Entire organization – deploys the Add-In for all users in your Microsoft 365 tenant.
- Specific users/groups – deploys the Add-In for selected users or Microsoft 365 groups.
After making your selection, click Update to confirm.