This article provides a step-by-step guide for creating a simple template to follow up with leads in our environment.
In this walkthrough, we will build a lead template that includes a brief message for the contact, essential contact details, and our own contact information.
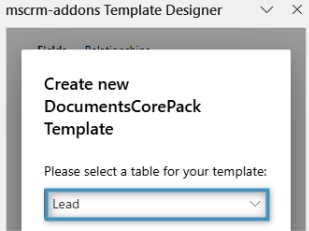
Step 1: Set the base table
The first thing that needs to be defined before you can begin designing a template is the base table. This choice determines which fields will be available in the Template Designer. Keep in mind that once a field is added, the base table cannot be changed. For this walkthrough, click on the Insert Fields button located in the Fields group under the DocumentsCorePack tab. Once the Template Designer opens, we will select the base table Lead.
Step 2: Add our text and basic structure
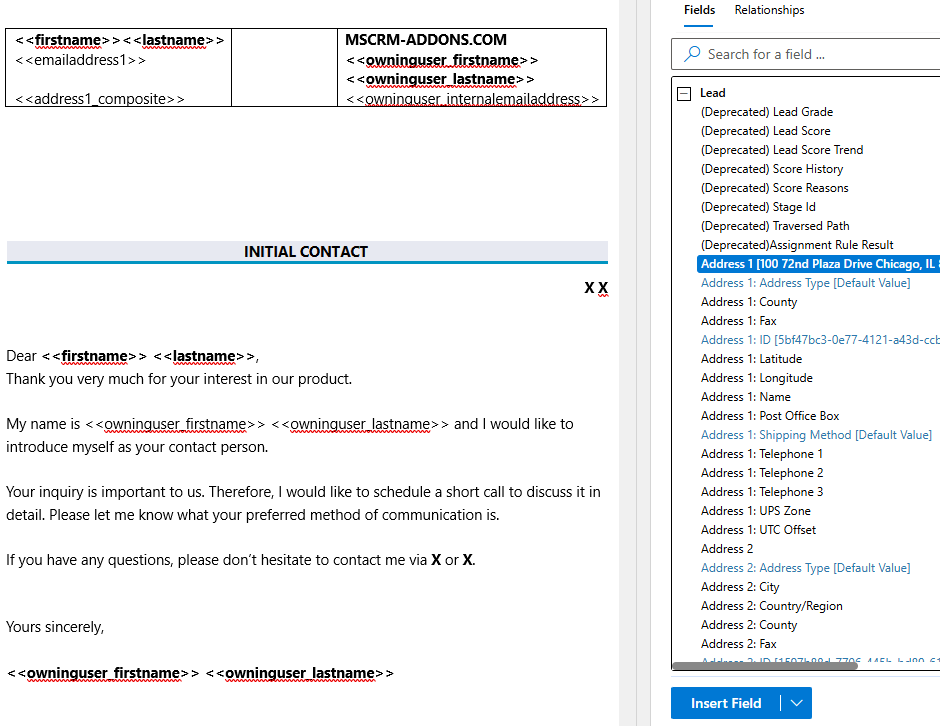
Next, we will insert our content and define the overall layout of the template. Here is the initial setup for our template.
Step 3: Adding our standard fields
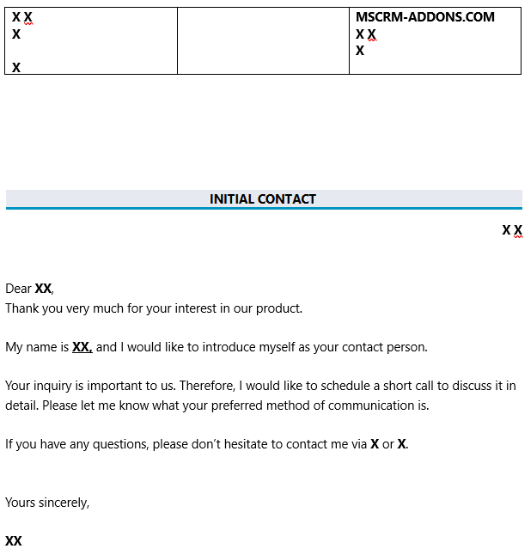
The placeholders marked with X will be replaced by fields from the Lead entity. These fields can be found under the Standard tab in the Template Designer. Some, such as the Owning User fields, are located within lookup fields near the bottom of the fields list.
After inserting the necessary fields, here is how our template should look like:
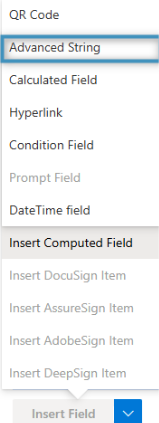
Step 4: Adding the current date via Advanced String
To add a date field in the Template Designer, open the Insert Field menu. Then, under the Insert Computed Field submenu, select Advanced String to open the Advanced String properties window.
In the Your Pattern for this property field, the current date can be added either through the ❶ Property Designer or through ❷ text.
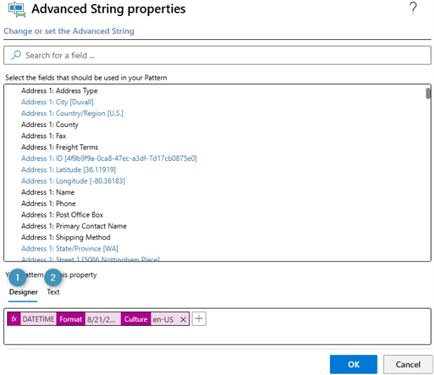
After clicking OK, the field will be inserted into the template.

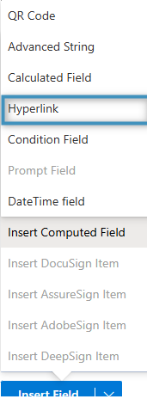
Step 5: Adding our Hyperlink and Condition fields
The final elements we need to add to the template are the Condition and Hyperlink fields. We want to display hyperlinks for both email and phone, but the phone hyperlink should only appear if a phone number is available. If no phone number is provided, the field should remain hidden.
We will start by adding the Hyperlink field to the email by selecting Hyperlink from the Insert Field menu under Insert Computed Field submenu as shown below.
In the Hyperlink properties window, you can format the field as follows:
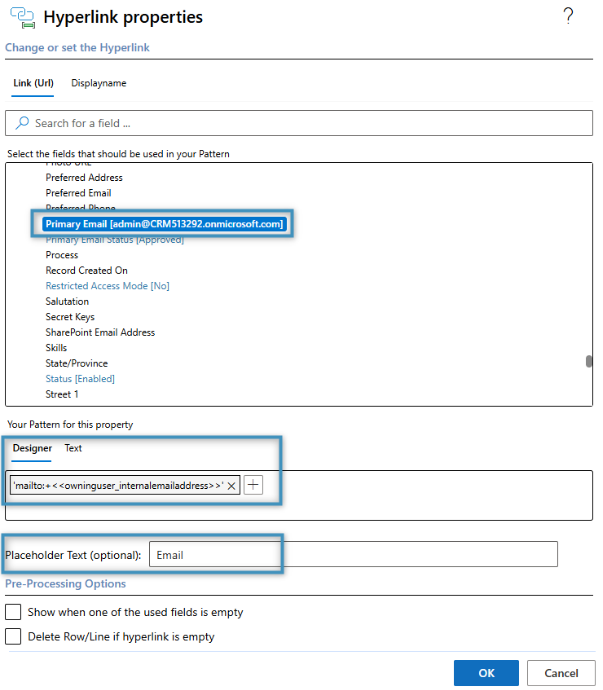
This pattern will retrieve the primary email during the merge process. The Displayname must also be set before clicking OK.
The field will be added to the template and should look like this:

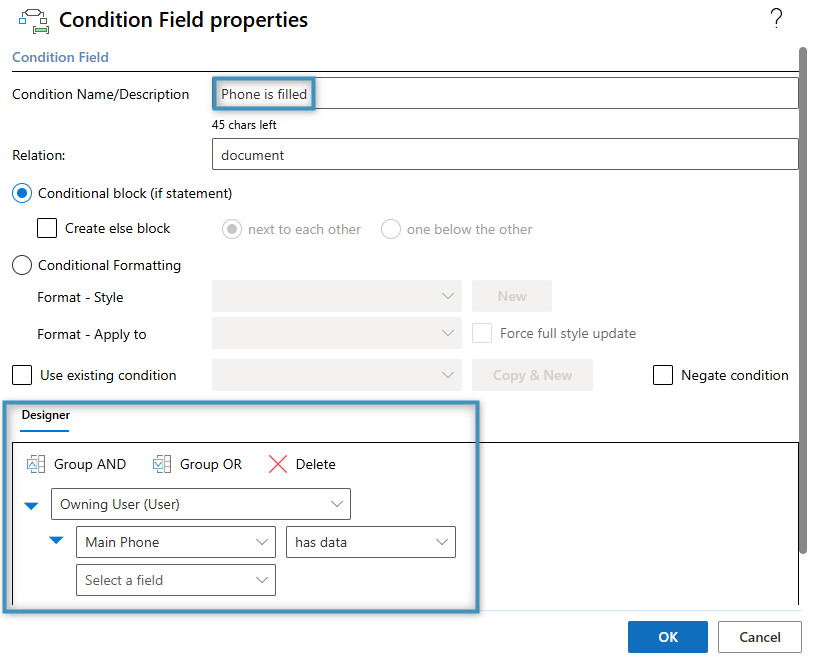
We also want to add a hyperlink to the phone number, if it is available. To do this, we first need to create a Condition Field using the Condition button in the Fields group in the DocumentsCorePack tab.

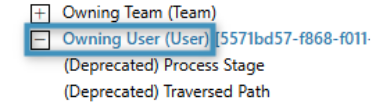
To set up the condition, start by selecting Owning User (User) from the dropdown. This will reveal a secondary dropdown below, where you can choose the Main Phone field. Then, in the operator dropdown to the right, select has data to ensure the condition only applies when the phone number field contains a value.
The condition field should appear similar to this:
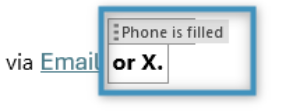
Click OK. The condition field should appear as shown below.
Next, we need to insert the phone hyperlink. To do this, click inside the condition field and reopen the Hyperlink field window. Then, configure the hyperlink pattern as follows:
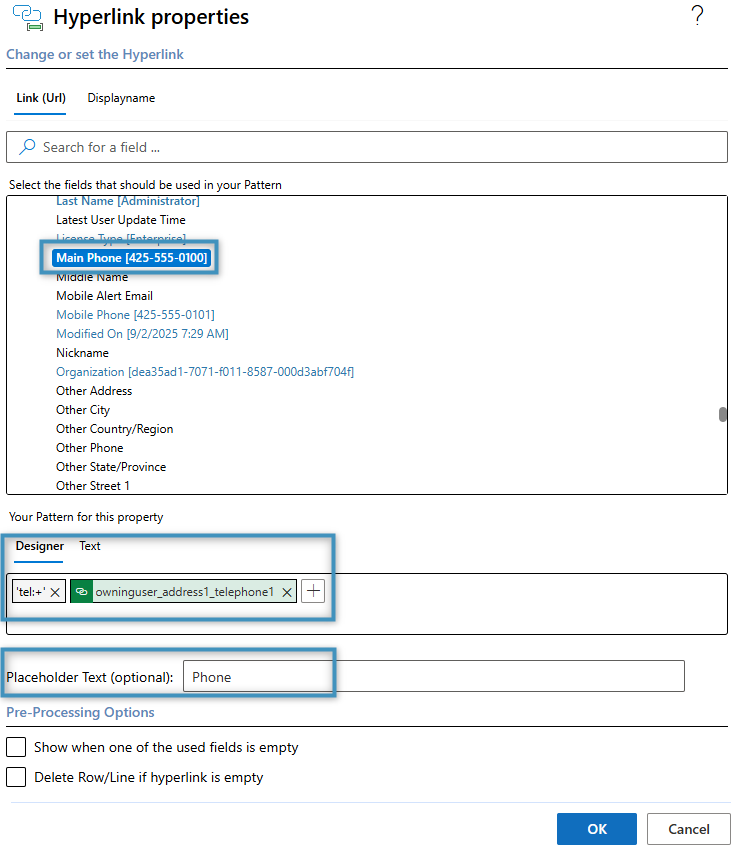
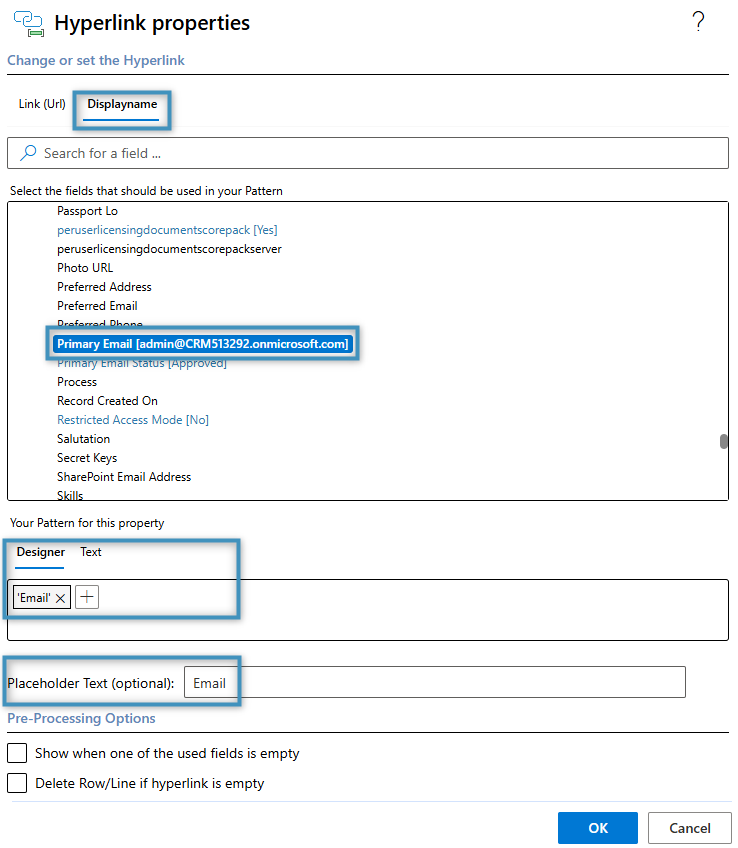
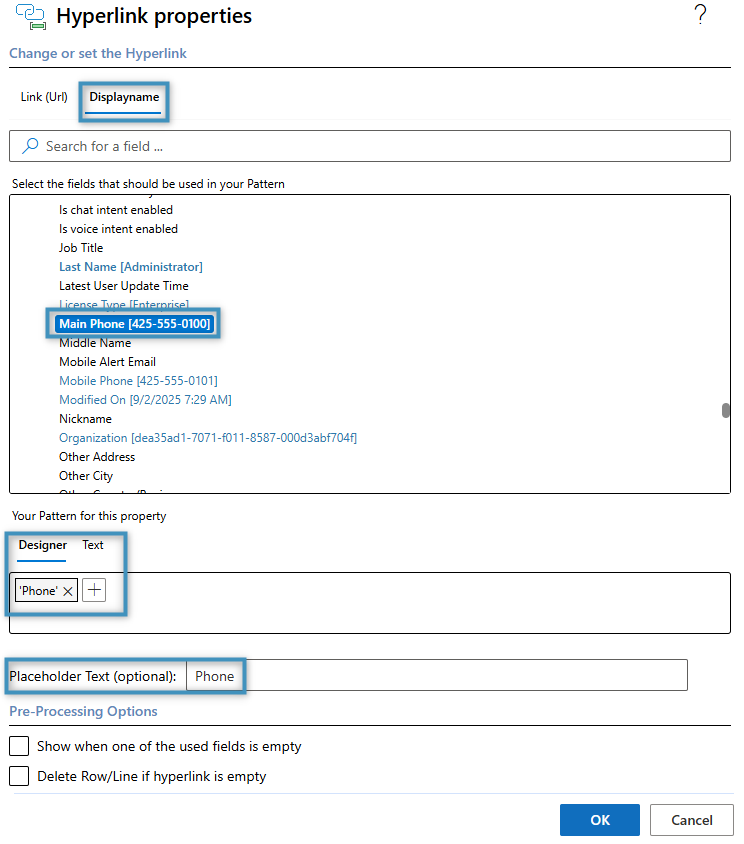
Make sure to include the Displayname here as well.
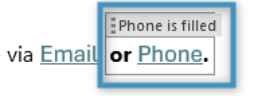
Click OK. This will insert the field into the condition field. If configured correctly, your hyperlink field will now appear within the condition field.
Step 6: The Result
At this stage, your template should resemble the following layout.
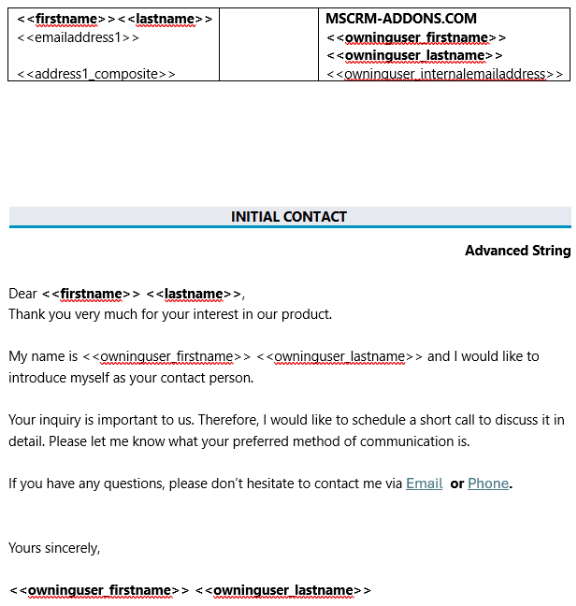
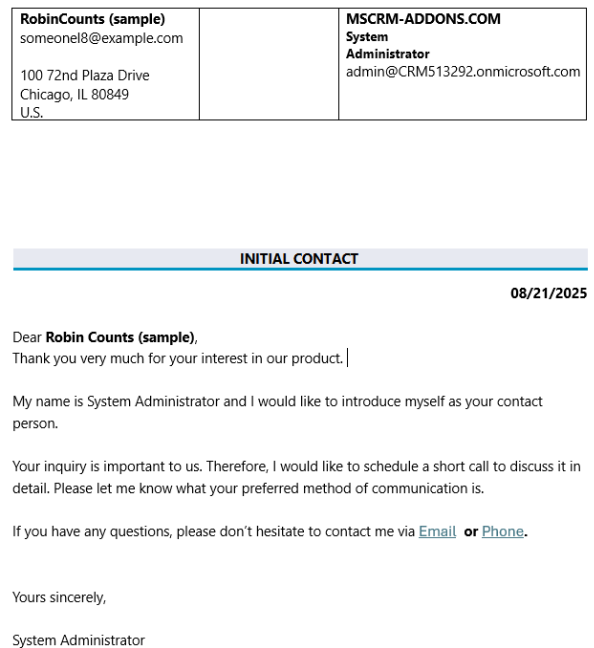
Merging this template with a Lead record from our environment produces the following result: