This article provides a step-by-step guide for generating a customizable sales report template that consolidates and presents data from related sales entities – such as Opportunities, Quotes, and Invoices – associated with a specific Account record in Dynamics 365.
Step 1: Setting the base table
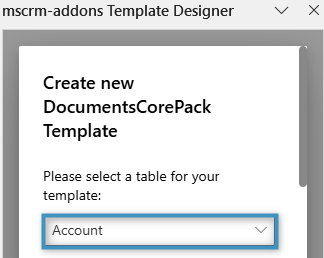
When creating a template, it is essential to first define the base table. This selection determines which fields will be available in the Template Designer, and once a field from the chosen table has been inserted, the base table cannot be changed. We will begin by opening the Template Designer and selecting Account as the base table.
Step 2: Creating the document title with Advanced String
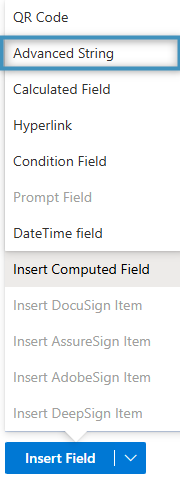
Our document headline should state the Account name and the date the report is generated. To do so, we apply the Advanced String option within the Template Designer. This can be done by opening the Insert Field menu and selecting Insert Computed Item->Advanced String.
In the configuration window that appears, you can enter a value that will be dynamically populated when the document is merged. For this template, we will configure the value as follows:
The Advanced String field will now appear as shown below:
You can also configure the document’s dynamic name by referring to the steps in this article.
Below the Advanced String field, we want to add the primary contact’s full name. To do this, select the respective lookup field from the Treeview – specifically, Primary Contact – and then select Full Name.
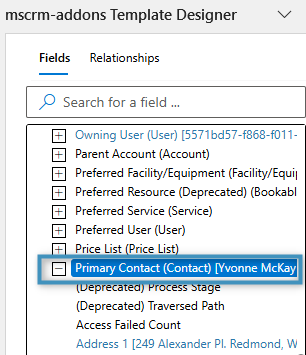
Figure 5: Selecting our lookup field
Our template should resemble the following:
Step 3: Creating the Overview table
For the Overview table, we want to display the total number of Opportunities, Quotes, and Invoices, as well as the aggregate revenue for each entity. This can be done by utilizing the relationship aggregation feature within the relationship designer.
First, we will create a 1×1 table using Word’s table creator with the title “Overview” in the center. Next, we will create a 3×4 table to organize our entities, define the column headers, and include an Advanced String field that dynamically inserts the current year during the merge process.
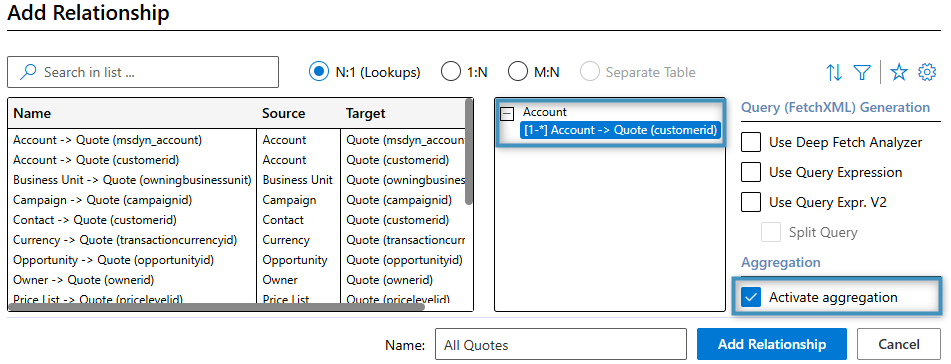
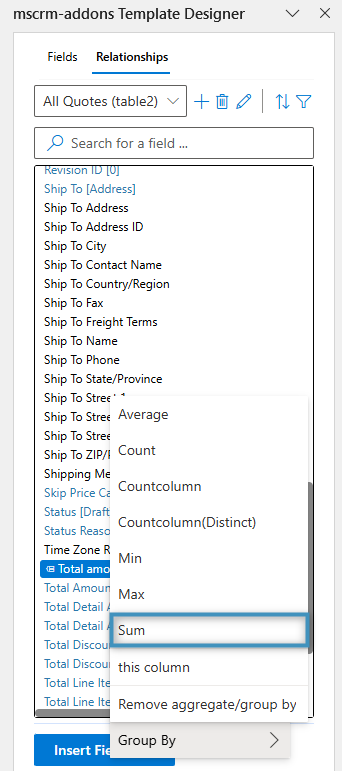
Next, we will open the Relationship Designer, select the Quote entity and activate aggregation, which allows us to aggregate values across all quotes related to the account.
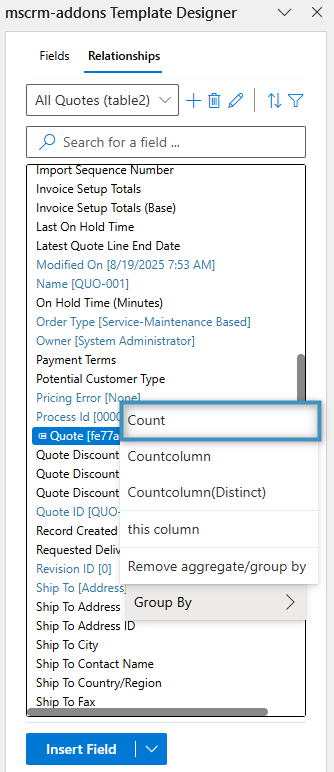
Quote aggregated by Count will give us the total number of quotes related to the account. Total amount aggregated by Sum will give us the total revenue generated from all these quotes. This setup should be similar for the Invoice table.
After establishing the relationships, we can add our newly created fields to the table.
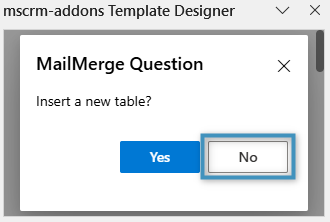
IMPORTANT: When adding the fields to the table, select No if you are prompted to insert the field as a new table. In this case, we only want to add them as fields.
This information should be configured for all entities except for Opportunity, as we will aggregate it by Est. revenue instead of Total amount.
After adding all the fields, your table should look like this:
Step 4: Creating the Details table
Our final step is to add a detailed table for each entity. In our case, we will include four fields from each entity in its respective table.
To do this, we will create another relationship with each entity using the Relationship Designer. However, this time, we will leave activate aggregation unchecked and only select the fields we need from the list.
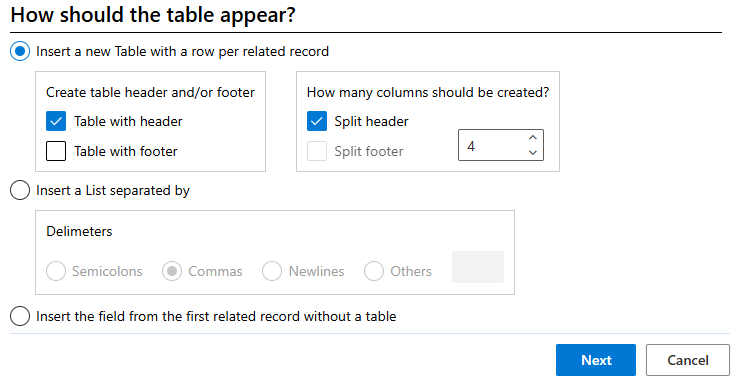
Once the relationships have been set up, we can proceed to create our table.
As part of the table setup, we will configure our table with the following parameters:
Once the table has been created, we can proceed to populate it with fields and assign column names.
We will follow the same steps for our other tables, namely the Quote and Invoice tables. After adding each one, the “Details” section will look like this:
Optional: Adding a Table of Contents
To keep this template organized, consider adding a Table of Contents (TOC), which can be inserted via the References tab in Word.
To include your tables in the Table of Contents (TOC), simply highlight the first column header of each table and apply a Heading style to it.
Final step: The Result
Once your template is complete, save it and merge it with your data. The resulting document should include the data from your environment.
