The feature “ActivityTools QueueView” for Dynamics 365 is created to display related activities of a queue record. It easily allows you to select a queue and load its activities in the known ActivityTools layout.
Let´s start with the first steps on how to add ActivityTools QueueView to your SiteMap and to your dashboard and see later how to use it.
The ActivityTools QueueView feature is part of the ActivityToolsPluginExtension solution version 2020.4 or higher.
How to add ActivityTools QueueView to SiteMap
Open the built-in Dynamics 365 SiteMap editor for your Dynamics 365 app and select the App in which you want QueueView to be used.
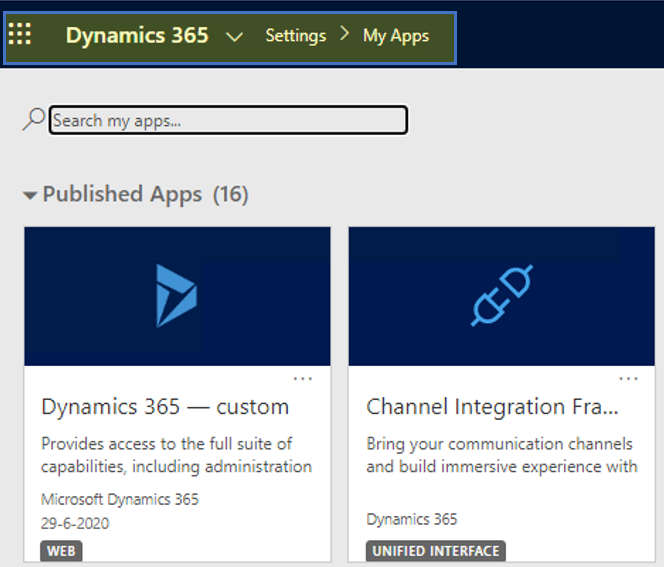

Figure 1: My Apps in Dynamics 365
Press the [Site Map]-button in your App Designer.
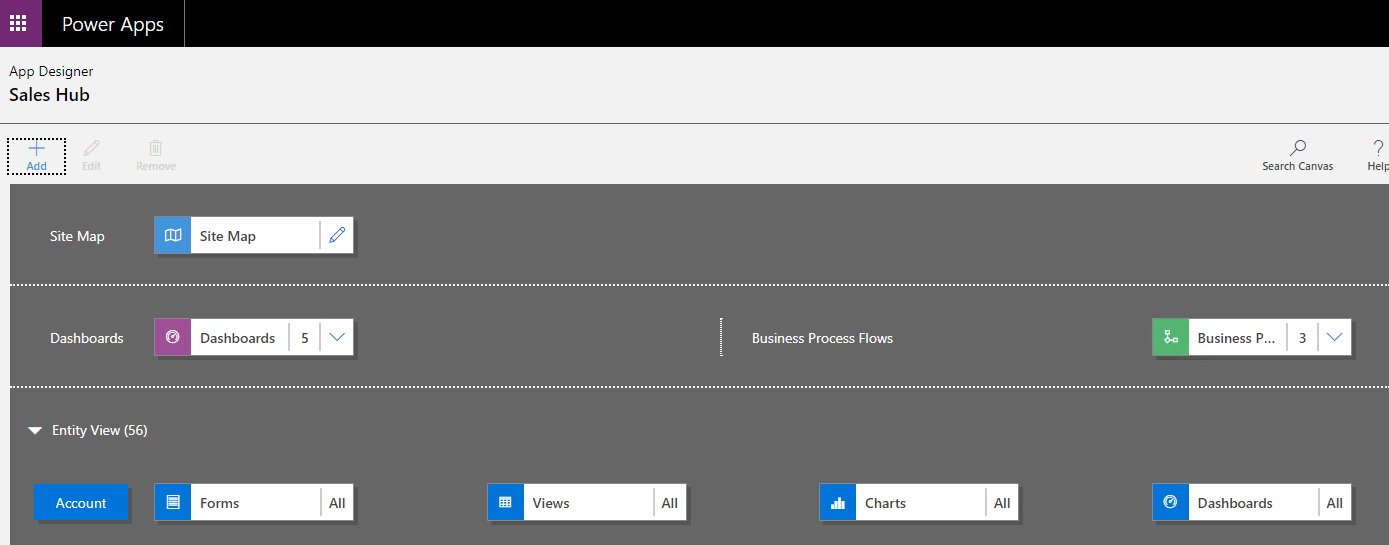
Figure 2: Site Map button in App Designer Area
Hit on “Add”. A selection opens – choose “Subarea” and define in the ❶ “Properties”-section the following:
- Type: “Web Resource”
- Url: “ptm_ActivityTools/queueview/QueueView.html”
- Title: the choice is up to you, for example: “ActivityTools QV”
- Icon: “MSCRM-ADDONS.com Icon svg”
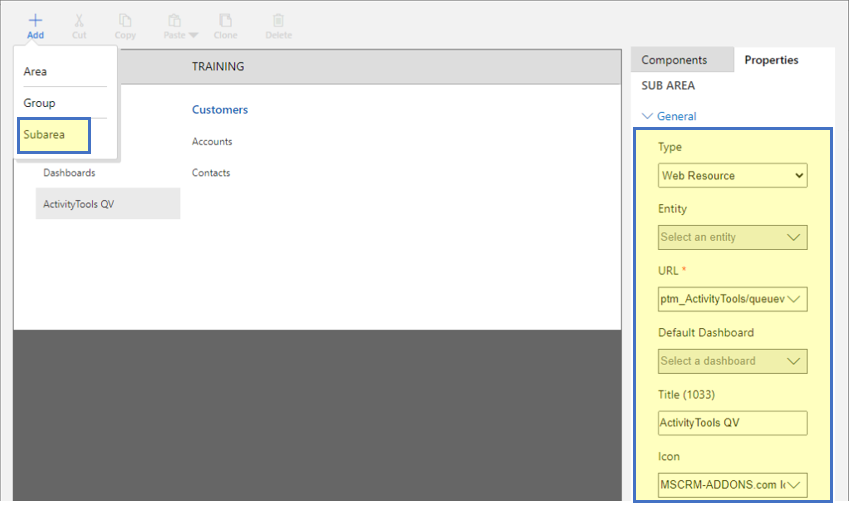
Figure 3: Add ActivityTools QueueView
After saving and publish all your actions, reload the page.
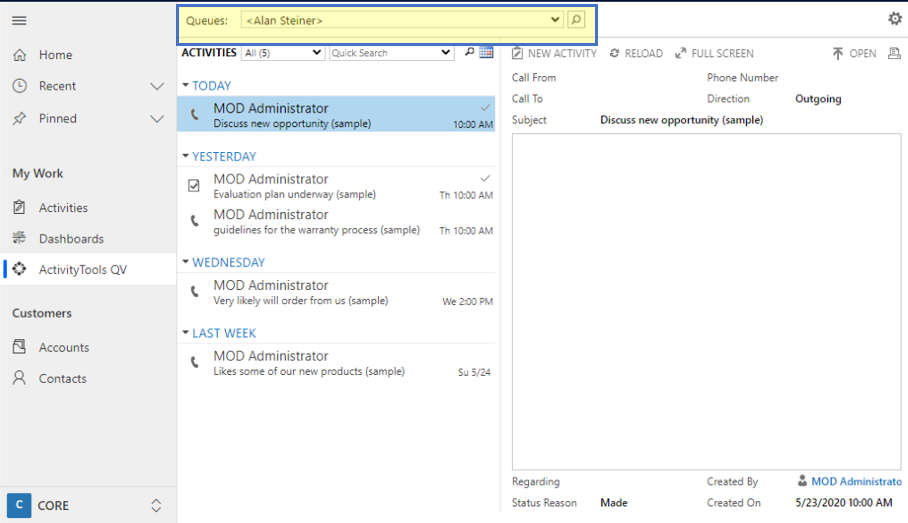
Figure 4: Installed ActivityTools QueueView-Feature
How to add ActivityTools Queue View to a Dashboard
When you are on this App Designer Overview you have two possibilities on your dashboard:
❶ Create a new Dashboard or
❷ Edit an existing one by hitting the according buttons.

Figure 5: App Designer Overview
After you have decided on a dashboard, this overview is shown. There are Symbols in each field. Please hit the [Insert Web Resource]-button:
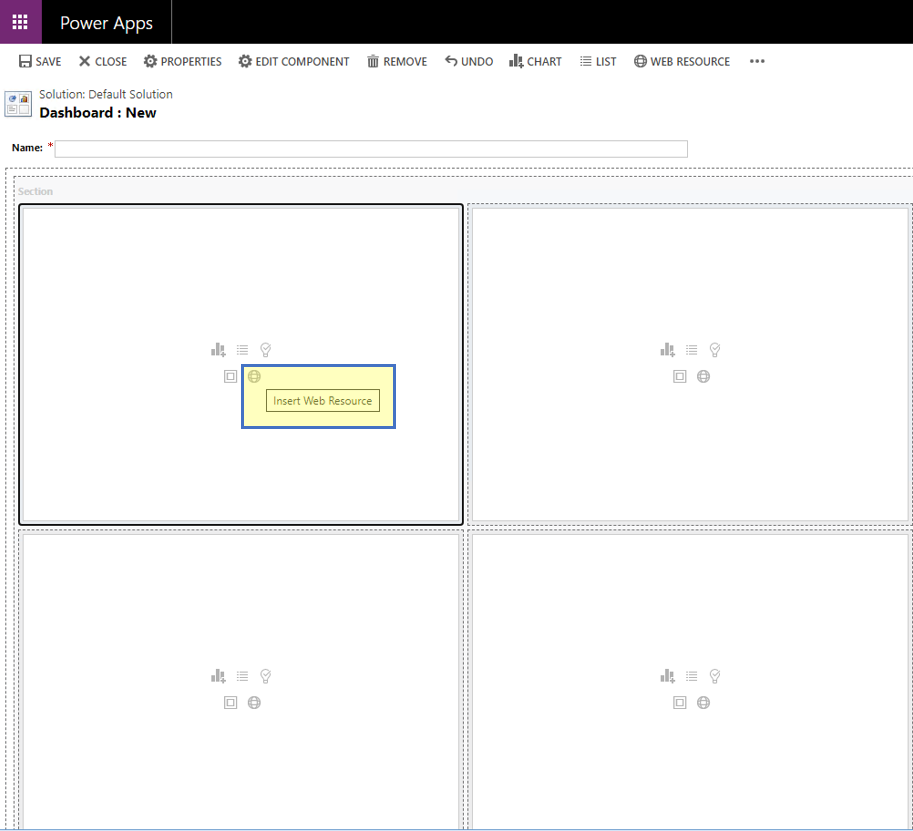
Figure 6: Insert web Resource Button
This “Add Web Resource”-window opens. Select from the drop-down list:
“ptm_ActivityTools/queueview/QueueView.html”
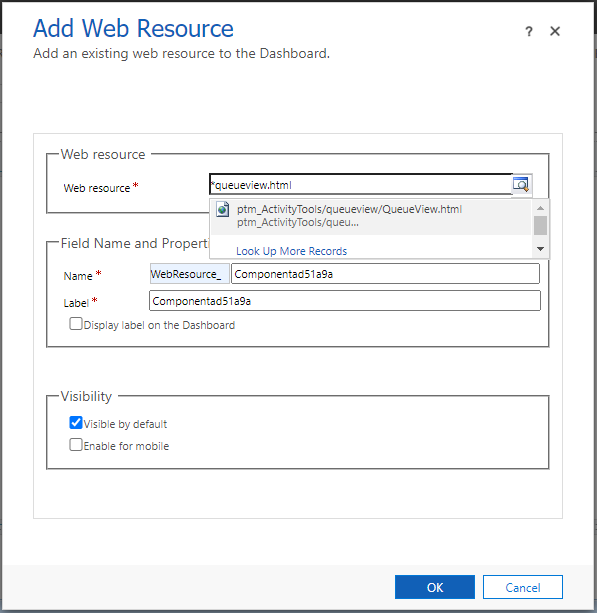
Figure 7: Add Web Resource
First, press the [OK]-button then save, close, and reload the Dashboard.
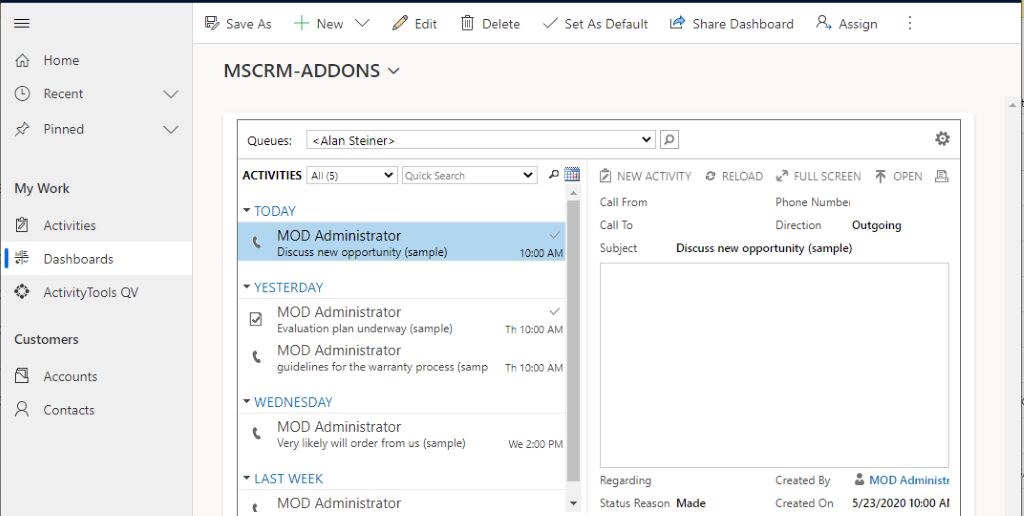
Figure 8: ActivityTools with QueueView
How to use ActivityTools QueueView
![]()
Figure 9: ActivityTools QueueView
❶Dropdown: Select the target queue via the dropdown list to select a queue record.
❷Lookup Dialog: Or use the Dynamics 365 lookup dialog to select a queue record. The ActivityTools will show related activities of the selected queue.
❸Settings Icon: Use the icon to open the configuration page.

Figure 10: Configuration page
- View: With the selected view it can be controlled which queue records should be shown in the dropdown control like in the figure “Configuration page” all queues of the „Active Queue“-view.
- Default Record: The defined queue is preselected when opening the ActivityTools Queue View page. This record must be included in the result of the selected “View”, otherwise it is empty.
- Config access: Opens a new dialog to define which security roles are required to be able to launch this configuration. If the current user does not have one of the defined roles, the settings icon will not be displayed. Use this dialog to define required security roles for accessing the config.
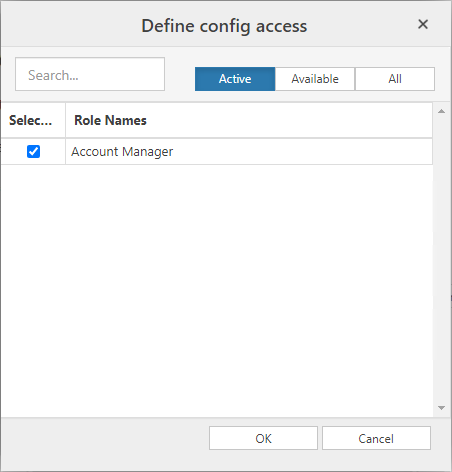
Figure 11: Config access
That´s it! We appreciate your feedback! Please share your thoughts by sending an e-mail to support@mscrm-addons.com