The solution enhances the handling of e-Mails, notes and attachments. This articles outlines how to import the solution and how to embed the features of the solution as webresource into a random entity.
Minimum requirement: Microsoft Dynamics CRM 2015, AttachmentExtractor and/or ActivityTools.
Depending on the CRM version and add-on you use, the solution must be downloaded in different ways.
Please find the solution for AttachmentExtractor here.
Please find the solution for ActivityTools here.
How the solution facilitates your user experience
Once you have embedded the solution, you can benefit from its functionalities:
Learn how to add notes and attachments via drag and drop in this article.
And learn how to avoid the browser security check for *.url files in MS Dynamics 365 (CRM) in this article.
How to import the solutions
Please navigate to Microsoft Dynamics 365 (CRM) > Settings > Solutions and open ‘Solutions’ in order to import the solution.

Figure 1: Access the solutions
Next, please click on the [Import]-button in the Command bar of the All Solutions-section.
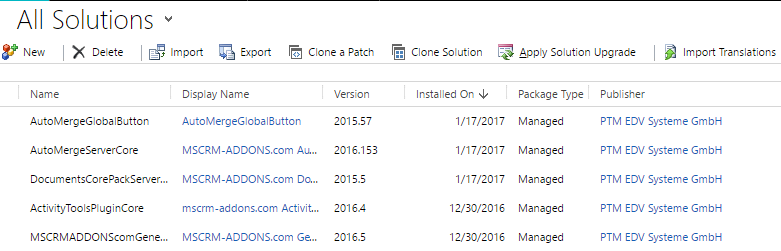 Figure 2: Click on the [Import]–button
Please import the solution with a click on the [Browse]-button.

Figure 3: Solution import
In the next window, click on the [Import]-button in the right lower corner. The solution import starts. As soon it has finished you will be forwarded.
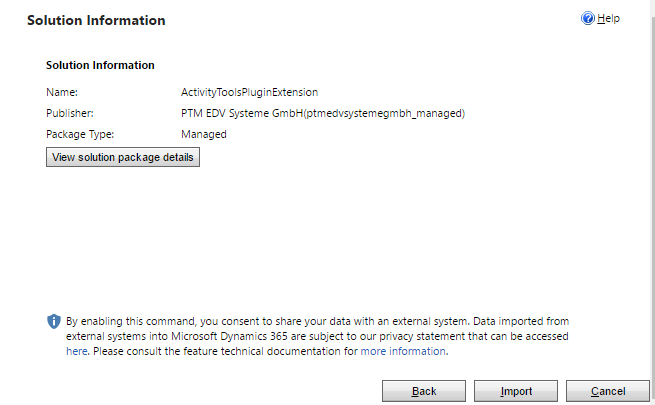
Figure 4: Click on the [Import]-button
Congratulations! You have successfully imported the ActivityToolsPluginExtension Solution. In the next chapter, you will learn how to embed the required webresource in order to benefit from the ActivityToolsPluginExtension features.
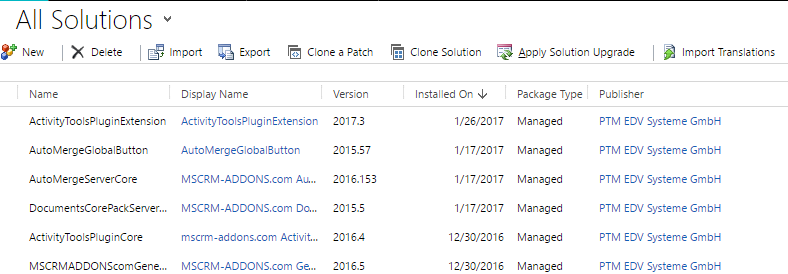
Figure 5: ActivityToolsPluginExtension added
How to embed the required webresource
Please follow this step-by-step tutorial in order to embed the required webresource into any given entity.
Please note, that it is necessary to select an entity with attachments and notes activated.
Step 1: Open the form editor
In order to do so, navigate to the entity you would like to embed ActivityToolsPluginExtension to and click on the [Form]-button ❶ in the CRM command bar. This action opens the form editor ❷ for (as in this example) the entity Account.
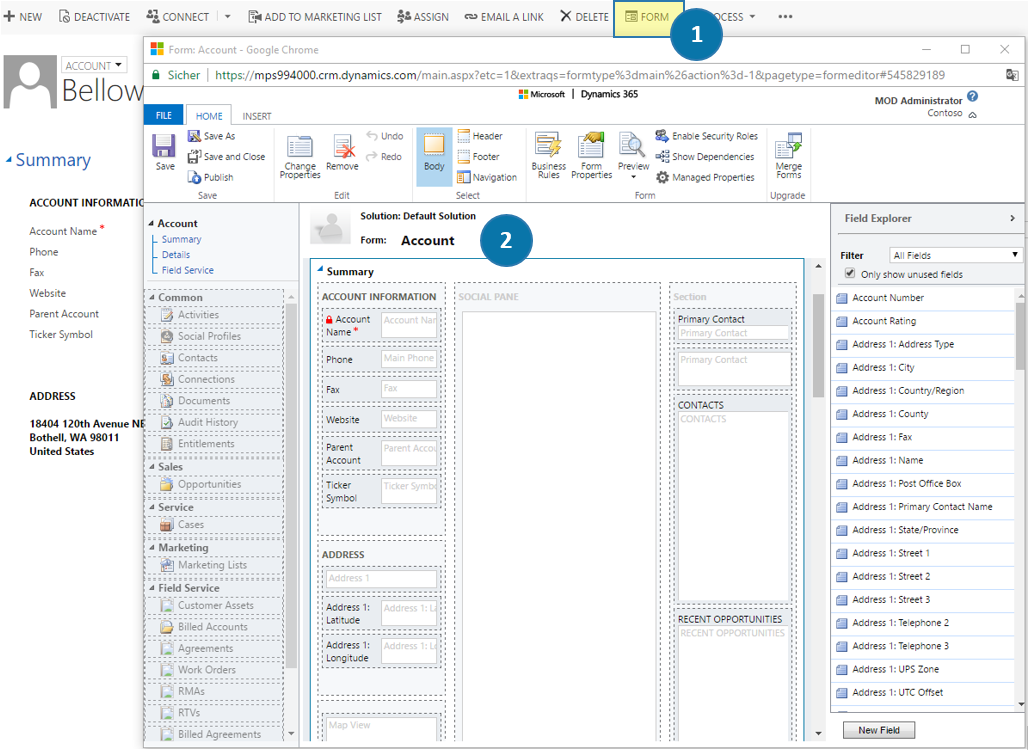
Figure 6: Open the form editor
Step 2: Add the webresource
Please switch to the Insert-tab ❶ and click on Webresource ❷ in order to look for an existing web resource.
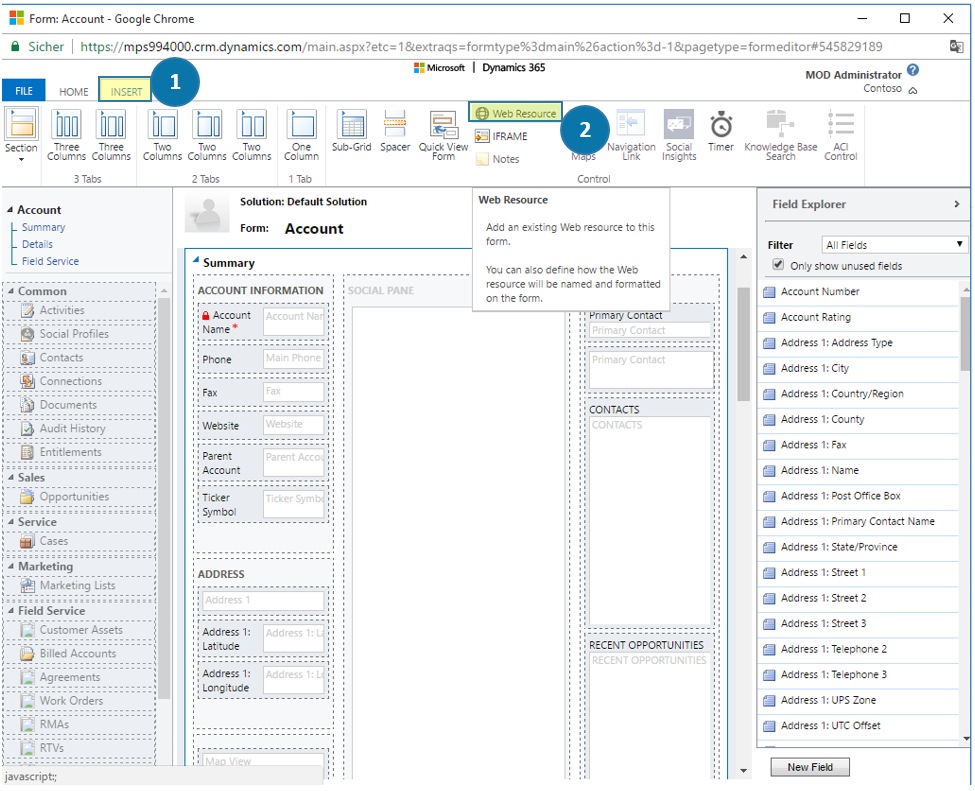
Figure 7: Open the webresource
Next, look for the ptm_ActivityTools/Extension/AdvancedEMail.html webresource and name it properly. Please note: All fields marked with an * are mandatory.

Figure 8: Look for ptm_ActivityTools/Extension/AdvancedEMail.html
If you want to, you can customize your newly added webresource. To do so, switch to the Formatting-tab. Here, you can select the number of columns the control occupies, change the row layout (we reccomend to insert 8 rows), customize the scrolling settings and define if you want your future webresource to be framed or not. Once you have set all the details, please click on the [OK]-button.
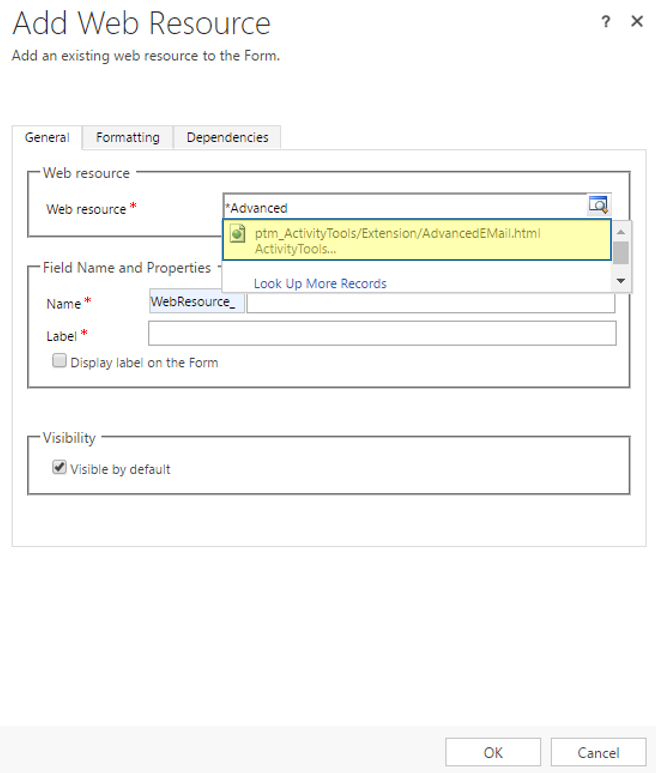
Figure 9: Customize webresource
Step 3: Save and publish your changes
Drag and drop your newly created webresource to its future place ❶. Next, click on the [Save]-button ❷ and then publish your customizations with a click on the [Publish]-button ❸.

Figure 10: Save and publish your changes
Step 4: Navigate back to CRM and refresh the page with a click on F5.
Congrats! You have successfully embedded the webresource.
That’s it! We appreciate your feedback! Please share your thoughts by sending an email to support@mscrm-addons.com.