Next to generating documents, DocumentsCorePack allows to creation of new activities (emails, letters, etc.) and automatically attaches the document to those records. Sometimes you might need to have the activity associated with a specific record inside Dynamics 365. This setting provides the option to save an activity created via DocumentsCorePack to a related table.
Example: A quote document is generated but the document should be attached to the Account the quote is for rather than the quote itself.
The configuration options allow template editors to define
- Recipient
- Regarding
- Save Location
of activities based on a template independently.
Step-by-step description
Step 1: Open the template and navigate to the ❶ mscrm-addons.com tab, click on the ❷ Insert MailMerge Fields and the ❸ Advanced Template Settings. In the open window navigate to ❹ Create Activities For and click to open it.
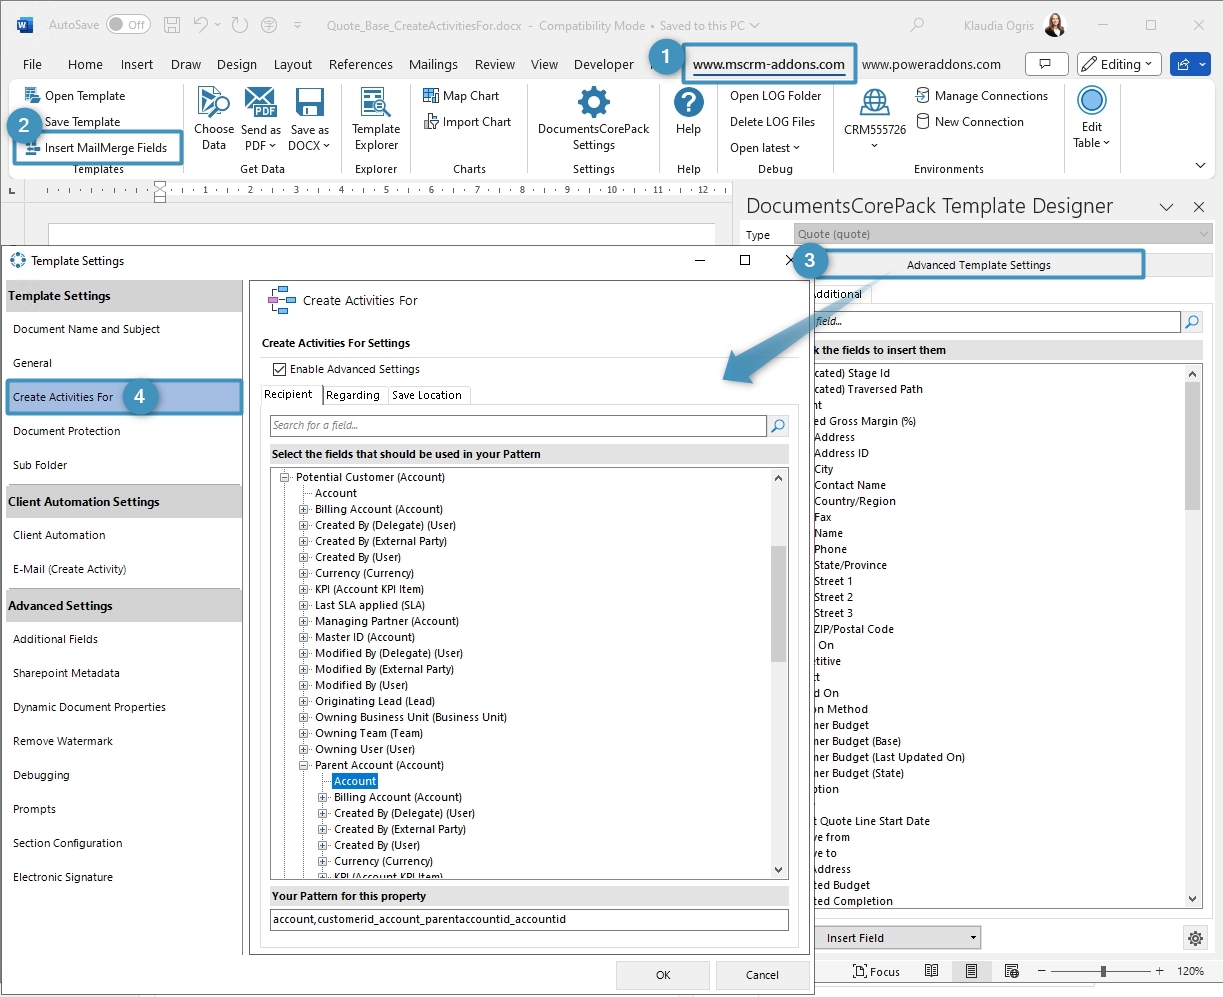
Step 2: Enable the Advanced Settings. Now you can set the ❶ Recipient, Regarding, and Save Location for your template.
The options, which can be selected for each area, are displayed in a tree view. You can insert the required relation by clicking on ❷ the nodes.
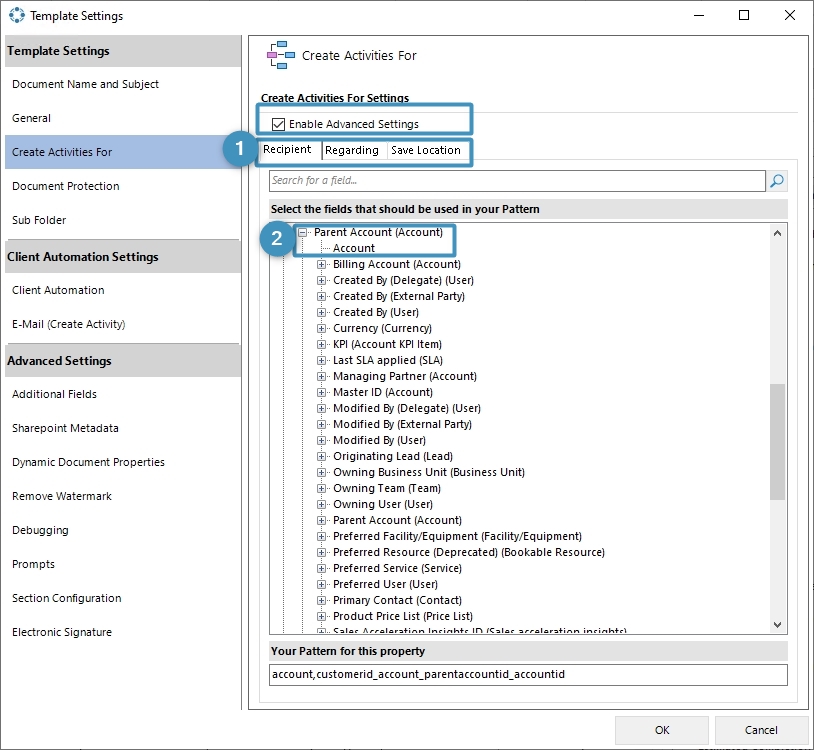
Step 3: The configuration is set for a quote and has the following effects:
- The ❶ Recipient of the generated activity will be the ❷ account the quote belongs to.
- The ❸ Regarding field of the activity will be set to the ❹ quote directly.
- The generated document will be ❺ saved to the ❻configured location for the parent account of the quote template.

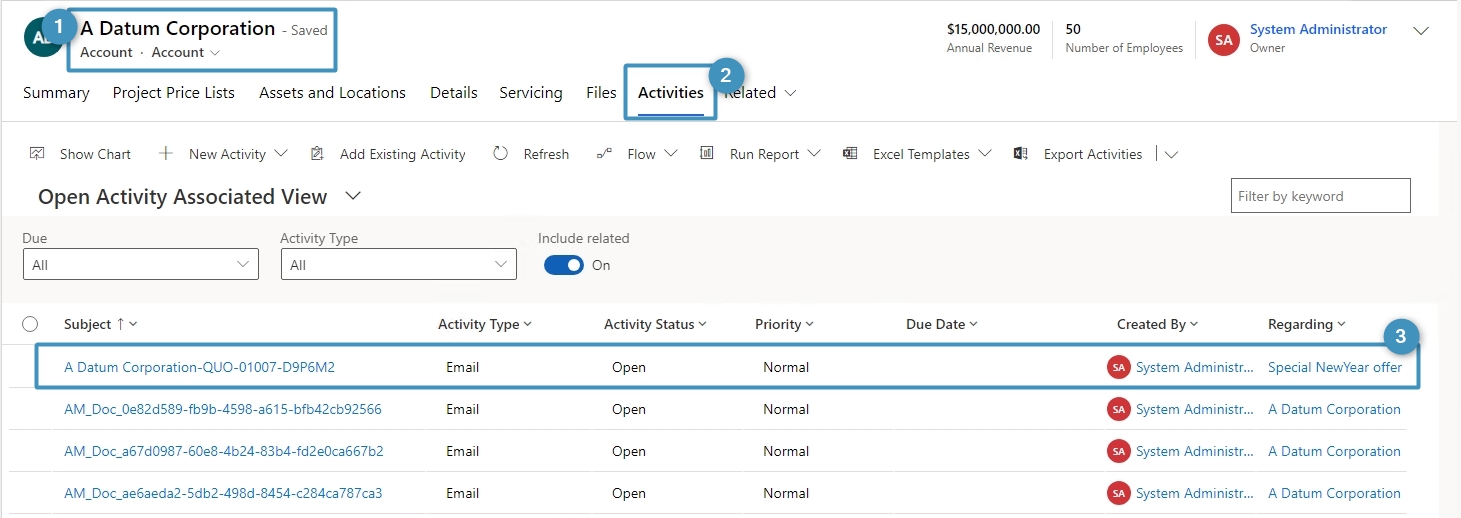
Step 4: After saving your template, proceed to create the document either through the Dialog or by Choose Data and create an activity from within Word via the DocumentsCorePack Template Designer ribbon
The save location is the account ❶ A Datum Corporation and gets saved to the ❷ folder of the account and the ❸ regarding is set to the quote directly.
That’s it! We appreciate your feedback! Please share your thoughts by sending an email to support@mscrm-addons.com.