• Release History
  • Documentation
  • Back to www.mscrm-addons.com
  • Release History
  • Documentation
  • Back to www.mscrm-addons.com
home/Knowledge Base/DocumentsCorePack(DCP)/Batch document generation in Dynamics 365 via the DocumentsCorePack dialog

Batch document generation in Dynamics 365 via the DocumentsCorePack dialog

898 views 0 Updated on September 3, 2024

The DocumentsCorePack dialog not only gives you the ability to generate single documents but also perform batch document generation processes in order to create multiple documents in a single step.

The dialog automatically recognizes a batch once you hit the “Create Document” button with multiple records selected. ( Detailed Information about the DocumentsCorePack dialog here.)

Step-by-step description: How to process a batch in the DocumentsCorePack dialog

Step 1: Select the data you want to process. In this example, we send a welcome letter to contacts.

Therefore, we start from a view (Contacts) and mark the contacts to create a document for.

Select your data
Figure 1: Select your data

Step 2: Open the DocumentsCorePack dialog (see Figure 1 where to find the Create Document button) and select the template that should be sent. Click Next.

Please Note: If you have created a One-Click-Action, your dialog might look different at this point. Go on with Let me decide every step.

Select template in DCP dialog
Figure 2: Select template in DCP dialog

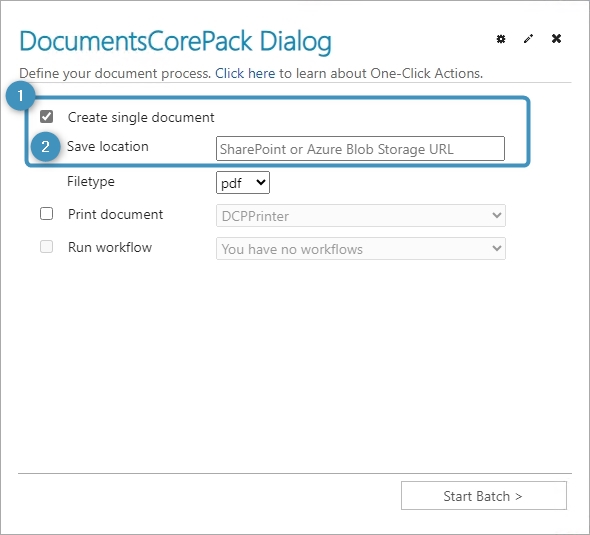
Step 3: Define your document process: The dialog recognizes batch data as you can see in Figure 4 at the bottom with the ❼ Start Batch button.

The dialog offers you the ❶Create single document option (Figure 3, 4). This means that upon generation, all documents are concatenated into a single file. This e.g. eases the process of printing such documents. With the option selected, you can also save the final file to either a SharePoint location or an Azure Blob by providing the URL.

Figure 3: Create single document option for batches

Apart from that, all other options are available as known for single-record document processes:

Decide the ❷ Filetype and how to ❸ Attach the document, Email Sender, Recipients, unless they are preset, a Subject or select an Email Template. 

Further, you can choose to ❹ Send Email(s) straight away, send your document to a printer with the ❺ Print document option or ❻ Run a workflow.

Define your document process
Figure 4: Define your document process

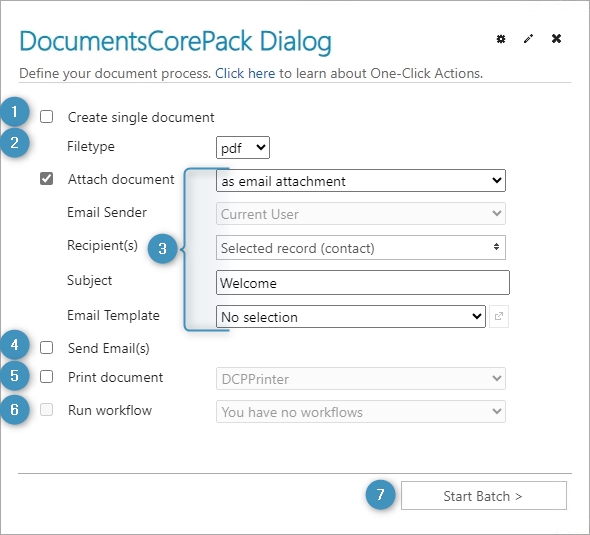
Once configured, continue with ❼ Start Batch

Step 4: The batch process starts and will show the progress of the batch document generation. Once completed the result window provides a preview and access to the created records and documents. 

Note: The “Download All” option enables you to download all documents into a single .zip-file.
Congratulations, you managed your first batch process!

Batch result is displayed
Figure 5: Batch result is displayed

Creating One-Click-Actions for Batch Processes

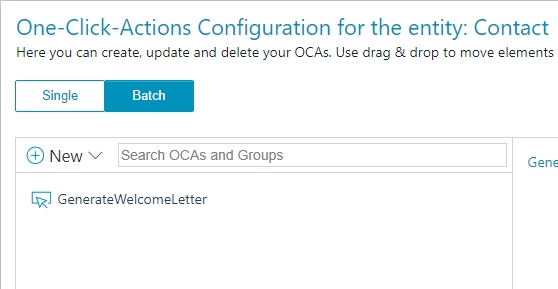
The One-Click-Action configuration offers the selection between Single and Batch operations as you can see in Figure 6. If you want to learn more about One-Click-Actions have a look at this article.

Selection between Single and Batch in OCA configuration
Figure 6: Selection between Single and Batch in OCA configuration

That’s it! We appreciate your feedback! Please share your thoughts by sending an email to support@mscrm-addons.com 

Was this helpful?

Yes  No
Related Articles
  • Document Generation via Copilot in Dynamics 365 Sales using DocumentsCorePack
  • DocumentsCorePack: Best practices for Dynamics 365 on-premises to online migration projects
  • Multilingual Support in DocumentsCorePack
  • Configure DocumentsCorePack within custom pages
  • Ensuring correct time zone display for DateTime fields
  • Document Generation Failure from Missing Privileges
Latest Articles
  • Document Generation via Copilot in Dynamics 365 Sales using DocumentsCorePack
  • DocumentsCorePack: Best practices for Dynamics 365 on-premises to online migration projects
  • Multilingual Support in DocumentsCorePack
  • Recap: ColorCloud 2025
  • Configure DocumentsCorePack within custom pages
Popular Articles
  • DocumentsCorePack Template Designer – Getting Started
  • Step-by-Step: How to configure a One-Click-Action
  • Application Access for Dynamics 365
  • How to find your environment’s unique name in Microsoft Dynamics 365
  • How licenses are counted
Top Rated Articles
  • “Undefined”-labels in Chrome and Edge 114 and higher
  • Important information for Dynamics 365 online customers using DocumentsCorePack and/or AttachmentExtractor
  • How to activate the DocumentsCorePack Connector for PowerApps & Microsoft Flow
  • How licenses are counted
  • How to insert Condition Fields in DocumentsCorePack Templates designer
Categories
  • *News and General Infos* 62
  • Webinars 45
  • Template Designer(DCP 196
  • DocumentsCorePack(DCP 251
  • TelephoneIntegration (TI 65
  • AttachmentExtractor (AE 72
  • PowerSearch (PS 50
  • ActivityTools (AT 61
  • SmartBar (SB 54
  • GroupCalendar (GC 47
Our Vision

“We see it as our purpose to provide products that simplify and speed up our customers’ Microsoft Dynamics 365 experience.”

Knowledgebase
LogIn
mscrm-addons.com
  • Products
  • Online Shop
  • Downloads
  • My Account
About Us
  • About Us
  • Case Studies
  • Newsletter
  • Partner Program
  • Contact
Support
  • Support
  • Terms & Conditions
  • Documentation
  • Webinars
  • Legal Documents
  • Impressum
  • © 2022 www.mscrm-addons.com. All Rights Reserved.