For customers who wish to use their own custom application for our service, we offer the ability to connect to DocumentsCorePack or AttachmentExtractor via App Access (Custom). The following step-by-step guide outlines how this process is done.
Prerequisites
- Azure Role requirement: Application admin rights within your Azure tenant to create an application
Step 1: Create Custom application
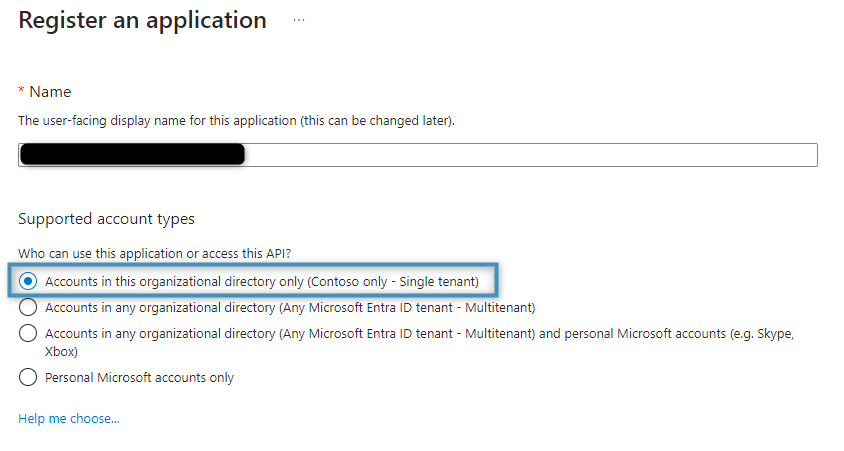
First, a new application must be created/registered as described in this article. Please follow the steps and configure the following parameters:
Register an application
When registering an application, select Accounts in this organizational directory only.
Get the application ID
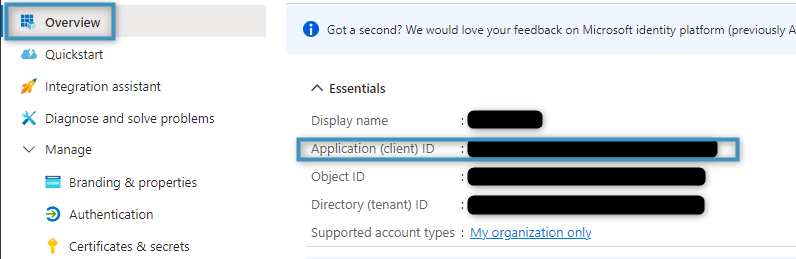
After creating the application, location the application ID under Overview and copy it. It will be needed later.
Add credentials
You can choose between
- Adding a client secret which supports only Dynamics 365 connections or
- Adding a certificate (public key) which supports Dynamics 365 and SharePoint connections. If you don´t have a certificate, you can create
Certificates (public keys) can be uploaded and client secrets can be created in your app under Manage > Certificates & secrets.
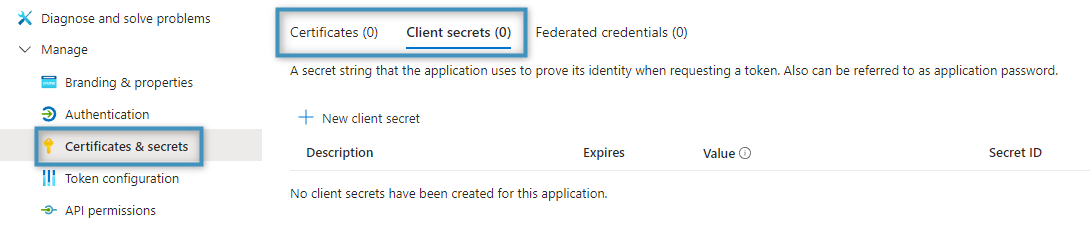
Note: Do not encrypt the public key prior to uploading.
Important information regarding client secrets: Once created, copy and save your created client secret value. It will be required for setup and it cannot be reviewed again after creation.
API Permissions
The custom application requires the following minimum set of privileges (see this article for information about adding security):
- User.Read rights in Azure Active Directory Graph
- user_impersonation in Dynamics CRM
- Sites.ReadWrite.All in SharePoint (optional)
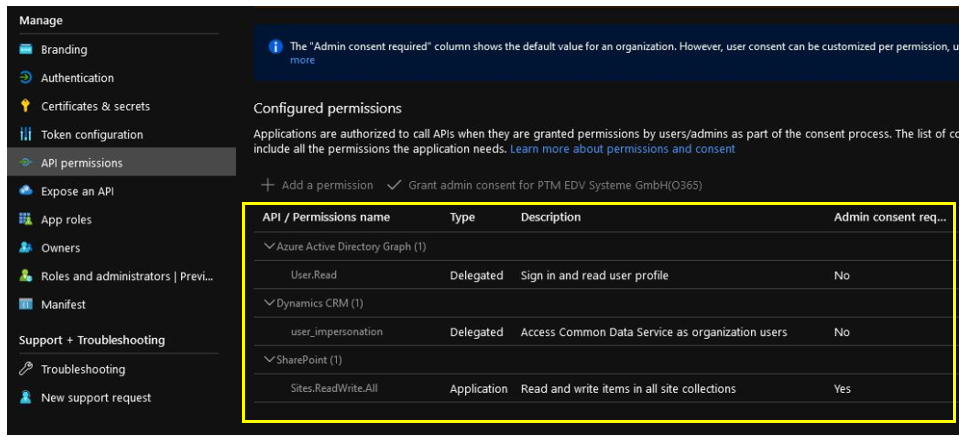
Note: Please be aware that the SharePoint privileges defined here will apply only if there is no conflict with SharePoint’s own privileges.
Step 2: Create an application user in Microsoft Dynamics 365
Next, create an application user. We recommend that this application user be given the System Administrator role to prevent any issues. Follow this link to manage application users in the Power Platform admin center.
Step 3: Connect our online service via custom application
Within the connection settings of the DocumentsCorePack or AttachmentExtractor Online Service Configuration, switch to “Advanced” settings and choose the App Access (Custom) connection type and provide the following details:
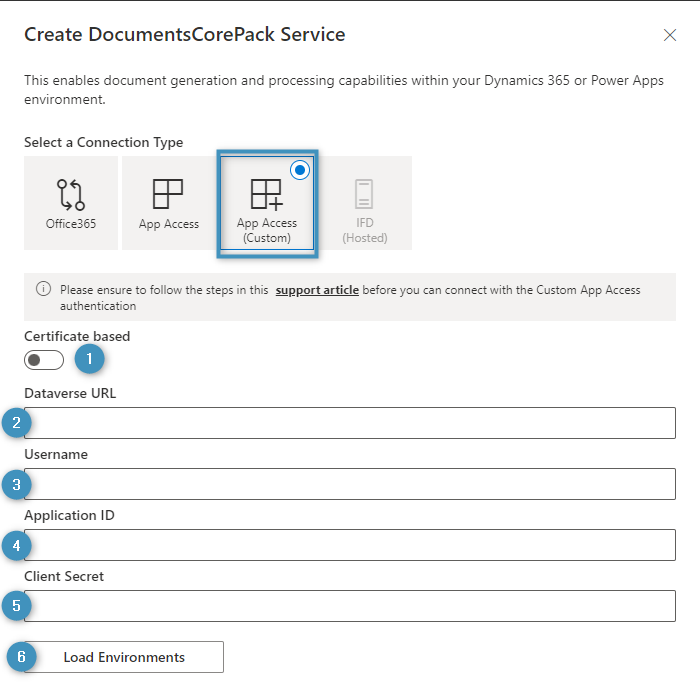
Authenticate with “Client secret”
❶ Certificate based: Leave disabled
❷ Dataverse URL: The URL of your Dataverse environment
❸ Username: Application user created in step #2 or a username with a fully qualified domain name (such as any user from Dynamics 365)
❹ Application ID: ID of the application created in step #1
❺ Client Secret: Client secret created in step #1
❻ Load Environments: Once you have filled in all credentials. Then, select your environment and select Save & Close.
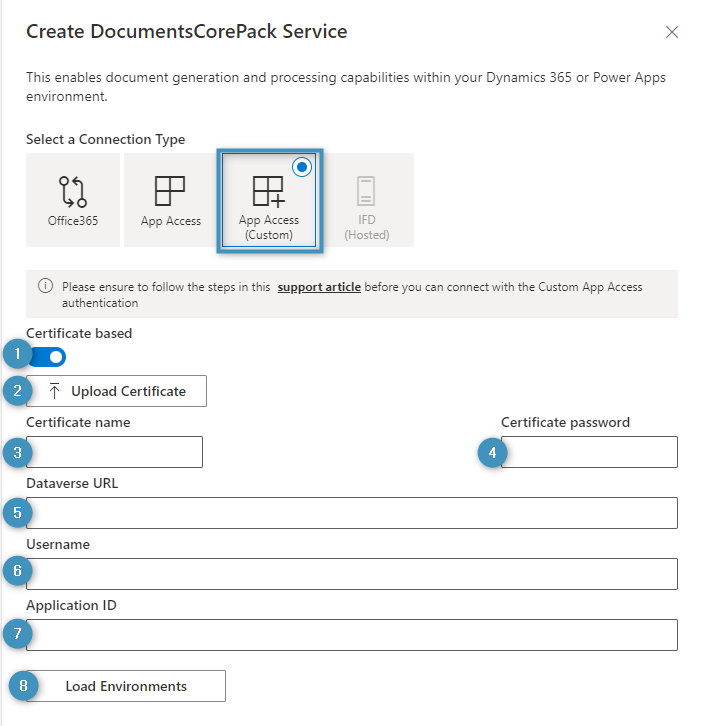
Authenticate with Certificate
❶ Certificate based: Enable this setting
❷ Upload certificate: Upload your own provided certificate.
❸ Certificate name: Enter the name of the certificate
❹ Certificate password: Enter the certificate password
❺ Dataverse URL: The URL of your Dataverse environment
❻ Username: Application user created in step #2 or a username with fully qualified domain name (like any user from Dynamics 365).
❼ Application ID: ID of the application created in step #1.
❽ Load Environments: Once you have filled in all credentials. Then, select your environment and select Save & Close.
After saving the certificate-based App Access settings, you can configure your SharePoint connection as seen in this article.
Note: While running the application, the application will access the SharePoint REST endpoint, if SharePoint is configured. This is required for the application to analyze and understand SharePoint location URLs.
Limiting access to SharePoint and adding SharePoint metadata
You can limit access or add SharePoint metadata to SharePoint via the Sites.Selected privilege using Windows PowerShell. For more information, please see here.
That’s it! We appreciate your feedback! Please share your thoughts by sending an email to support@mscrm-addons.com.