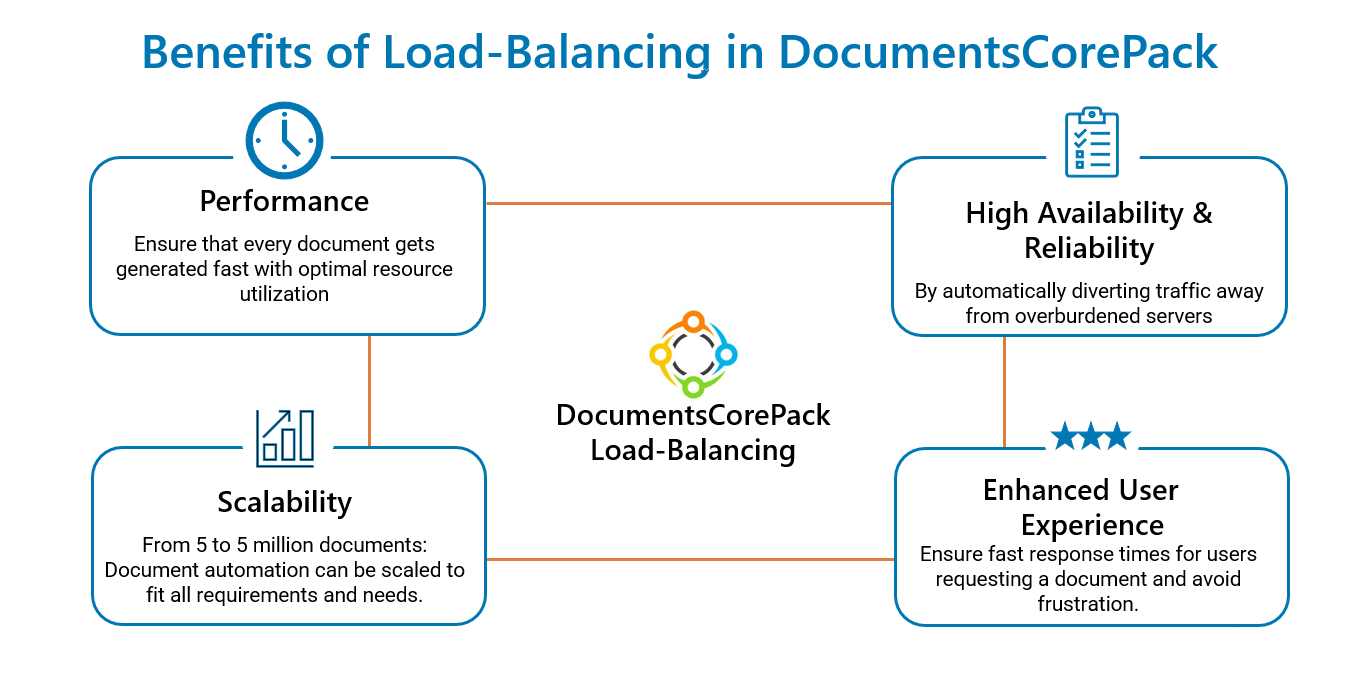
If there are many documents to be processed by a DocumentsCorePack service, one service may not be enough. This issue can be solved by enabling DocumentsCorePack (DCP) Load Balancing. This enables scaling document generation power significantly. The impact of Load Balancing can be seen in this article: Performance benchmark, limitations & scalability.
This documentation outlines the functionality of a DocumentsCorePack Load Balancing Service and how to install it.
Requirements: DocumentsCorePack (Online/OnPremise) version 2016.173 and higher.
The functionality of the DocumentsCorePack Load Balancing
In the default setup, all document generation requests are assigned to the same service. This service processes jobs one after the other in the queue – comparable to a printing service. Although single document requests are prioritized (they will be generated between the batch document jobs), users might need to wait for the completion of a batch to get their document, and if the batch is big, they may need to wait awhile. So, if you run large batches, having multiple services to get better performance can be very helpful.
The logic of the DocumentsCorePack Load Balancing works as described in the following figure.
Essentially, it delegates the workload to be handled by multiple services. The main priority is always on manually triggered document generation requests since users are actively waiting for the documents to be finished to continue their work.
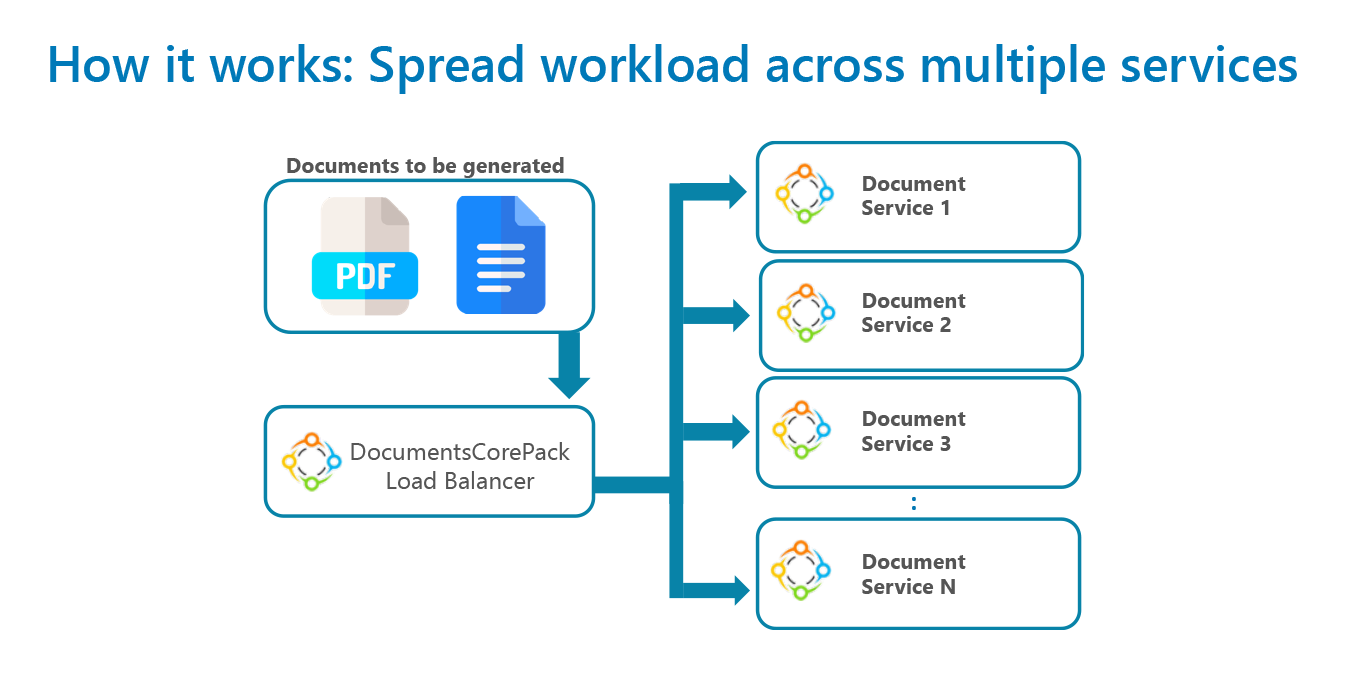
Thus, with DocumentsCorePack Load Balancing being active, there will always be at least one service exclusively reserved for single document generation jobs, such as Document Service 1 in the above figure. At least one service is also reserved for batch document generation requests and background jobs (PowerAutomate or workflows), such as Document Service 2 and 3 in the below figure. The basic load-balancing package will provide you with a total of 5 services.
It is also possible to add more services to your Load Balancer, where you can define how many services should be available for single document generation jobs as well as for batches.
How to configure a Load Balancing Service (Online)
First, create a new service in DocumentsCorePack Online (If you have not set up a service yet, please have a look at this article with the corresponding video). Once you have created a new service, you will be provided with the Online Configuration window where you can configure your service in detail. If you have already configured a service, you will see an overview of your hosted service(s).
The Load Balancing licenses can be found on our website. You first must determine and select how many licenses you require and then in the so-opened window, you can buy the DocumentsCorePack Load Balancing Service. The minimum package contains five services.
The configuration for the Load Balancing Service is straightforward. In the Online Configuration, click on the Load Balancing tab and click Configure.

The Load Balancer Configuration window provides you with information about how many ❶ available Load Balancer Services you have. Here, you can specify how many load balancers you want to configure ❷ (Please note: there must be at least three) and how many services you want to ❸ reserve for single documents only.
For example: There are 5 Load Balancing licenses available and want to configure all 5 and reserve 2 of them only for single documents and the rest are for batch document generation (see figure below).

How to configure a DocumentsCorePack Load Balancing Service (On-Premise)
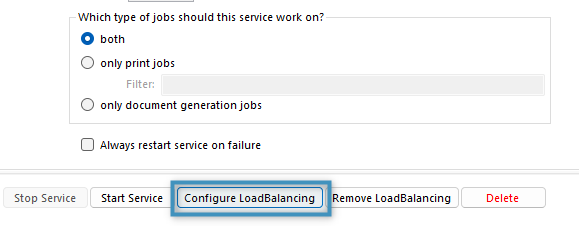
To enable Load Balancing for DocumentsCorePack On-Premise, you will need to open the DocumentsCorePack – Service Management app after downloading and installing DocumentsCorePack Server. The button to configure Load Balancing is located near the button of the app.
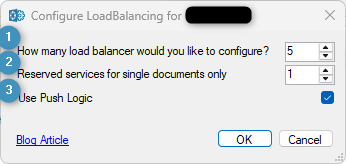
Like above, you can set the ❶ number of Load Balancing services and ❷ number of services dedicated to single documents only. The ❸ Use Push Logic setting is enabled by default and improves Load Balancing performance. Disabling this setting is not recommended (contact support for more information).
Further information on On-Premise Load Balancing can be found here.
That’s it! We appreciate your feedback! Please share your thoughts by sending an email to support@mscrm-addons.com.