Customer Journeys in Dynamics 365 Customer Insights (formerly Dynamics 365 Marketing) helps guide members of a selected marketing segment through a predefined process. This process includes automated messaging, activity generation, interactive decision points, and more.
In combination with Power Automate, DocumentsCorePack (DCP) adds the option to generate and deliver documents within these journeys.
Examples:
- Create and print letters upon an event registration
- Create and send a contract for e-signing
- ….
This article explains how it works and how to get started.
How is DocumentsCorePack used within Customer Journeys?
DocumentsCorePack can be used within any customer journey through the use of a custom trigger. This custom trigger can be configured to call a flow within Power Automate that then uses the DocumentsCorePack Connector to generate a document.
For the example in this article, we will add DCP functionality to a journey that is triggered when a contact is created.
Step 1: Creating the custom trigger
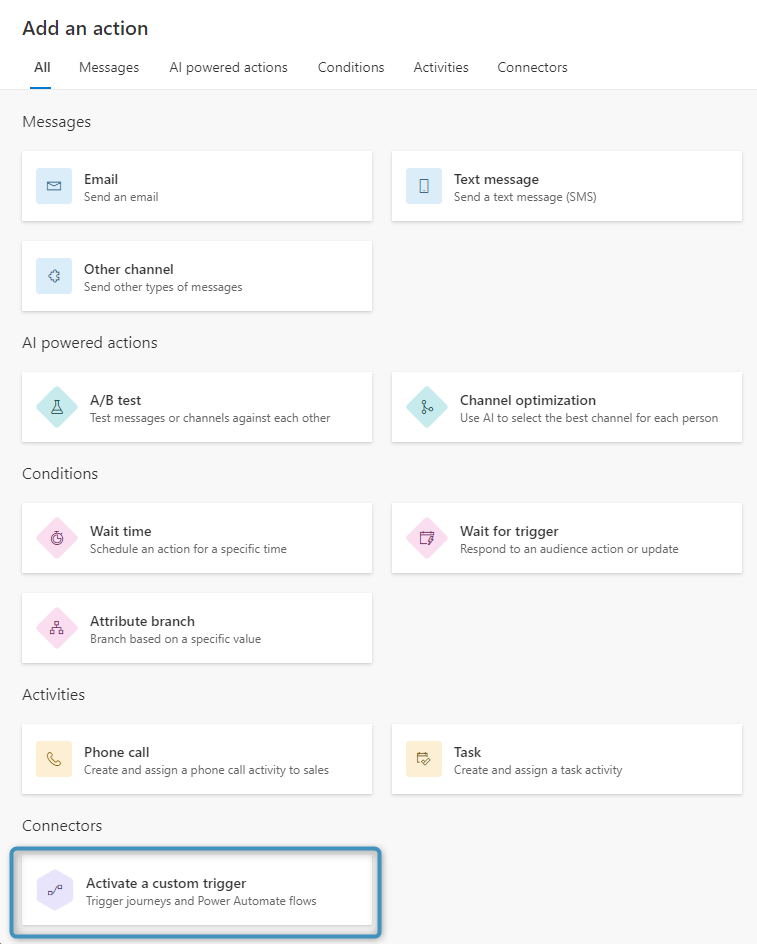
In a given journey, click the ‘+’ button to add an action.

On the following screen, choose “Activate a custom trigger.”
Select the newly created action and create a new custom trigger under Select a custom trigger.

In the New Trigger window, just click Next, then Next again on the following page, then Ready to use.


After the custom trigger is set up, close the window. The trigger should now be displayed in the Select a custom trigger dropdown. Make sure it is selected before continuing.

This concludes setting up the customer journey.
Step 2: Setting up our Flow
Navigate to Power Automate and choose your marketing environment. Create a new automated flow with When an action is performed (Microsoft Dataverse) as the starting trigger.

In the starting trigger, set ❶ Catalog to “Cxp,” ❷ Category to “Custom,” ❸ Table name to “(none),” and ❹ Action name to the trigger created in the journey.

Add another step to the Flow and choose Create document (sync) (V3).

In the parameters of this step, set the ❶ Body/Template to a template from your environment, ❷ the Row ID to the ❸ profileid as shown below, and ❹ File Type to the desire file type (in our case, PDF).

After setting the parameters, save your Flow. The Flow is ready, however, you will need to add the following SettingsKey to your environment as well:
Name: EnableMarketing
IsCached: Yes
Keyvalue: true
Product: AutoMerge
Once you add and save this SettingsKey, your customer journey should trigger the Flow and generate a document.
Step 3: Viewing the result
After you trigger our customer journey by creating a contact, the system generates the document.

Extra Step: Adding Error Handling
We can also add error handling to our journey to check whether or not our flow has succeeded. To do this, trigger another action.
To configure this, add another action to the journey. Under Conditions, choose Wait for trigger.

Add it to our journey as shown below:

❶ Choose a branch condition type, select A trigger is activated. Then, create a ❷ new trigger. Set up the trigger the same way as outlined in Step 1 above.
❸ You must set a time limit. This is to detect if there is a response from the flow. If there is no response after a set time, then the journey will proceed down the above No branch.

After configuring the action, return to Power Automate and open your flow. Add a new action under the Microsoft Dataverse connection called Perform an unbound action.

With the added action, the flow should look similar to the below:

For the Action Name, choose the action you created the in previous flow step.

Pass in values for the parameters shown below. The values should come from the When an action is performed step.

Save the flow. The system has now configured the error handling.
That’s it! We appreciate your feedback! Please share your thoughts by sending an email to support@mscrm-addons.com