In this step-by-step tutorial, you will learn how to create a document in a Dynamics 365 workflow using DocumentsCorePack.
Step 1: Create a document.
To get started, access the Advanced Settings of your Dynamics 365 and select Processes under the Process Center category.
Select + New and then either create a new Workflow or open a workflow you want to create a document in.
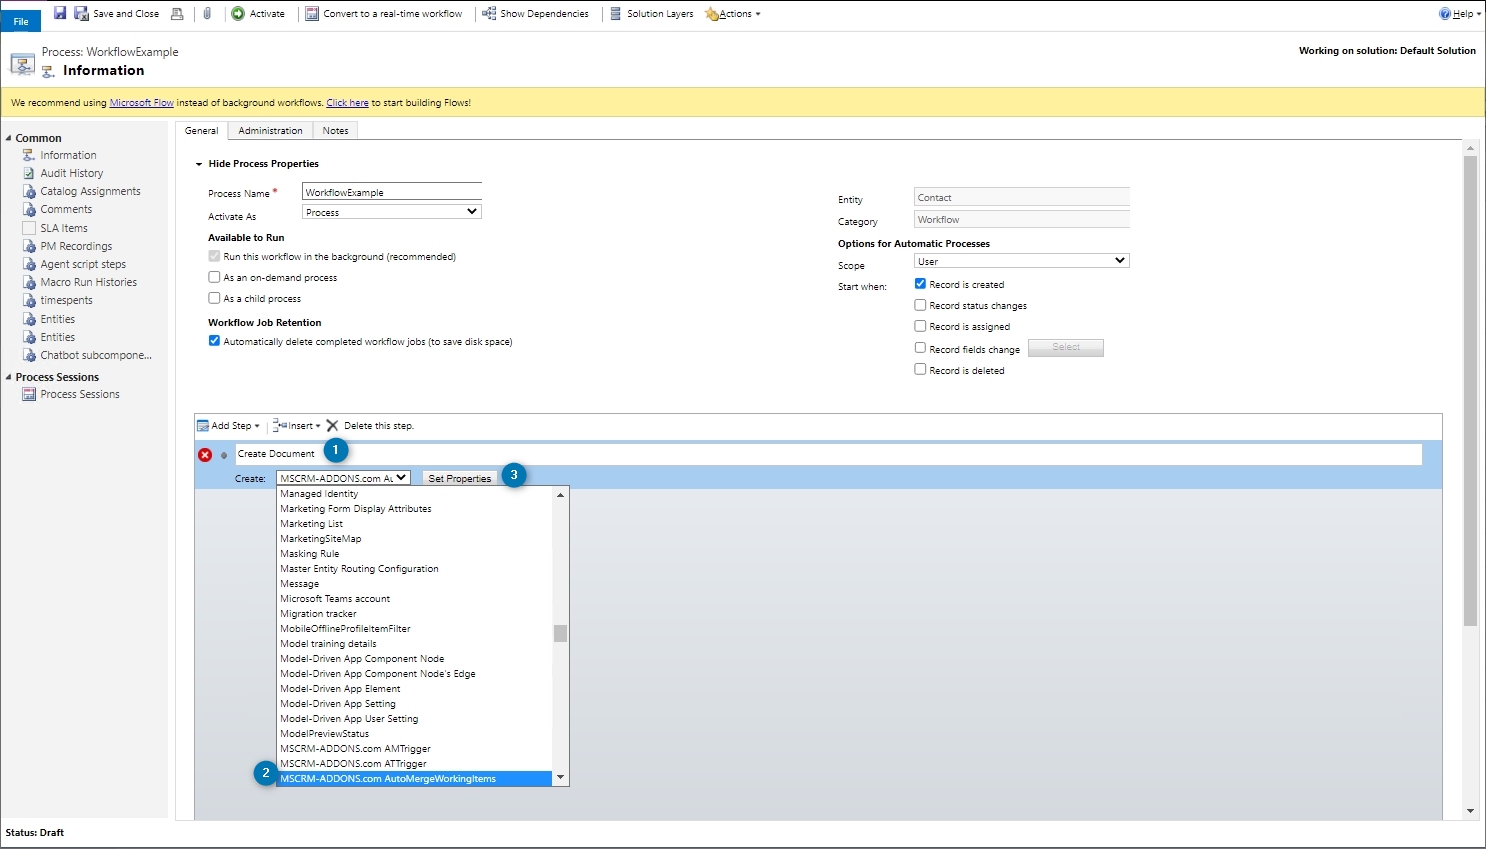
With the [Add Step] button, select Create Record in the drop-down menu.

❶ Name the step and select the ❷ MSCRM-ADDONS.com AutoMergeWorkingItems entity from the Create drop-down. Then click the ❸ [Set Properties] button.
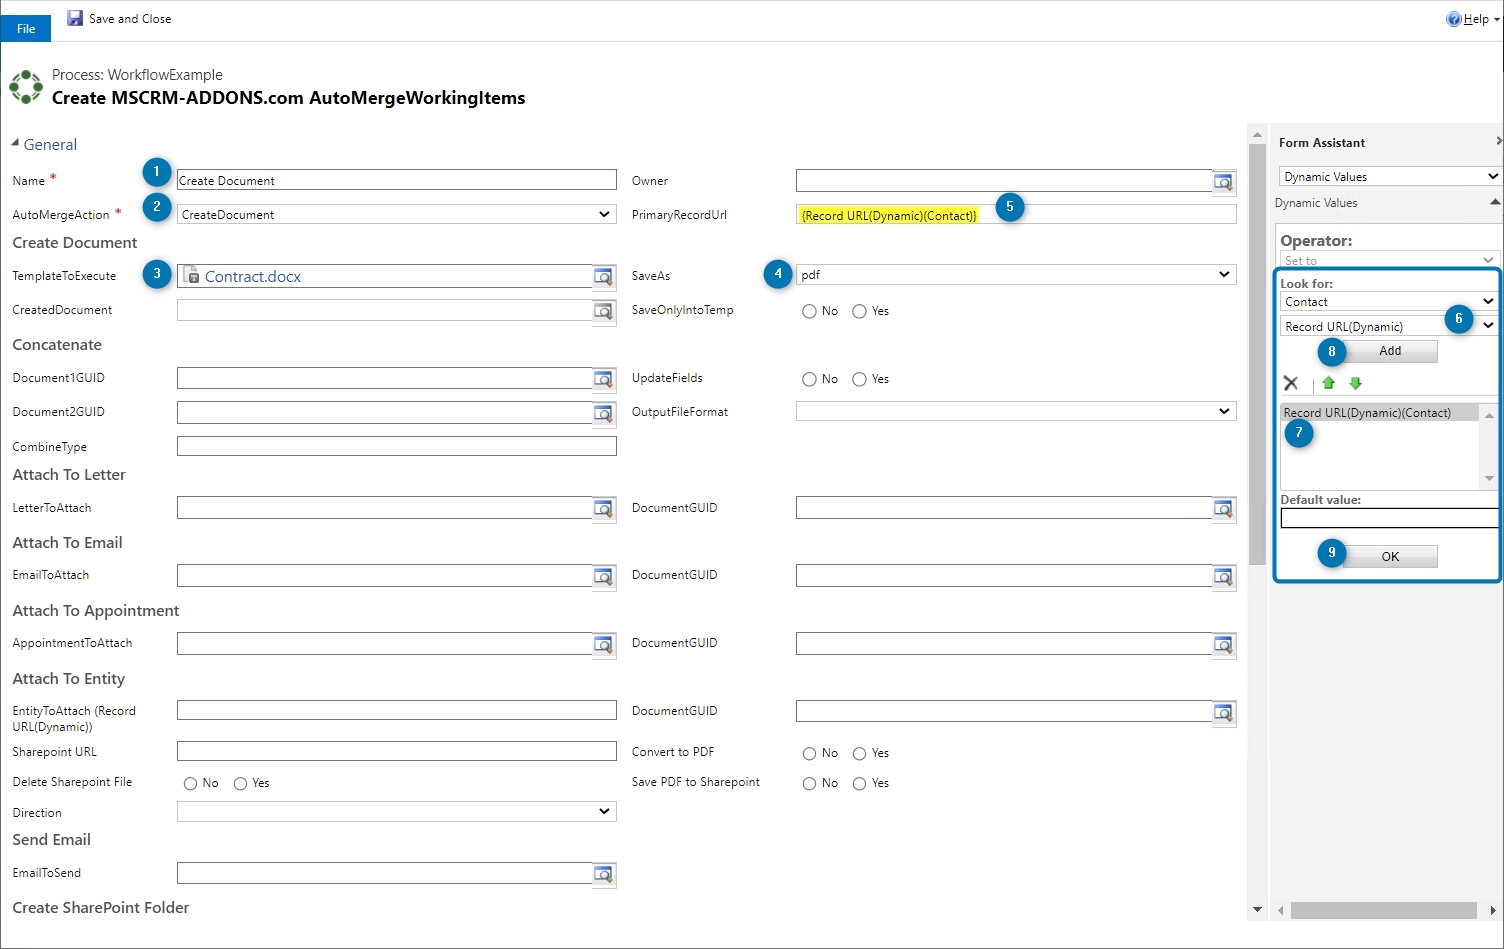
The Create MSCRM-ADDONS.com AutoMergeWorkingItems window opens. Enter a ❶ Name, select the ❷ AutoMergeAction CreateDocument, select a ❸ template to execute and select the ❹ file format you want to generate your document in.
Now set the cursor in the ❺ PrimaryRecordUrl field, navigate to the Form Assistant on the right, look in the ❻ drop-down and select ❼ Record URL (Dynamic). ❽ Click [Add] and confirm with ❾ [OK].
Step 2: Wait Condition
In order to use the new document in your workflow, you need to ensure that the document generation is finished before continuing in your workflow. This can be done with a Wait Condition that checks for the AutoMergeWorkingItem record to be inactive. This indicates that the document is ready.
Example:
You want to create a letter activity with the previously generated document as an attachment. You need to make sure that the document is successfully created before you attach the document to the letter activity.
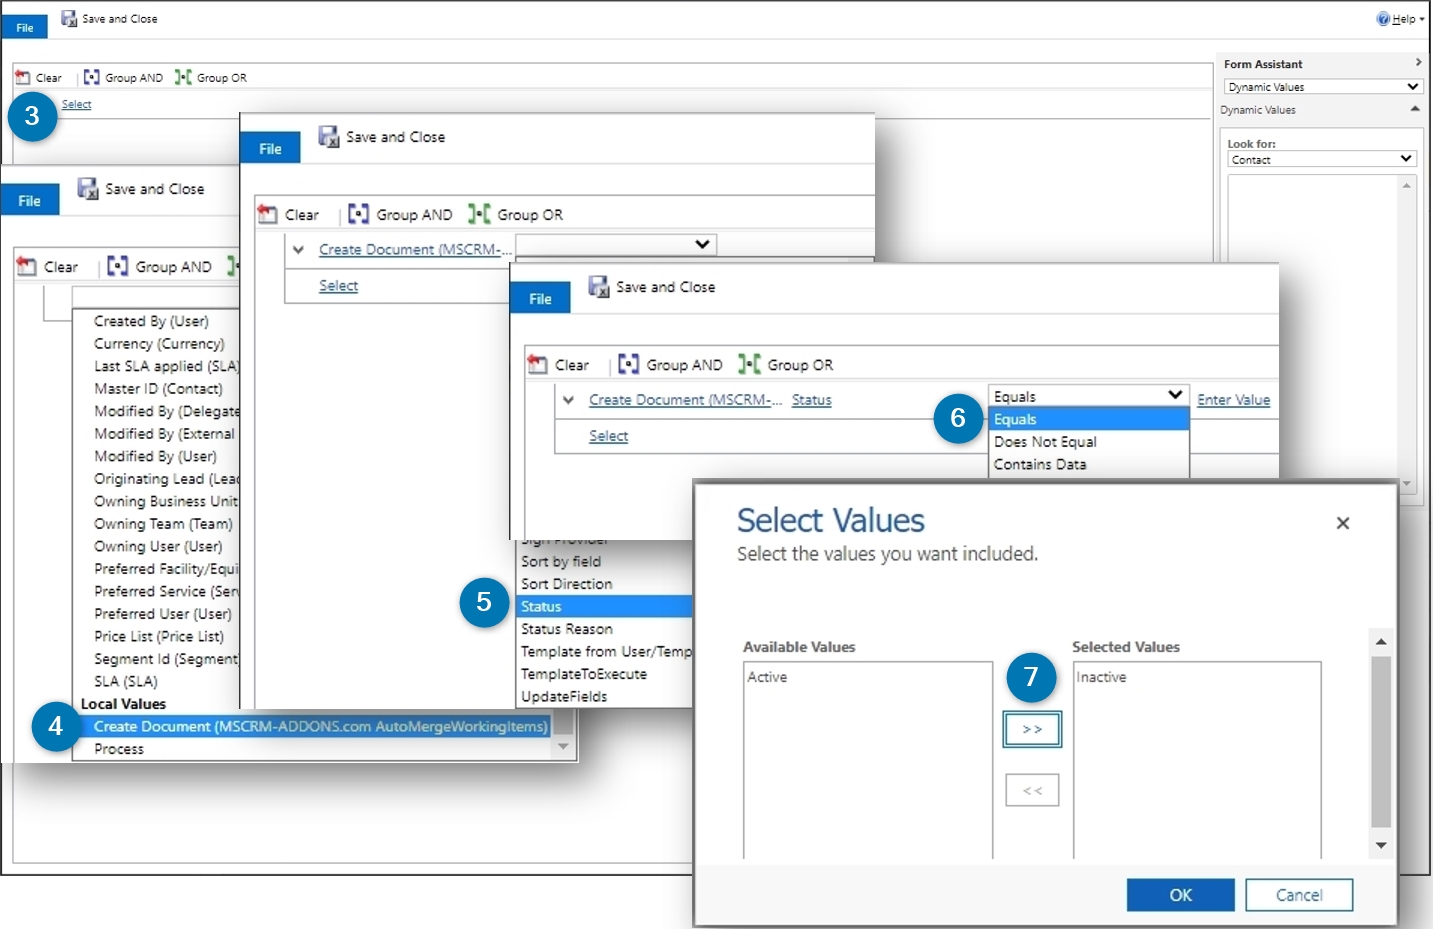
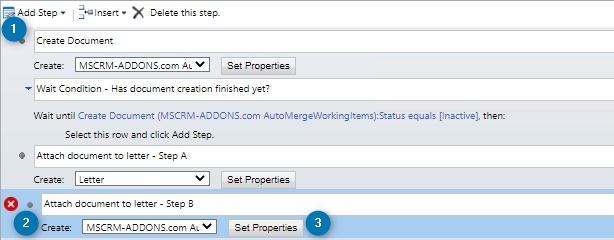
To do this, click ❶ [Add Step] and select Wait Condition from the drop-down. When the step has been added, name it, so it is later easy to identify what the step is for. Press ❷ (click to configure) to define the condition.

❸ Open the Select drop-down for ❹ Create Document (MSCRM-ADDONS.com AutoMergeWorkingItem). In the next drop-down to the right ❺, choose Status. ❻ Then continuing to the right, choose Equals and then the value ❼ Inactive.
Step 3: Attach document to letter – Step A
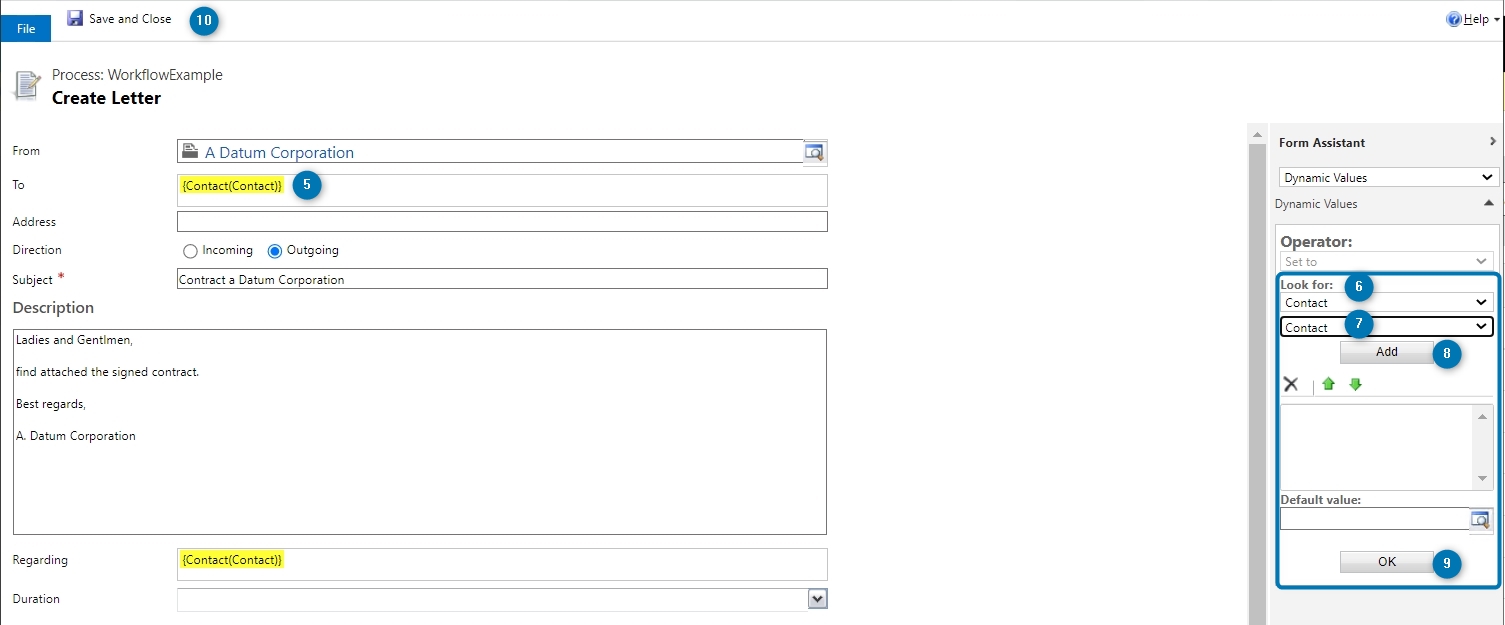
This step makes it possible to attach a document to a letter. Select the ❶ [Add Step] button. Then select ❷ Create Record and create a ❸ Letter activity. Name the step.
Open ❹ Set Properties. Within this window, you must define a sender and a subject, and type in the letter’s text. For the recipient, set the cursor in the ❺ recipient field and under ❻ Look for ❼ select Contact. ❽ [Add] it and confirm with ❾ [OK]. Don´t forget to ❿ [Save] your settings.
Step 4: Attach document to letter – Step B
This step makes sure that the previously created document will be added to the letter-activity. ❶ Add another Create Record step and name it. ❷ Create a MSCRM-ADDONS.com AutoMergeWorkingItems and open the ❸ [Set Properties].
Now you need to configure the AttachToLetter workflow step. Name it and define the corresponding AutoMergeAction ❶ AttachToLetter.
To determine the letter activity to attach the document to, set the cursor in the ❷ LetterToAttach field and select in the Operator on the right side ❸ Attach document to Note (Letter). In the following drop-down below, look for ❹ Letter. ❺ [Add] it and confirm with ❻ [OK]. Don´t forget to ❼ [Save].

Now determine the document that should be attached. Set the cursor in the DocumentGUID field and select in the Operator on the right side CreateDocument (MSCRM-Addons.com AutoMergeWorkflow). In the drop-down select CreatedDocument. [Add] it and confirm with [OK].
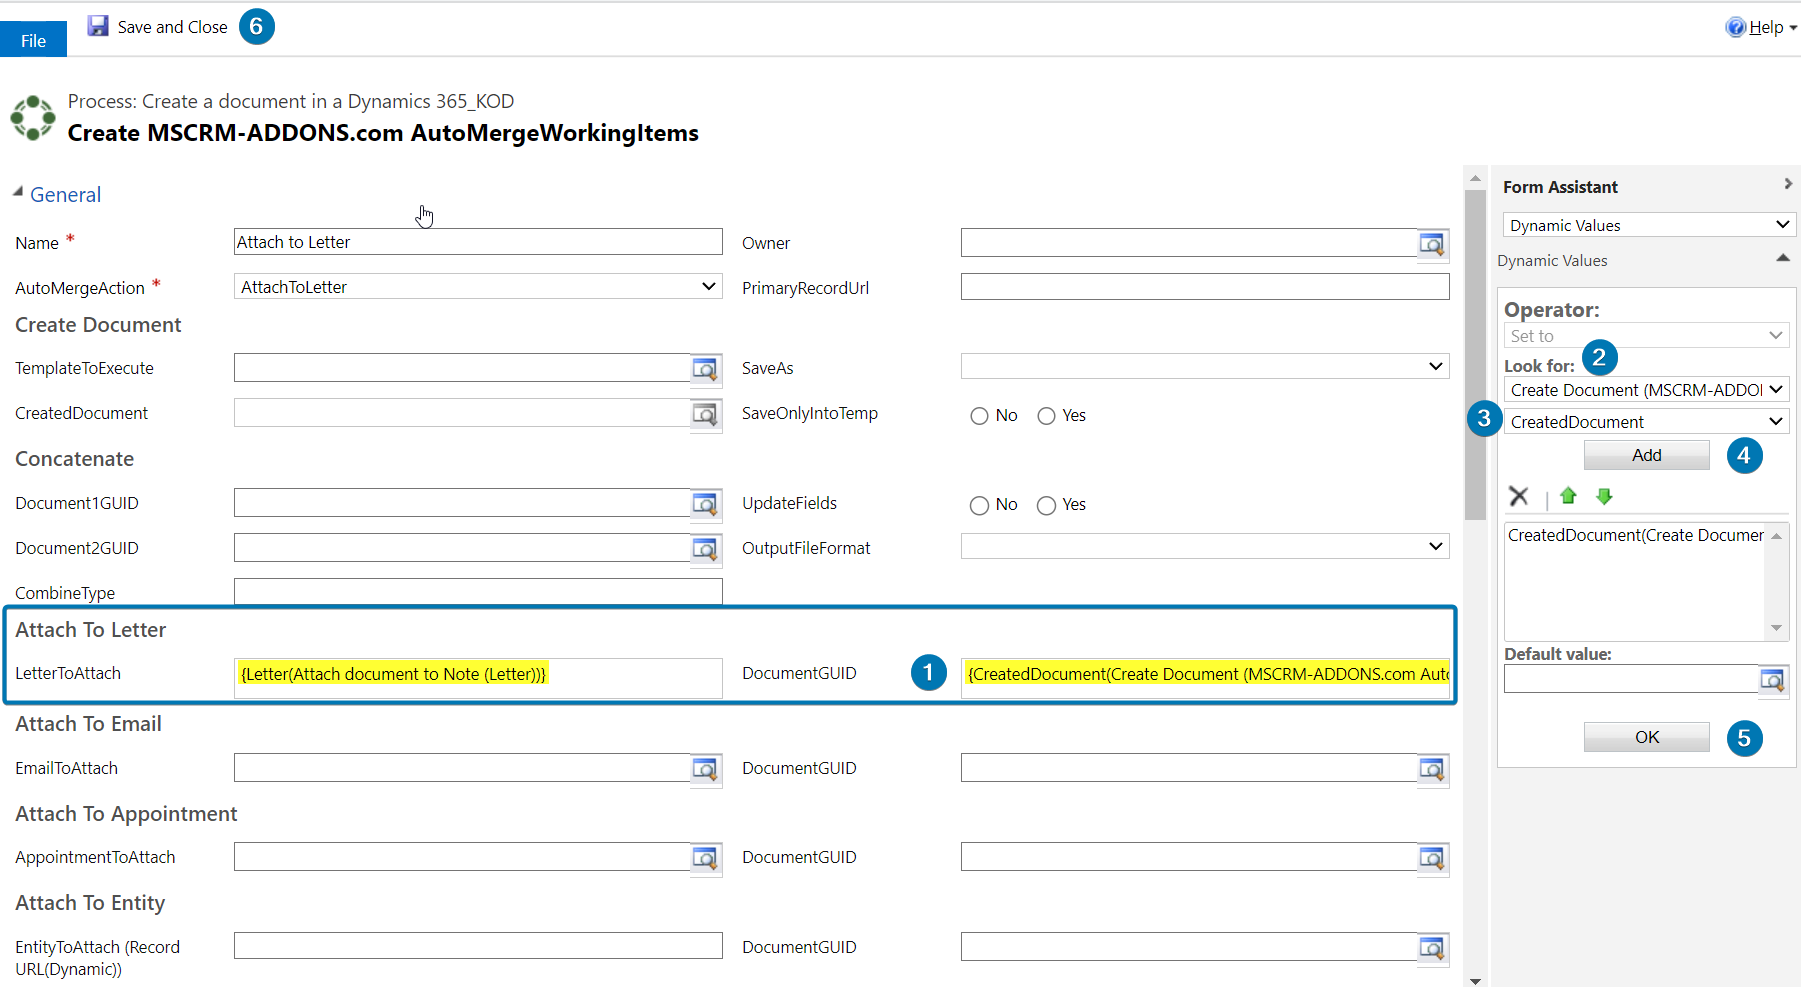
Figure 10: Attach document to letter activity.
You have now completed the configuration of this step. Never forget to save the settings! If you want to stop your workflow at this point, simply click on the [Save and Close] button within the general workflow-configuration-window and finish here.
Step 5: Insert another Wait Condition
If you want to add further steps to your workflow, you have to define another Wait Condition to be fulfilled before you add further workflow-steps. For more information on Wait Conditions, have a look back at Step 2.
Step 6: Delete document
In this step, you can delete the document after it has been attached to the letter activity. To do this, add another step with ❶ [Add Step]. ❷ Create another ❸ MSCRM-ADDONS.com AutoMergeWorkingItems and open the ❹ [Set Properties].

After naming the AutoMergeWorkingItem, select the ❶ AutoMergeAction: DeleteTempDocument. Scroll down to the Delete Temp Document section and set the cursor in the ❷ DocumentGUID field. Select on the right side in the Operator ❸ CreateDocument (MSCRM-Addons.com AutoMergeWorkflow) and in the drop-down below look for ❹ DocumentGUID_Delete. ❺ [Add] it and confirm with ❻ [OK].

Please note: You can add as many steps as you want to a certain workflow. But since our example’s last step consists of deleting the document, we decided that it is the last one for our workflow.
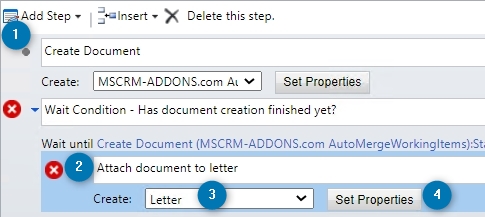
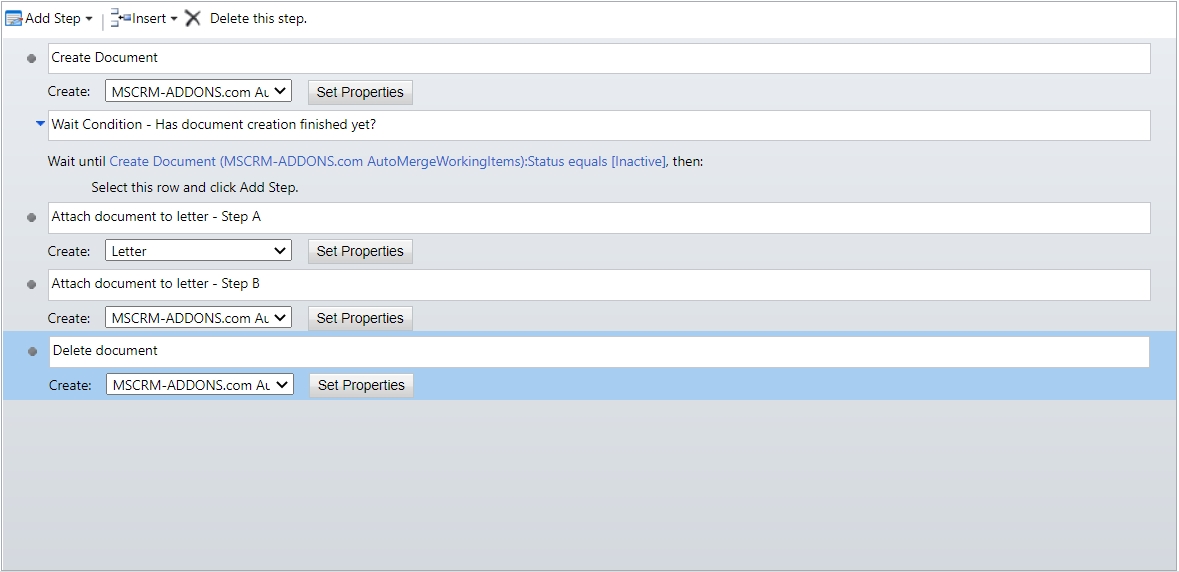
Step 7: Get your result.
If you have followed all the steps, your result should look like the screenshot below.
That’s it! We appreciate your feedback! Please share your thoughts by sending an email to support@mscrm-addons.com!