This article outlines how to create relationships in the DocumentsCorePack (DCP) Template Designer to map data from records related to your starting table (entity).
The following step-by-step tutorials will teach you how to create and manage complex relationships with the DCP Template Designer Additional tab. Essentially, relations can be solved for 1:N (1:many) and N:N (many:many) relationships. All custom entities, as well as system entities, are supported.
Step-by-Step Video: How to create relationships using DocumentsCorePack Template Designer
Tutorial 1: How to add a predefined relationship
Predefined relationships are existing relationships that have been already been resolved to a given base entity. They can be added to your template from the Add Relationship/Entity dropdown. These relationships will always exist, and thus do not need to be manurally recreated for each template.
Step 1: Create a new template
Begin by creating a new template. For further information on how to create a template, please read this article.
Step 2: Navigate to the “Additional” tab in the Template Designer
Next, open the Additional tab. It has been designed to manage additional relationships.
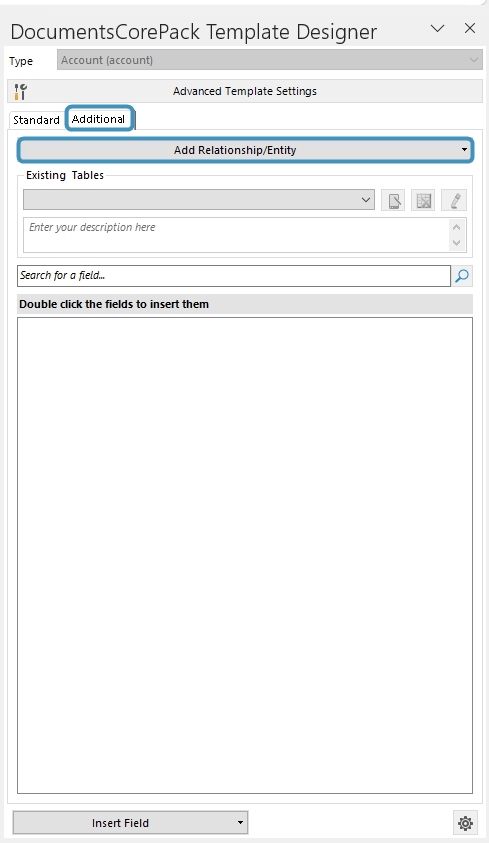
Step 3: Add a relationship/entity
Click on the Add Relationship/Entity dropdown arrow. This will display a list of predefined relationships associated with the base entity.
![The [Add Relationship/Entity]-button](https://cdn.mscrm-addons.com/wp-content/uploads/2016/10/2023-06-01_10h56_29.jpg)

The highlighted area in Figure 3 shows all predefined relationships. DocumentsCorePack already has a variety of different predefined relationships for standard CRM entities ready for you (for example, All Contacts of an Account, Quote Products of a Quote, etc). They facilitate the creation of templates. Simply click on the predefined relationship to add it. The related fields will then be visible in the Template Designer TreeView.
Tutorial 2: How to add a relationship from scratch
More complicated relationships can be created using the Configure Fields and Datasource dialog. Creating relationships in this way gives you more flexibility in how your relationships are structured.
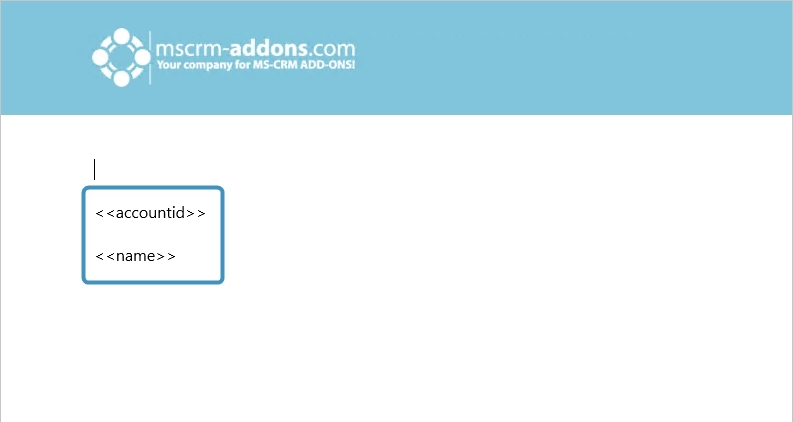
Step 1: Create a template and insert fields
For further information on how to insert fields, read this article. As you see below, we have inserted the following fields: <<accountid>> and <<name>>
Step 2: Add a new relationship
Next, go to the Additional tab and open the Add Relationship/Entity drop-down menu. Then, select Add New Relationship.

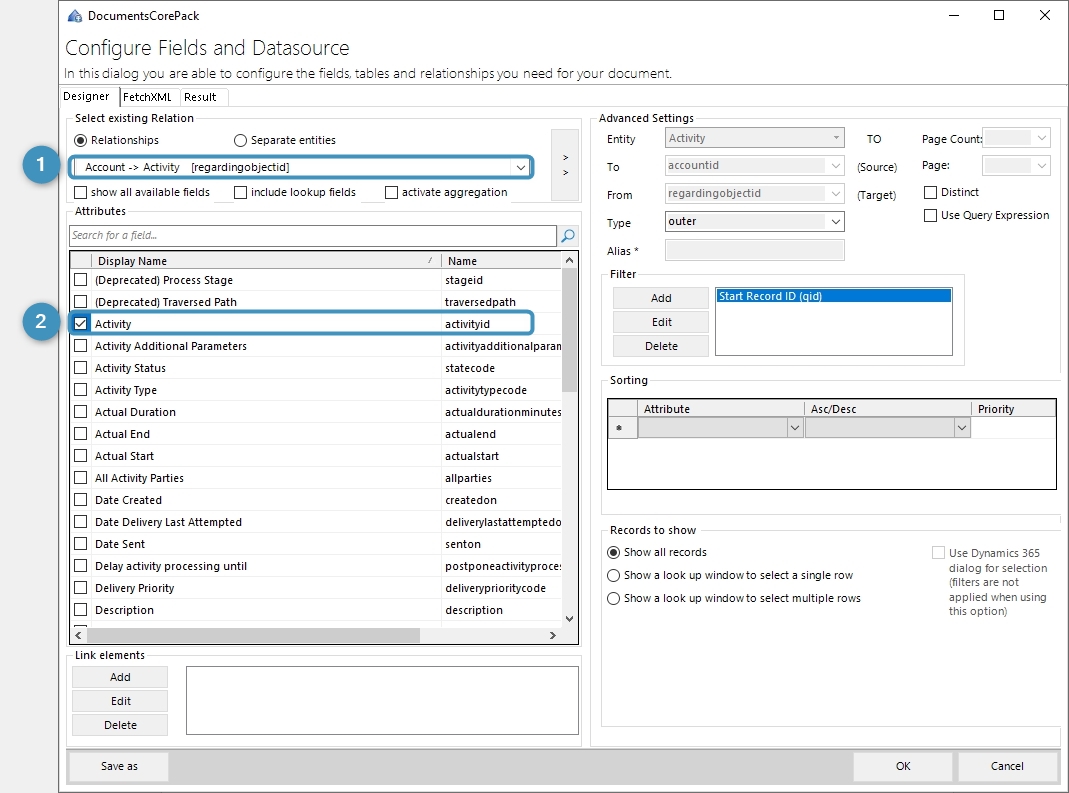
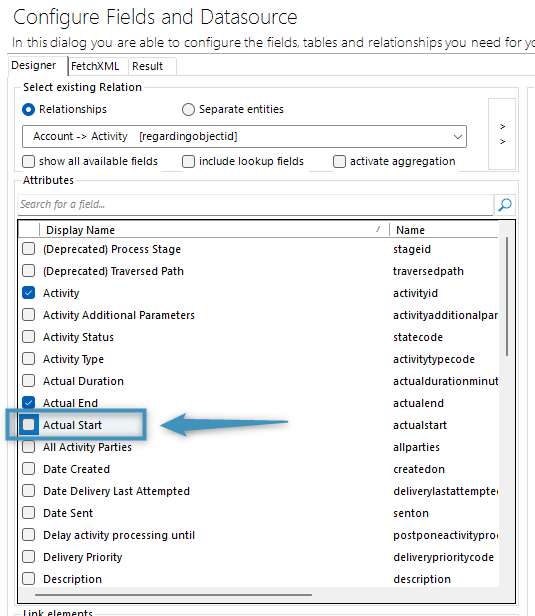
The Configure Fields and Datasource dialog will open. Select a relationship you would like to insert ❶ and add attributes by checking the boxes next to the attributes ❷. In the example below, we have chosen the relationship Account > Activity [regardingobjectid] and added the following attributes: Activity, Actual End, Actual Start, and Due Date.
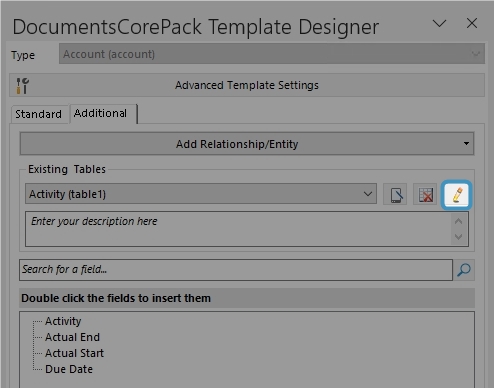
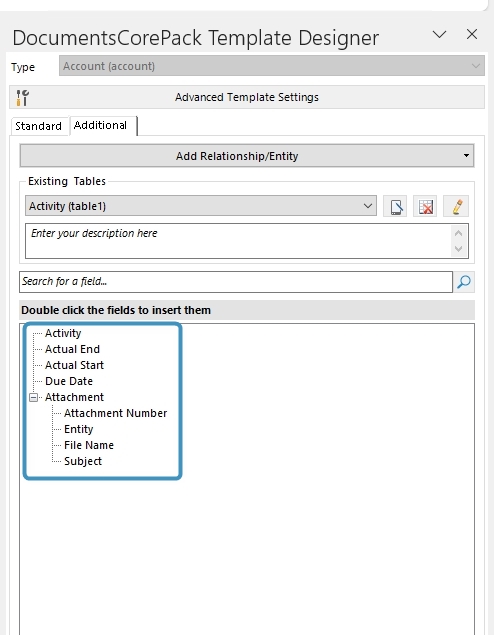
The chosen attributes of the entity are now also visible in the Additional tab of the Template Designer. From here, you can insert any of the fields into the document.

Step 3: Add or edit relationships
If you would like to add further relationships or edit your existing ones, click Edit in the Additional tab.
This action opens the Configure Fields and Datasource dialog again, providing you with the former established relationship. Select ❶ Add and add another relationship ❷ here. In the example below, we added Activity [activityid] -> Attachment [objected] and the entities ❸ Attachment Number, Entity, File Name, Subject.

As you can see, the resolved entities are now also visible in the Additional tab of the Template Designer. From here, you can insert any of the fields into the document.
If need be, you can repeat this process as often as you’d like to enhance the complexity of your relationships.
Tutorial 3: How to create a relation to a separate entity
The creation of a relation to a separate entity follows the same rules as the creation of an entity from scratch, with one exception. In order to create a relation to a separate entity, follow the steps in Tutorial 2 carefully, but make sure that you change the following parameter when you select a new relationship:
Instead of checking Relationships, check Separate Entities ❶ in the Select existing Relation section. The main difference is that you will now be provided with separate entities ❷ instead of relationships.

Removing attributes
If you feel you no longer need a particular attribute in your template, you can always open your relationship in the Configure Fields and Datasource dialog and deselect the attribute. Once it has been deselected, click OK to save your changes to properly remove it.
Note: Removing an attribute will also remove it from the relationship’s FetchXML.
Additional Filtering
The most common additional step when adding a relationship is adding additional filters to limit returned results. For example, if you only want to see active records, you would add an additional filter for that. How to create or modify additional filters is described here.
That’s it! We appreciate your feedback! Please share your thoughts by sending an email to support@mscrm-addons.com.