This step-by-step guide outlines how to add a filter to a relationship with DocumentsCorePack Template Designer. In this tutorial, we will show you how to add a filter to a query that loads product line items, so that the result will only return products with an amount greater than 500 Euro.
Step-by-Step Guide
Step 1: Create a new template
If you have not created a template with DocumentsCorePack before, please have a look at this article.
Step 2: Create a relationship
If you have not added a relationship to a template before, please have a look at this article.
Step 3: Add a filter to a relationship
Once the relationship is created, open the DocumentsCorePack template designer by selecting InsertMailMerge fields from the mscrm-addons.com tab in Word. Then select the Additional tab, an existing table, and the edit icon. From here, ❶ navigate to Filter and click on the Add button ❷.
Please Note: Any existing QID-Filter (Root-Record-Filter) is a reference to the base record.
Next, select which type of filter you would like to add (AND / OR). For this example, we use AND ❸. Then, click on the lower Add button ❹. The Condition window opens.
In the Condition window ❺, select a matching attribute (example: Amount), an operator (example: greater than) and a value (example: 500) and click on the OK button.
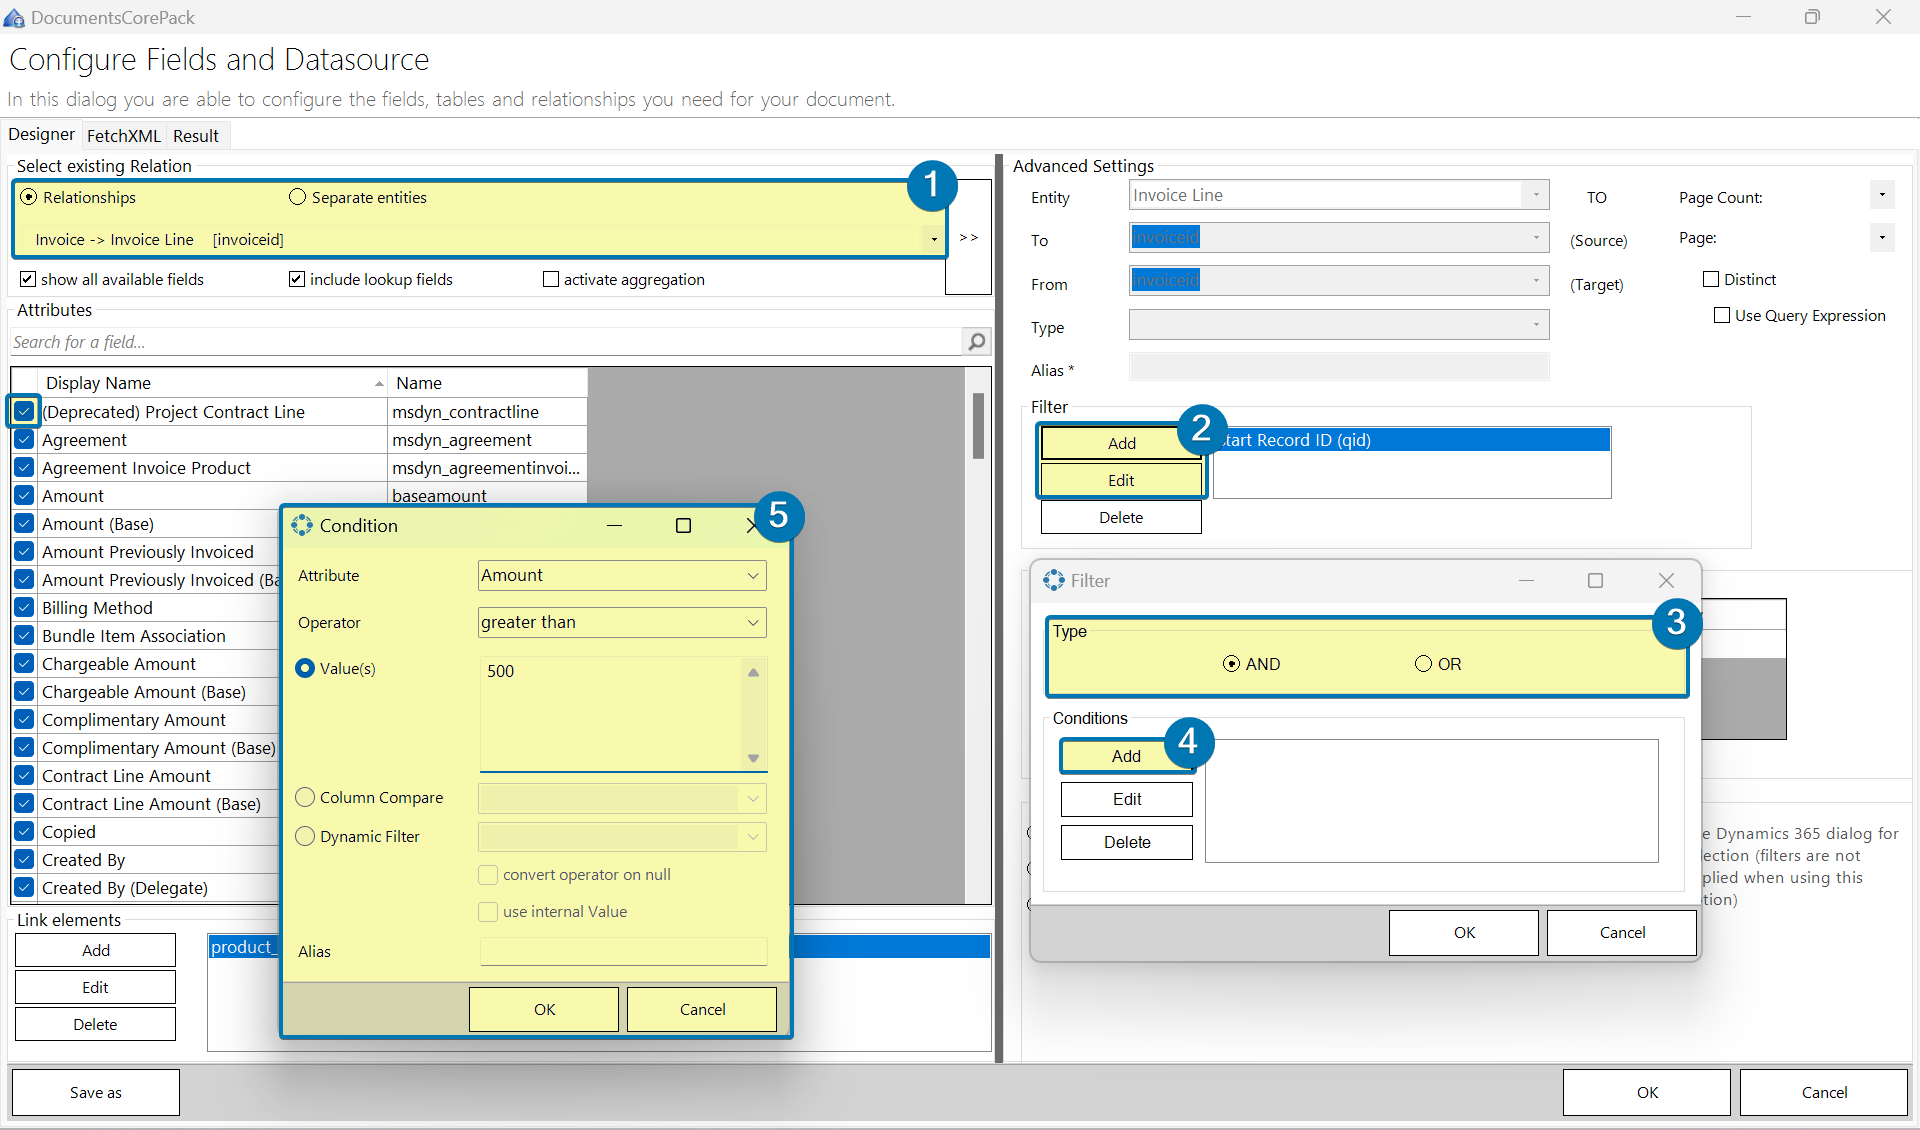
Figure 1: Add a filter to a relationship
That completes the steps for adding a filter. Click on the OK button in the Configure Fields and Datasource window to return to the Template Designer in order to proceed.
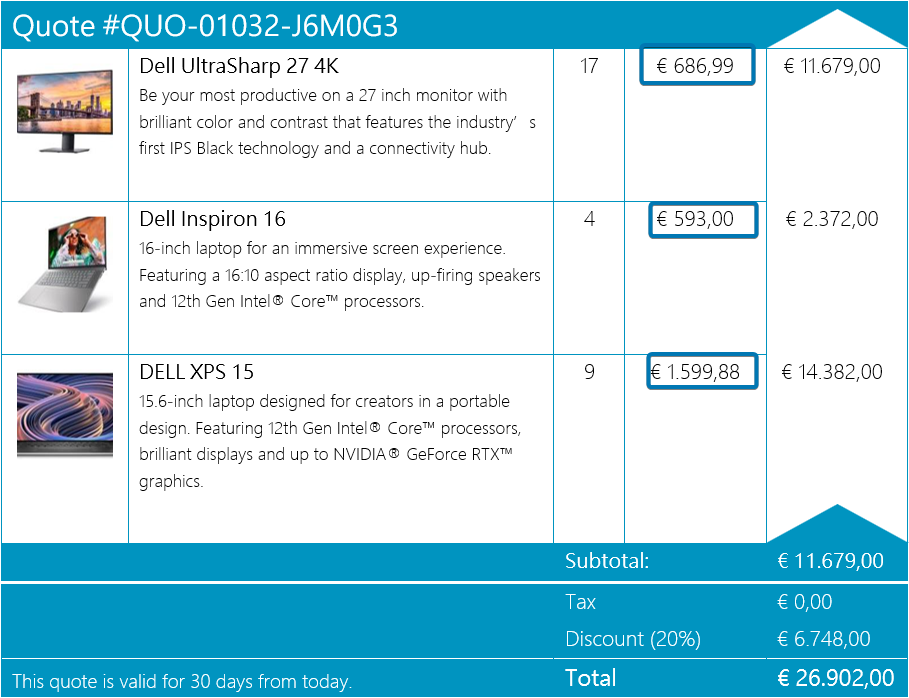
Figure 2: Sample result with filter
As an additional filter option, you can use the column comparison (external link) option, which is an extension of Microsoft to fetch queries ❶.
You can also use dynamic filters, which are an additional DocumentsCorePack feature ❷.
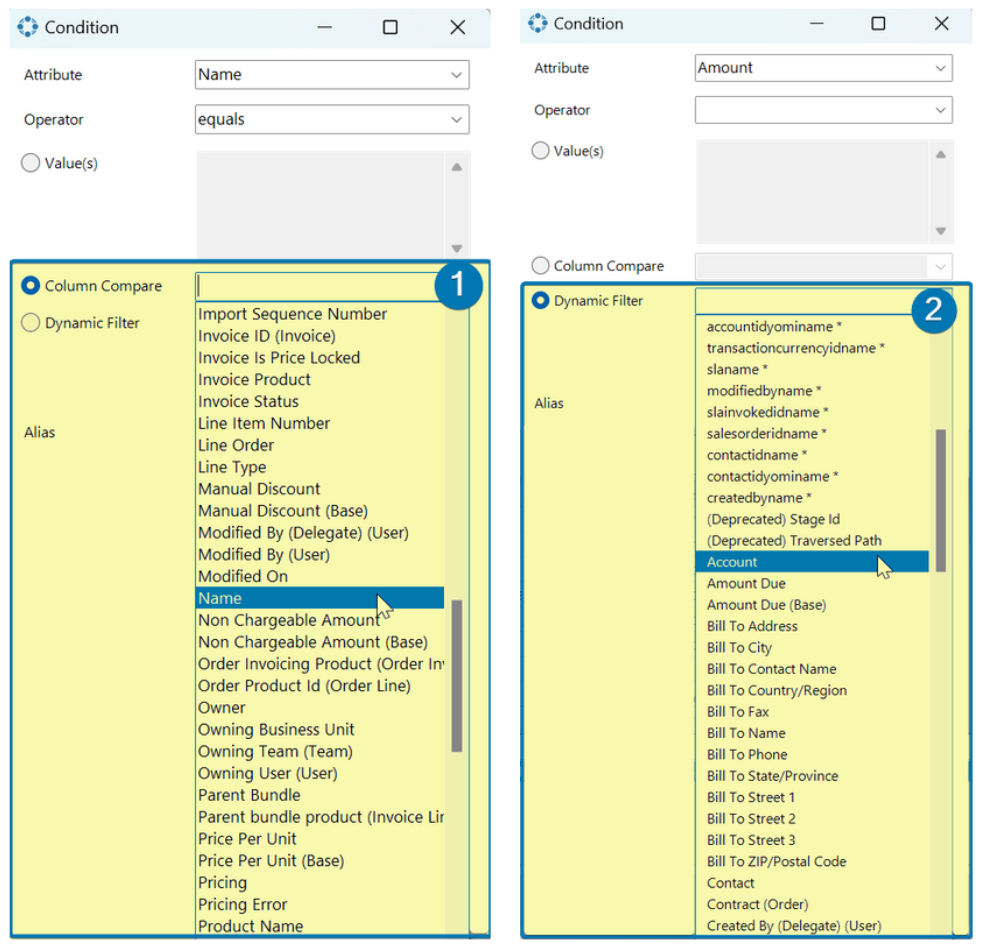
Figure 2: Additional options for filtering (left: column comparison, right: dynamic filters)
That’s it! We appreciate your feedback! Please share your thoughts by sending an email to support@mscrm-addons.com.