This article outlines how to add your GroupCalendar to the Sitemap. Per default GroupCalendar tries to add the application to the “Sales” area. If you do not have this Area, you can add the GroupCalendar manually, here is how to do that:
Navigate to: Dynamics 365 > ❶ Advanced Settings > ❷ Customizations > ❸ Customize the System
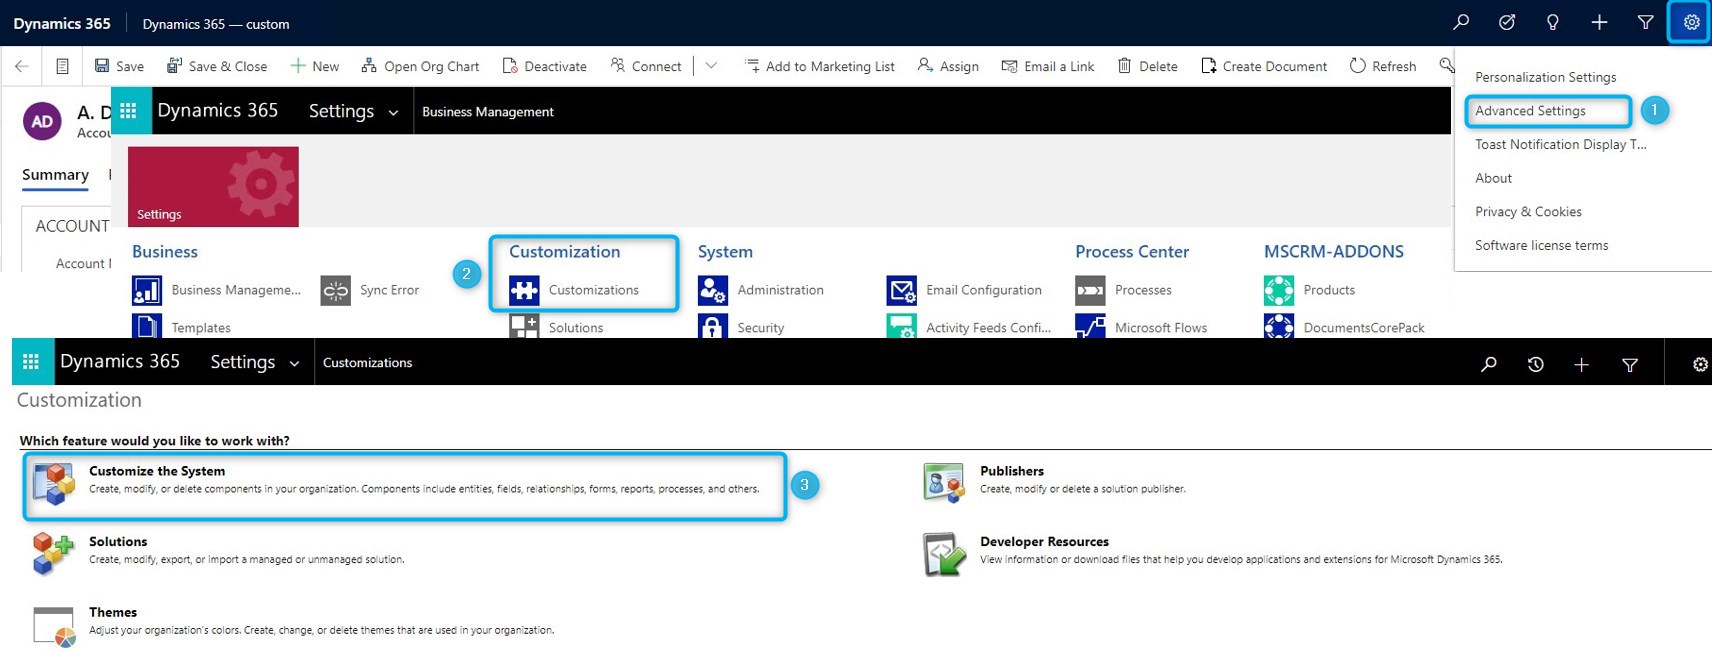
Figure 1: Navigation to Customize the System
The Power App site opens. Navigate on the left side to “Client Extensions” and “Site Map”.

Figure 2: Client Extensions – Site Map
Make a double click and the site map designer opens. Select an ❶ “Area” and a ❷ “Group” where you want to add the GroupCalendar. Mark the last entry (in the picture below it is “PowerSearch”).
Please note: If there is no entry marked, you cannot go to the next step!!
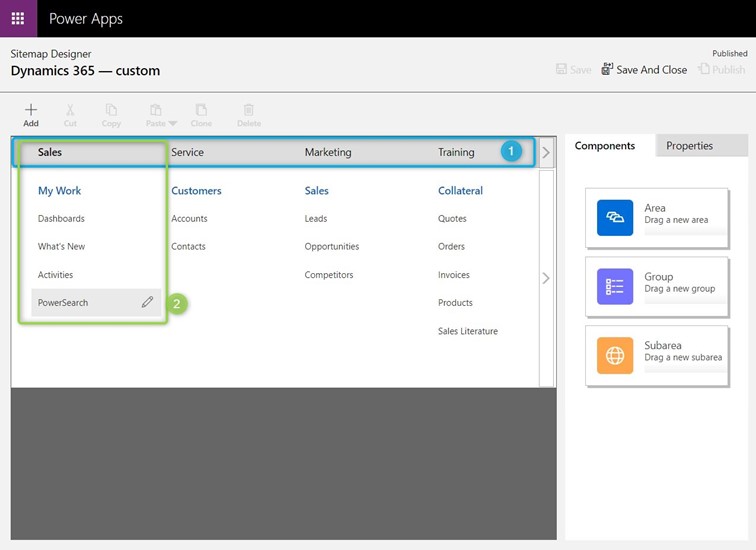
Figure 3: Select Area and Group
Now press the [Add]-button in the left top corner, select “Subarea” in the drop-down menu and a new entry appears.
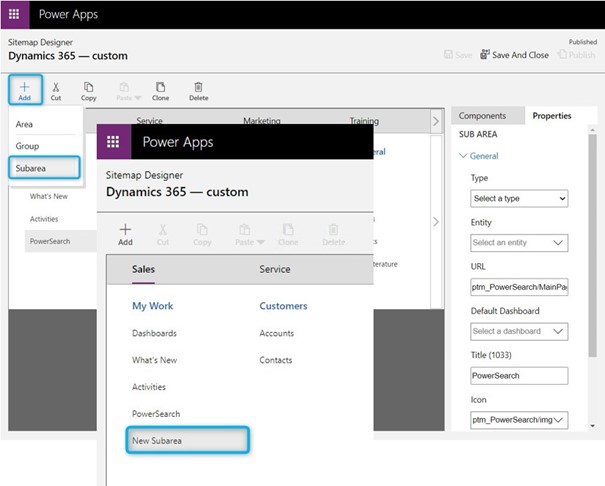
Figure 4: New created Subarea
To edit the new Subfolder, move your mouse over the new entry and click the “edit-pencil”. On the right side a settings bar opens.
We recommend the following parameters:
Type = Web Ressource
URL = ptm_WebApplicationPreloaderGroupCalendar
Title = GroupCalendar
Icon = ptm_Icon32x32_White.png
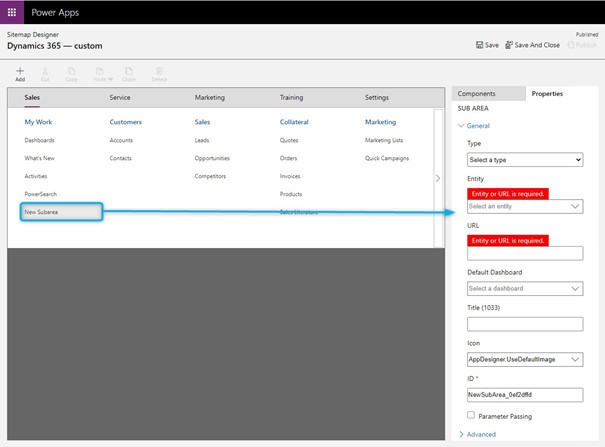
Figure 5: Type in recommended parameters
Now save and publish your changes and enjoy the result.
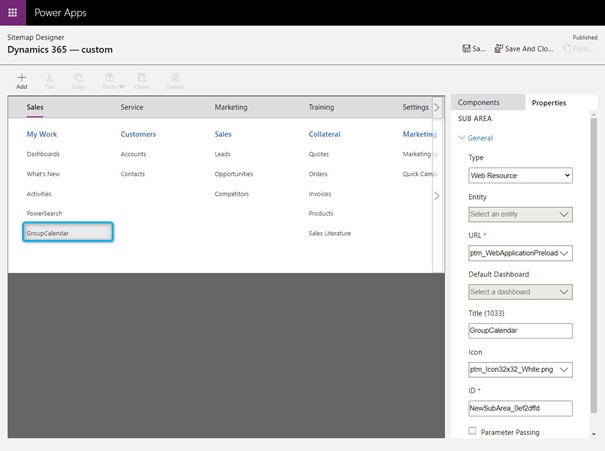
Figure 6: Result
That’s it! We appreciate your feedback! Please share your thoughts by sending an email to support@mscrm-addons.com.