In this article, we will walk through the process of creating a document package in Power Automate using an XML-based definition of the individual elements within the package.
Example
We will be creating an example document package consisting of a document for each account in our system. The example package will consist of the following elements:
- A document that is generated based on a DocumentsCorePack template
- A file that is retrieved from SharePoint
- A file that is retrieved from a note in Dynamics 365
We will demonstrate how to include these elements and the XML behind them.
1. Generating a document from a template
First, we must create a Flow in Power Automate. This can be an Automatic or Instant Flow, started by a trigger of your choosing.
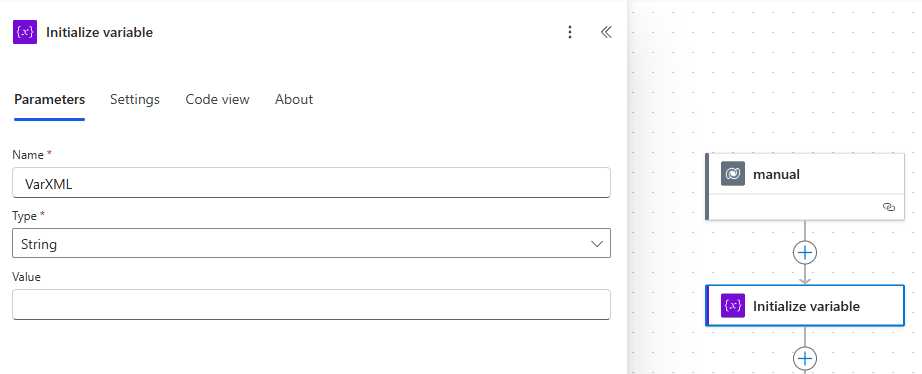
Upon creating a Flow, we would need to begin by creating and initializing a variable. This variable will hold our custom XML. We will append additional XML to this variable throughout the example.
With the variable created, we can proceed to append our XML to it. To begin with, we will append our initial <doc> and <docparts> tags, along with a few parameters. The savetosharepoint parameter will save the generated document to SharePoint, while the stsentitytype and stsentityid parameters will define the SharePoint save location. The converttopdf parameter, when set to true, will save the generated document as a PDF.
The XML is as follows:
<doc><docparts savetosharepoint="true" stsentitytype="account" stsentityid="ENTITYID " converttopdf="true">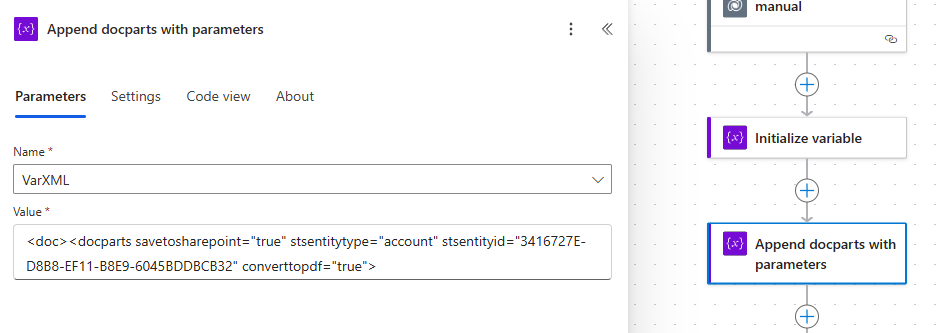
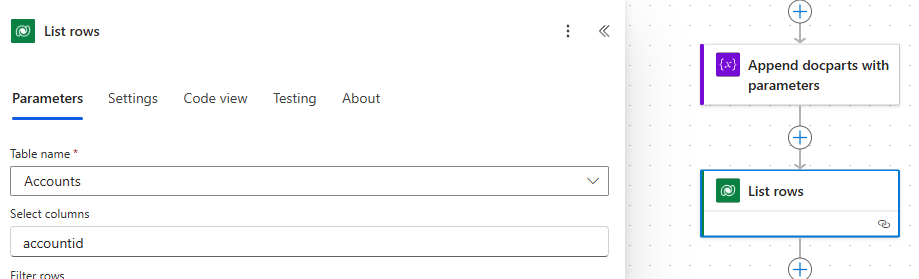
Next, we will need to get the IDs for all of our accounts (using the Dataverse -> List rows action) and create a variable that will contain the number of accounts in our environment.
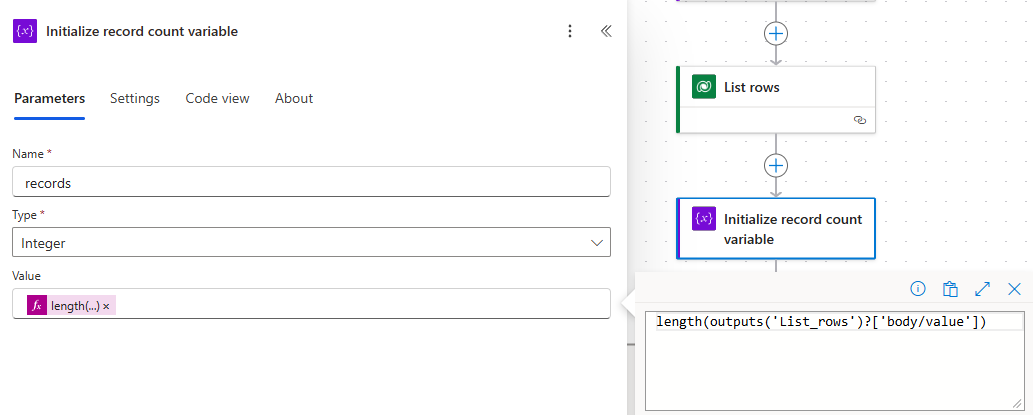
We require both actions for our Apply to each loop, which is needed to append a docpart containing our template information for each account record. Our loop will look like this:
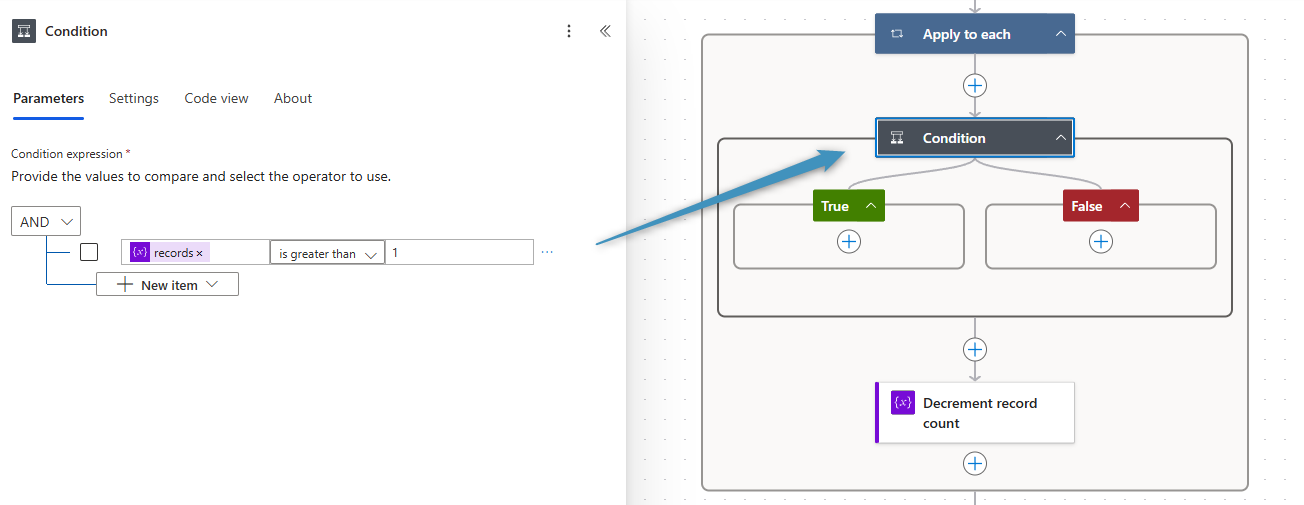
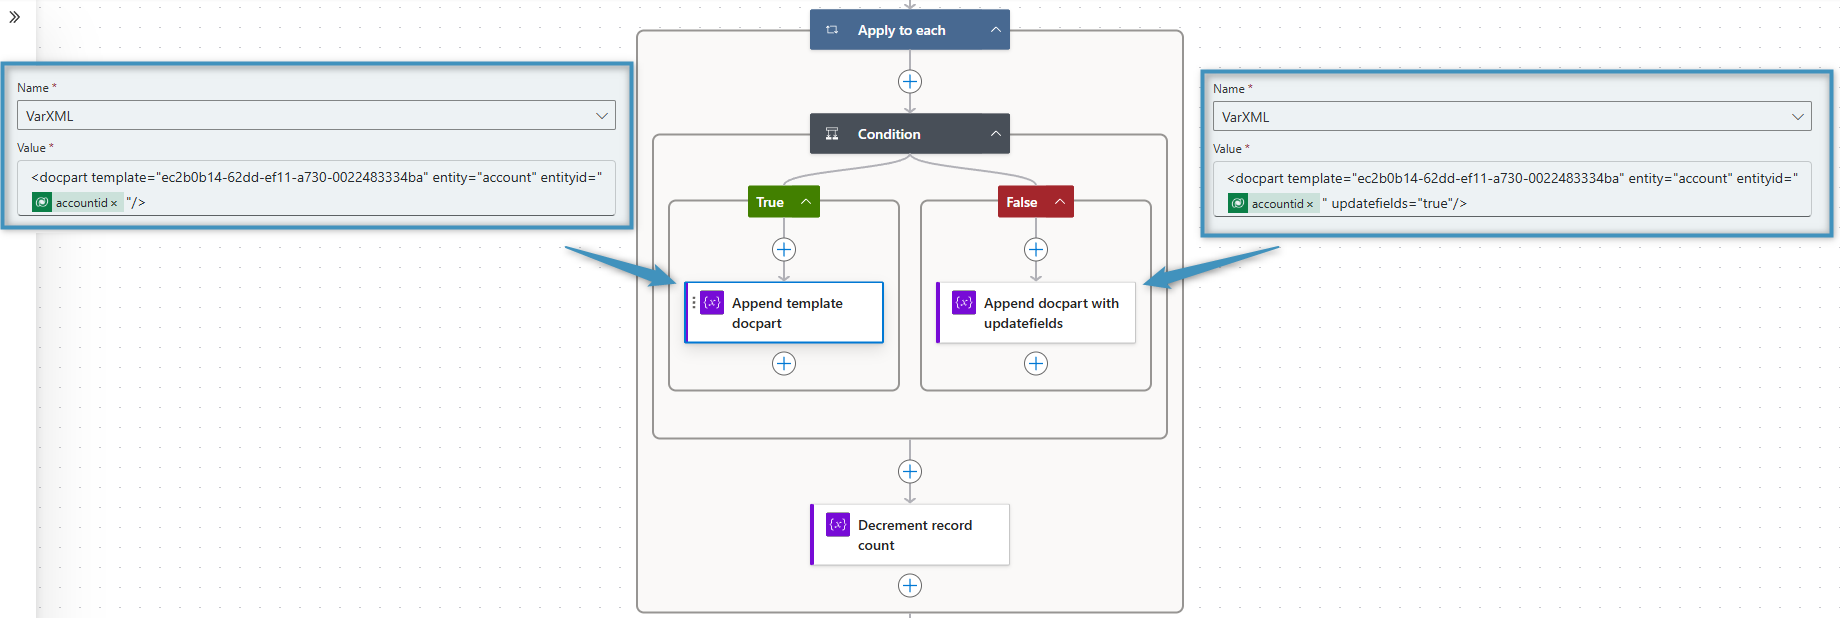
Each docpart will contain the template’s GUID, entity name, and entity GUID (retrieved from our List rows action) save for the last one, which will have an additional parameter added to it: the updatefield parameter. This parameter needs to be added to the last docpart to properly update any included Word fields across all templates. Thus, this last docpart is placed in the false condition that will be triggered when the last record in the list is reached.
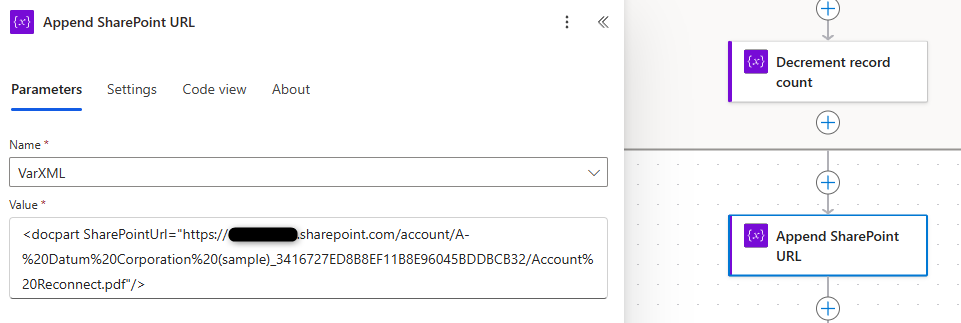
2. Adding a Sharepoint document
Our Sharepoint document comes next. You can include this by adding the Sharepoint URL to the docpart. To get the Sharepoint URL, you must retrieve it from Sharepoint itself.
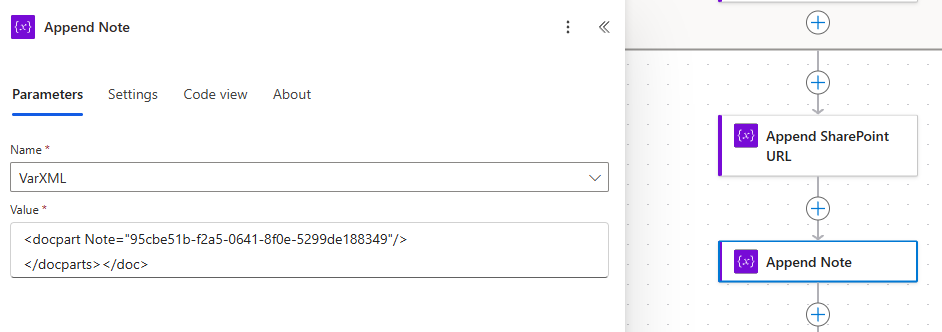
3. Adding a Note
Similar to the template above, the note is static as well, so we include its ID in the XML as well. Since this is our last docpart, we can also add the closing <docparts> and <doc> tag to it.
Finishing up
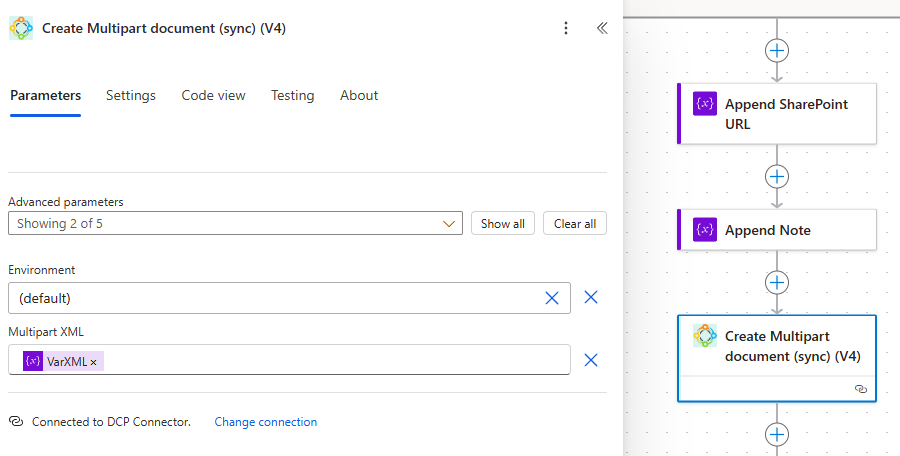
To create the document, we would need one more step. By adding the Create Multipart document (sync) step and including our variable, this allows for the document to be created upon executing the Flow.
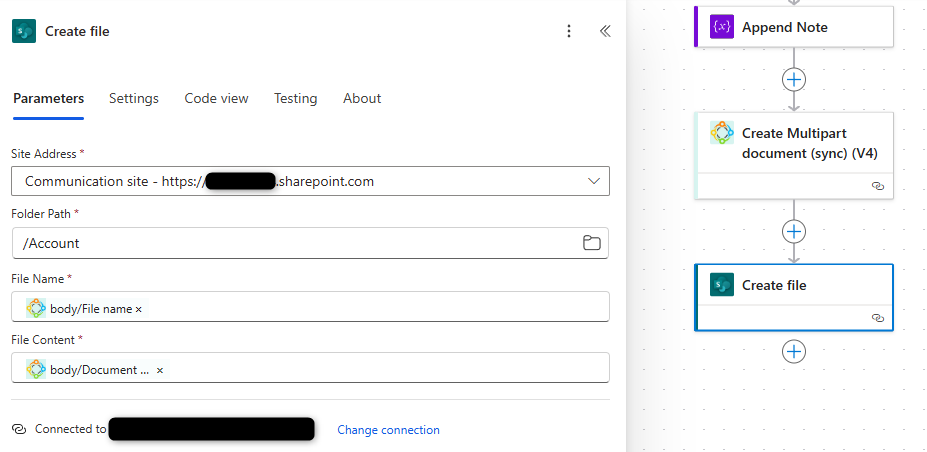
In case the created document should be saved to an additional, alternate path, another step would need to be added. Here, using Sharepoint as an example, you can set the URL, folder path, the file name and content. Since the created document was the output of the previous step, the file name and content can be retrieved, giving direct access to the generated document package.
Sample XML
Below is the XML used in the Flow with placeholders inserted. Please feel free to repurpose it for your own Flows!
<doc>
   <docparts savetosharepoint="true" stsentitytype="ENTITY" stsentityid="ENTITYID" converttopdf="true">
      <docpart template="TEMPLATE" entity="ENTITY" entityid="ENTITYID"/>
      ...
      <docpart template="TEMPLATE" entity="ENTITY" entityid="ENTITYID" updatefields="true"/>
      <docpart SharePointUrl="SHAREPOINTURL"/>
      <docpart Note="NOTEID"/>
   </docparts>
</doc>
That’s it! We appreciate your feedback! Please share your thoughts by sending an email to support@mscrm-addons.com.