• Release History
  • Documentation
  • Back to www.mscrm-addons.com
  • Release History
  • Documentation
  • Back to www.mscrm-addons.com
home/Knowledge Base/Template Designer(DCP)/How to build and format an address block with DocumentsCorePack Template Designer

How to build and format an address block with DocumentsCorePack Template Designer

290 views 2 Updated on May 25, 2023

This article explains how to build and format an address block properly with DocumentsCorePack Template Designer. With the DocumentsCorePack Field Properties functionality, users can easily format every address line and define specific line behavior for information, even if it is not stored in Dynamics 365.

Step-by-step description: How to build an address block

Step 1: An address block can be easily created with the DocumentsCorePack Template Designer. To do this, open Microsoft Word and navigate to the ❶ www.mscrm-addons.com tab. Click on the ❷ Insert MailMerge Fields button and the ❸ DocumentsCorePack Task Pane opens.

Open DocumentsCorePack Template Designer
Figure 1: Open DocumentsCorePack Template Designer

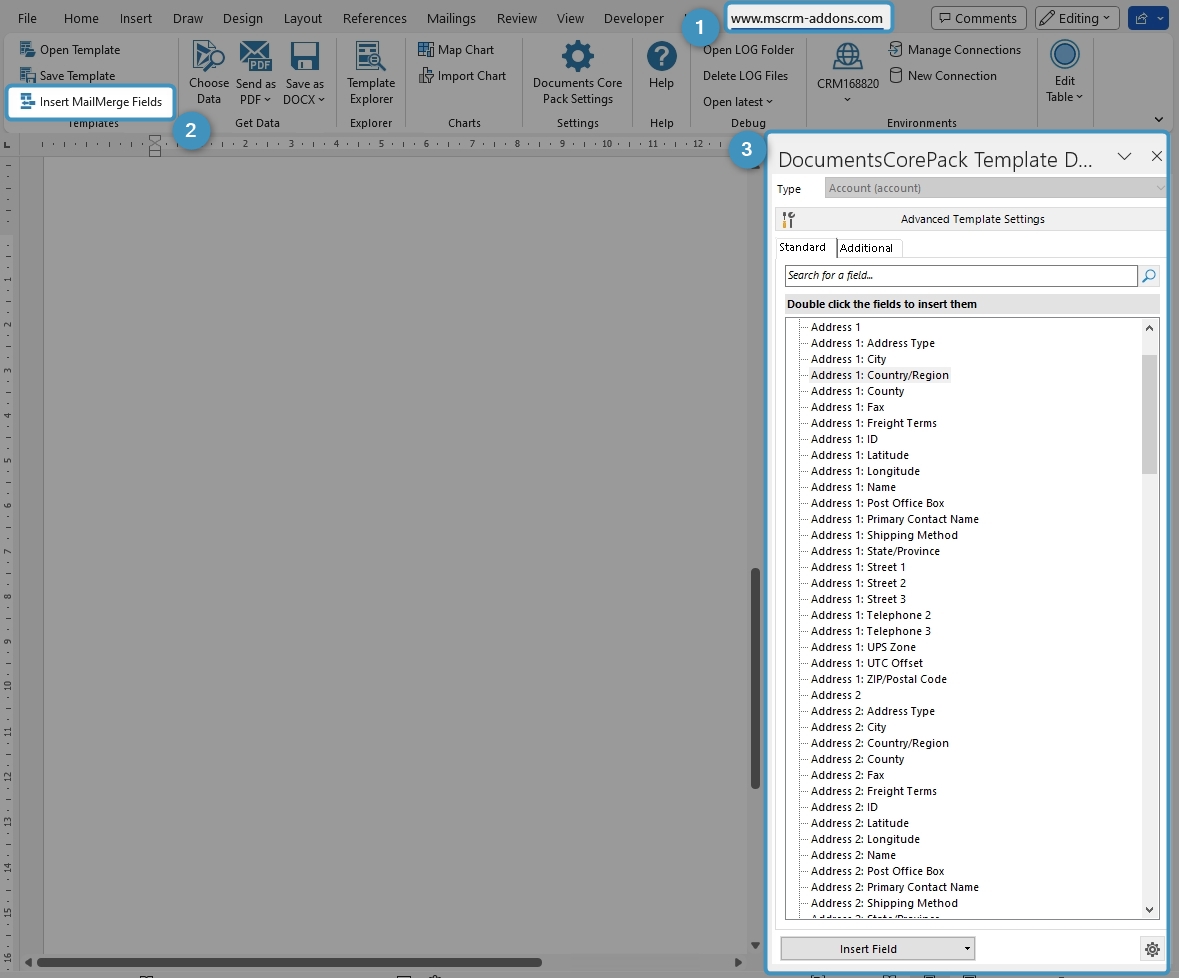
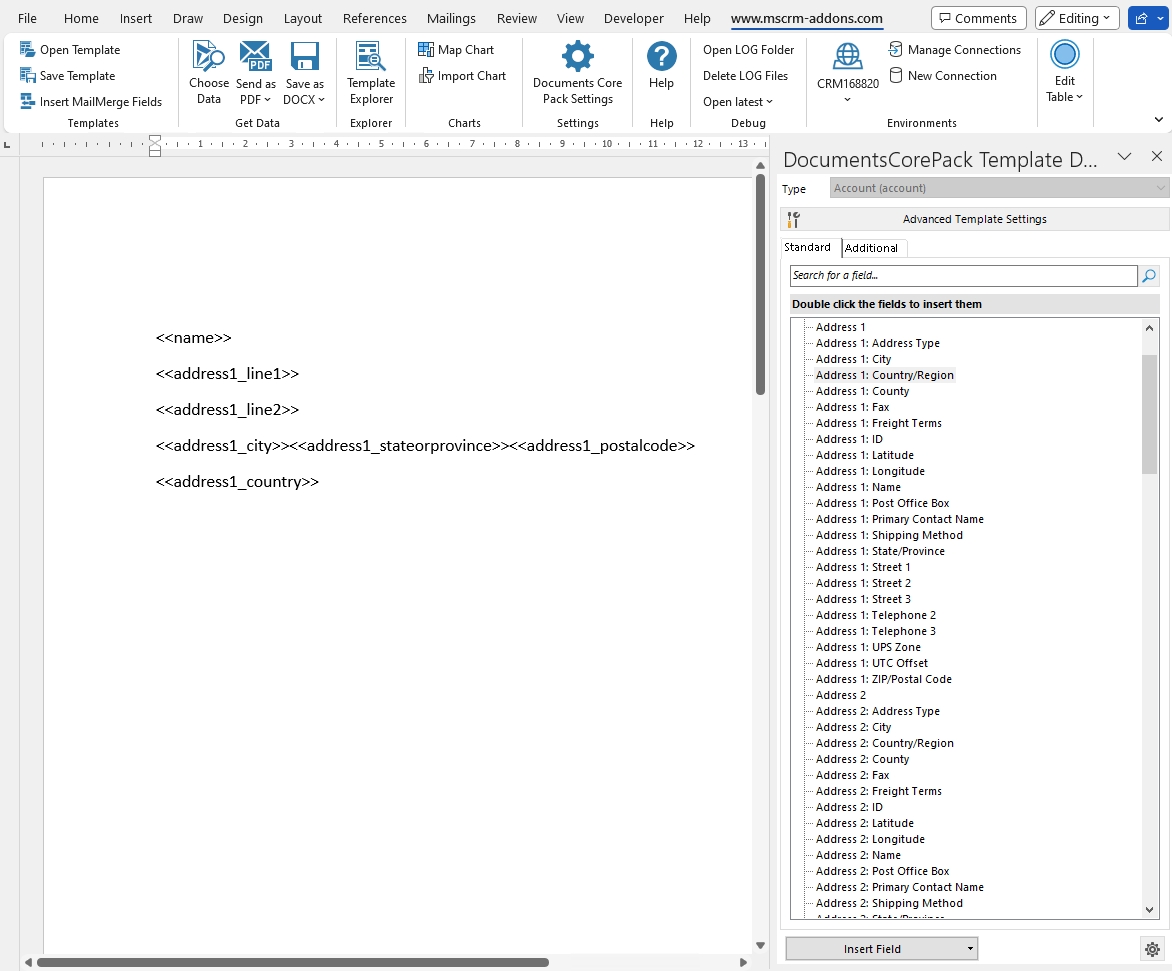
Step 2: After selecting the Entity Type/Table (it is Account in this example), you can begin inserting the appropriate MailMerge Fields into your future address block by double-clicking on the required fields to add them to the document.

An example address block
Figure 2: An example address block

Step 3: In order to save it to your Dynamics 365 click the Save Template button in the Word ribbon.

Save template to Dynamics 365
Figure 3: Save template to Dynamics 365

Step 4: This window opens. Define a name for your template and confirm with Save.

Save template window
Figure 4: Save template window

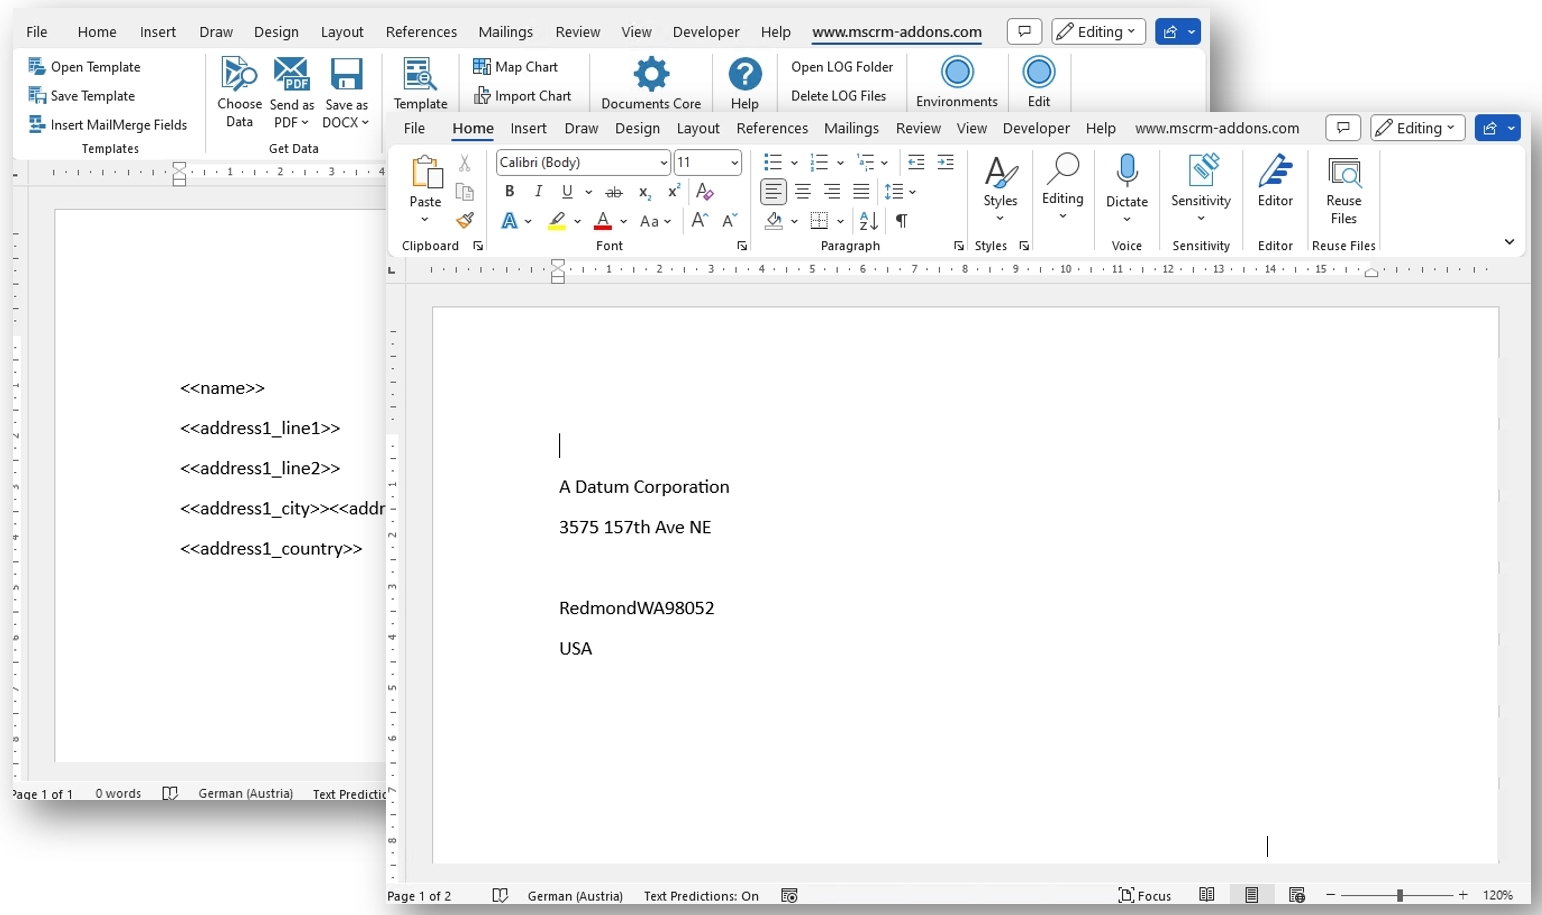
Step 5: To select the relevant Data from Dynamics 365, click on the ❶ Choose Data button. In the MailMerge window select the ❷ entity/table you want your template to merge to and hit the ❸
Search button. All ❹ Dynamics 365 data is loading. Now look for the data you need to merge the template with and confirm with ❺ Select.

Select Dynamics 365 data for merging the template
Figure 5: Select Dynamics 365 data for merging the template

Step 6: After the merge process.

Merged template with empty address lines
Figure 6: Merged template with empty address lines

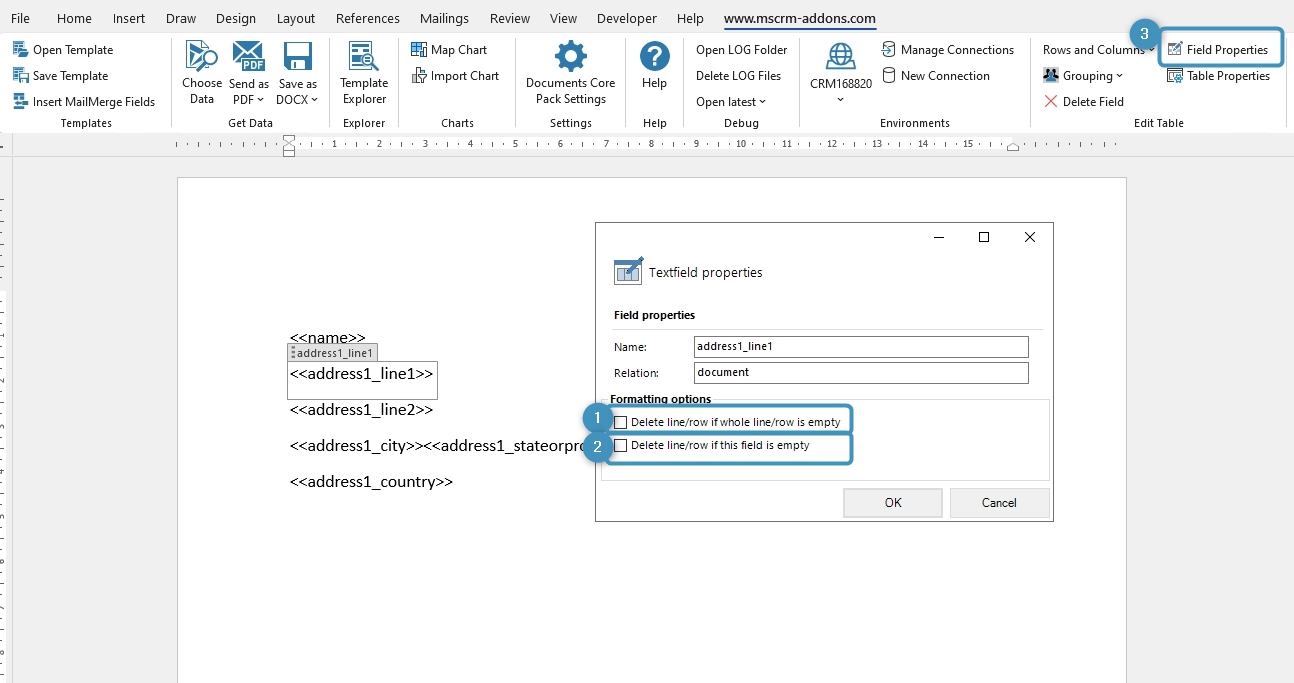
Step 7: To keep your documents compact, avoiding empty lines within your documents is recommended. For example, think of an address block where some customers use the Address Line 2 field, but others do not. To ensure a compact output, you want to avoid empty lines for those not using the field.

There are two options:

❶ Delete line/row if whole line/row is empty: If the value of the selected field, as well as all other fields within the same line, are empty in DataVerse, the line will be removed.

❷ Delete line/row if this field is empty: If the value of the selected field is empty, the whole line is removed independent of other content in the same line.

Place the cursor in the field you want to format. Click on the ❸ Field properties to open the options.

If the value of the selected field and all other fields within the same row in DataVerse are empty, take Option ❶.

If you need the whole line removed when only one selected field is empty, take Option ❷.

Learn more about field formatting options in DocumentsCorePack templates or how to remove empty lines.

Field properties
Figure 7: Field properties

That’s it! We appreciate your feedback! Please share your thoughts by sending an email to support@mscrm-addons.com.

Was this helpful?

2 Yes  No
Related Articles
  • Simplify Contract Processes with Dynamics 365 + E-Signature 
  • How to update the metadata in the DocumentsCorePack Template Designer
  • Working with Product Properties in DocumentsCorePack
  • How to work with the Relationship Manager
  • Using virtual tables in DocumentsCorePack
  • DocumentsCorePack Template Designer Settings
Latest Articles
  • Generate large documents using the Multipart-feature of DocumentsCorePack 
  • Recap: DynamicsMinds Conference 2023
  • How to automate the E-signature process via Power Automate
  • Technical Description: The AutoMergeWorkingItem (AMWI) 
  • Dataverse Online OData v2.0 endpoint removal for custom “ExportToWord” Button
Popular Articles
  • DocumentsCorePack Template Designer – Getting Started
  • Where do I find the Unique Organization name in Microsoft Dynamics 365?
  • Step-by-Step: How to configure a One-Click-Action
  • mscrm-addons.com Application Access for Dynamics 365 (App Access) – DocumentsCorePack
  • DocumentsCorePack Online Service Configuration
Top Rated Articles
  • IMPORTANT information for Dynamics 365 online customers using DocumentsCorePack and/or AttachmentExtractor
  • How to activate the DocumentsCorePack connector for PowerApps & Microsoft Flow
  • Step-by-Step: How to configure a One-Click-Action
  • “Blocked by Conditional access” error in Azure Active Directory
  • Online Services: Required Application Permissions
Categories
  • *News and General Infos* 52
  • Webinars 36
  • Template Designer(DCP 180
  • DocumentsCorePack(DCP 196
  • TelephoneIntegration (TI 65
  • AttachmentExtractor (AE 62
  • PowerSearch (PS 48
  • ActivityTools (AT 59
  • SmartBar (SB 53
  • GroupCalendar (GC 46
Our Vision

“We see it as our purpose to provide products that simplify and speed up our customers’ Microsoft Dynamics 365 experience.”

Knowledgebase
LogIn
mscrm-addons.com
  • Products
  • Online Shop
  • Downloads
  • My Account
About Us
  • About Us
  • Case Studies
  • Newsletter
  • Partner Program
  • Contact
Support
  • Support
  • Terms & Conditions
  • Documentation
  • Webinars
  • Legal Documents
  • Impressum
  • © 2022 www.mscrm-addons.com. All Rights Reserved.