In this article we would like to show you how you can change the details on the DocumentsCorePack Lookup Dialog via Microsoft Power Apps.
This Dialog refers to DocumentsCorePack Templates, and you will get in touch with if you use any of the e.g. Insert Static Document or Master Template functionality an other options where you can select a templates.
Here is an overview of the LookUp Record in your DocumentsCorePack TemplateDesigner before and after the columns were added.
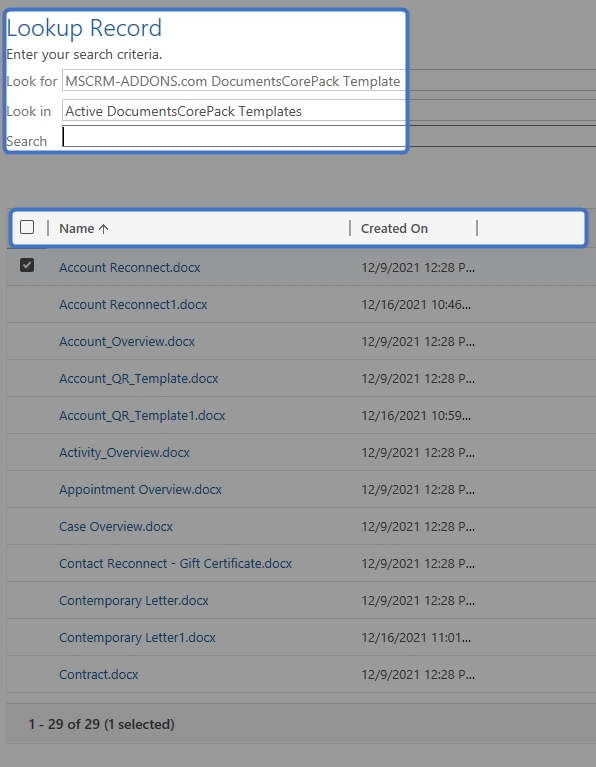
Figure 1: Lookup Record with the 2 columns “Name” and “Created On”
Let´s start with opening the Microsoft Power Apps
❶ Check if you are in the right environment
❷ Then navigate to the left sidebar, choose “Data”, and select “Tables”. If you can´t find the Table you are looking for, move to the right side, press “Default” and a drop-down list opens. Click on
❸ “All”. A greater selection is offered.
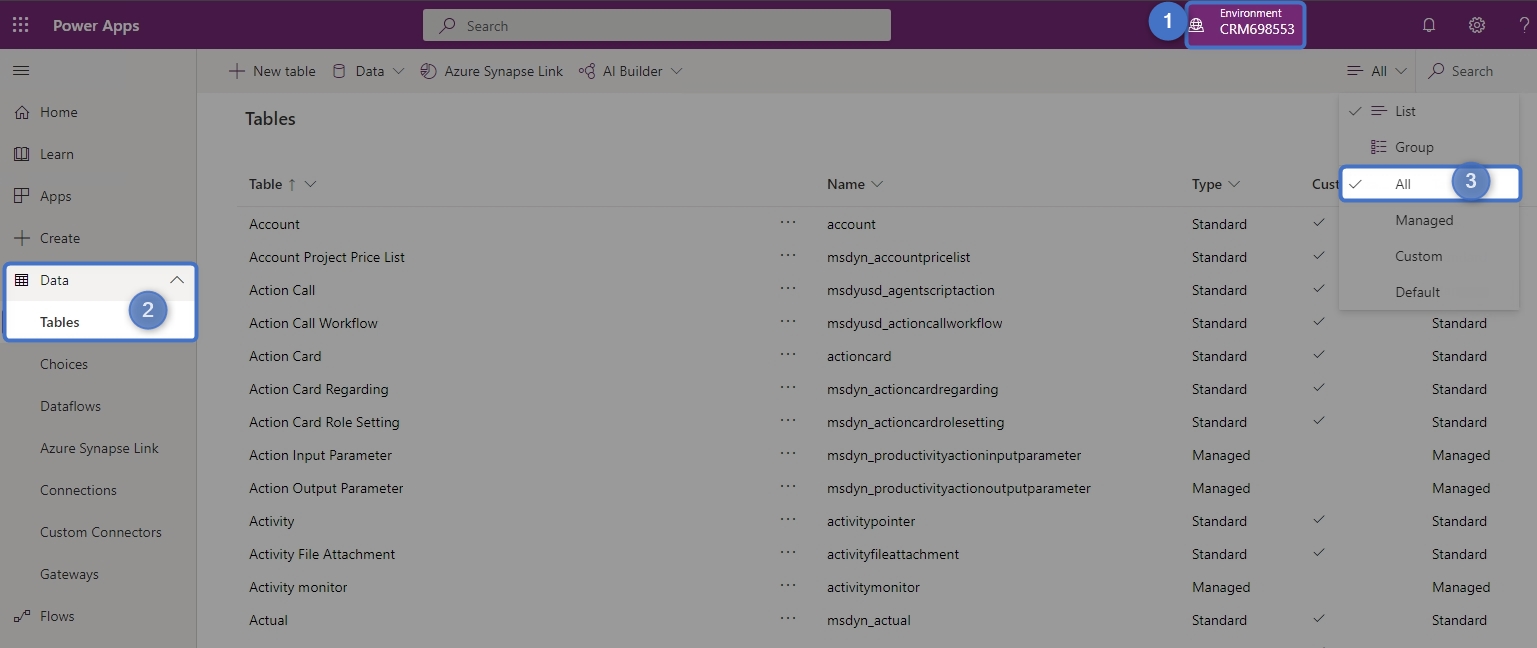
Figure 2: Power Apps – Tables
Look for the “MSCRM-ADDONS.com DocumentsCorePack Template” and click on it.

Figure 3: Power Apps – MSCRM-ADDONS.com DocumentsCorePack Template
In the opened surface, navigate to “Views” and select the “MSCRM-ADDONS.com Advanced Find View” and open it with a double click!
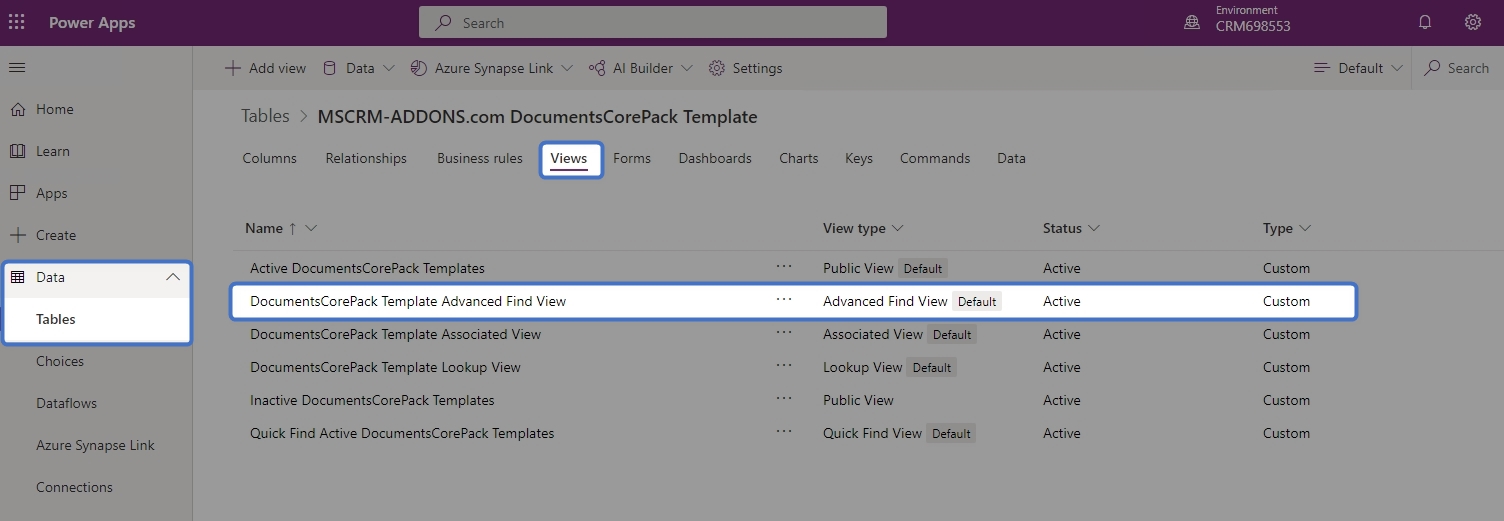
Figure 4: Power Apps – DocumentsCorePackTemplate Advanced Find View
The site “Table columns” opens.
❶ You can see the table columns “Name” and “Created On” are set. Now you can add another column to the view by hitting the [+View column] and
❷ Searching for it or
❸ Select one.
❹ It is also possible to create a new table column.

Figure 5: Power Apps – Table Column
Two Table columns were added (“Entity” and ”Subject”). The next very important step is to “Save” and “Publish”.
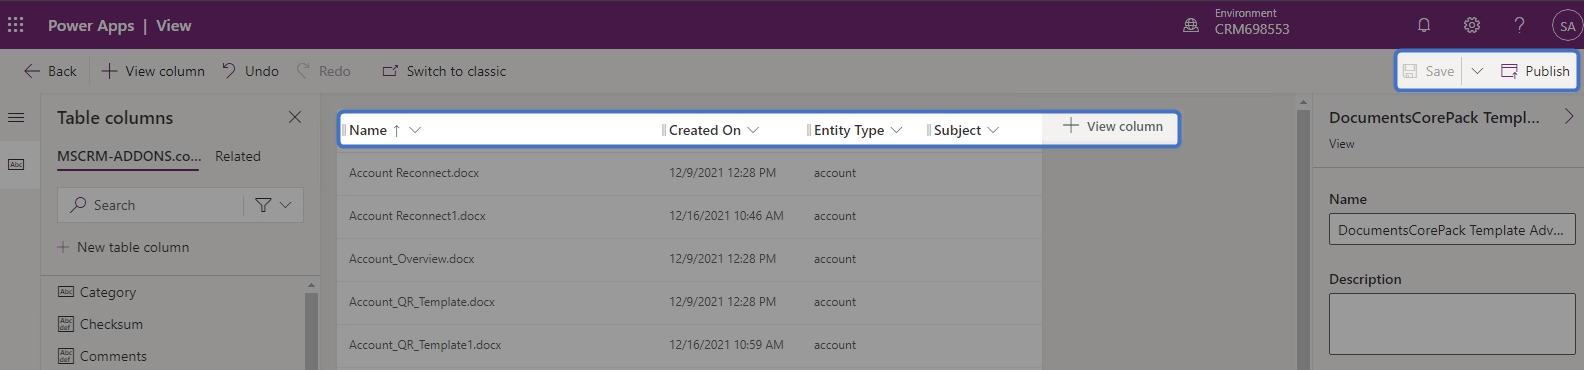
Figure 6: Power Apps – Save and Publish application
Test it in your DocumentsCorePack TemplateDesigner if it worked. Open the LookUp Record and check the table columns.
Please note: You have to restart the Dataprovider to make the changes work.

Figure 7: Successful added columns to DCP Lookup View
That’s it! We appreciate your feedback! Please share your thoughts by sending an email to support@mscrm-addons.com.