DocuSign is another tool that simplifies the world of e-signatures. It empowers you to electronically sign documents. This blog article outlines how to create a DocumentsCorePack template for DocuSign.
First open Microsoft Word, navigate to the www.mscrm-addons.com tab and follow the instructions below.

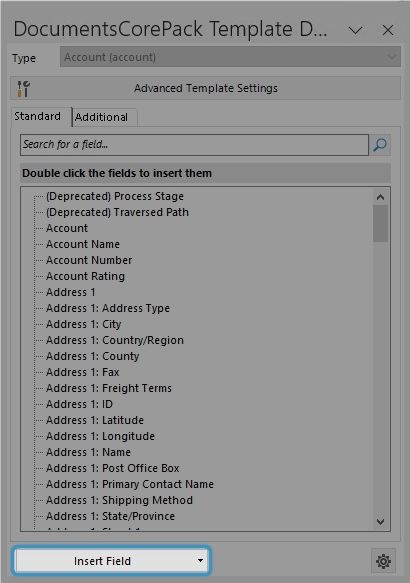
Step 1. Open the Insert Mail Merge Fields window and then click on the Insert Field button drop-down menu.
Step 2. Select Insert DocuSign Item > Signature.
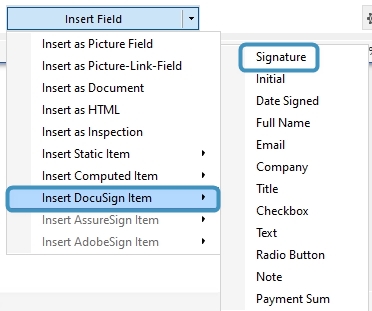
Please note: Besides Signature, you can also select Initial, Date Signed, Full Name, Email, Company, Title, and Checkbox.
Position your cursor where you want the field to be inserted.
![]()
Figure 4: Insert field function in the template
Step 3. Click on the field and then select the Field properties button to open the DocuSign Properties window. In this window, you can set the properties for your signature.
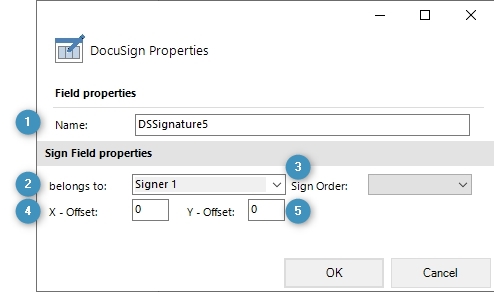
Step 4. Set your DocuSign Properties.
❶ Enter the Field Name in the DocumentsCorePack Template.
❷ Select one of your signers, add a new one, or delete one.
❸ Select a sign order.
❹ X-Offset sets the horizontal offset of the field.
❺ Y-Offset sets the vertical offset of the field.
When you are finished, click OK to proceed. You have now created your first DocumentsCorePack Template for DocuSign for 1 signer.
Learn how to create a DocuSign Document with multiple signees or how to merge a document and send it to DocuSign.
Back to the DocuSign overview.
That’s it! We appreciate your feedback! Please share your thoughts by sending an email to support@mscrm-addons.com.