Sometimes you may be asked to create a new SettingsKey for one of our products (e.g. for a customized development or if a special configuration is needed).
Please follow the steps below.
How to create a SettingsKey manually in Microsoft Dynamics 365
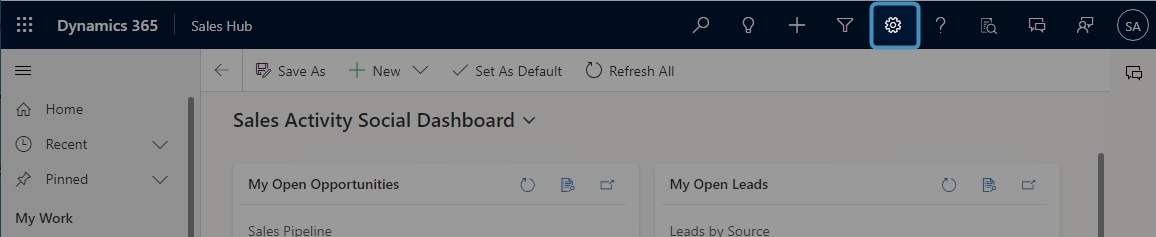
Step 1: Open your Dynamics 365 in your browser and navigate to the Settings button
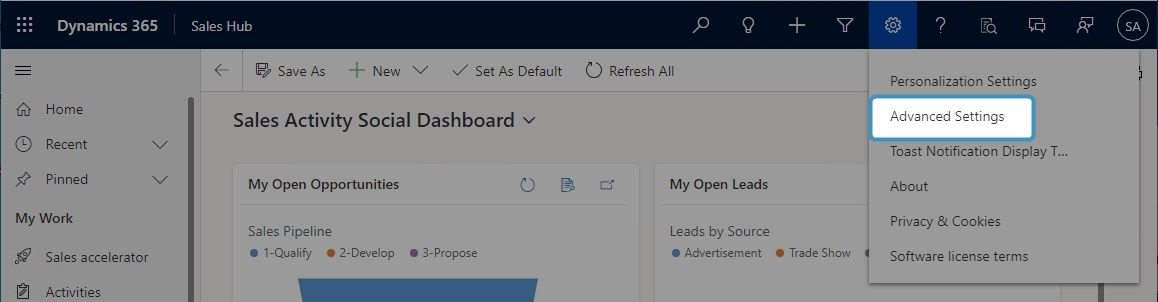
Step 2: Select Advanced Settings
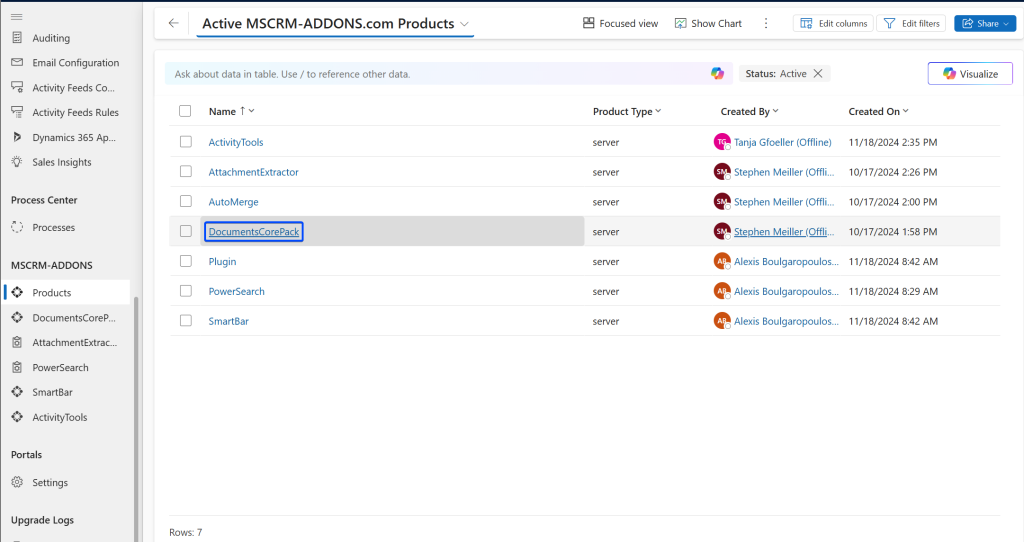
Step 3: Open the settings overview. Navigate to the MSCRM-ADDONS and choose Products.


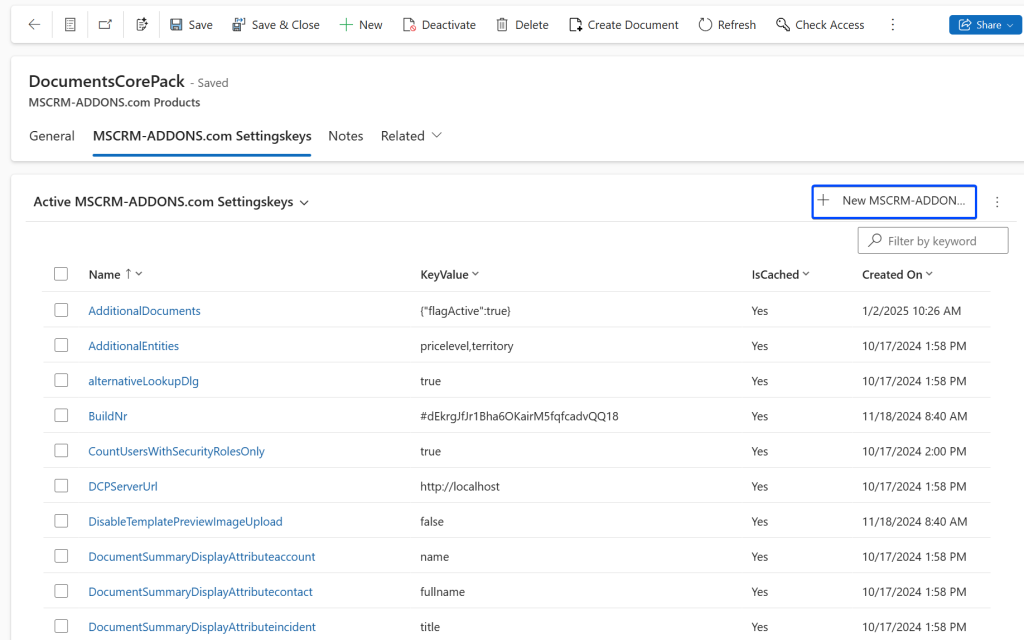
Step 4: All active MSCRM-ADDONS are listed. Please select the one you need to create a SettingsKey for (in this case it is the DocumentsCorePack).
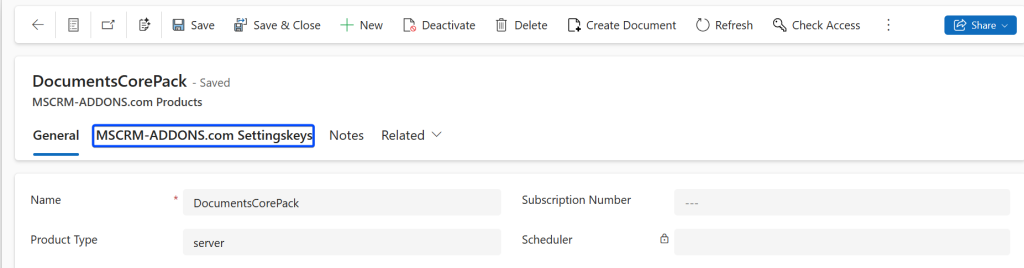
Step 5: Create a new SettingsKey by pressing this symbol on the right (Display the records associated with this view).
Step 6: The MSCRM-ADDONS.com Settingskey Associated View is shown. Press the New MSCRM-ADDONS.com Settingskey button.
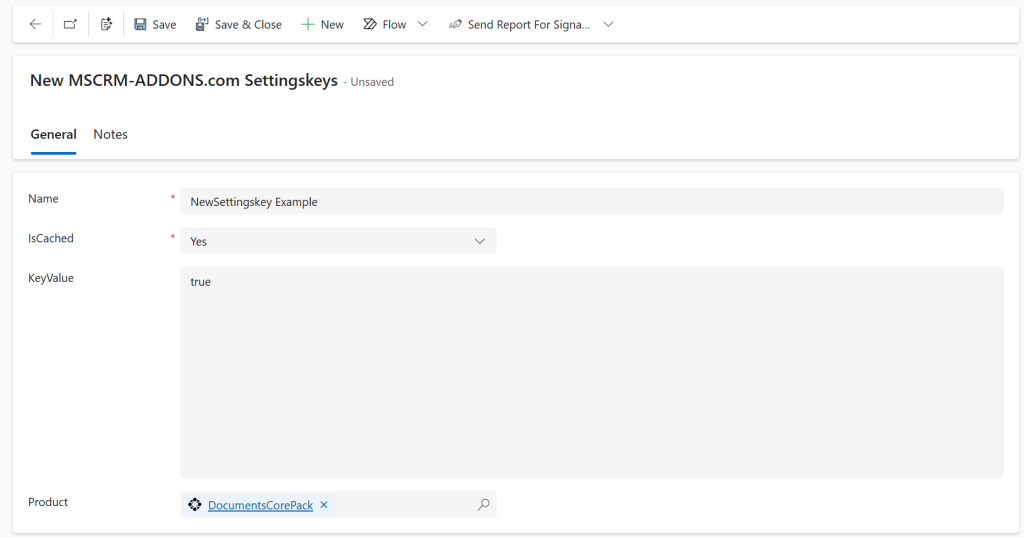
Step 7: This window pops up. You can create a new Settingskey here. Enter Name and KeyValue. Please pay attention to the product bar. The product should always appear when you create a SettingsKey. In the picture below, you can see, it is for the DocumentsCorePack.
Please note: If the new key is intended for a client application, you need to restart the Client application. Otherwise, the setting will not be applied to the Client.
How to restart the Client application properly please click here.
That´s it! We appreciate your feedback! Please share your thoughts by sending an e-mail to support@mscrm-addons.com