• Release History
  • Documentation
  • Back to www.mscrm-addons.com
  • Release History
  • Documentation
  • Back to www.mscrm-addons.com
home/Knowledge Base/ActivityTools (AT)/How to embed previews in CRM Dashboards

How to embed previews in CRM Dashboards

134 views 0 Updated on July 27, 2022

Thanks to this feature of ActivityTools, you can easily embed the ActivityTools previews to your CRM dashboard.

Depending on your configuration, it is possible to show one or mutliple previews in one dashboard.

Figure 1: Dashboard with one preview (email-preview)


Figure 2: Dashboard with two previews (email-preview and account-preview)


How to embed the previews in CRM dashboards

After you have successfully installed ActivityTools, you can configure your dashboard.

Start in the Workplace-area in your CRM system and navigate to CRM Dashboards.

  • If there are already some defined custom dashboards, select the custom dashboard you want to edit from the Dashboards dropdown-menu and click on the [Edit]-button in the CRM menu.
  • If you would like to create a new custom dashboard, simply click on the [New]-button in the CRM menu.

Figure 3: Dashboards-area in CRM workplace

Next, enter a name for your dashboard in the dashboard-configuration-window.
Then doubleclick on the grid in which you want the preview to be shown.

In our example, we doubleclick on E-mail Messages. Then, the List of chart properties-window pops up. It has the attribute Name. Copy the value of the attribute Name into your Editor or anywhere you can save the name for later. Click on the [OK]-button to close the window.

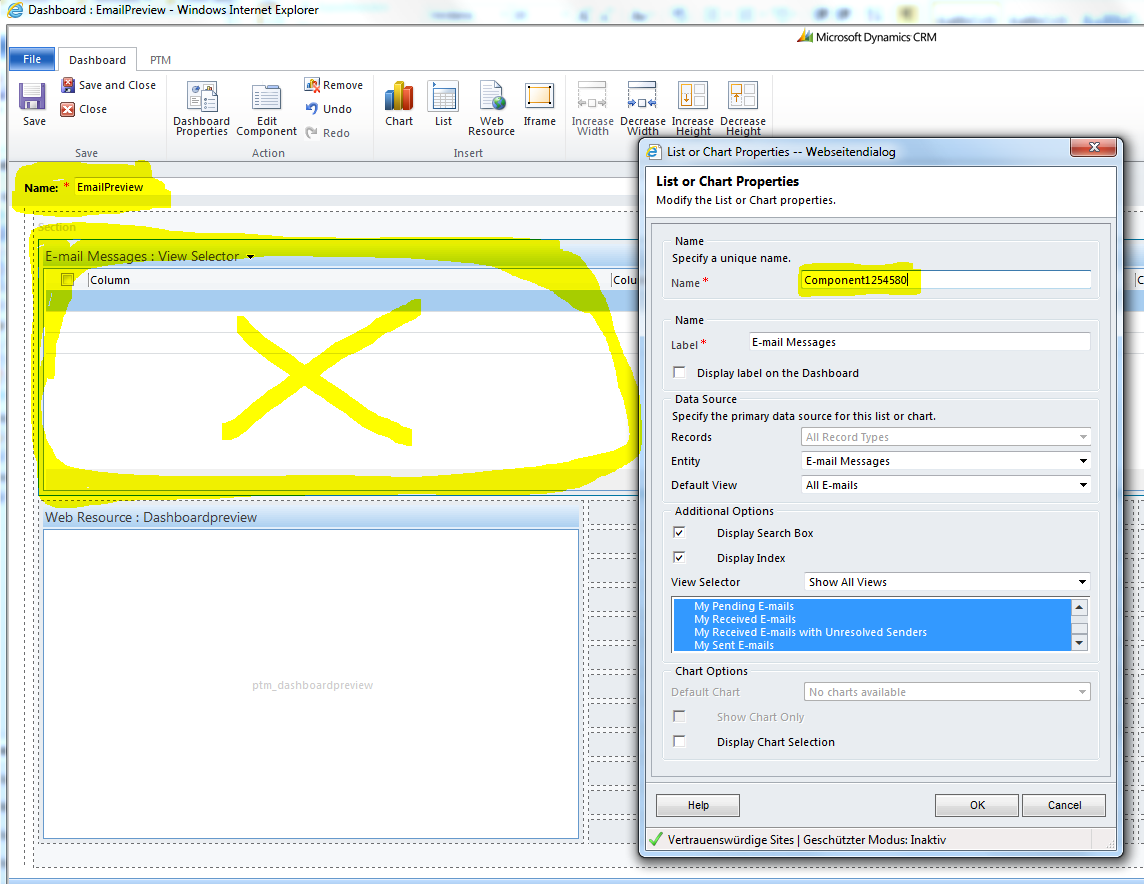
Figure 4: Dashboard-configuration-window and list of chart properties-window

Now click on Web Resource in the CRM menu in order to add a new webresource.
The Add Web Resource-window appears. Within this window, click on the [LookUp]-button to search for a web resource. Then another window appears. Within this window, type ptm_dashboardpreview into the search field and look for it. As soon as you have a match, select it and click on the [OK]-button.

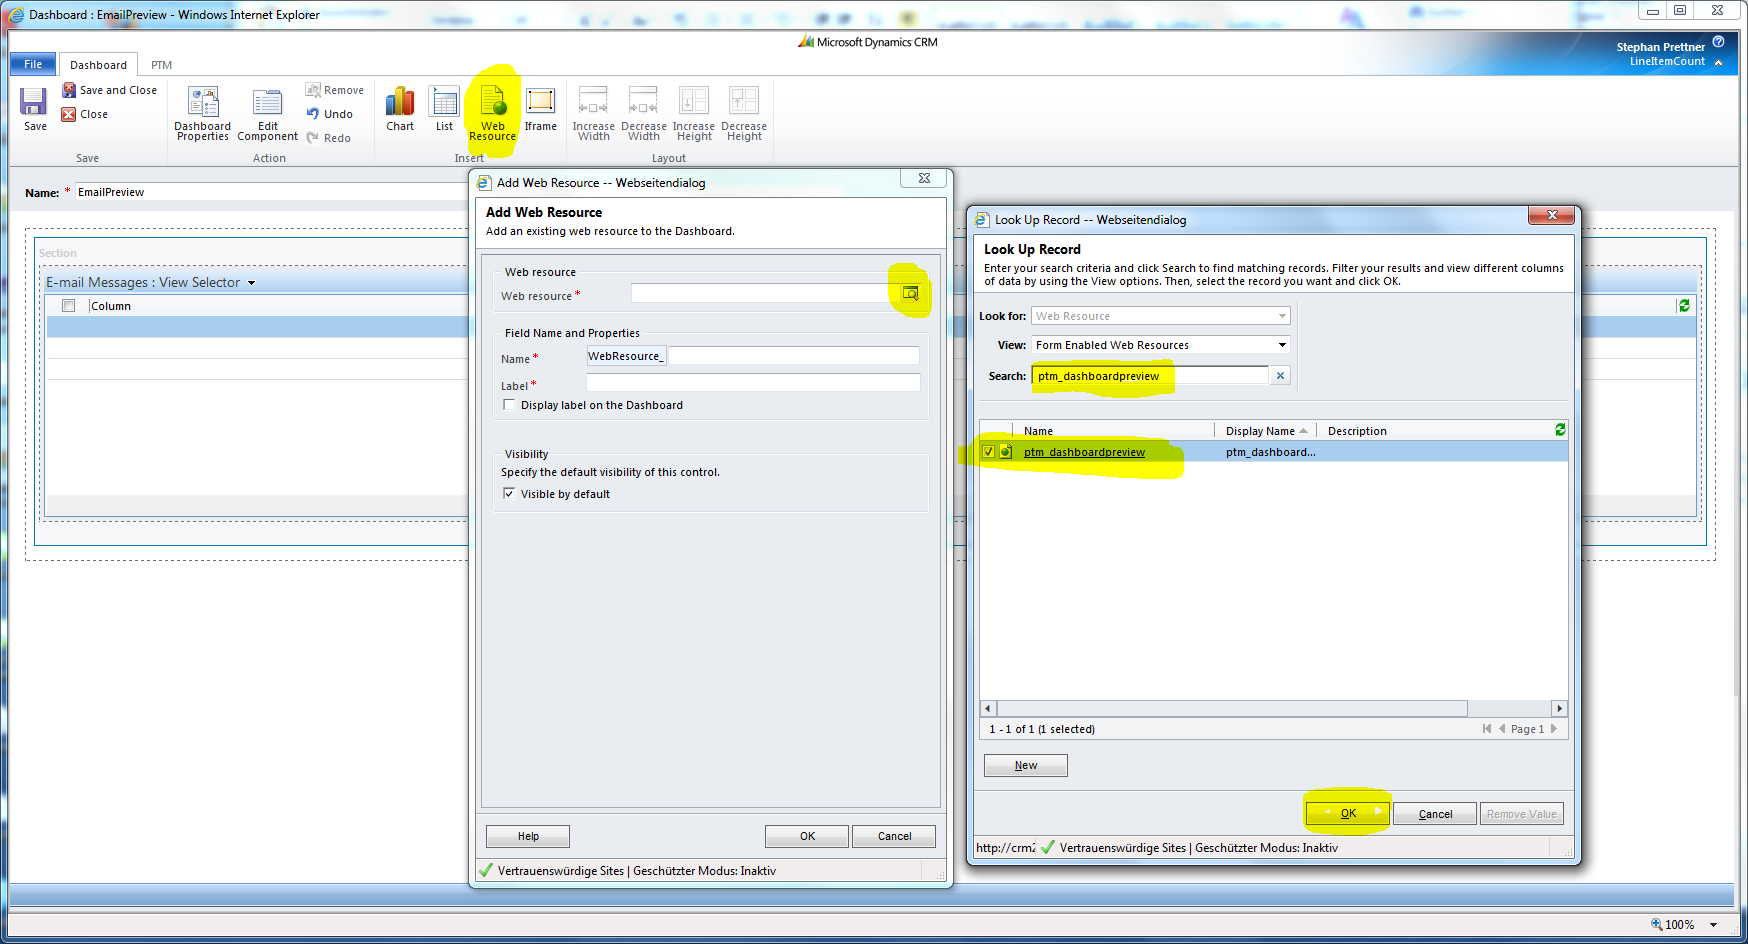
Figure 5: Add Web Resource-window and Look Up Record-window

Now enter a name and a label which you can select as dashboard-preview. In the Web Resource Properties-area of this window, insert the value of the gridname which you have copied previously. Once finished, hit the [OK]-button.

Figure 6: Add Web Resource-window

Now, the dashboard-preview has been added to the dashboard. To modify the height and witdh of the preview, click on the preview and use the scalingbuttons in the CRM menu on the top. Finally, click on the [Save and Close]-button to see the preview in your CRM Dashboards.

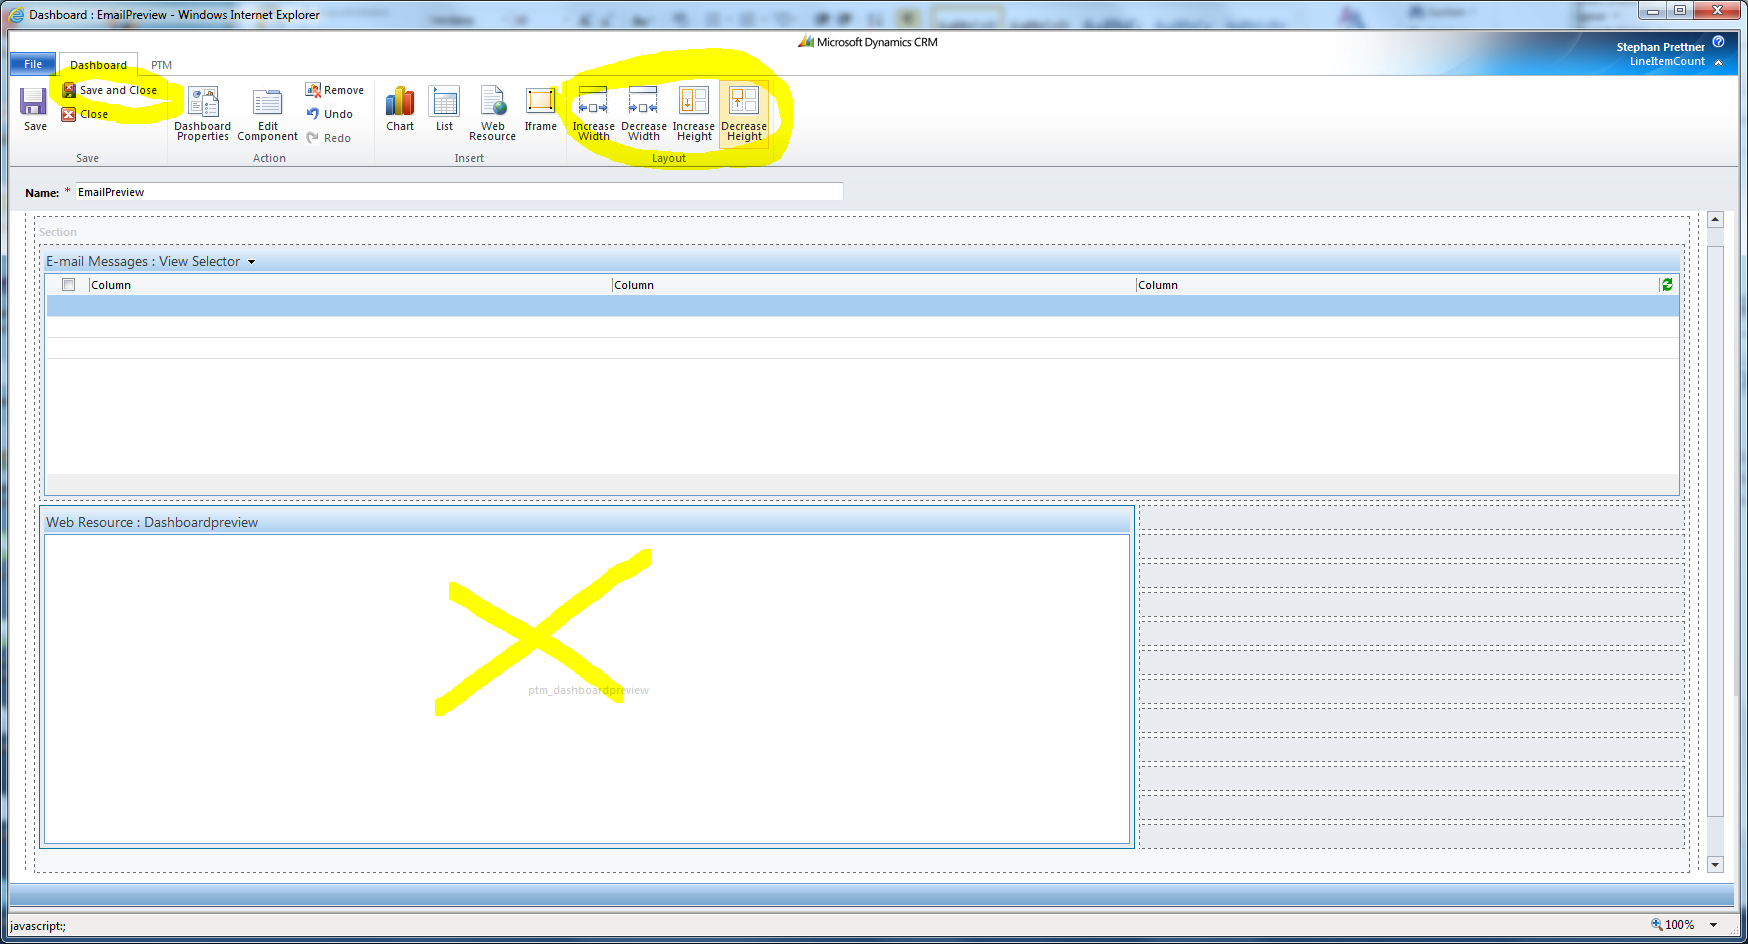
Figure 7: Dashboard-configuration-window

That’s it! We appreciate your feedback! Please share your thoughts by sending an email to support@mscrm-addons.com.

Was this helpful?

Yes  No
Related Articles
  • How to activate per User Licensing in CRM 2011
  • ActivityTools – Important information for Dynamics 365 Online update v. 9.2.22083
  • How to access mscrm-addons product settings in Dynamics 365
  • Azure Active Directory licensing counts explained
  • ActivityTools for Dynamics 365 – Customize date time format in activities grid
  • When ActivityTools or SmartBar are showing no or wrong related activities in Dynamics 365
Latest Articles
  • New DocumentsCorePack Connector features for Power Automate
  • Office Theme Support of DocumentsCorePack
  • AssureSign for DocumentsCorePack
  • Dynamic Document Properties
  • How to conditionally remove a watermark in DocumentsCorePack templates
Popular Articles
  • Where do I find the Unique Organization name in Microsoft Dynamics 365?
  • mscrm-addons.com Application Access for Dynamics 365 (App Access) – DocumentsCorePack
  • DocumentsCorePack Online Service Configuration
  • DocumentsCorePack Template Designer – Getting Started
  • Step-by-Step: How to configure a One-Click-Action
Top Rated Articles
  • IMPORTANT information for Dynamics 365 online customers using DocumentsCorePack and/or AttachmentExtractor
  • How to activate the DocumentsCorePack connector for PowerApps & Microsoft Flow
  • Step-by-Step: How to configure a One-Click-Action
  • Online Services: Required Application Permissions
  • Information on Security roles: Which roles are needed for which solution?
Categories
  • *News and General Infos* 51
  • Webinars 35
  • Template Designer(DCP 173
  • DocumentsCorePack(DCP 191
  • TelephoneIntegration (TI 65
  • AttachmentExtractor (AE 62
  • PowerSearch (PS 48
  • ActivityTools (AT 59
  • SmartBar (SB 53
  • GroupCalendar (GC 46
Our Vision

“We see it as our purpose to provide products that simplify and speed up our customers’ Microsoft Dynamics 365 experience.”

Knowledgebase
LogIn
mscrm-addons.com
  • Products
  • Online Shop
  • Downloads
  • My Account
About Us
  • About Us
  • Case Studies
  • Newsletter
  • Partner Program
  • Contact
Support
  • Support
  • Terms & Conditions
  • Documentation
  • Webinars
  • Legal Documents
  • Impressum
  • © 2022 www.mscrm-addons.com. All Rights Reserved.