• Release History
  • Documentation
  • Back to www.mscrm-addons.com
  • Release History
  • Documentation
  • Back to www.mscrm-addons.com
home/Knowledge Base/Template Designer(DCP)/How to enable debugging for DocumentsCorePack TemplateDesigner

How to enable debugging for DocumentsCorePack TemplateDesigner

2240 views 0 Updated on March 8, 2024

Debugging helps our support team to identify and correct errors and investigate issues you might experience when using DocumentsCorePack.  This article describes how to activate debugging and access log files to be provided to our support team.

Step-by-Step description:

Step 1: Open Microsoft Word, navigate to the DocumentsCorePack TemplateDesigner by clicking the ❶ www.mscrm-addons.com-tab and open the ❷ DocumentsCorePack Settings.

DocumentsCorePack TemplateDesigner in Word ribbon
Figure 1: Open DocumentsCorePack Settings in TemplateDesigner

Step 2: The DocumentsCorePack Settings-window opens. Navigate to the ❶ General-tab and check the ❷ Activate Debugging-option.

DocumentsCorePack settings, General tab, Debugging is activated
Figure 2: Activate Debugging

Step 3: In the ribbon of the DocumentsCorePack TemplateDesigner you can find the following three options:

❶ Open LOG Folder
❷ Delete LOG Files
❸ Open latest Debug

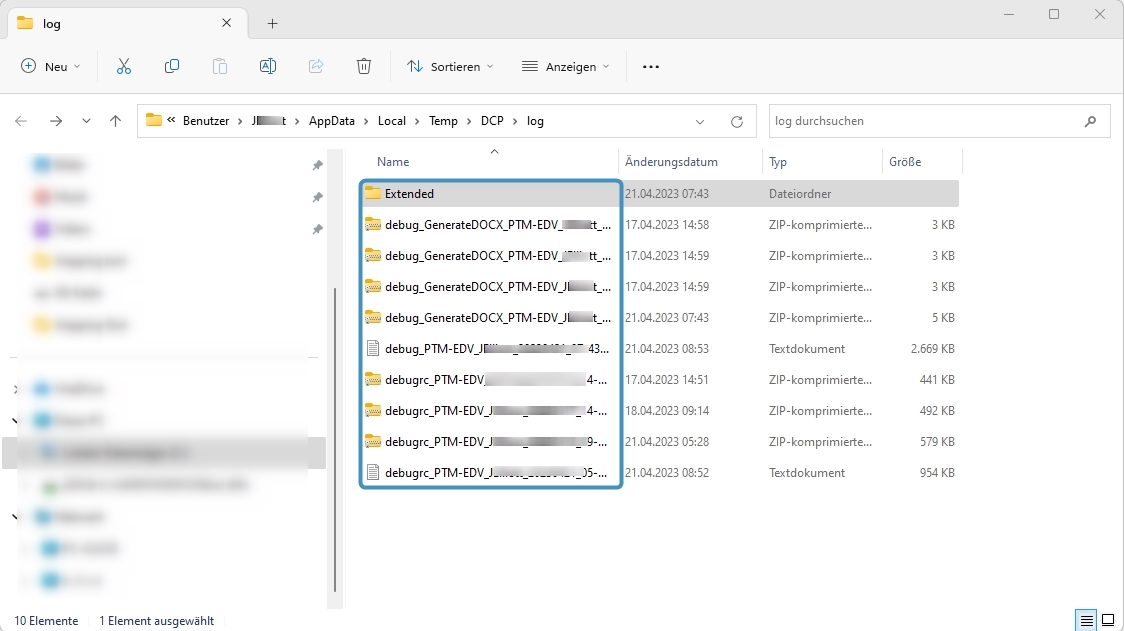
IMPORTANT: It is recommended to delete all Log files before you recreate the error by repeating all steps you took until the error occurs. Then click on Open LOG Folder and send the files, including the files from the Extended Folder to our support team with a brief description of what steps were taken. We also recommend sending the files as a .zip-file.

DocumentsCorePack TemplateDesigner in Word ribbon showing debug options
Figure 3: Debug options

Please send us all the files from the log file folder:

end all Files from the log file folder
Figure 4: Send all Files from the log file folder

Troubleshooting

No access to DocumentsCorePack Settings

If you are unable to open the DocumentsCorePack TemplateDesigner due to an error or other issue, debugging can be enable in an alternative way.

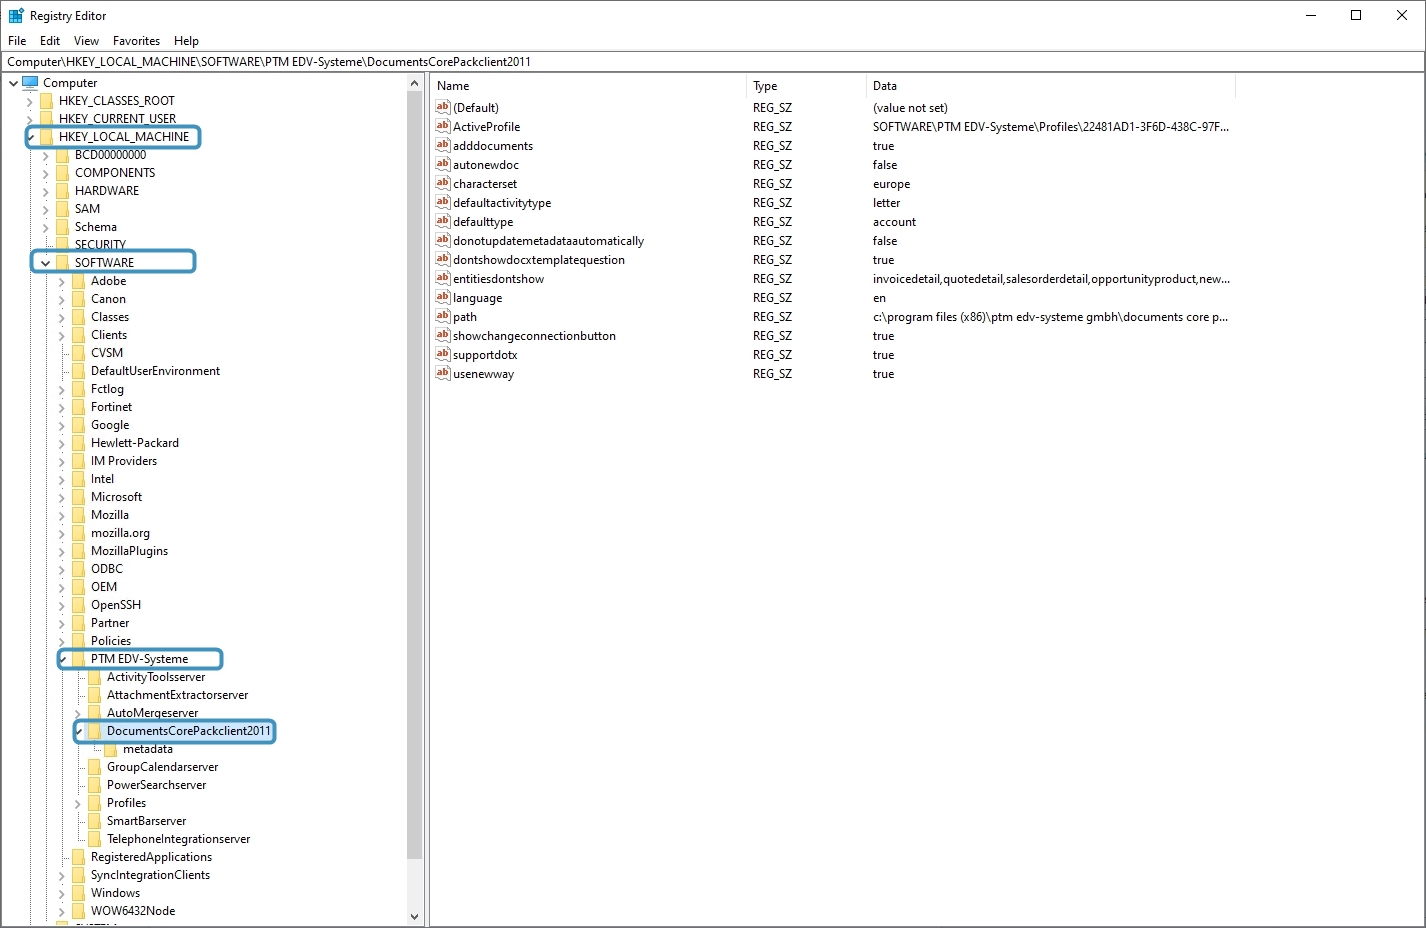
Open the Registry Editor (e.g., via the Microsoft search pane) and go to HKEY_LOCAL_MACHINE > SOFTWARE > PTM EDV-Systeme > DocumentsCorePackclient2011.

Open Registry Editor
Figure 5: Open Registry Editor

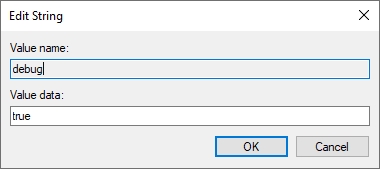
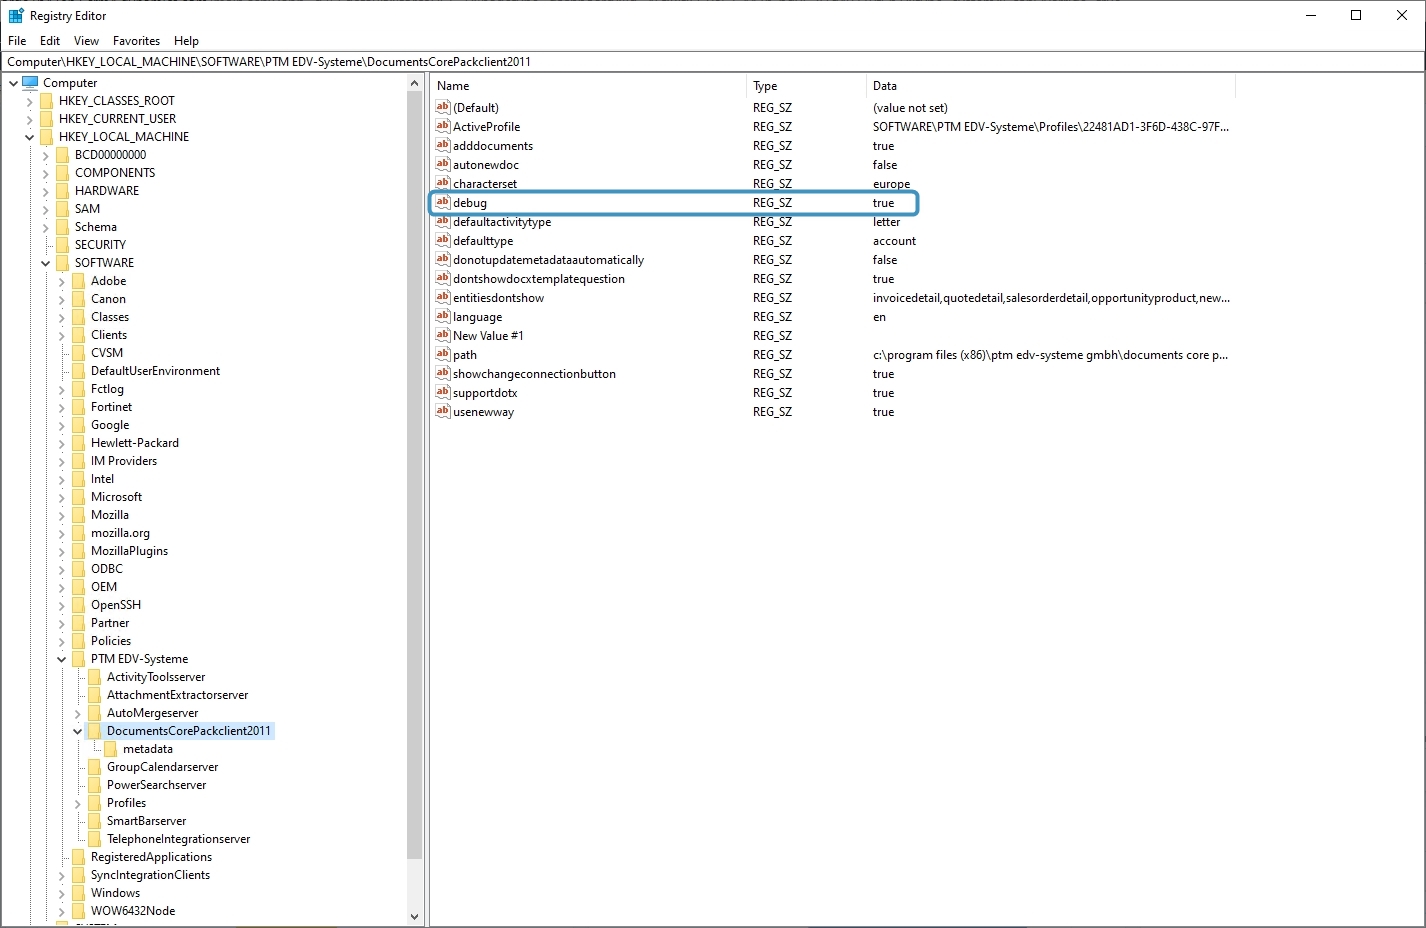
Right-click in the DocumentsCorePackclient2011 registry tree and create a new string value with the value name set to “debug” and the value data set to “true“. Confirm with [OK].

Value name is debug and Value data is true for new string
Figure 6: Set name and value
New created string in Registry editor
Figure 7: New string created for debug

Locating errors and warnings in the Event Viewer

In some circumstances, we may need information recorded within the Windows Event Viewer to determine particular issues.

After opening the Event Viewer, navigate to the ❶ Windows Logs and select either the ❷ Application or ❸ System elements.
The Event Viewer, with the Windows Log tab selected
Figure 8: The Event Viewer, with the Windows Log tab selected

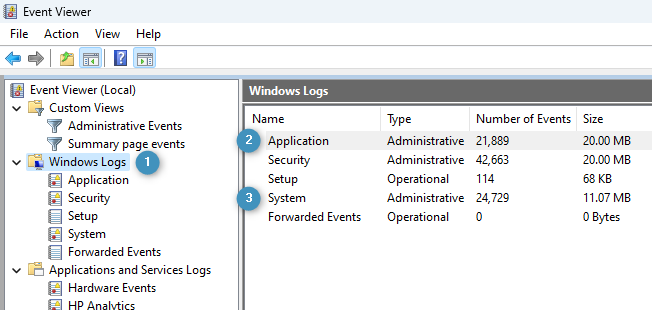
Under these elements, check for any noticeable logged errors that occurred during the time of a given issue.  If an error has been found, select the log and save it by navigating to the Action tab and selecting Save Selected Events.

Saving a selected event.  Multiple events may also be selected and saved.
Figure 9: Saving a selected event. Multiple events may also be selected and saved.

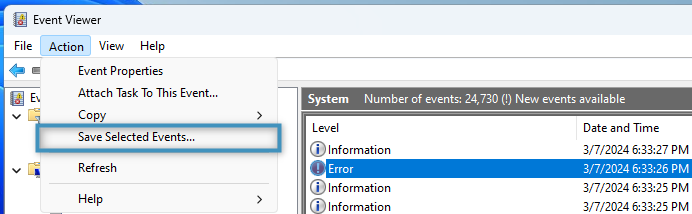
The saved file can be sent to our support team for further investigation.

That’s it! We appreciate your feedback! Please share your thoughts by sending an email to support@mscrm-addons.com.

Was this helpful?

Yes  No
Related Articles
  • Ensuring correct time zone display for DateTime fields
  • How to compare a date-fields with the current date 
  • Create a template for XML or plain text
  • E-Invoicing with DocumentsCorePack
  • How to add content from SharePoint to a document
  • Using MS Word field codes in DocumentsCorePack templates
Latest Articles
  • How to Eliminate Excess Storage Costs in Microsoft Dynamics 365 Without Losing Access to Emails and Attachments
  • 3 Ways DocumentsCorePack Transforms Proposal, Quote, and Contract Creation
  • DeepSign for DocumentsCorePack 
  • Generate and send a document for e-signing using DeepSign
  • How to prepare a document for DeepSign
Popular Articles
  • DocumentsCorePack Template Designer – Getting Started
  • Step-by-Step: How to configure a One-Click-Action
  • Application Access for Dynamics 365
  • How to find your environment’s unique name in Microsoft Dynamics 365
  • How licenses are counted
Top Rated Articles
  • “Undefined”-labels in Chrome and Edge 114 and higher
  • Important information for Dynamics 365 online customers using DocumentsCorePack and/or AttachmentExtractor
  • How to activate the DocumentsCorePack Connector for PowerApps & Microsoft Flow
  • How licenses are counted
  • How to insert Condition Fields in DocumentsCorePack Templates designer
Categories
  • *News and General Infos* 64
  • Webinars 45
  • Template Designer(DCP 196
  • DocumentsCorePack(DCP 257
  • TelephoneIntegration (TI 65
  • AttachmentExtractor (AE 74
  • PowerSearch (PS 50
  • ActivityTools (AT 61
  • SmartBar (SB 54
  • GroupCalendar (GC 47
Our Vision

“We see it as our purpose to provide products that simplify and speed up our customers’ Microsoft Dynamics 365 experience.”

Knowledgebase
LogIn
mscrm-addons.com
  • Products
  • Online Shop
  • Downloads
  • My Account
About Us
  • About Us
  • Case Studies
  • Newsletter
  • Partner Program
  • Contact
Support
  • Support
  • Terms & Conditions
  • Documentation
  • Webinars
  • Legal Documents
  • Impressum
  • © 2022 www.mscrm-addons.com. All Rights Reserved.