• Release History
  • Documentation
  • Back to www.mscrm-addons.com
  • Release History
  • Documentation
  • Back to www.mscrm-addons.com
home/Knowledge Base/SmartBar (SB)/How to enable debugging for the show-license-info plugin for Dynamics 365

How to enable debugging for the show-license-info plugin for Dynamics 365

287 views 0 Updated on July 26, 2022

This blog article describes how you can activate debugging for the Licensing page plugin.

The article is relevant if you get the following error message although this setting exists. The message below can appear on the licensing tab of the web configuration.

 Error message
Figure 1: Error message

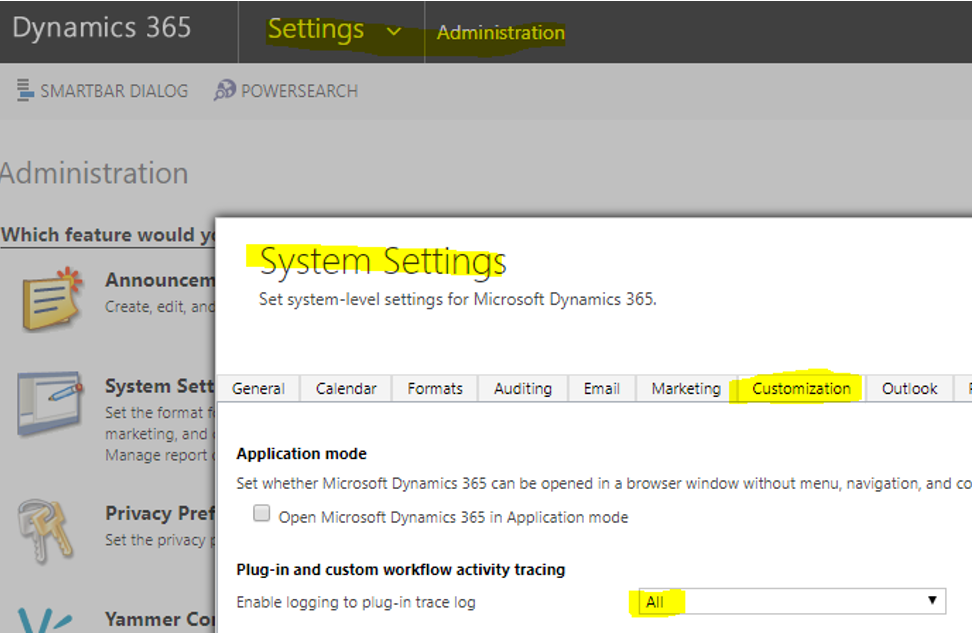
First, you have to enable tracing for your organization: Open a browser and navigate to Dynamics 365 -> Settings -> Administration -> System Settings -> [Customization]-tab and select “All” from the drop-down menu of the Enable logging to plug-in trace log.

 System Settings
Figure 2: System Settings

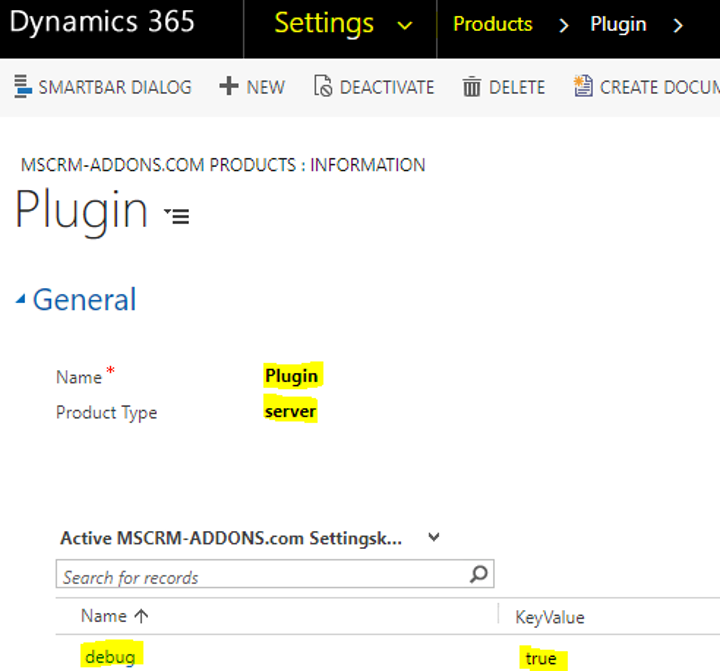
Next, go to Dynamics 365 -> Settings -> Products and check if a record named “Plugin” already exists. If not create a new one by hitting the “NEW” button.
Name: Plugin
Product Type: server

In the subgrid in its body ensure that a Settings Key with the following information exists:
Name: debug
KeyValue: true

The result will look like in the figure below:

Plugin record
Figure 3: Plugin record

Next, reload the licensing page to generate log files.

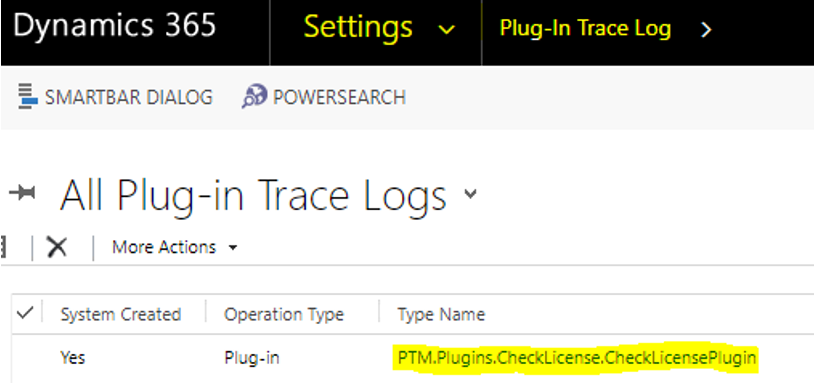
Then access the log files: Dynamics 365 -> Settings -> Plug-In Trace Log and look for “PTM.Plugins.CheckLicense.CheckLicensePlugin”.

PTM.Plugins.CheckLicense.CheckLicensePlugin
Figure 4: PTM.Plugins.CheckLicense.CheckLicensePlugin

Finally please send us the content of the “Message Block” field.

That’s it! We appreciate your feedback! Please share your thoughts by sending an email to support@mscrm-addons.com.

Was this helpful?

Yes  No
Related Articles
  • Sample Templates 
  • Dynamic document Header & Footer selection via the DocumentsCorePack Dialog
  • Azure Blob Storage: Setting Recommendations 
  • Migrating One-Click-Actions Using the Data Migration Tool 
  • Force Service to be the only document-generating service
  • The DocumentsCorePack Dialog
Latest Articles
  • Sample Templates 
  • Step-by-Step: How to create an account sales report template
  • Step-by-Step: How to create a NDA-contract template 
  • Step-by-Step: How to create a work order template
  • Step-by-Step: How to create a quote template 
Popular Articles
  • DocumentsCorePack Template Designer – Getting Started
  • Step-by-Step: How to configure a One-Click-Action
  • Where do I find the Unique Organization name in Microsoft Dynamics 365?
  • mscrm-addons.com Application Access for Dynamics 365 (App Access) – DocumentsCorePack
  • DocumentsCorePack Online Service Configuration
Top Rated Articles
  • “Undefined”-labels in Chrome and Edge 114 and higher
  • IMPORTANT information for Dynamics 365 online customers using DocumentsCorePack and/or AttachmentExtractor
  • How to activate the DocumentsCorePack connector for PowerApps & Microsoft Flow
  • Step-by-Step: How to configure a One-Click-Action
  • How licenses are counted
Categories
  • *News and General Infos* 52
  • Webinars 37
  • Template Designer(DCP 192
  • DocumentsCorePack(DCP 204
  • TelephoneIntegration (TI 65
  • AttachmentExtractor (AE 64
  • PowerSearch (PS 48
  • ActivityTools (AT 59
  • SmartBar (SB 53
  • GroupCalendar (GC 46
Our Vision

“We see it as our purpose to provide products that simplify and speed up our customers’ Microsoft Dynamics 365 experience.”

Knowledgebase
LogIn
mscrm-addons.com
  • Products
  • Online Shop
  • Downloads
  • My Account
About Us
  • About Us
  • Case Studies
  • Newsletter
  • Partner Program
  • Contact
Support
  • Support
  • Terms & Conditions
  • Documentation
  • Webinars
  • Legal Documents
  • Impressum
  • © 2022 www.mscrm-addons.com. All Rights Reserved.