These step-by-step instructions show you how to enable the SharePoint integration in MS Dynamics 365, and how to automatically create SharePoint folders for your records. This must be done so that you can use the AttachmentExtractor to move files from Dynamics 365 to SharePoint, and use DocumentsCorePack (DCP) to save in SharePoint.
The SharePoint integration feature enables you to store and manage documents on SharePoint in Dynamics 365 for Customer Engagement records. This feature also allows you to use the SharePoint document management abilities in Dynamics 365 for Customer Engagement, such as checking the document in and out, viewing version history, and changing document properties.
❶ Enable Server-Based SharePoint Integration
Step 1: Visit the Microsoft Power Platform, go to Environments and select your environment for SharePoint. Then go to Settings and click Integration. Finally, select Document management settings and then Enable Server-Based SharePoint Integration to verify your SharePoint path/address.

Figure 1: Access the Document Management in Dynamics 365
Step 2: A window will appear with an overview of the function. Click Next.
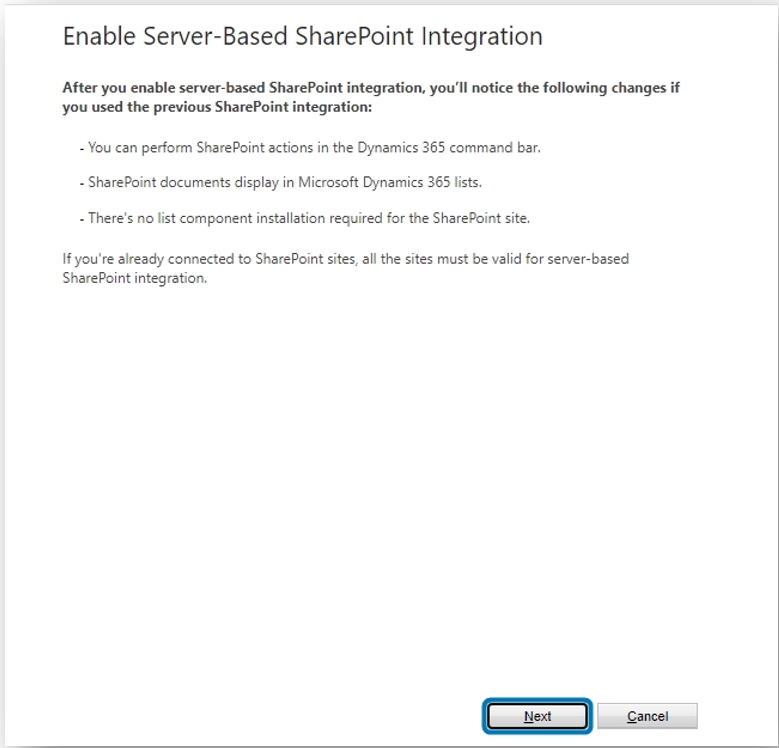
Figure 2: Enable Server-Based SharePoint Integration
Step 3: Define Deployment by selecting whether your SharePoint sites are located Online or On-Premises. Then click Next.
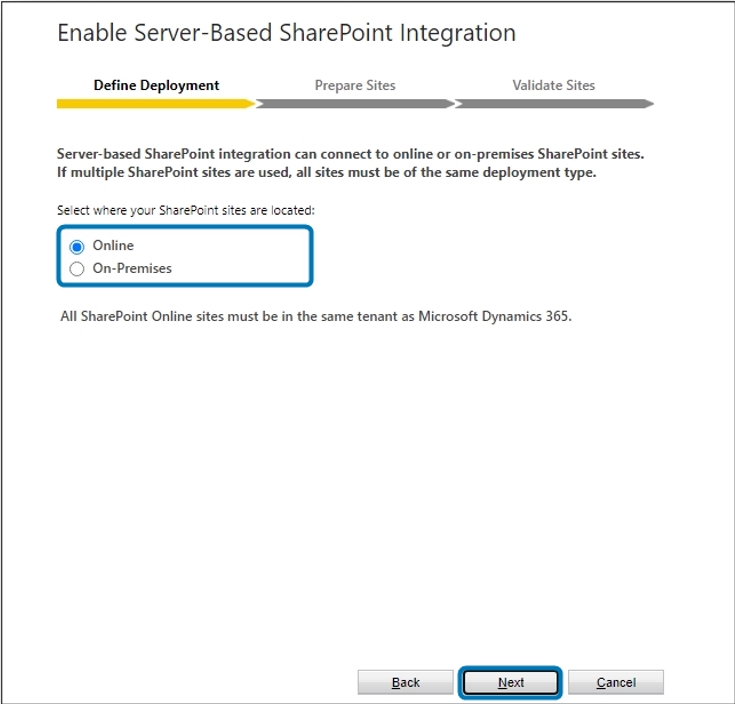
Figure 3: Define Deployment
Step 4: Prepare sites by entering the URL of the SharePoint site for use with server-based integration. Then click Next.

Figure 4: Prepare sites
Step 5: You will then see a verification that the site validation was successful. Click Finish.

Figure 5: Validate Sites
❷ Document Management Settings
Step 1: Access the Document Management Settings in your Dynamics 365 to select default document management settings for your organization.
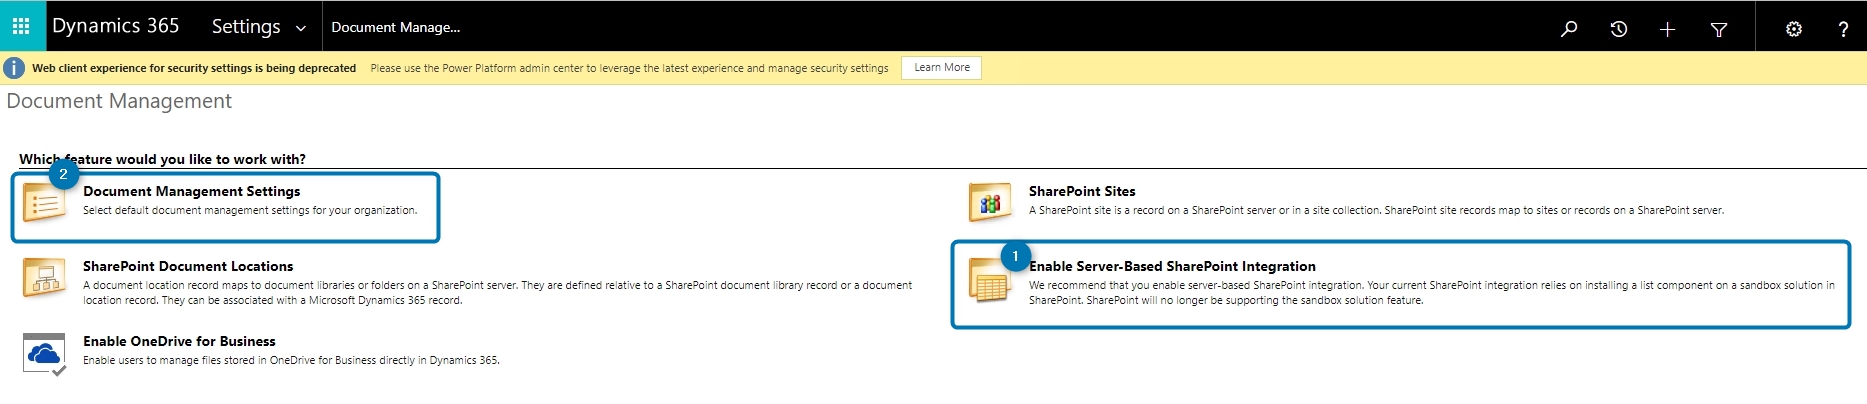
Figure 6: Access the Document Management in Dynamics 365
Step 2: Select the tables for which your document management should be enabled for. Then enter a SharePoint site that will be used as a default site for management. Click Next.

Figure 7: Document management settings
Step 3: Simply follow the instructions in the next window to create a folder structure based on a certain table. Then click Next to proceed.
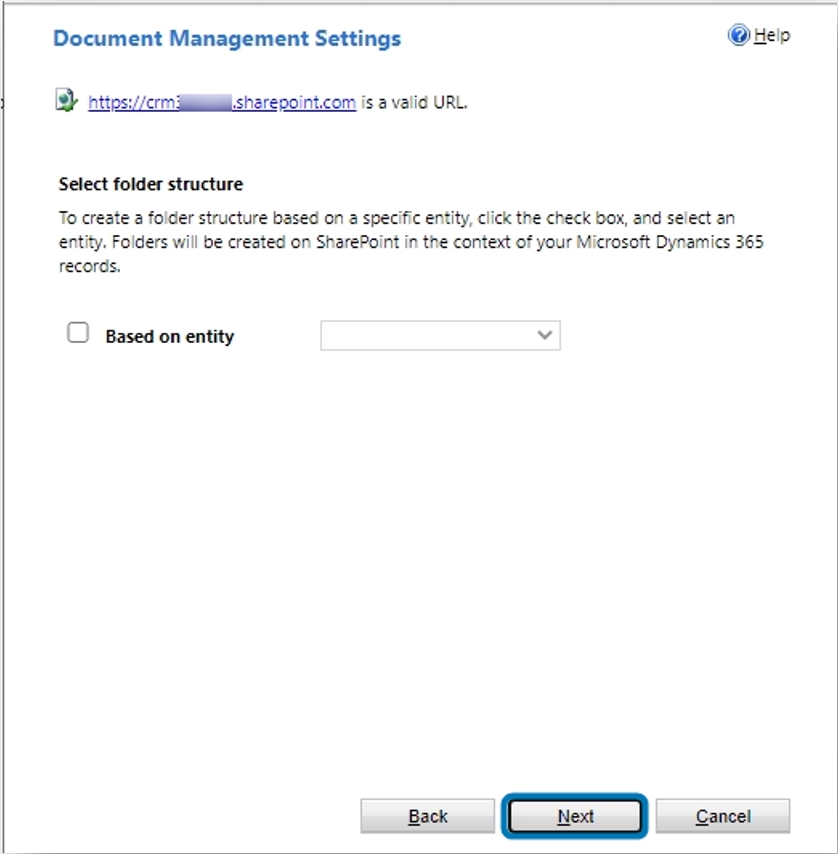
Figure 8: Create a folder structure
Step 4: This window will show you the path that the Document Libraries are being created at. Confirm with OK.
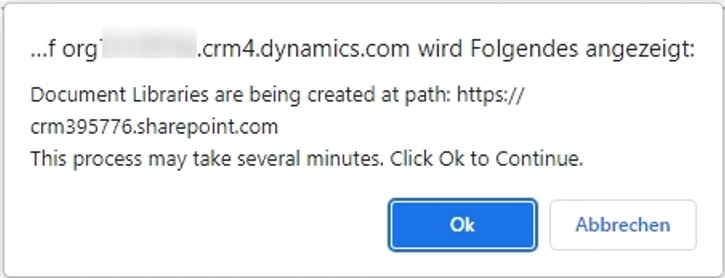
Figure 9: Document Library Creation status
Step 5: After the creation process is finished, the next window will provide you with the document library creation status and details. Click Finish.
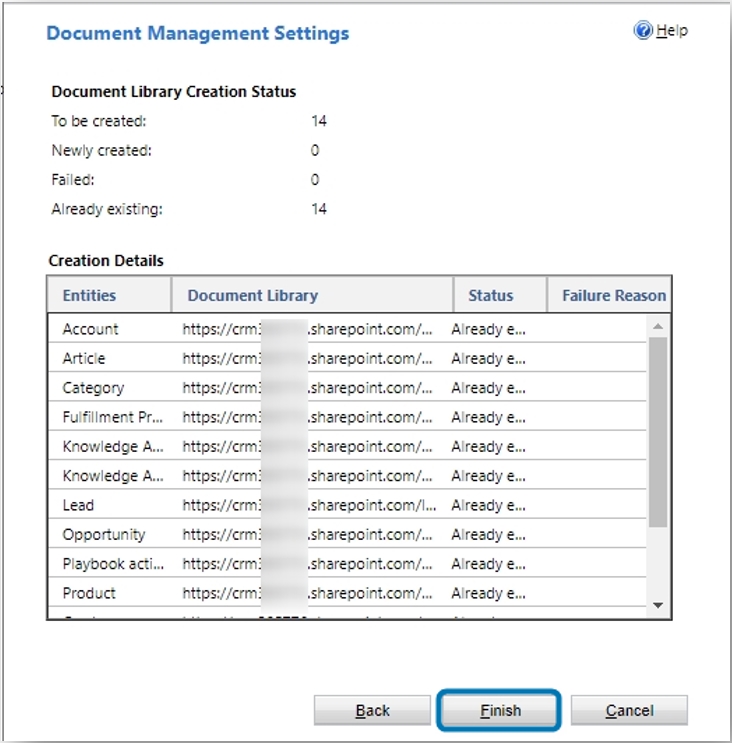
Figure 10: Document Library Creation status
That’s it! If you require further assistance or would like to share feedback, please reach out to us at support@mscrm-addons.com.
For additional reference to related topics, please explore the articles below: