DocumentsCorePack (DCP) integrates with SharePoint and supports saving and managing generated documents in respective SharePoint folders. The Dynamics 365 SharePoint integration enables you to utilize all SharePoint document management abilities, including checking the document in and out, viewing version history, searching capabilities, and more. You can also save on high storage costs with this integration.
This blog article outlines how to activate SharePoint in DCP and the available options for saving a document to SharePoint.
Prerequisites:
Depending on the context, the following options to save to SharePoint are supported:
1. Via DCP Dialog
In your Dynamics 365, select the [Create document] button from your starting record. The DCP dialog will open. Once you reach the processing settings, a “Save to SharePoint” checkbox allows you to store the file in the SharePoint folder of that record.

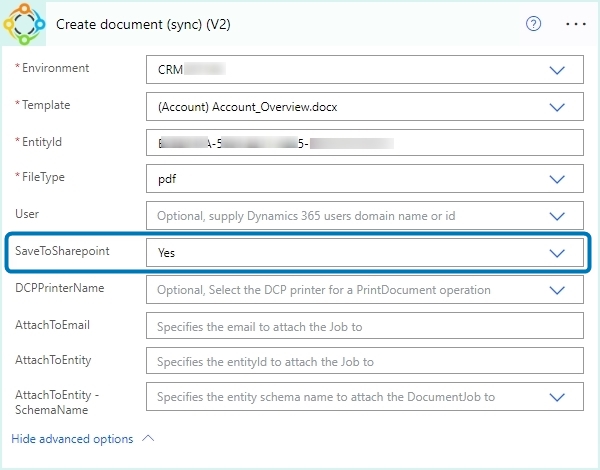
2. Via Power Automate
The [Create a document (sync)] as well as the [Create DocumentJob (async)] actions have a parameter that allows you to select if the created document should be stored in SharePoint.
3. Via Dynamics 365 Workflow
In classic Dynamics 365 workflows, you will find an option titled “SaveOnlyIntoTemp” when creating an AutoMergeWorkingItem. If you set this option to “No” the document is saved to the SharePoint folder of the respective record.

Additional Features
- Populate Metadata on SharePoint with Dynamics 365 values: Learn more
- Specify the save location if a record has multiple locations: Learn more
- Create SharePoint locations, folders, and subfolders using DCP: Learn more
- Create SharePoint locations, folders, and subfolders using DCP in On-Premise environments: Learn more
- Save generated documents to a specified SharePoint URL in a classic workflow: Learn more
- Attach a document from SharePoint to an e-mail in a classic workflow: Learn more
- Attach multiple documents to an e-mail via the DCP Dialog: Learn more
Troubleshooting
- This article explains how to handle issues with SharePoint path limitations (For example: “Error 414” when exceeding the maximum path length of 260 characters).
- This article shows how to correct SharePoint paths exceeding the limitations (Advanced).
- This article explains what to do when you receive the error message “No part of the path in DCP” Online.
- This article explains what to do when you receive the error message “No part of the path in DCP” OnPremise.
- This article explains how to act if you are facing check-in/check-out issues when uploading documents to SharePoint via DCP.
That’s it! We appreciate your feedback! Please share your thoughts by sending an email to support@mscrm-addons.com.