mscrm-addons.com logomscrm-addons.com logo
  • Release History
  • Knowledge Base
  • Documentation
  • Contact Support
  • Release History
  • Knowledge Base
  • Documentation
  • Contact Support
home/Knowledge Base/DocumentsCorePack(DCP)/Setting up the DocumentsCorePack Custom Connector for Power Automate

Setting up the DocumentsCorePack Custom Connector for Power Automate

1119 views 1 Updated on November 2, 2026

In this article, we will show you how to create a DocumentsCorePack custom connector for PowerAutomate enabling users to utilize the document generation and processing capabilities within their Flows and Canvas Apps.

Important: The method described here is already outdated and is only useful for manually importing the DocumentsCorePack REST-API. We highly recommend using the certified DocumentsCorePack connector. Please go to following article to learn how you can set up the certified connector.

Prerequisites:

  • Your DocumentsCorePack service must be hosted on mscrm-addons.com (Open Service Configuration)
  • Your DocumentsCorePack service must use Server2Server authentication

​Step-by-Step guide:

1. Visit https://documentapi.mscrm-addons.com/swagger/v1/swagger.json and save the JSON file locally.
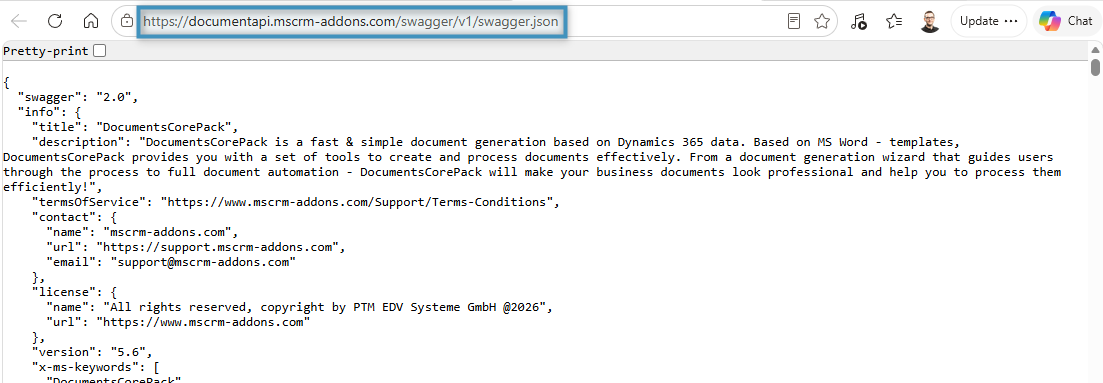
The JSON file
Figure 1: The JSON file

2. Navigate to Power Automate, choose the environment you want to add the connector too and go to More -> Discover all.
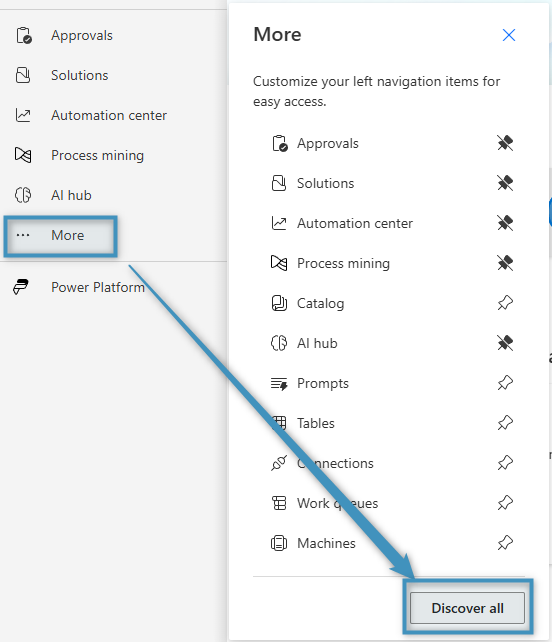
Figure 2: Navigating to "Discover all"
Figure 2: Navigating to “Discover all”

3. Scroll down to Data and select Custom connectors.
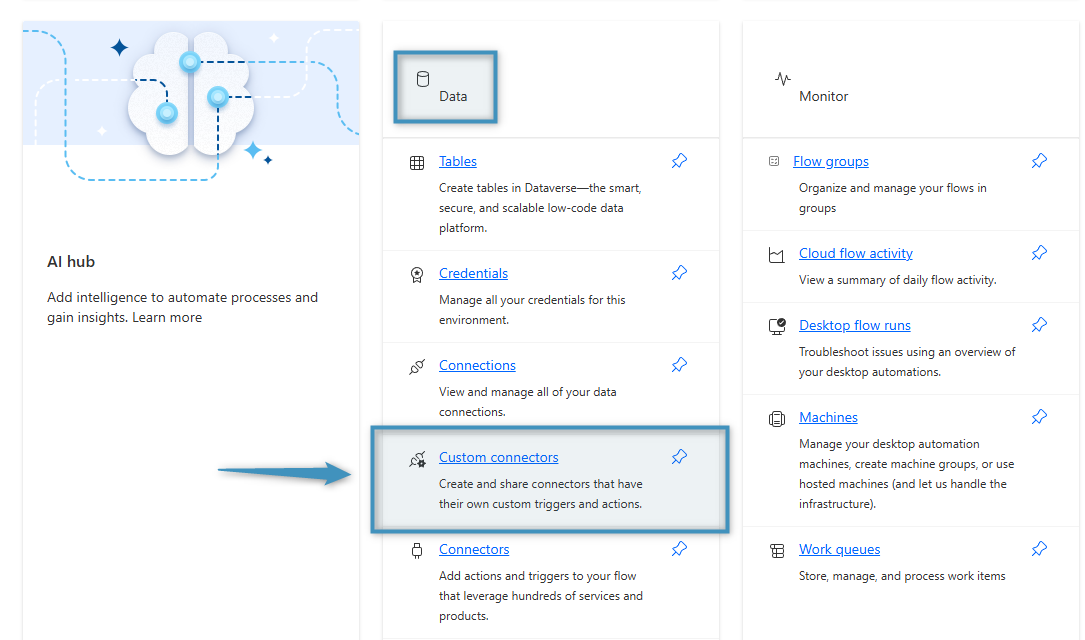
Navigating to the custom connector page
Figure 3: Navigating to the custom connector page

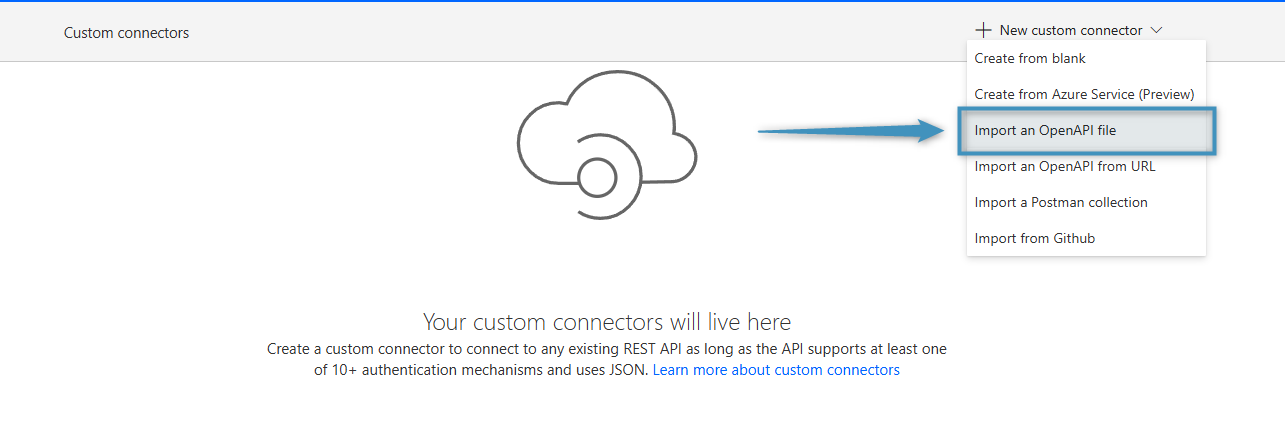
4. Select Import an OpenAPI file.

Importing our JSON file
Figure 4: Importing our JSON file

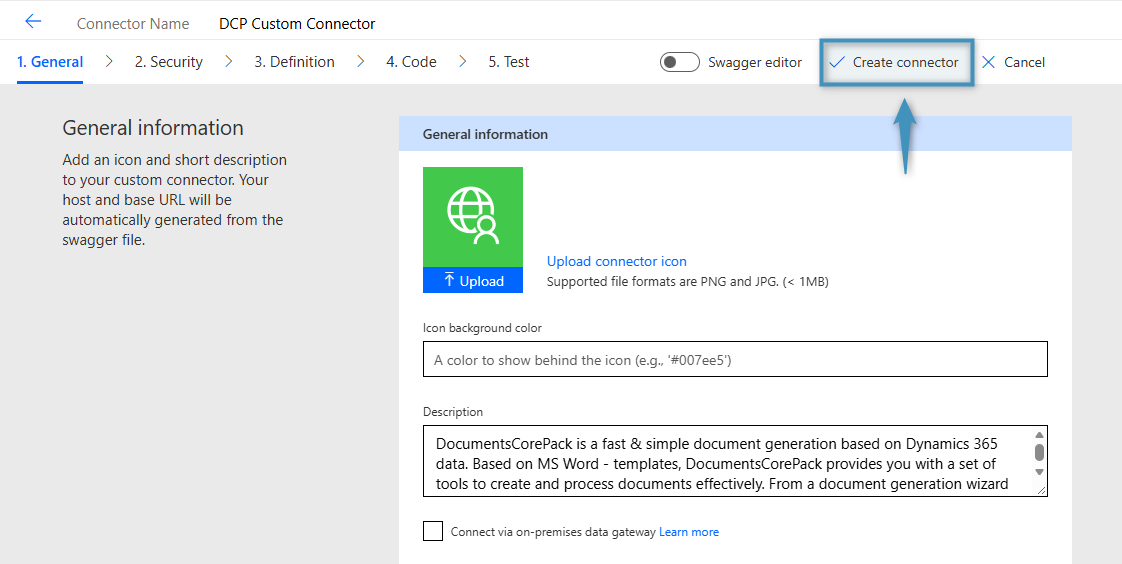
5. Give your connector a name and select the file saved in step 1. Then, follow the instructions that appear. You can optionally change the icon. Once you are ready, click on Create connector.
Creating the custom connector
Figure 5: Creating the custom connector

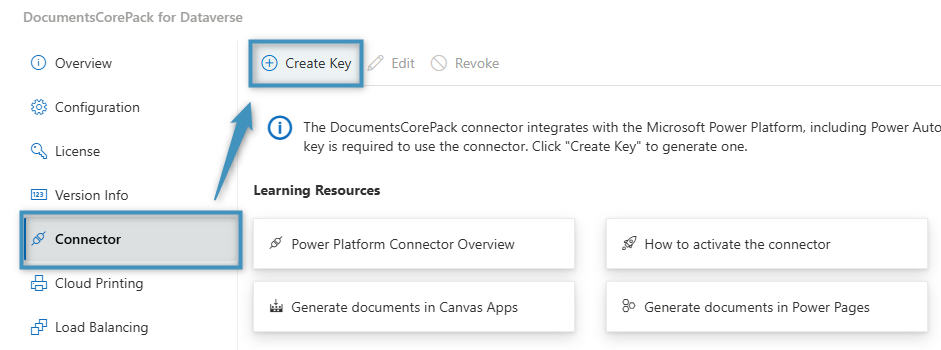
6. After creating the connector, you will need to get an API key to use it. To get an API key, visit the DocumentsCorePack Online Service Configuration, select your service and navigate to the Connector tab. Click on the Create Key button to generate an API key.

Note: The API key will only be displayed once. Make sure to copy the key before proceeding. Otherwise, you will have to revoke the key and create a new one.
Creating an API key
Figure 6: Creating an API key

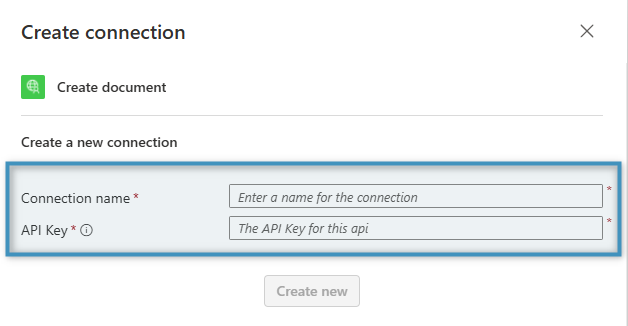
7. When attempting to add an action from the connector to a flow, you will be prompted to enter a name and API key. Enter the value from step 6 here. Once the key has been entered, you will able to use the custom connector for your flows.
Being prompted to enter our API key
Figure 7: Being prompted to enter our API key


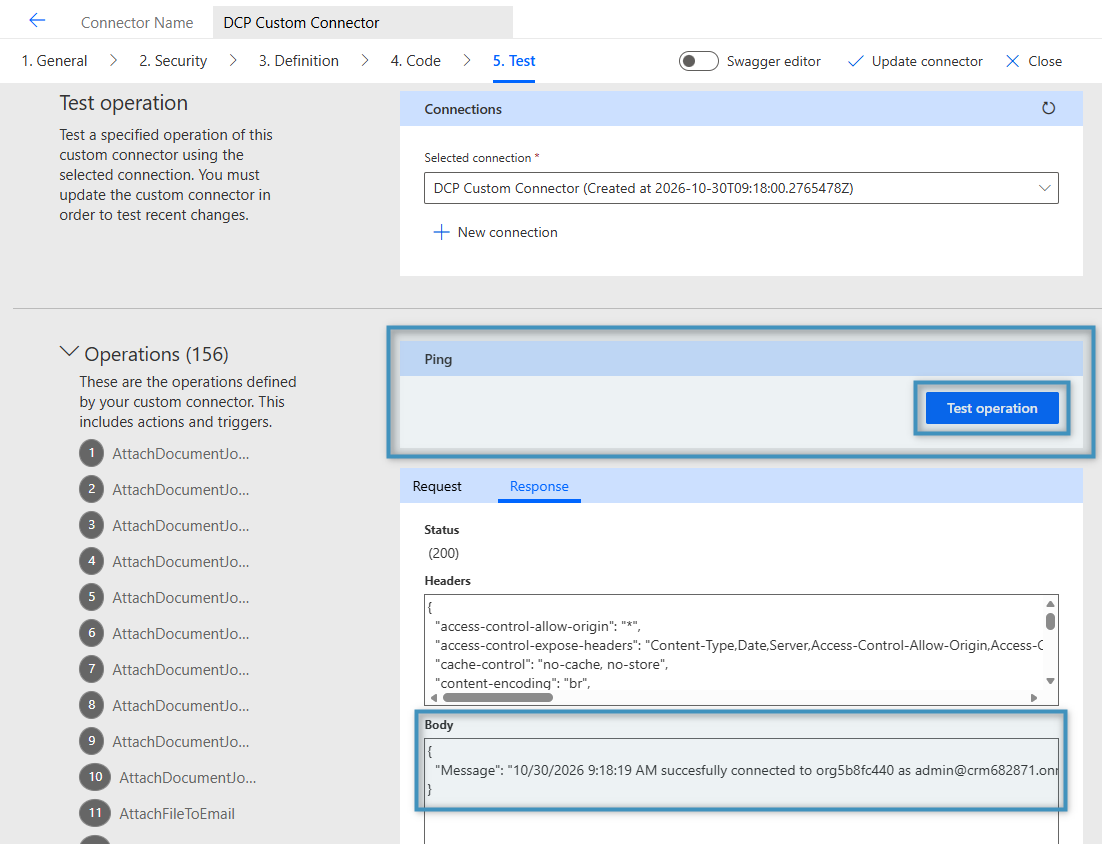
Note: To test the connection, click on the Edit button on the custom connector and go to step 5 (Test). After selecting the Ping action under Operations, click the Test operation button. If successful, you will see a “successfully connected” message in the Response area.
Testing our connection
Figure 8: Testing our connection

Other Resources

  • Step-by-Step video on using the DocumentsCorePack connector to generate and process documents in a flow: https://www.youtube.com/watch?v=tUG10goIbzE
  • Free trial of DocumentsCorePack: Get DocumentsCorePack from AppSource

Was this helpful?

1 Yes  1 No
Related Articles
  • Can You Customize Business Central Document Layouts Without RDLC or Developer Support? 
  • How do you speed up complex quote creation in Dynamics 365 Sales?
  • Why do companies struggle to automate document processes in Dynamics 365?
  • Understanding Push Logic in DocumentsCorePack ServerBased (OnPremise)
  • Add Document Generation to a Generative Page in Power Apps
  • How do teams automate document and PDF generation directly inside Dynamics 365?
Latest Articles
  • Recap: Power Platform Community Conference 2026
  • How Do You Audit Dynamics 365 Storage Before Costs Get Out of Control? 
  • Recap: Community Summit 2026
  • Can You Customize Business Central Document Layouts Without RDLC or Developer Support? 
  • Introducing DocumentsCorePack for Business Central
Popular Articles
  • DocumentsCorePack Template Designer – Getting Started
  • Step-by-Step: How to configure a One-Click-Action
  • Application Access for Dynamics 365
  • How licenses are counted
  • How to find your environment’s unique name in Microsoft Dynamics 365
Top Rated Articles
  • “Undefined”-labels in Chrome and Edge 114 and higher
  • How to insert Condition Fields in DocumentsCorePack Templates designer
  • Important information for Dynamics 365 online customers using DocumentsCorePack and/or AttachmentExtractor
  • How to activate the DocumentsCorePack Connector for PowerApps & Microsoft Flow
  • Step-by-Step: How to configure a One-Click-Action
Categories
  • DCP for BC 2
  • *News and General Infos* 87
  • Webinars 50
  • Template Designer(DCP 200
  • DocumentsCorePack(DCP 278
  • TelephoneIntegration (TI 65
  • AttachmentExtractor (AE 82
  • PowerSearch (PS 50
  • ActivityTools (AT 61
  • SmartBar (SB 54
  • GroupCalendar (GC 47
Our Vision

“We see it as our purpose to provide products that simplify and speed up our customers’ Microsoft Dynamics 365 experience.”

Knowledgebase
LogIn
mscrm-addons.com
  • Products
  • Online Shop
  • Downloads
  • My Account
About Us
  • About Us
  • Case Studies
  • Newsletter
  • Partner Program
  • Contact
Support
  • Support
  • Terms & Conditions
  • Documentation
  • Webinars
  • Legal Documents
  • Impressum
  • Cookies
  • © 2025 www.mscrm-addons.com. All Rights Reserved.