Details about the general functionality can be found here.
This feature is available for Dynamics 365, DocumentsCorePack TemplateDesigner 10.12; Server version 2020.50.
Before you can setup editable sections your template you must choose an existing DocumentsCorePack, or create a new one. This feature can only be used with DocumentsCorePack templates.
Please note: The editable sections functionality is not available in the multipart case, only when creating a single document!
1. Structure your template into sections
To make it easier to see the sections enable the “Hide/Show” button (❷) in Word. This option can be found in the Paragraph Area if you navigate to “Home” (❶) in your Word ribbon.

You can split your document into sections by navigating to “Layout” -> “Breaks” (❶) and select “Continuouse” (❷). This will insert a hidden element (❸) that split your template into to two sections.

PLEASE NOTE: Ensure that you know how many sections you will need for your document otherwise you might have to recofingure it later which requires you to perform the following steps again as the following configration does no change if you added additional sections later.
2. Configure the template accordingly
Navigate to “www.mscrm-addons.com” (❶) in Word. Hit “Insert MailMerge Fields” (❷) and open the “Advanced Template Settings” (❸). In the settings dialog select “Section Configuration” (❹) which will display the Export Section Configuration area (❺).
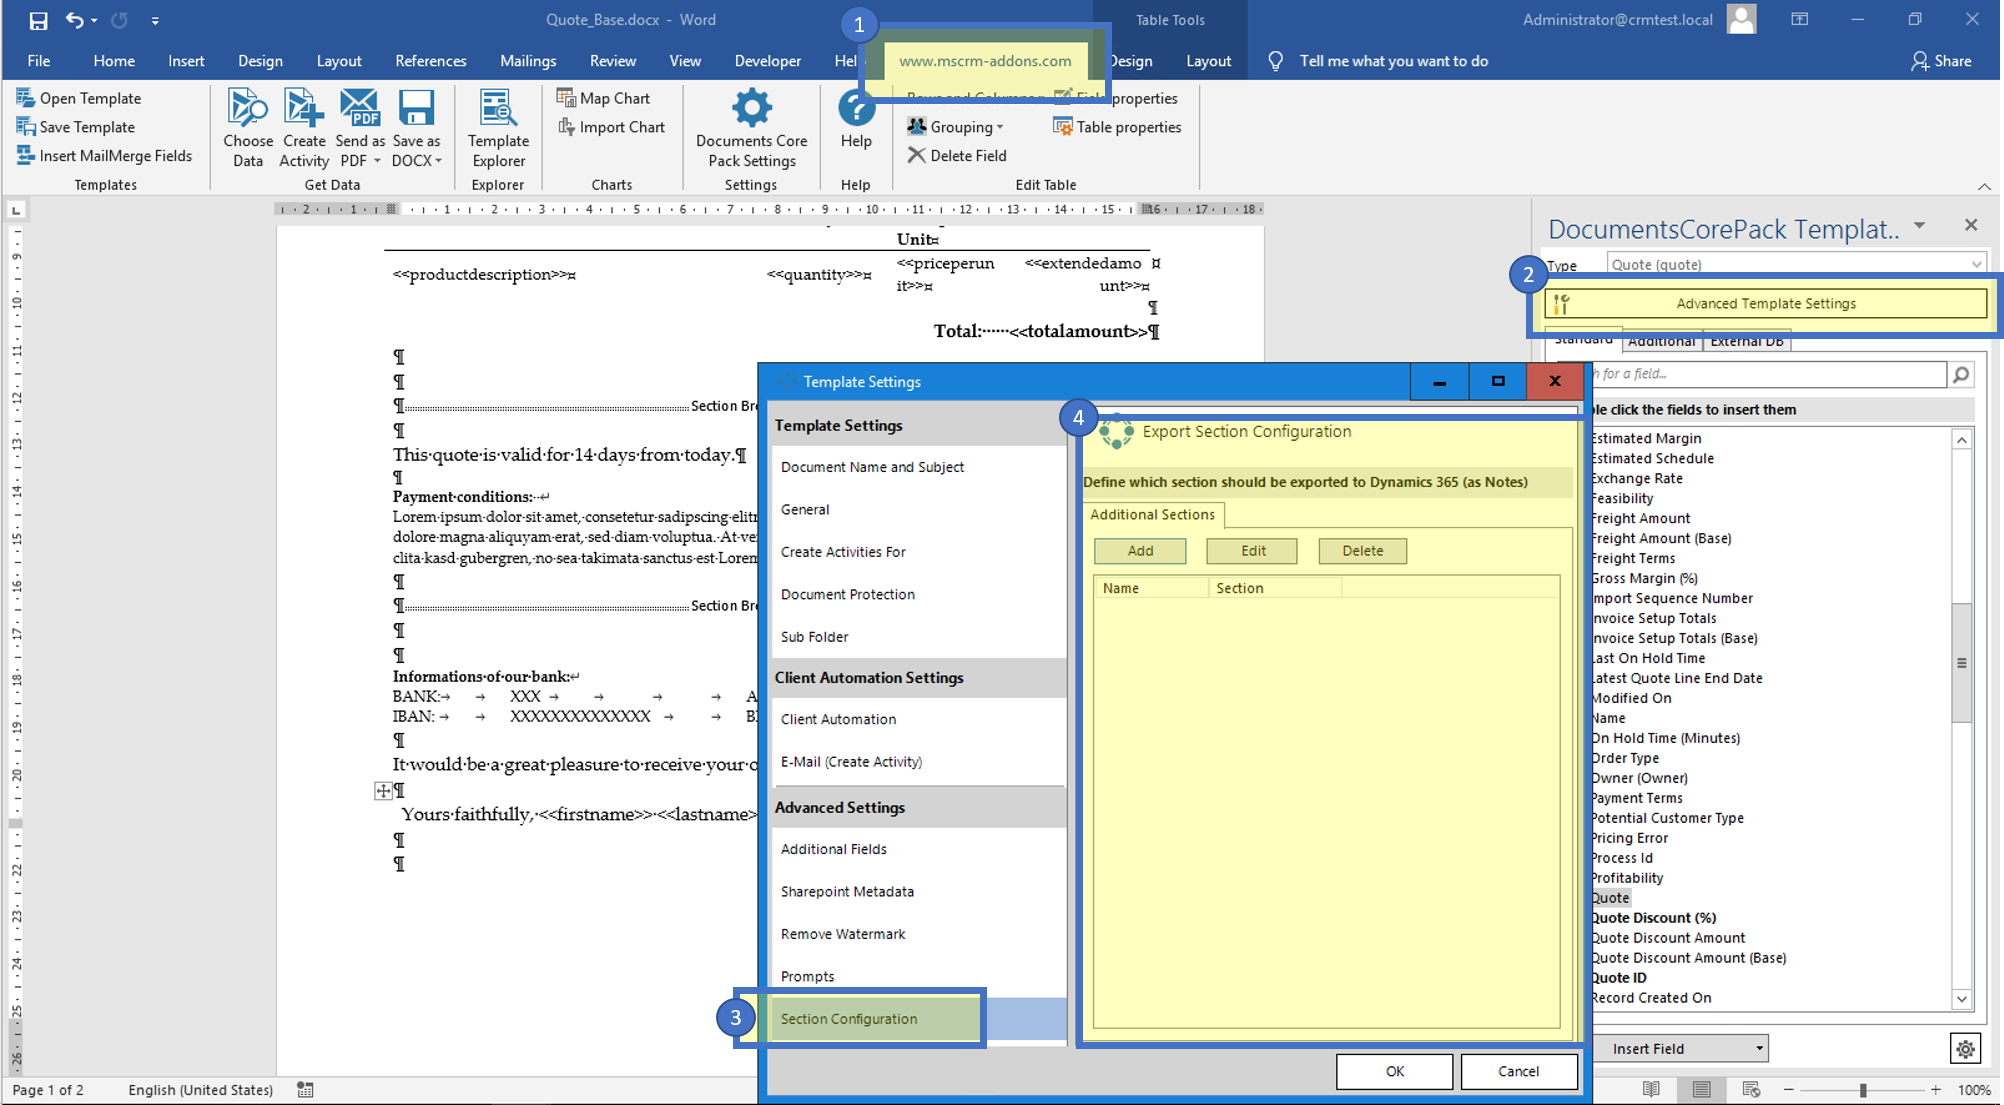
In the section configuration you manage all your existing sections you can “Add“, “Delete” ord “Modify“. You are not limited to one section, you can setup several to show the same behaviour.
You can add a new entity by using “Add” (❶). Provide a unique name for your section (❷) and also select the section number of the used section. (❸)

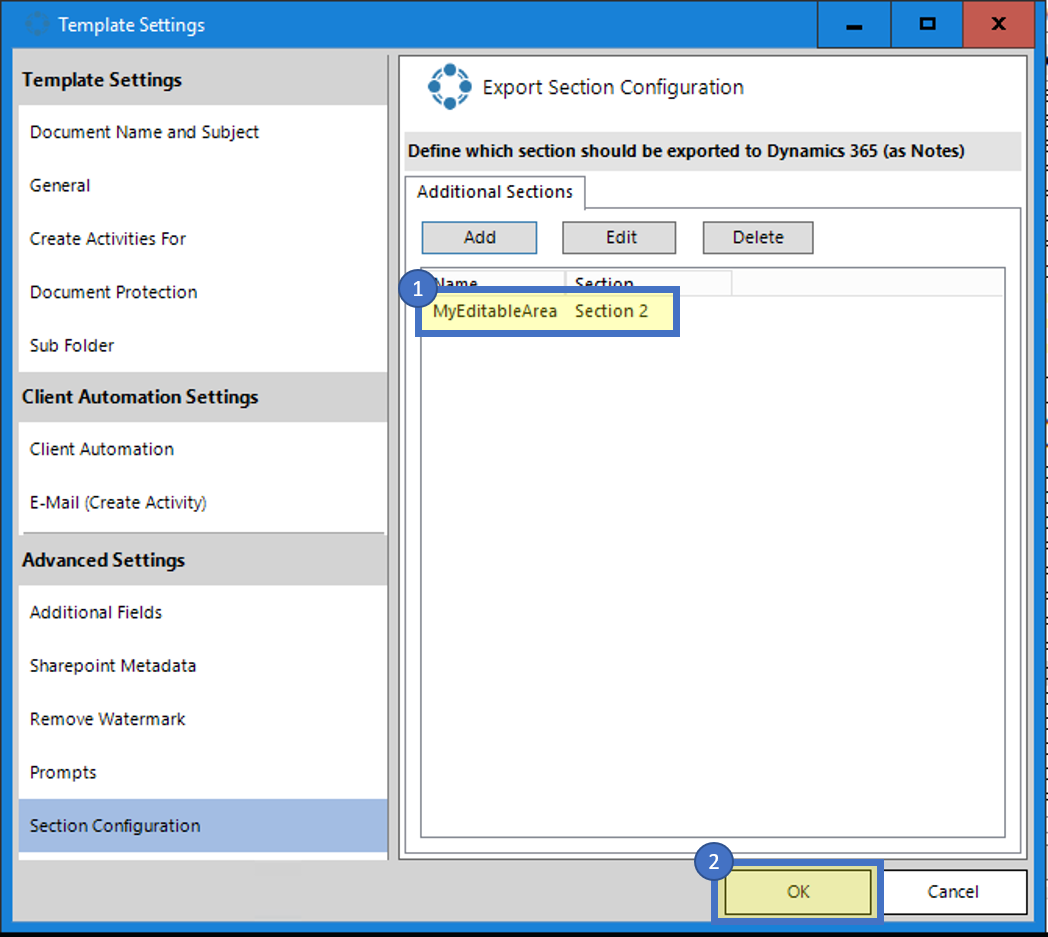
PLEASE NOTE: Be especially careful when using this on several templates for the same entity as the name is identifier for your section. If you use the same name across several templates you might see already existing sections content when you generate a document.
After you have setup your section you will see it in a listed of confiugred sections (❶). After you hit “OK” (❷) your changes will take effect in the template and the configuration is completed.
You will see a placeholder that indicates that the section is an export section. (❶) And additional also a new relationship will be added automatically as this is a technical requirement for this feature (❷) (why there als a relationship is created is described in the technical details at the en of this post)
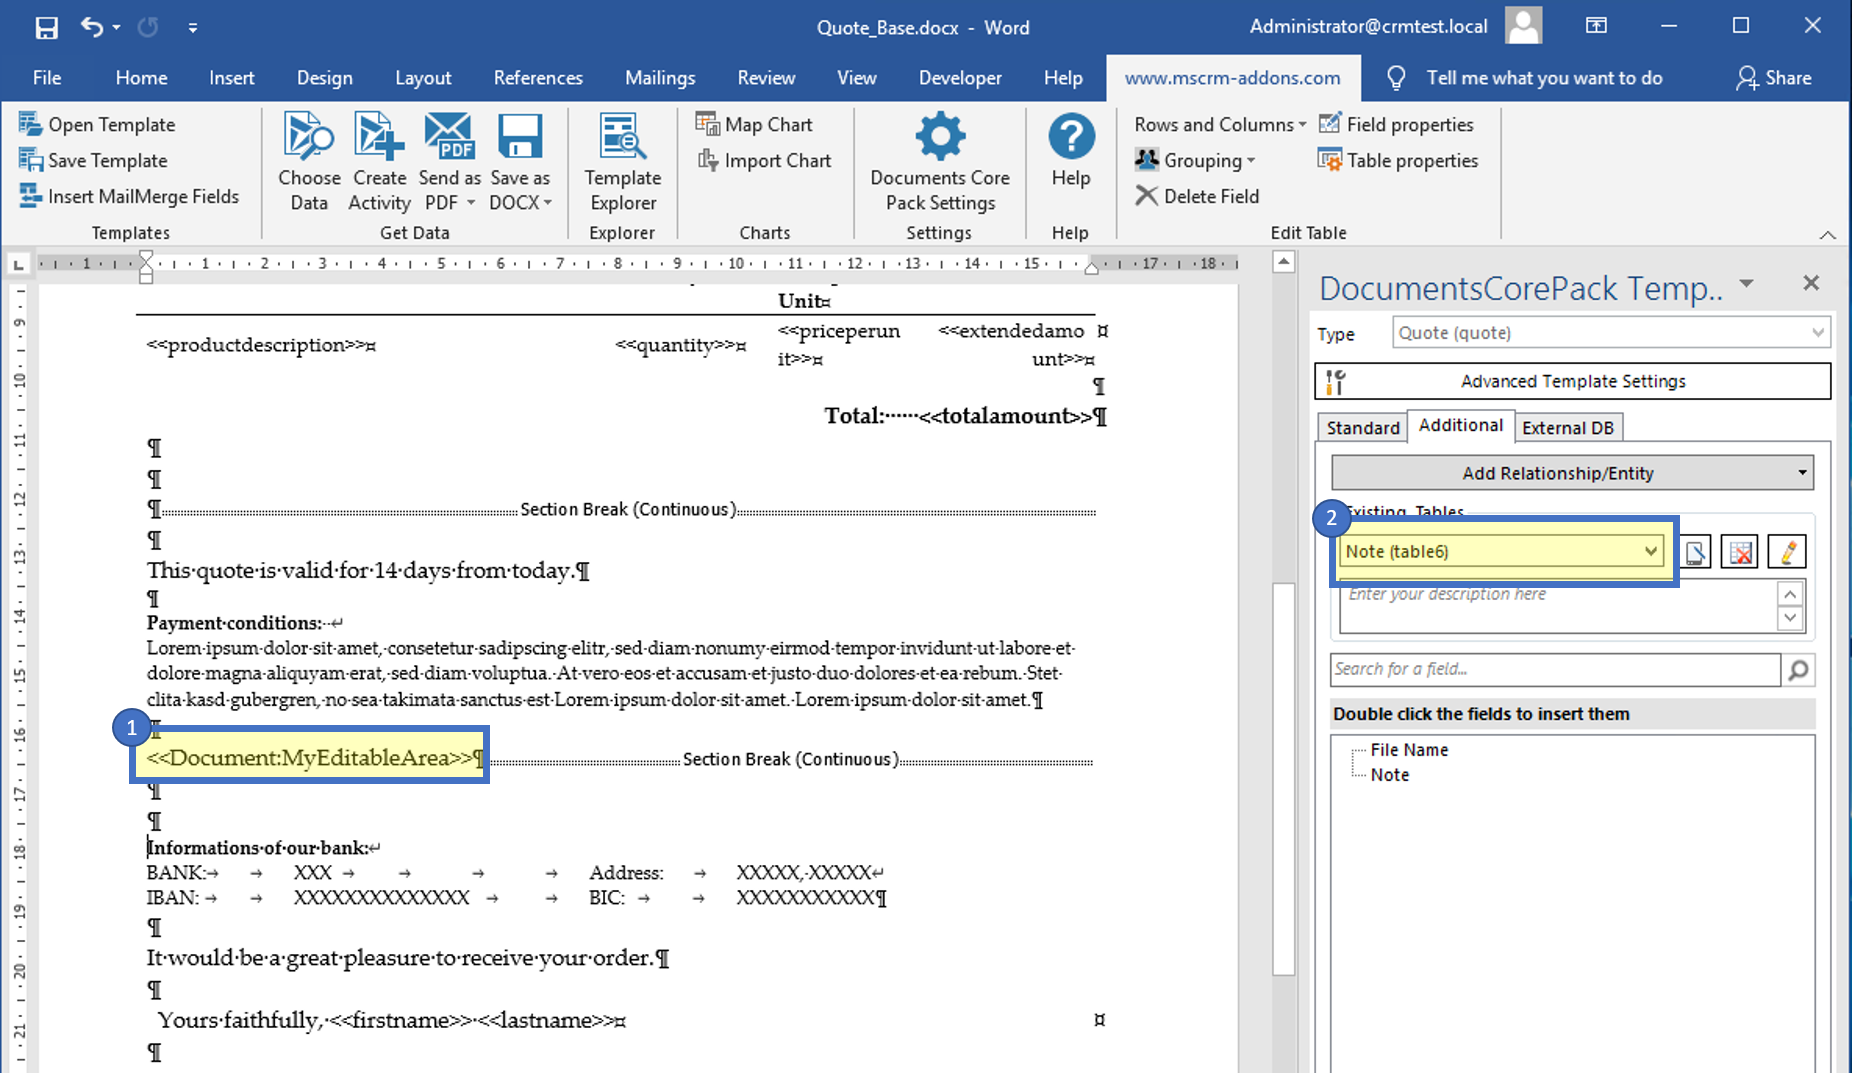
PLEASE NOTE: The placeholder should be the only element within a line for this functionality to work properly.
3. Save your template
Before you can use or test your template you have to save it.
Either you save your template locally with the standard Save or Save as
the functionality of Word or you use the Save template-option of the
DocumentsCorePack client in order to publish the template to Dynamics 365.
4. Test your template [optional]
As you have made changes to your template you might want to test them quickly. A step by step description of how to test your template can be found here.
PLEASE NOTE: For the initial run you also can use Dynamics fields in your template, but those will not be filled again on a re-creation of the document.
That´s it! We appreciate your feedback! Please share your thoughts by sending an email to office@mscrm-addons.com
TECHNICAL DETAILS and other Considerations:
- If you are using this feature for several templates on a specific entity that you have to take care, that the sections names should be unique across different templates!
- A configured section can contain already existing text and also fields. But any used fields will only be filled the first time.
- Section are stored as seprate documents attached as notes to the base entity.

- The insertion of the sections is based on the insert as document functionality. This is the reason why you see a document placeholder and also an additional relationship in the template.