With the option to call a flow from the DocumentsCorePack Dialog, users can utilize the full suite of Power Automate to process documents or add logic as needed for their business process.
How it works
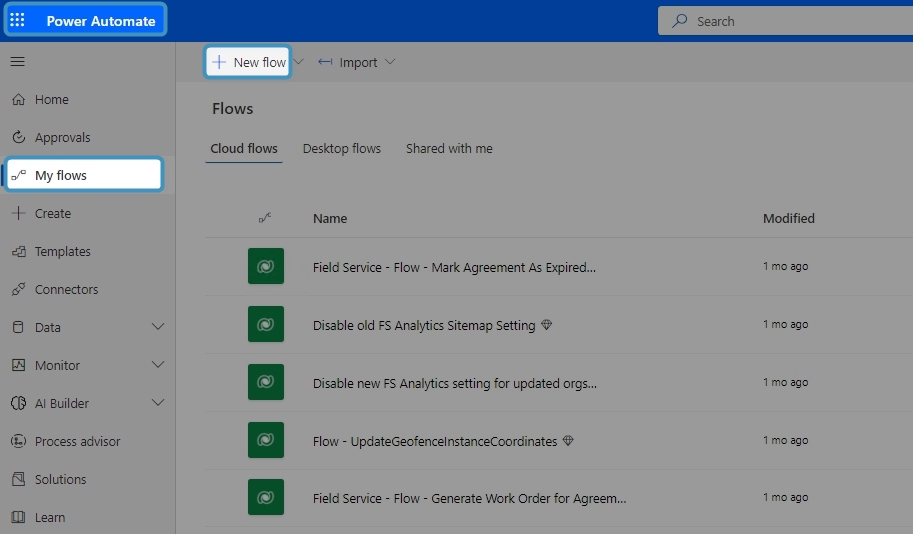
Visit make.powerautomate.com, navigate to My Flows, and press New Flow.
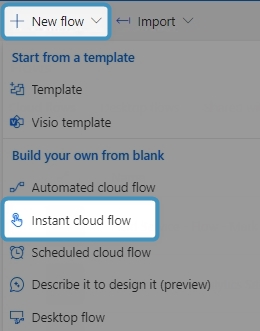
Select Instant cloud flow from the New flow dropdown.
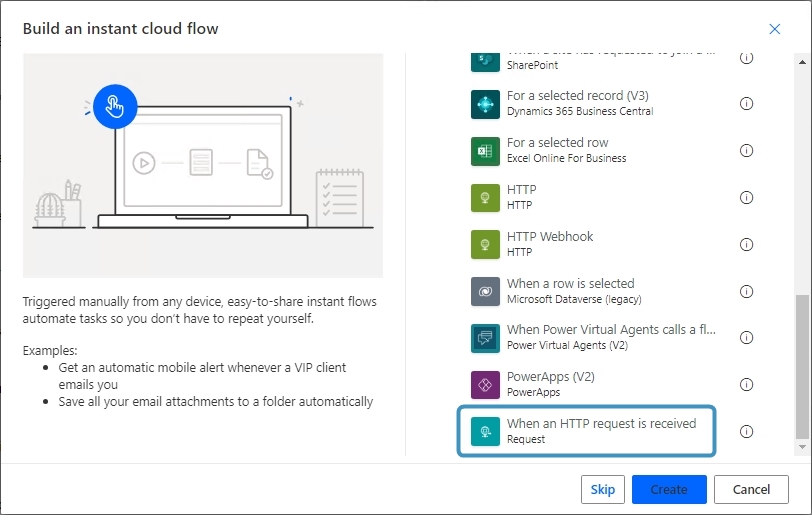
The Build an instant cloud flow site will open. First, give your flow a name. Then, scroll down to When HTTP request is received and select it. Press the Create button.
Note: Only flows with a specific trigger (When a HTTP request is received) will work.
On the following screen, click on the When a HTTP request is received action header to open the details.
In the action details, note the following parameters:
❶ The Who Can Trigger The Flow dropdown
❷ The HTTP URL
❸ The Request Body JSON Schema
❹ The Method
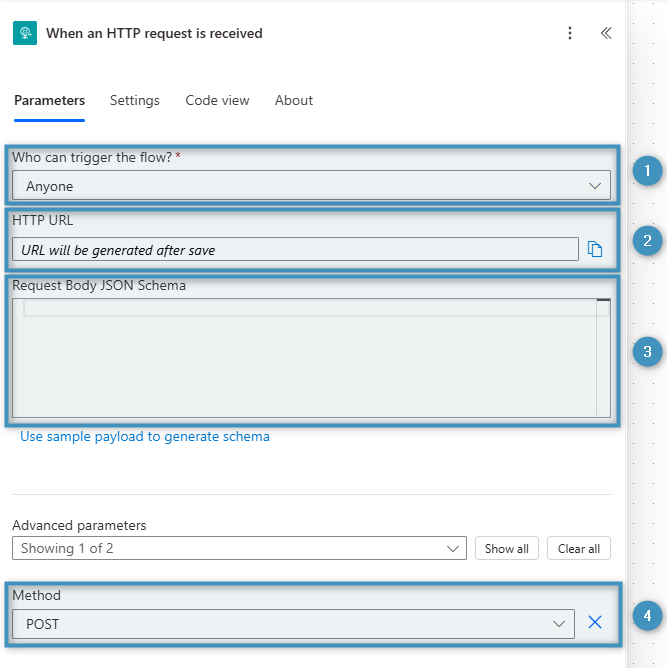
- The ❶ Who Can Trigger The Flow? dropdown must be set to “Anyone.” The default value, “Any user in my tenant,” requires authentication, and thus, it will not work when triggered through the dialog.
- The ❷ HTTP URL will contain a URL to the Flow after it has been saved. This will be required later.
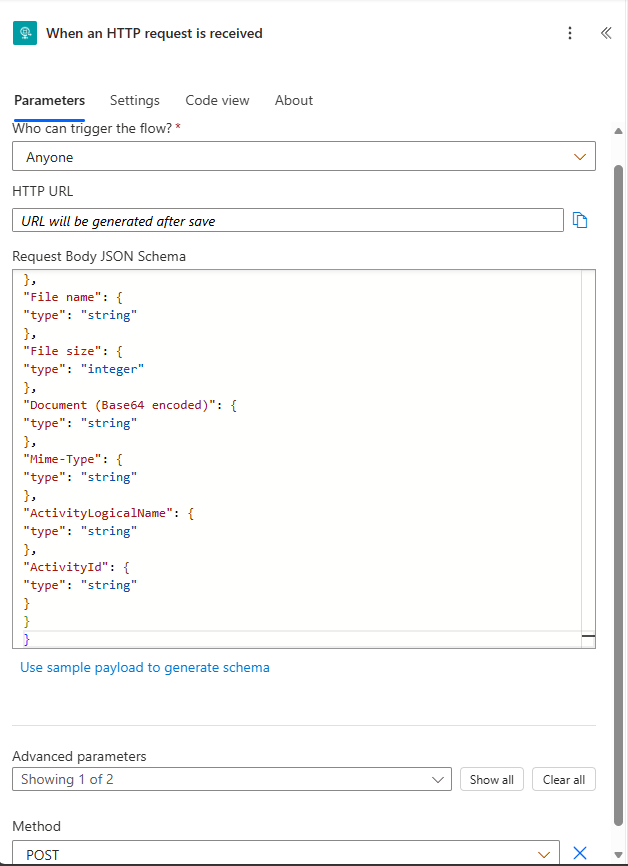
- The ❸ Request Body JSON Schema will contain the JSON schema we want to pass into it. The following schema on the left can be used in most cases. The following schema on the right should only be used for batch processing with the Attach as email setting enabled.
{
"type": "object",
"properties": {
"AMWIID": {
"type": "string"
},
"RecordID": {
"type": "string"
},
"RecordLogicalName": {
"type": "string"
},
"File name": {
"type": "string"
},
"File size": {
"type": "integer"
},
"Document (Base64 encoded)": {
"type": "string"
},
"Mime-Type": {
"type": "string"
},
"ActivityLogicalName": {
"type": "string"
},
"ActivityId": {
"type": "string"
}
}
}
This JSON schema is used in most cases
{
"type": "object",
"properties": {
"AMWIID": {
"type": "string"
},
"RecordID": {
"type": "string"
},
"RecordLogicalName": {
"type": "string"
},
"File name": {
"type": "string"
},
"File size": {
"type": "integer"
},
"Document (Base64 encoded)": {
"type": "string"
},
"Mime-Type": {
"type": "string"
},
"ActivityLogicalName": {
"type": "string"
},
"ActivityId": {
"type": "object",
"properties": {
"activityid": {
"type": "string"
}
}
}
This JSON schema is used only for batch processing with the Attach as email setting enabled
- Lastly, the ❹ Method should be set to POST.
When finished, the action should be set up similar to the following:
The JSON Schema
The request JSON Schema defines the data that will be delivered to the Flow:
- “AMWIID“ – It is the ID from the AutoMergeWorkingItem which was created in the dialog.
- “RecordID“ – ID of the start data record from which the dialog was started
- “RecordLogicalName” – Logical Name of the start data record (e.g.: account, quote, contact, opportunity,…)
- “File name“ – Name of the file that was created
- “File size“ – The size of the file that was created
- “Document (Base64 encoded)“ – Document content as Base64 string
- “Mime-Type“ – Document type that is given (e.g., application/pdf)
- “ActivityLogicalName” – Logical name of the activity (e.g.: email, letter, phone call,…)
- “ActivityID” – The ID of the created activity
The JSON schema contains both information on the record (RecordID) the document was generated for as well as the document itself. Thus, it is now possible to use this information in your flow to work with the document and perform operations in your Dynamics 365 instance (DataVerse) as required by your business process.
Creating the SettingsKey
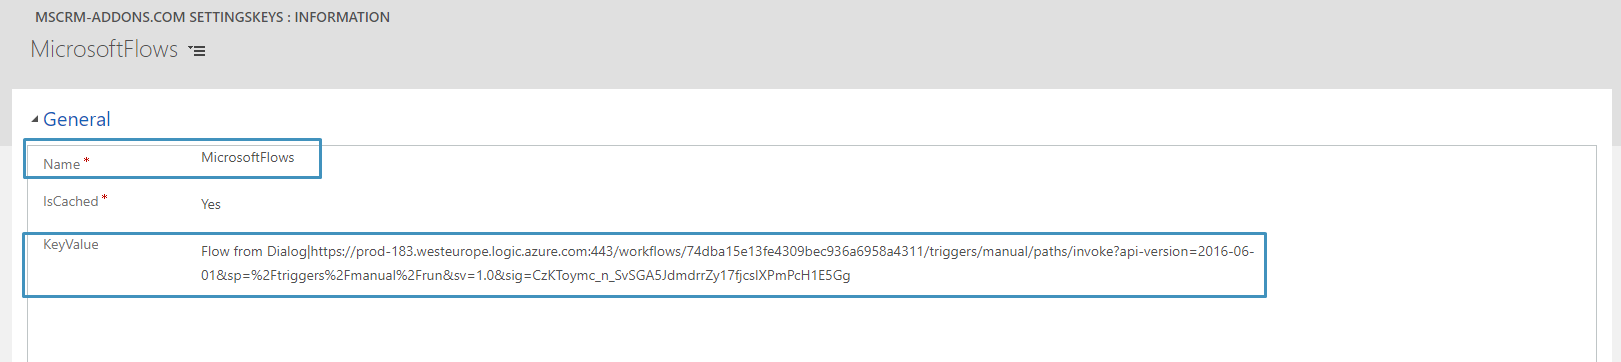
To activate this flow in your environment, you need to add the following MSCRM-ADDONS.com Settingskey (Learn more about how to create a Settingskey):
Name: MicrosoftFlows
KeyValue: [FlowName1]|[FlowUrl1];[FlowName2]|[FlowUrl2]…
Product: AutoMerge
In this example, it looks like this:
In your Dynamics 365 environment, you can see if your flow was a success in PowerAutomate under My Flows.
Note: A flow URL can be retrieved after the flow has been saved (please see Figure 4 above).
Our use case
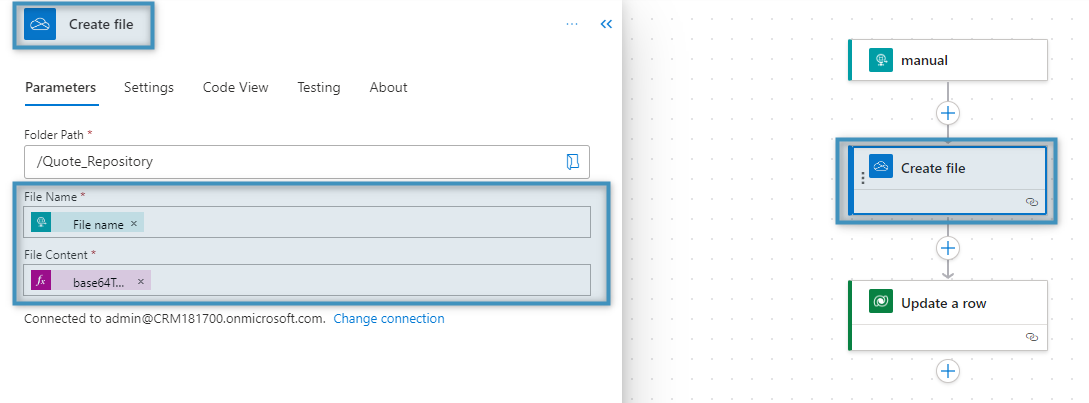
We want to save a document to OneDrive and store the link to the record in Dynamics 365.
The following example shows how a document generated for a Quote inside the Sales Hub can be uploaded to a specific folder on OneDrive as well as storing the URL of this file back to the quote inside the Sales Hub.
Flow Setup: Instant Cloud flow with HTTPS trigger as outlined above.
Actions:
- Upload file to Onedrive: We can use the Filename and Document (Base64 encoded) parameters provided by the HTTP trigger.
- Save URL back to Dynamics record: We will use the RecordID provided by the HTTP trigger to identify the quote record so we can update the description field to hold information on the uploaded file.


Bonus: Send a response from Flow to DocumentsCorePack dialog:
There is also the option of sending a response back to the dialog. You can define records as entity references and pass them back as the body of the HTTP-Response action inside your flow.
Examples:
- You are creating records (e.g. tasks or cases) in your flow and want to open them up upon generating a document.
- You are doing updates on the record you are generating the document for and want to refresh the record for the user so they see the updated version.
Example JSON-schema for two entity records:
{
"EntityReferences": [
{
"LogicalName": "[Entity Name 1]",
"Id": "[GUID 1]"
},
{
"LogicalName": "[Entity Name 2]",
"Id": "[GUID 2]"
},
]
}
In this response, you can specify data records in a JSON format, which are then opened by the dialog.
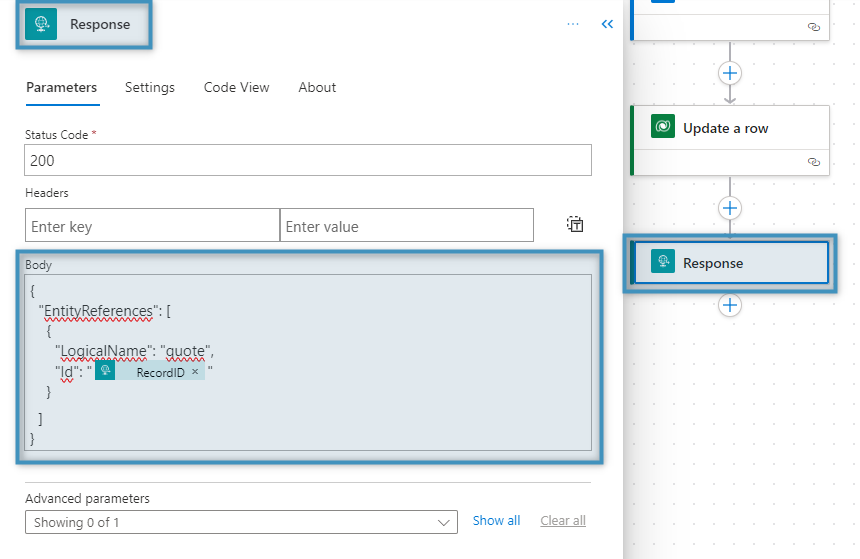
In this example the “Quote” is pushed back to the dialog ensuring users see the updated version (description field in this example).

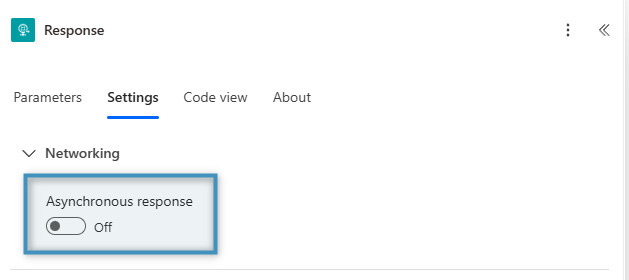
Known Issues
It may be required to turn off the Asynchronus Response setting when adding a Response action to your flow. In some cases, turning on this setting may result in unexpected behavior.