Aggregated fetches are a useful functionality when creating templates. They allow you to aggregate certain data (e.g., count, create a sum, or calculate the average of revenues, see Aggregation in DocumentsCorePack). Among other use cases, they e.g. allow to create quarterly, yearly, monthly, or daily reports (see How to create an account sales report template).
This article provides you with a step-by-step tutorial on how to define and use aggregation inside your templates. Click here to get a further overview of Aggregation in DocumentsCorePack.
Example: We want to display the invoices associated with an account by showing their count and total.
Step 1: Open Word, navigate to the ❶ www.mscrm-addons.com tab, and click on the ❷ Insert MailMerge fields button. The DocumentsCorePack Question Dialog opens. Click Yes to open the DocumentsCorePack Template Designer.

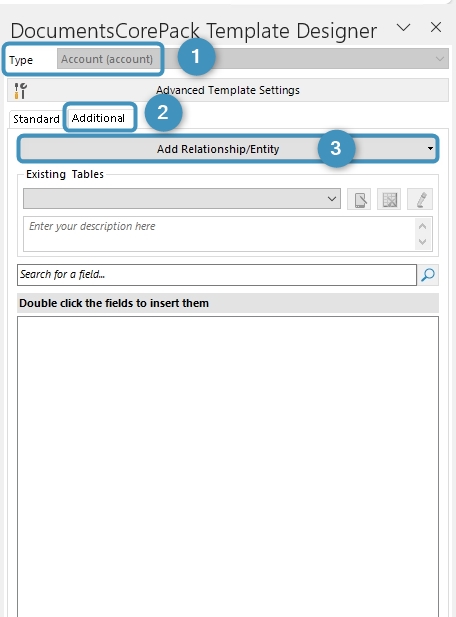
Step 2: In the opened Template Designer, select the entity type you want to work on, like ❶ Account in this example. Click the ❷ Additional tab and the ❸ Add Relationship/Entity button.
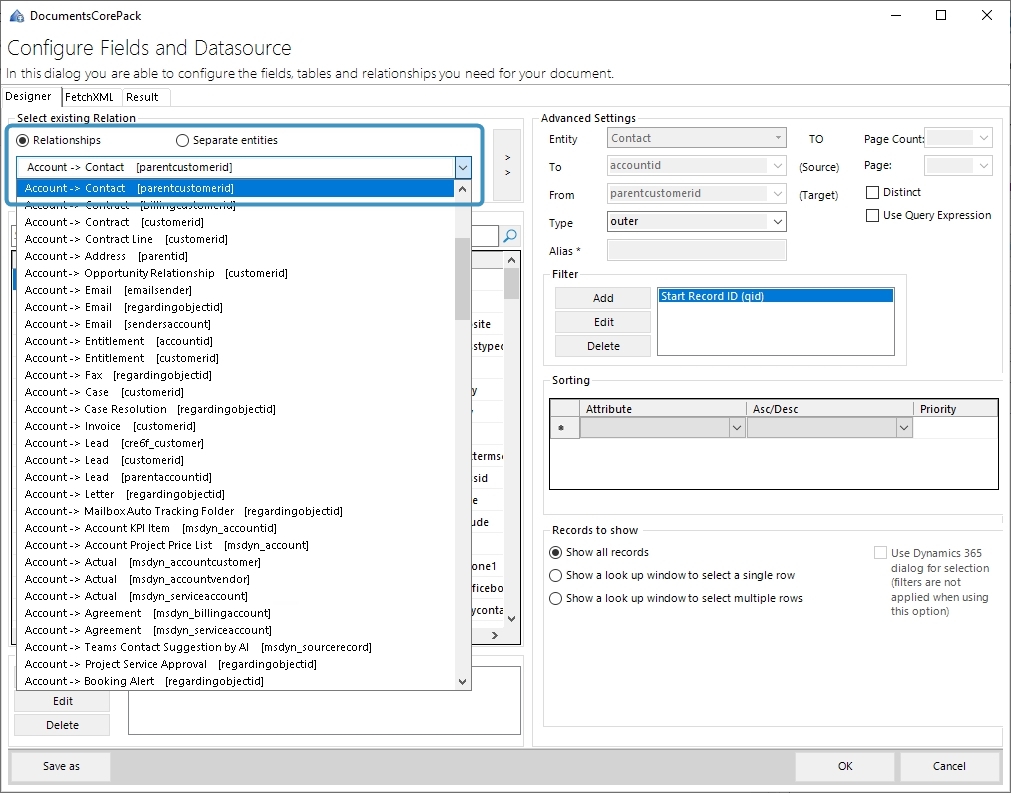
Step 3: The Configure Fields and Datasource window is shown. Select a relationship in the drop-down menu. In our example, we selected Account > Invoice [customerid]. Check the activate aggregation functionality.
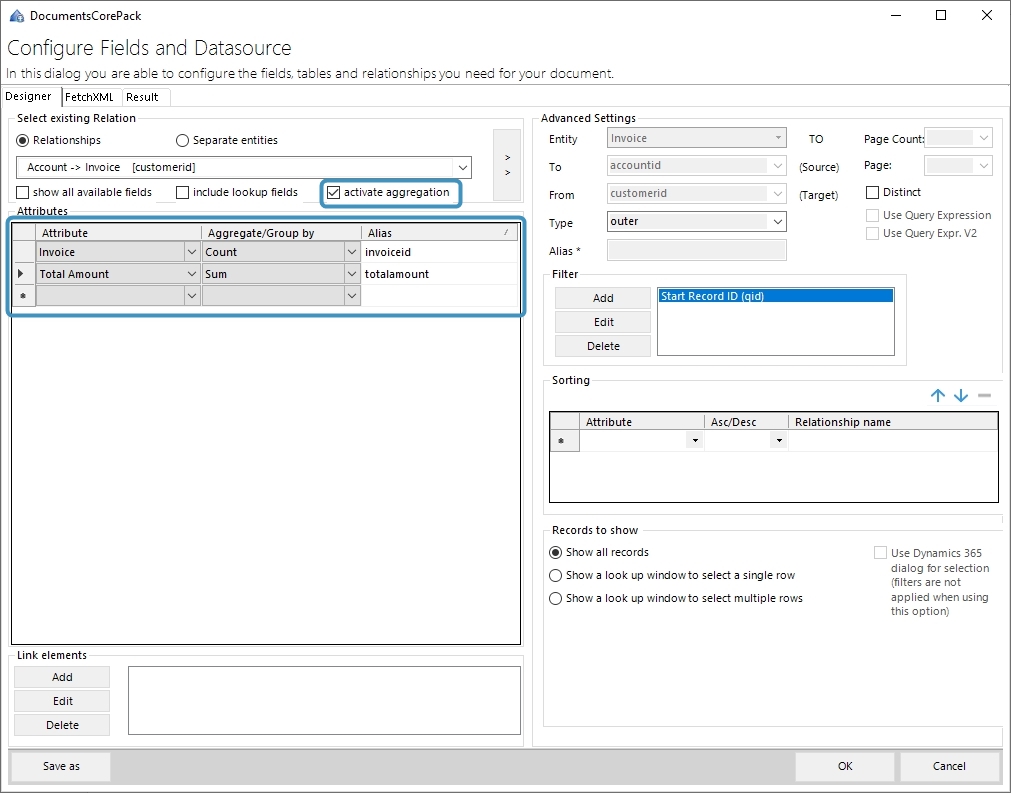
Step 4: Also, you can set certain aggregation functionalities. The Attribute drop-down menu enables you to select an attribute field, while the Aggregate/Group by drop-down menu provides you with an overview of which aggregation functionalities can be applied to this field.
In this example, we listed the Invoices from accounts and the total amount of them.
Please note: The possible aggregation functionalities depend on the attribute field you select. Click on the OK button to proceed.
Step 5: Insert the newly resolved relationship
Once the fetch is configured, we can go ahead and add the fields to our template. In our example, we will create a simple 3×2 table using Word’s table creator. Now enter the fields for the total number of the invoices and the total amount of the invoices to the table.
As shown in Figure 5, the relationship consists of two parts: The name of the field and in brackets the aggregation functionality that has been applied to the relationship.
1 Invoice (count)
2 Total Amount (sum)

Step 6: This is an example of a template that displays the number of invoices connected to an account and their total.

Step 7: Once saved, we can run a test. If you have not merged and/or tested a template before, please have a look at this article. As can be seen in Figure 7. We get a nice table row showing the aggregated count and sum of all invoices related to our account.

If you want to learn more about creating an account sales report follow this link.
That’s it! We appreciate your feedback! Please share your thoughts by sending an email to support@mscrm-addons.com.