Rich text fields are HTML-based editors that allow the user to enter formatted text and images into model-driven apps. These fields can be inserted into DocumentsCorePack templates via the Insert as HTML button. This article outlines how this can be done and provides a few examples on how rich text fields can be formatted within a document.
Inserting rich text using “Insert as HTML”
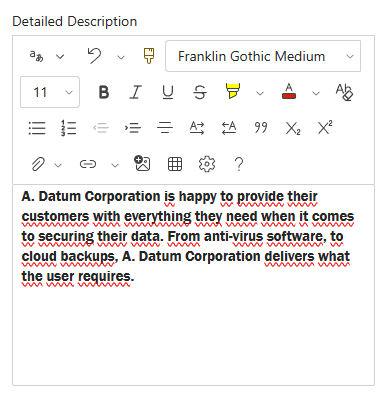
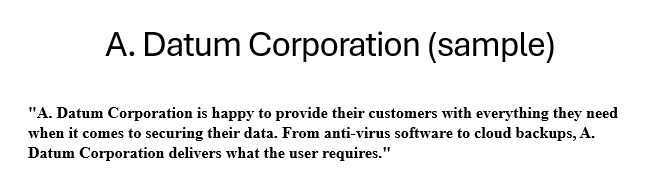
To demonstrate how to insert a rich text field, we’ll use this custom rich text field from an account record.
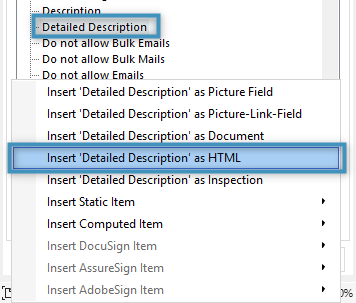
To insert a rich text field’s content, open Word and open the Template Designer. You will need to click on the field to be inserted (“Detailed Description,” in our case), click on the Insert Field button, and then select Insert (field name) as HTML. This will insert the field into the document.
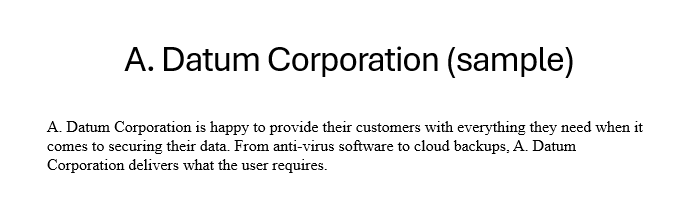
Generating a document based on this template with the field inserted will show the content in the result. Note that the font style and size is retained in the result.

Formatting rich text fields
Sometimes it may be necessary to format your rich text content in a generated document. The examples below detail some different approaches.
Example – Formatting using the Normal (Web) style
Let’s say we have a rich text field whose content fits our needs but does not fit our document’s font style and font size. Inserting the field into our document as-is will ensure that the field’s content will retain its formatting from Dynamics 365.
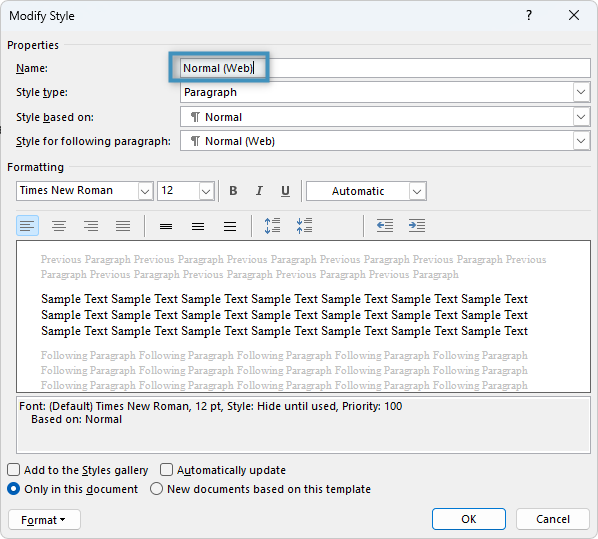
This can be changed by applying a pre-processing rule to the field as demonstrated in this article. By applying this rule, the content of the rich text field will take from the Normal (Web) style of Word. Changing the Normal (Web) style’s format will thus change the rich text field’s formatting.
Troubleshooting
Certain characters from rich text fields may not be printed correctly in a generated document. For example, when wrapping the above text in quotation marks, they may be replaced with question marks.
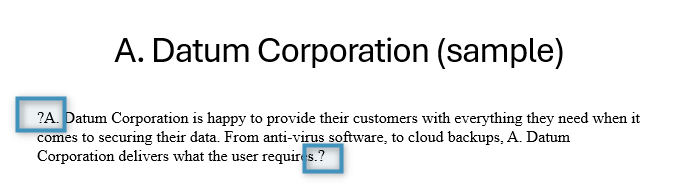
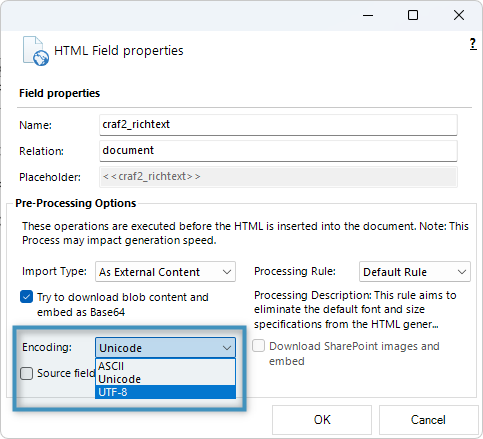
If this occurs, consider changing the field’s encoding in its field properties. The default encoding is ASCII, but by changing the encoding to Unicode or UTF-8, the above issue can be fixed.
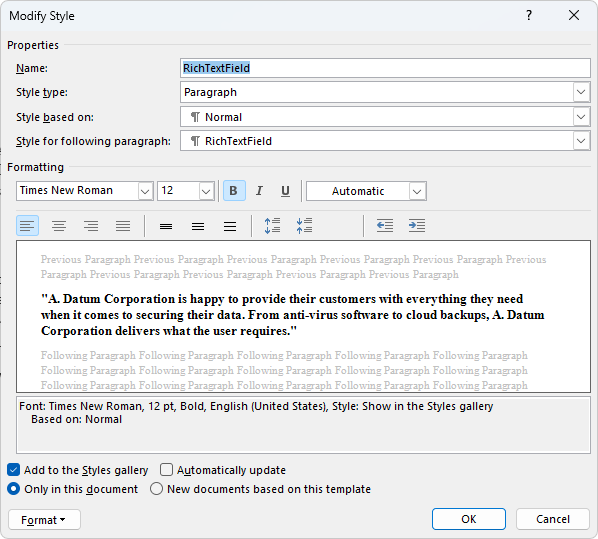
Example – Formatting by applying a custom style
In another case, let’s say we have a rich text field whose content we would want to include in the document, but we want to give it a particular formatting separate from the rest of the content within our document.
We can begin by creating a style within Word and applying that style to our field.
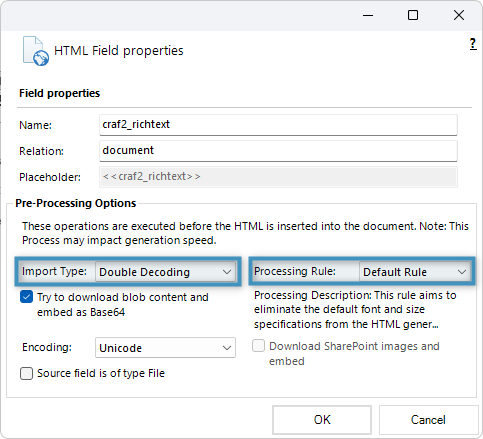
This alone will not work, however. The applied style will be lost upon merging the template. To retain this style, we will need to first modify our field properties. Our processing rule detailed above should be applied, and we will also need to set our import type to double decoding.
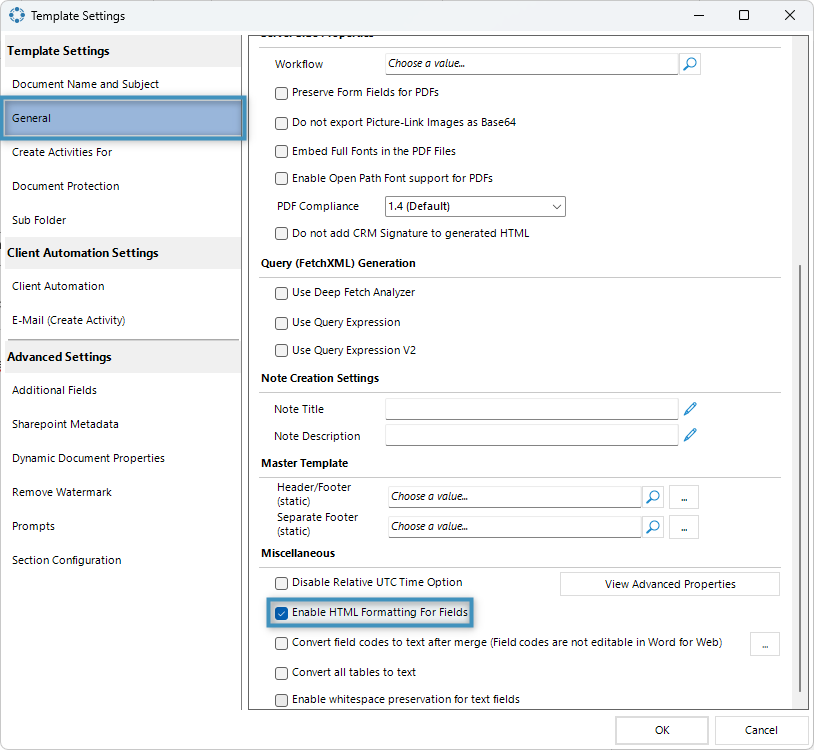
Then, we will need to enable the Enable HTML Formatting for Fields setting in our Template Settings. This can be found under the General tab under Miscellaneous.
Once these settings have been applied, our rich text field will have the correct style applied.
Known Issues
We have received reports that email content may be modified when using the Insert as HTML functionality together with Microsoft’s new Rich Text Editor (RTE) Control. In particular, inserted HTML, especially tables, may not render correctly, resulting in missing borders or altered formatting.
Workaround: Disable the Rich Text Editor Control
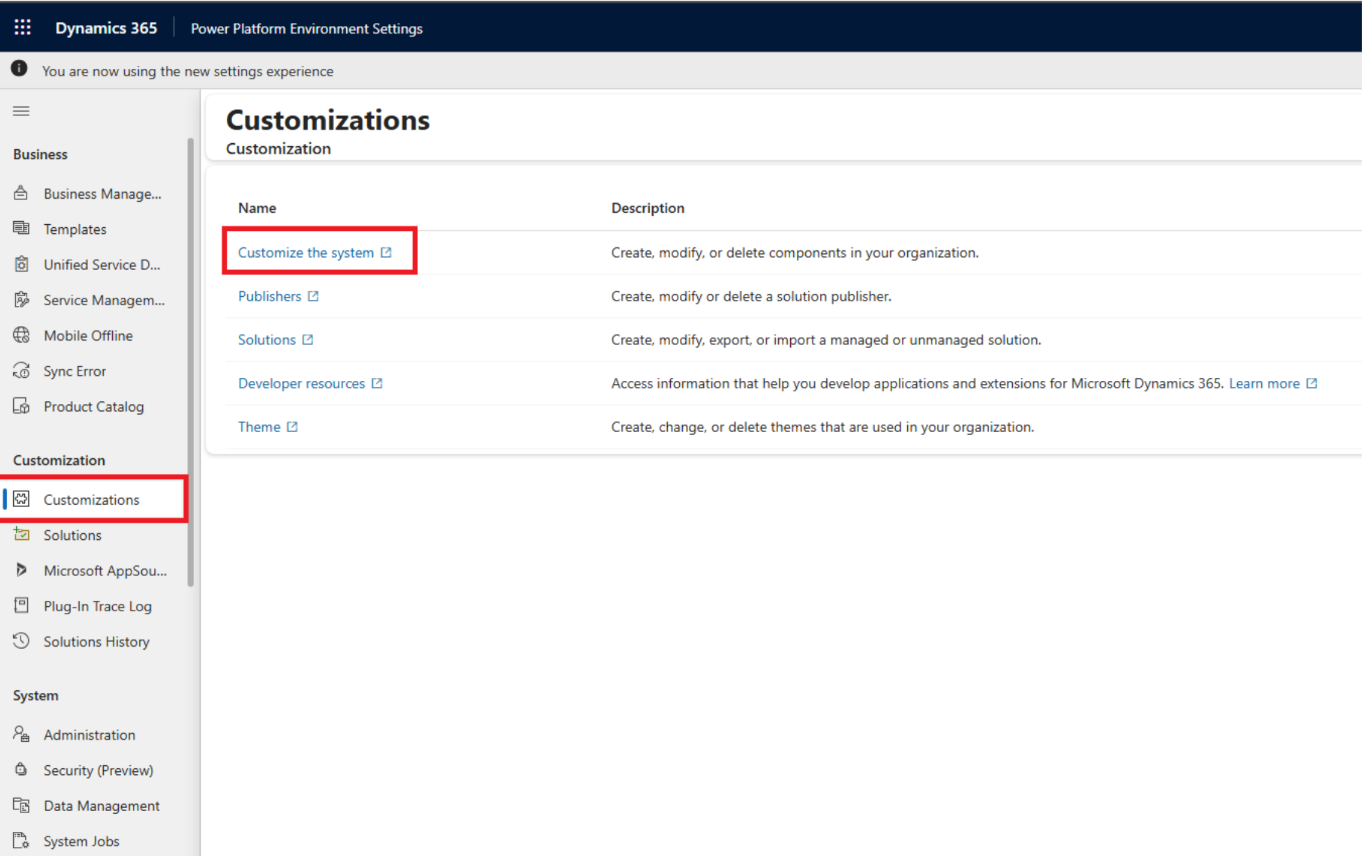
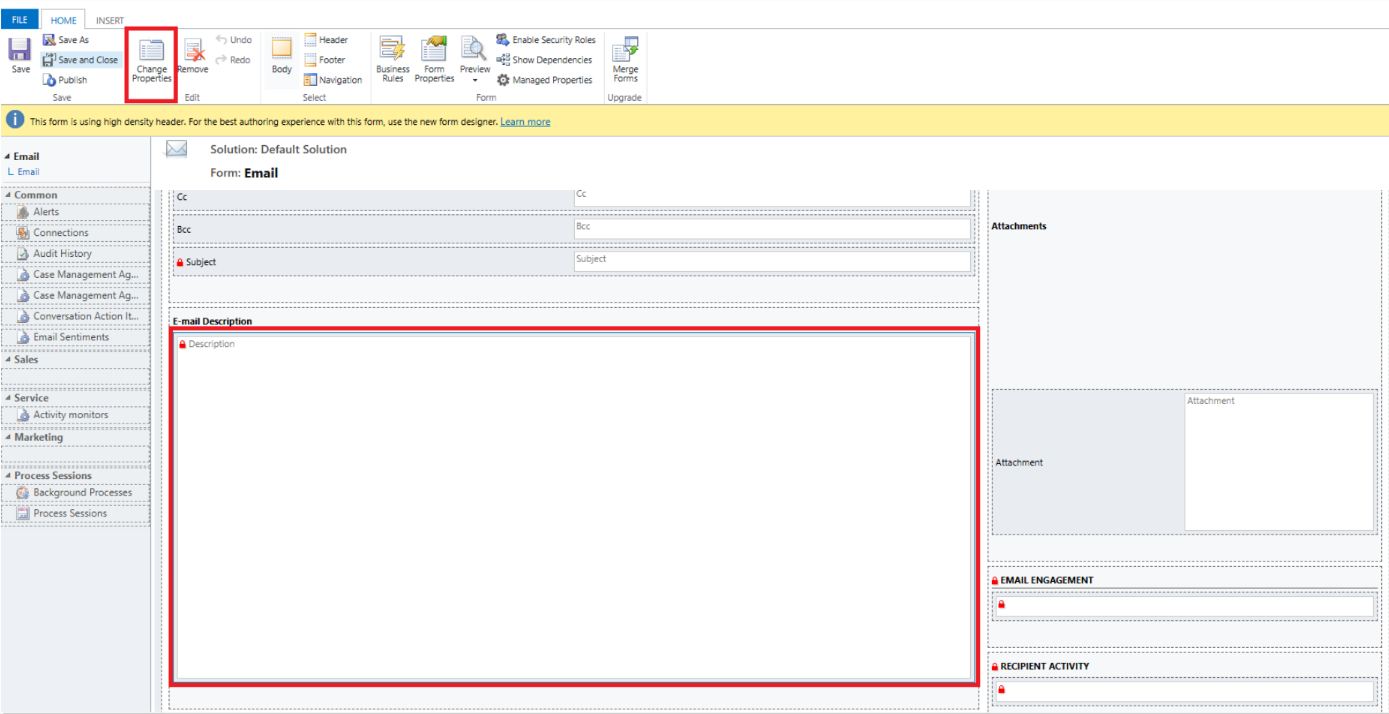
- In Dynamics, go to Advanced Settings > Customization > Customize the system.
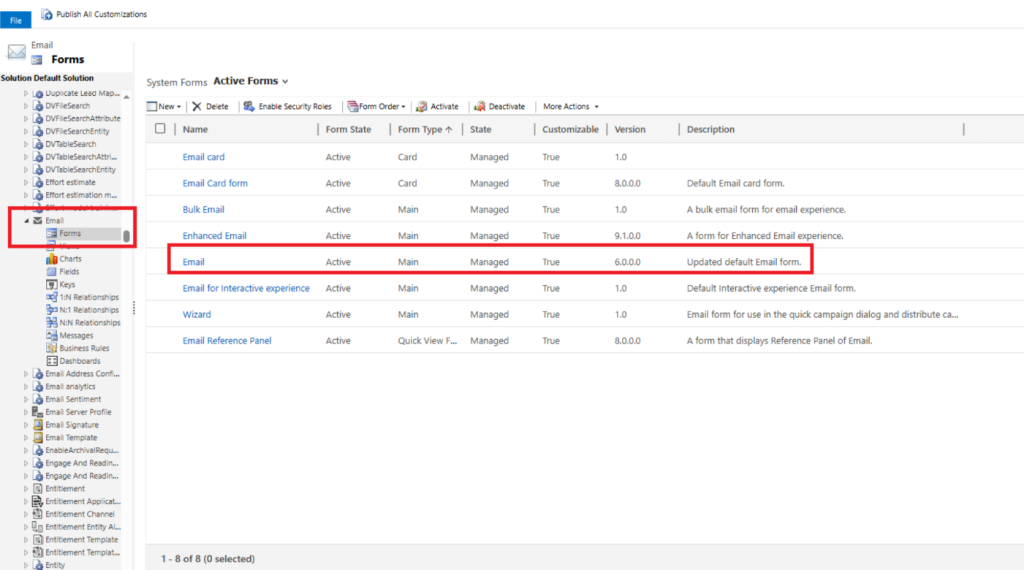
- Navigate to Entities > Email > Forms and select the form used when writing an email (e.g., Email – Main).
- Click on the Description field and select Change Properties.
- Go to the Controls tab and remove the Rich Text Editor Control.
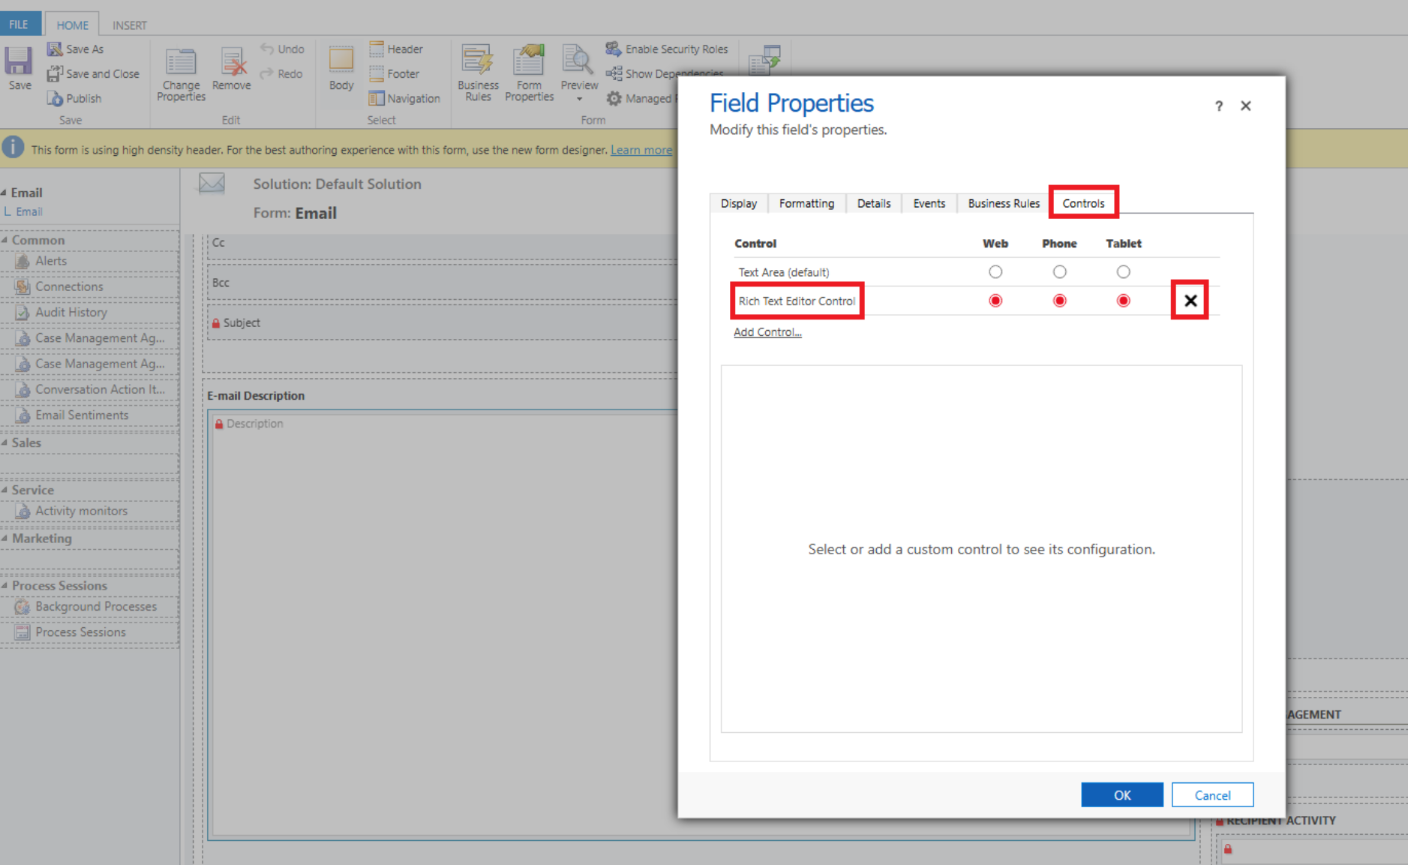
- Click OK, then Save, and finally Publish your changes.
Once applied, Dynamics will revert to the previous standard control, ensuring that HTML and tables are displayed correctly.
That’s it! We appreciate your feedback! Please share your thoughts by sending an email to support@mscrm-addons.com!