• Release History
  • Documentation
  • Back to www.mscrm-addons.com
  • Release History
  • Documentation
  • Back to www.mscrm-addons.com
home/Knowledge Base/Template Designer(DCP)/How to work with AdobeSign DataMapping

How to work with AdobeSign DataMapping

642 views 0 Updated on January 13, 2023

DataMapping is a specific feature of AdobeSign. With this feature, you can set an association between the field in Agreement and the attribute of the entity in CRM.

After signing a document, the values of the field of the CRM entity will be replaced with the predefined values of the user.

For example, this can help if you want to replace values of the fields Jobtitle and address1_city of contact entity.

First, create a Data Mapping Template entity in CRM.

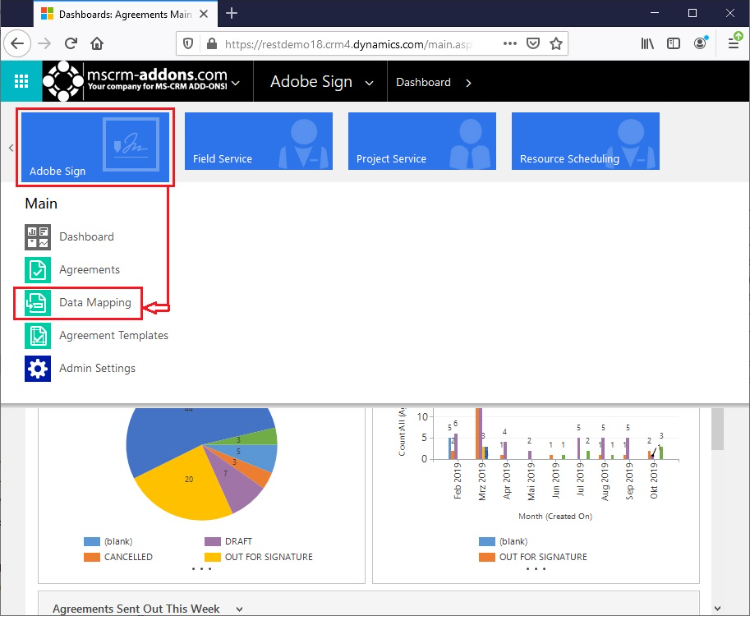
Then, in your CRM environment, navigate to the Adobe Sign tab and then to Data Mapping.


Data Mapping
Figure 1: Data Mapping


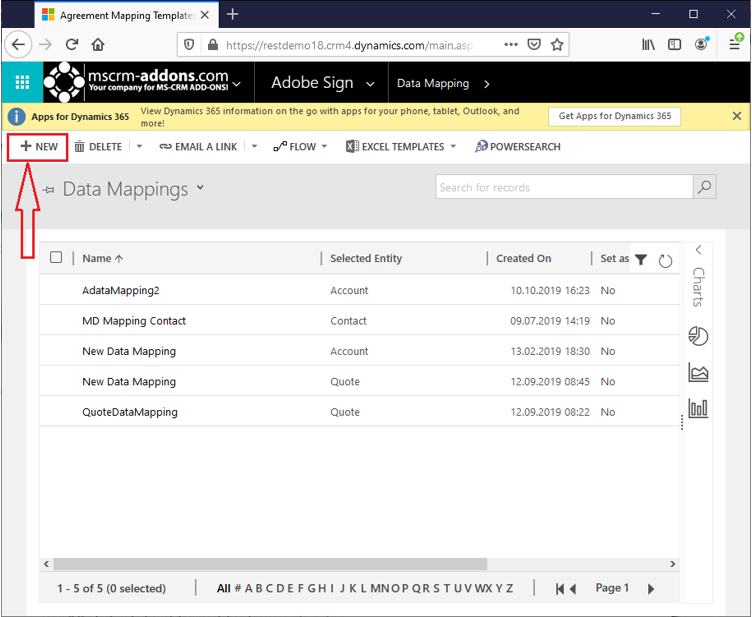
Then click the NEW Icon.


New Template
Figure 2: New Template


In the form, specify the new DataMapping name and select a target entity (in our case Contact).


New Data Mapping

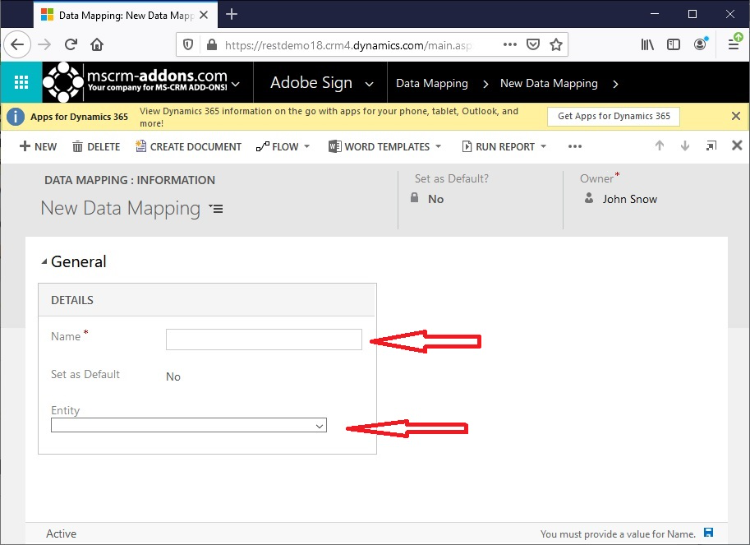
Figure 3: New Data Mapping 

After selecting the target entity, the form will expand with additional data. In the example we are interested in transfer data from an agreement to CRM, so we will fill out the corresponding section.


Data Mapping For Contact

Figure 4: Data Mapping For Contact 

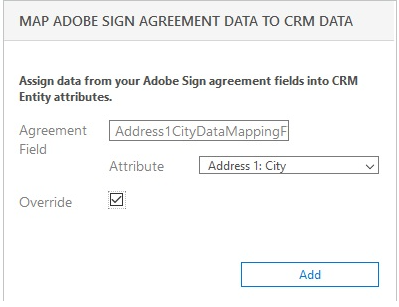
The Agreement field is the field we will later insert into the agreement. This name can be random, for example JobtitleDataMappingField. Attribute is the corresponding attribute of the entity (in our case Job Title). Then check the option Override and click the Add button.

Add Button

Figure 5: Add Button


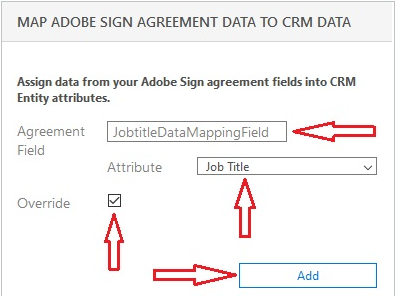
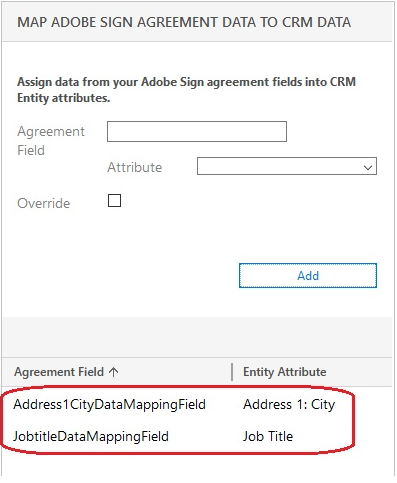
The record will be added.


Map Adobe Sign Agreement Data

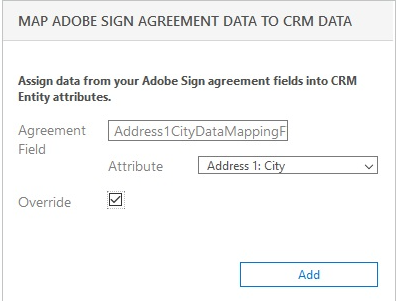
Figure 6: Map Adobe Sign Agreement Data

Repeat the same for address1_city attribute. The Agreement field we name Address1CityDataMappingField.​


Data Mapping for Address City
Figure 7: Data Mapping for Address City

Agreement Field
Figure 8: Agreement Field

Save the created Data Mapping Template.

Now we can create the DocumentsCorePack (DCP) template for a contact using our Data Mapping Template.

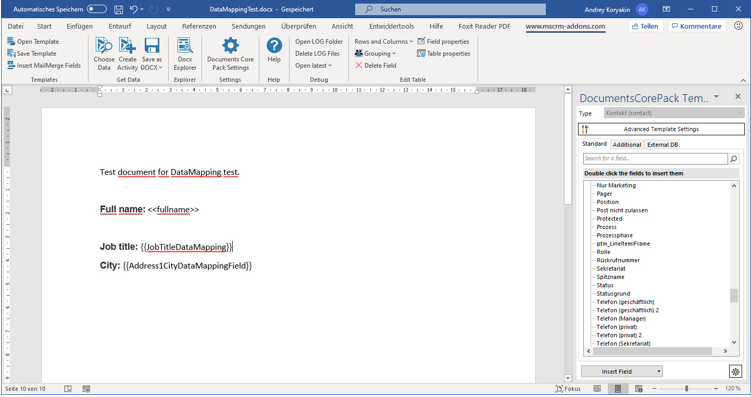
Open MS Word, create the DCP template (for additional information see How to create DCP templates) for the contact entity. In the necessary place, insert Agreement Field in the following format:

{{NameOfField}}

Job title: {{JobTitleDataMapping}}

City: {{Address1CityDataMappingField}}

Sample template:


Sample Template
Figure 9: Sample Template


Now we have to create the AdobeSign Data Mapping template in a DCP template. To do this, open the Advanced Template Settings on DCP Template Designer.

​DocumentsCorePack Template Designer

Figure 10: DocumentsCorePack Template Designer


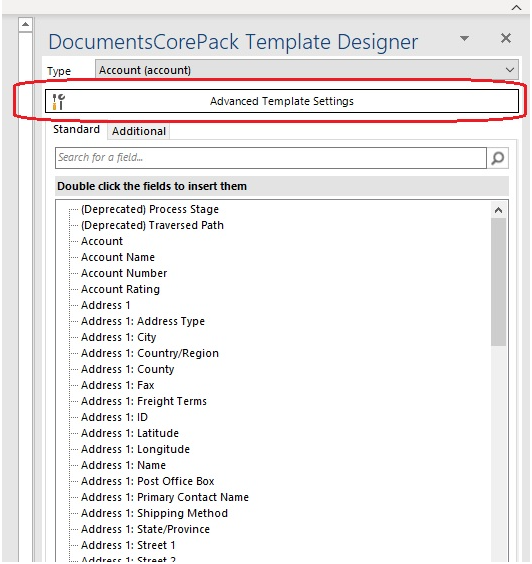
Then press the button Electronic Signature in Advanced Settings.


​Template Settings

Figure 11: Template Settings


In the opened eSign Settings, the user can set the following properties for AdobeSign:

  • DataMapping (The Agreement Mapping Template entity has to be already created in CRM)
  • Sign Oder – choose if the signee should sign the document in any order or in the order they are added to the agreement
  • Signing Language – default language of the Agreement

​In eSign Settings select the created DataMapping template.


eSign Settings

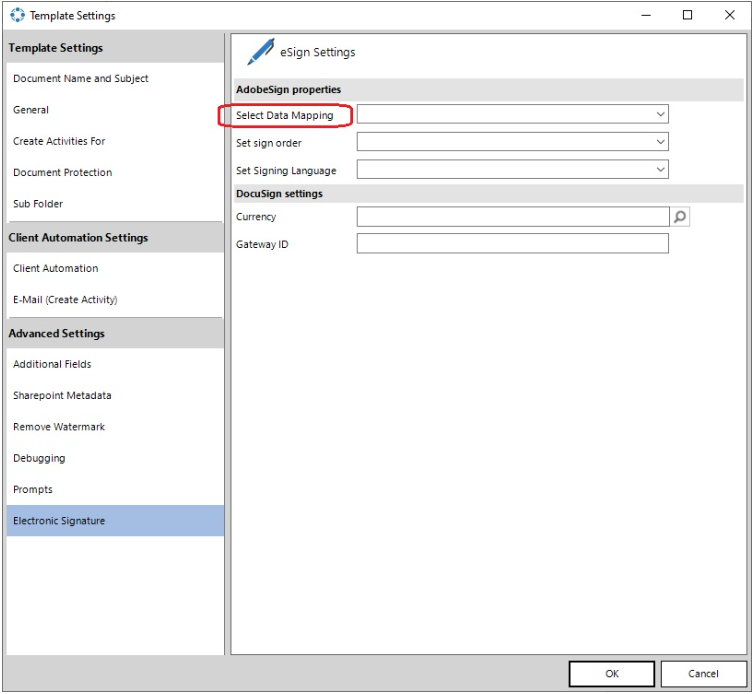
Figure 12: eSign Settings

Then press the OK button to save changes.

Save the DCP template in CRM.

Open a Contact entity which has to used for signing.


Contact Entity

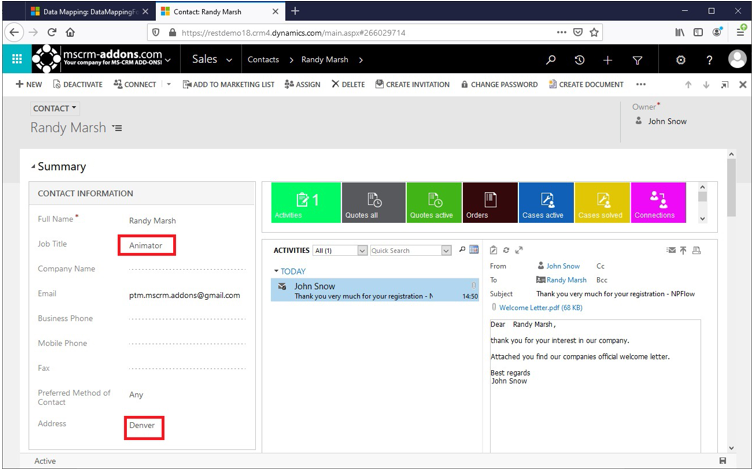
Figure 13: Contact Entity

Current value for Job Title is Animator and for Address City is Denver.

Now click the button Create Document ❶ and then click Let me decide every step (available for users). 

In the opened list choose the created DCP template ❷ and click the ❸ Next button.


Documents CorePack Dialog

Figure 14: Documents CorePack Dialog

Then check Attach document❶, choose As Adobe Sign email ❷ and select the recipient ❸.


Documents CorePack Dialog

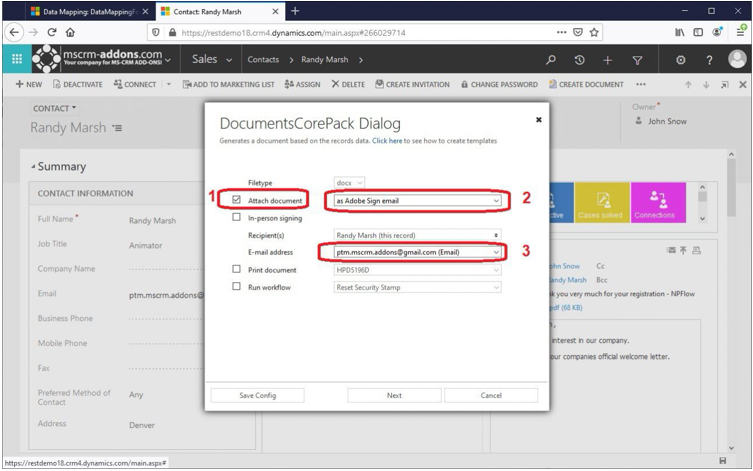
Figure 15: Documents CorePack Dialog

Then at the end click on Finish.


Documents CorePack Dialog

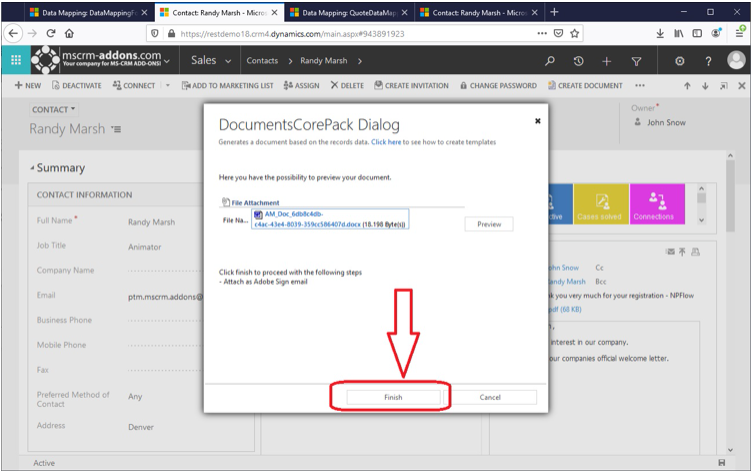
Figure 16: Documents CorePack Dialog

Shortly afterwards, the recipient will receive an email with an invitation to sign the document.


​Adobe Sign Invitation

Figure 17: Adobe Sign Invitation

After the recipient clicks the link, they can fill out the fields (in our case Job title and City) and sign the document.

Signed Document Figure 18: Signed Document

After signing it is necessary to open the AdobeSign Agreement in order to change the status.

Before signing:


AdobeSign Agreement

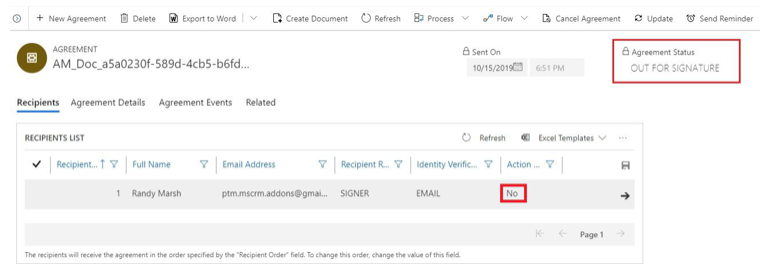
Figure 19: AdobeSign Agreement 

After signing:


Changed AdobeSign Agreement

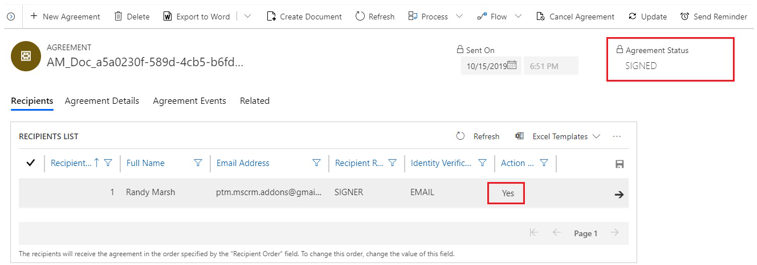
Figure 20: Changed AdobeSign Agreement 

Then open the contact you are working with and make sure that the values of Job title and City fields have been replaced with the values from the signed Agreement.


Changed Contacts
Figure 21: Changed Contacts


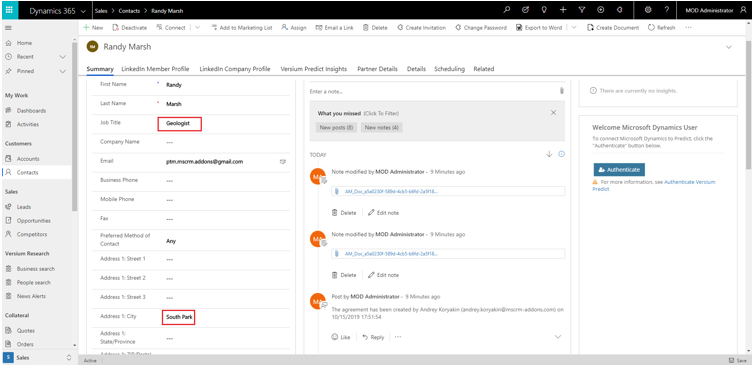
Now the value for Job Title is Geologist and for Address City is South Park. The values have been successfully replaced.

​That’s it! We appreciate your feedback! Please share your thoughts by sending an email to support@mscrm-addons.com.

Was this helpful?

Yes  No
Related Articles
  • Simplify Contract Processes with Dynamics 365 + E-Signature 
  • How to update the metadata in the DocumentsCorePack Template Designer
  • Working with Product Properties in DocumentsCorePack
  • How to work with the Relationship Manager
  • Using virtual tables in DocumentsCorePack
  • DocumentsCorePack Template Designer Settings
Latest Articles
  • How to automate the E-signature process via Power Automate
  • Technical Description: The AutoMergeWorkingItem (AMWI) 
  • Dataverse Online OData v2.0 endpoint removal for custom “ExportToWord” Button
  • Simplify Contract Processes with Dynamics 365 + E-Signature 
  • Simplify Your Contract Processes with Dynamics 365 and DocumentsCorePack
Popular Articles
  • DocumentsCorePack Template Designer – Getting Started
  • Where do I find the Unique Organization name in Microsoft Dynamics 365?
  • Step-by-Step: How to configure a One-Click-Action
  • mscrm-addons.com Application Access for Dynamics 365 (App Access) – DocumentsCorePack
  • DocumentsCorePack Online Service Configuration
Top Rated Articles
  • IMPORTANT information for Dynamics 365 online customers using DocumentsCorePack and/or AttachmentExtractor
  • How to activate the DocumentsCorePack connector for PowerApps & Microsoft Flow
  • Step-by-Step: How to configure a One-Click-Action
  • “Blocked by Conditional access” error in Azure Active Directory
  • Online Services: Required Application Permissions
Categories
  • *News and General Infos* 51
  • Webinars 36
  • Template Designer(DCP 180
  • DocumentsCorePack(DCP 195
  • TelephoneIntegration (TI 65
  • AttachmentExtractor (AE 62
  • PowerSearch (PS 48
  • ActivityTools (AT 59
  • SmartBar (SB 53
  • GroupCalendar (GC 46
Our Vision

“We see it as our purpose to provide products that simplify and speed up our customers’ Microsoft Dynamics 365 experience.”

Knowledgebase
LogIn
mscrm-addons.com
  • Products
  • Online Shop
  • Downloads
  • My Account
About Us
  • About Us
  • Case Studies
  • Newsletter
  • Partner Program
  • Contact
Support
  • Support
  • Terms & Conditions
  • Documentation
  • Webinars
  • Legal Documents
  • Impressum
  • © 2022 www.mscrm-addons.com. All Rights Reserved.