• Release History
  • Documentation
  • Back to www.mscrm-addons.com
  • Release History
  • Documentation
  • Back to www.mscrm-addons.com
home/Knowledge Base/Template Designer(DCP)/The “Insert as static document (or sub-template)” button

The “Insert as static document (or sub-template)” button

1506 views 1 Updated on February 11, 2023

The Insert as static document button is a very useful functionality when creating templates in DocumentsCorePack (DCP) Template Designer. It not only can insert static documents, but also sub-templates. Learn how to do so in this article.

First, you need to open two templates or create two new ones. Learn which fields can be added to a template here.

You need one template for your main entity and one for your sub-entity. They are the base for all further actions.

Description on how to create a sub-template to a static document

Step 1: Create a template for your main entity and the sub-entity.

In our example, the main template is based on the entity Account and the sub-template is based on the entity Contact.

Step 2: Build a relationship between the entity of the sub-template and the main template.

Open the DCP Template Designer with a click on the ❶ Insert MailMerge Fields button, switch to the Additional tab, and click on ❷ Add Relationship/Entity and select ❸ All contacts.

Open the DCP Template Designer and build a relationship between the entity of the sub-template and the main template.
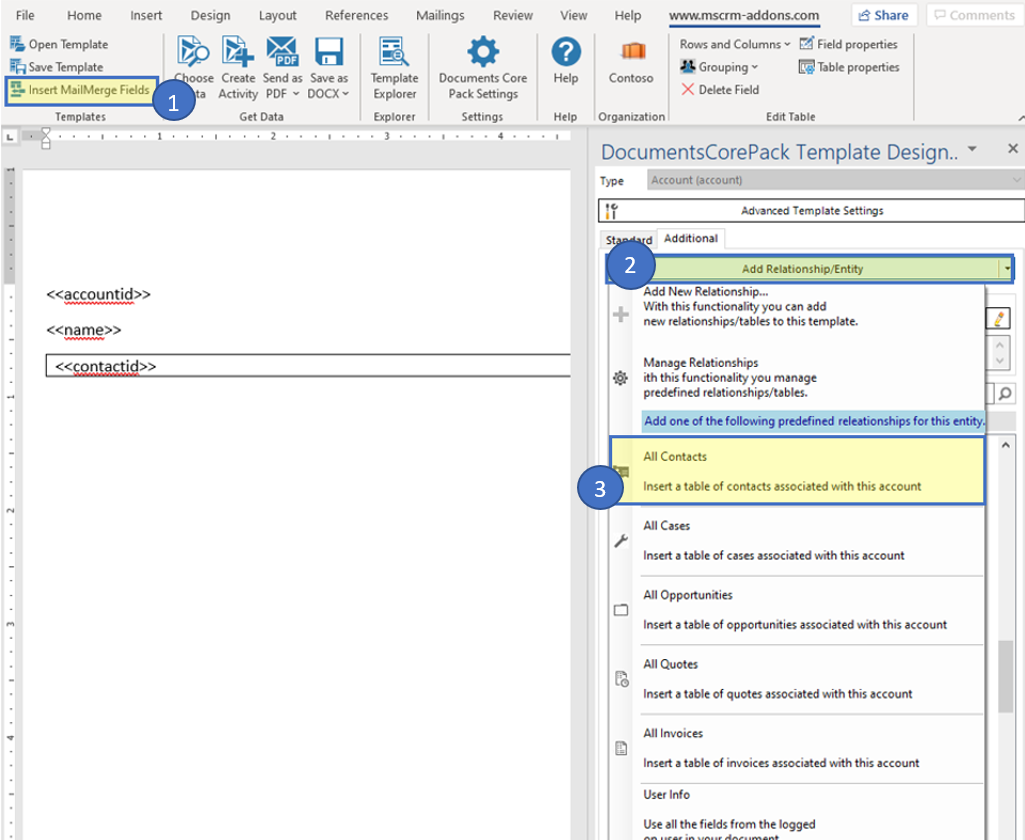
Figure 1: DCP Template Designer

Step 3: Now navigate to the Insert Field Button > Insert Static Item > Static Document within the Template Designer. The following dialog will pop up:

The "Static Document" dialog.
Figure 2: Static document properties

Within the Static Document dialog:

❶ Select the ID-field of the related record. (In our example, this is Contact ID.)
❷ You can do this via the search field or the ID-field.
❸ Check the Provide the selected field as a parameter checkbox to enable the sub-template to be merged with the ID-field.
❹ Click on the Select Document button to select the static document you would like to insert.
❺ The selected document is shown.
❻ Click OK to proceed.

If you go back to your main template, you will note that the following field has been added to it:

The added field to the main template.
Figure 3: Main template – additional field

You have now created your first static sub-template.

Our sample result looks like this in the merged template:
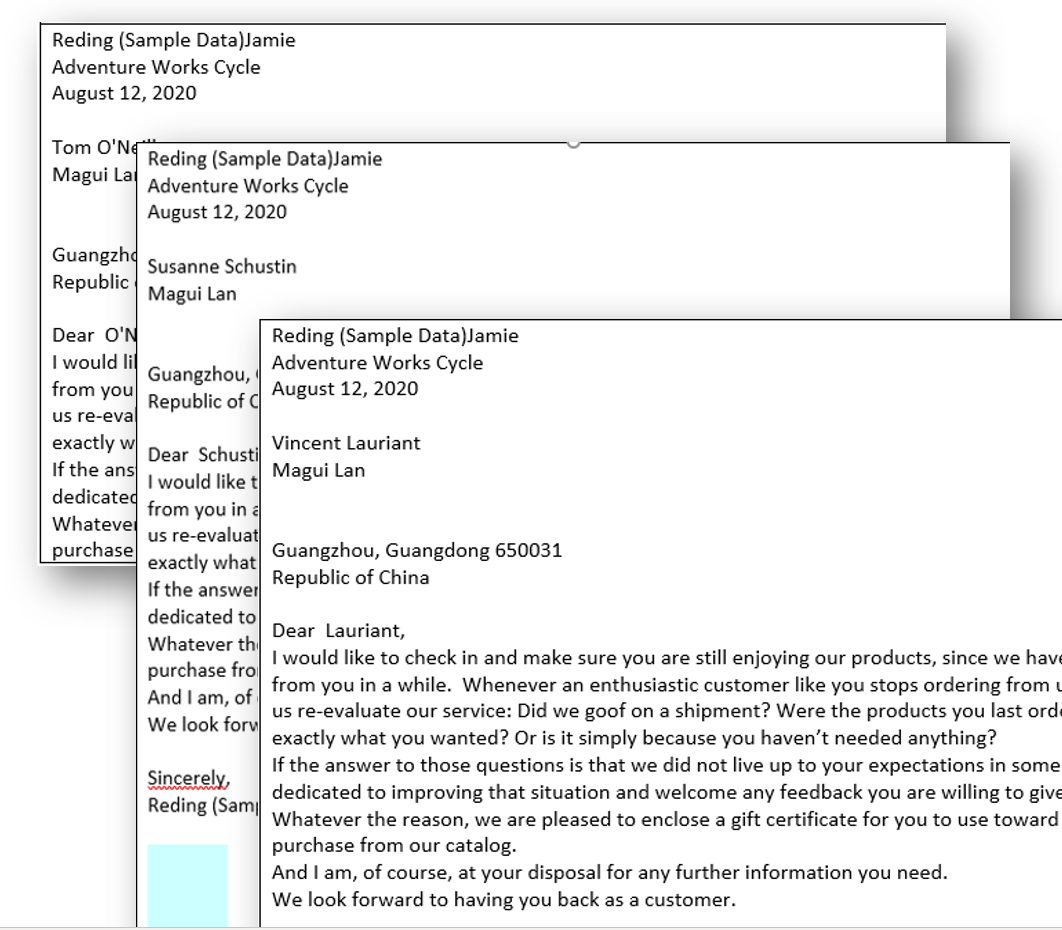
Sample resulting merged template.
Figure 4: Result

Please note:

  • If a sub-document is inserted within a table, some limitations of Word apply. Elements and controls that are part of the sub-document but cannot be part of a table might cause unexpected behavior (for example: page breaks).
  • A sub-document does not work when it is inserted in the header or footer section of a template.

That’s it! We appreciate your feedback! Please share your thoughts by sending an email to office@mscrm-addons.com.

Was this helpful?

1 Yes  1 No
Related Articles
  • How to: automate quote generation and delivery upon activation via Power Automate
  • Sample Templates 
  • Step-by-Step: How to create an account sales report template
  • Step-by-Step: How to create a NDA-contract template 
  • Step-by-Step: How to create a work order template
  • Step-by-Step: How to create a quote template 
Latest Articles
  • Attaching documents from SharePoint when sending emails via the DocumentsCorePack dialog
  • How to: automate quote generation and delivery upon activation via Power Automate
  • Dynamic document elements in Multipart documents
  • Limiting access to SharePoint for custom app access using Sites.Selected
  • Batch document generation via the DocumentsCorePack dialog
Popular Articles
  • DocumentsCorePack Template Designer – Getting Started
  • Step-by-Step: How to configure a One-Click-Action
  • Where do I find the Unique Organization name in Microsoft Dynamics 365?
  • Application Access for Dynamics 365 (App Access)
  • DocumentsCorePack Online Service Configuration
Top Rated Articles
  • “Undefined”-labels in Chrome and Edge 114 and higher
  • Important information for Dynamics 365 online customers using DocumentsCorePack and/or AttachmentExtractor
  • How to activate the DocumentsCorePack connector for PowerApps & Microsoft Flow
  • Step-by-Step: How to configure a One-Click-Action
  • How licenses are counted
Categories
  • *News and General Infos* 53
  • Webinars 37
  • Template Designer(DCP 193
  • DocumentsCorePack(DCP 211
  • TelephoneIntegration (TI 65
  • AttachmentExtractor (AE 65
  • PowerSearch (PS 48
  • ActivityTools (AT 59
  • SmartBar (SB 53
  • GroupCalendar (GC 46
Our Vision

“We see it as our purpose to provide products that simplify and speed up our customers’ Microsoft Dynamics 365 experience.”

Knowledgebase
LogIn
mscrm-addons.com
  • Products
  • Online Shop
  • Downloads
  • My Account
About Us
  • About Us
  • Case Studies
  • Newsletter
  • Partner Program
  • Contact
Support
  • Support
  • Terms & Conditions
  • Documentation
  • Webinars
  • Legal Documents
  • Impressum
  • © 2022 www.mscrm-addons.com. All Rights Reserved.