• Release History
  • Documentation
  • Back to www.mscrm-addons.com
  • Release History
  • Documentation
  • Back to www.mscrm-addons.com
home/Knowledge Base/Template Designer(DCP)/Create an inspection report for a Work Order Service Task

Create an inspection report for a Work Order Service Task

191 views 0 Updated on November 27, 2022

Field Service inspections support an out of the box export to PDF function. With DocumentsCorePack (DCP) you can easily replicate such a report and integrate it in One-Click-Actions, and can overcome certain limitations of the current export capabilities. This article covers how to create an inspection report for a Work Order Service Task in a DCP template. If you want to build your template based on the table “Work Order”, have a look at this post.

Sample template while editing
Figure 1: Sample template while editing

The following step is necessary for obtaining required data, as the questions and answers do not follow the standard table-row-model (entity-record-model) of MS Dataverse. The actual data is stored in fields as blocks of JSON data and these two elements are only loosely bound.

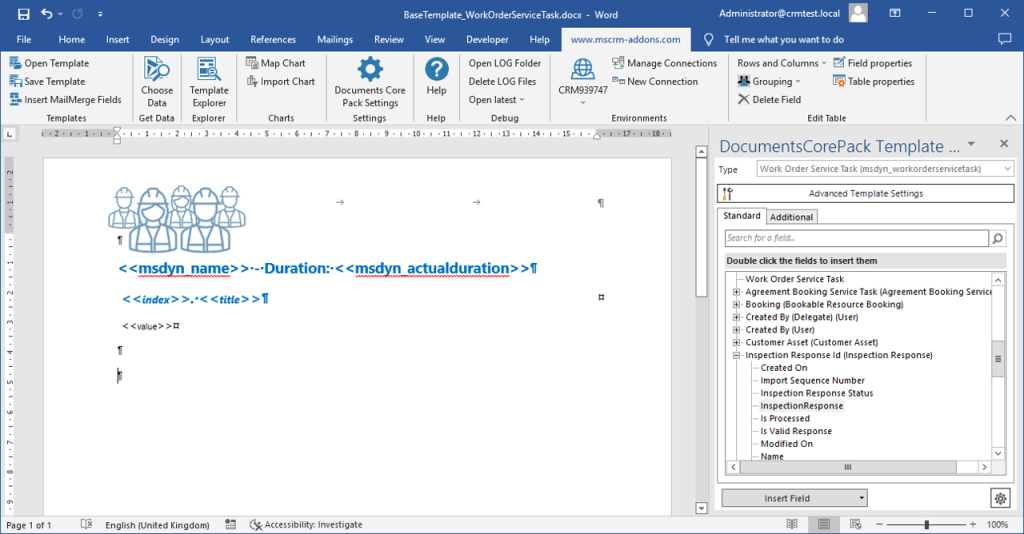
Insert field as Inspection

To insert the inspection response, you must select the field “ResponseJsonContent” [sic] ❶. Then expand the Insert Fields drop down ❷ and select “Insert ‘ResponseJsonContent’ as Inspection” ❸.

Insert as insepection
Figure 2: Insert as inspection

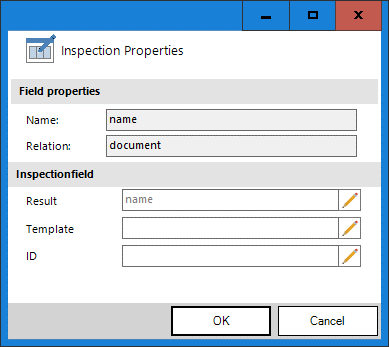
If you see a dialog like the one below, you most likely selected a wrong field that is not suitable for an inspection field. As the inspection field is a special case that also requires specific fields from the system, we automatically try to fill this dialog for you. If we find all the correct fields, we fill it automatically and you will not see this dialog.

Inspection Properties Dialog
Figure 3: Inspection Properties Dialog

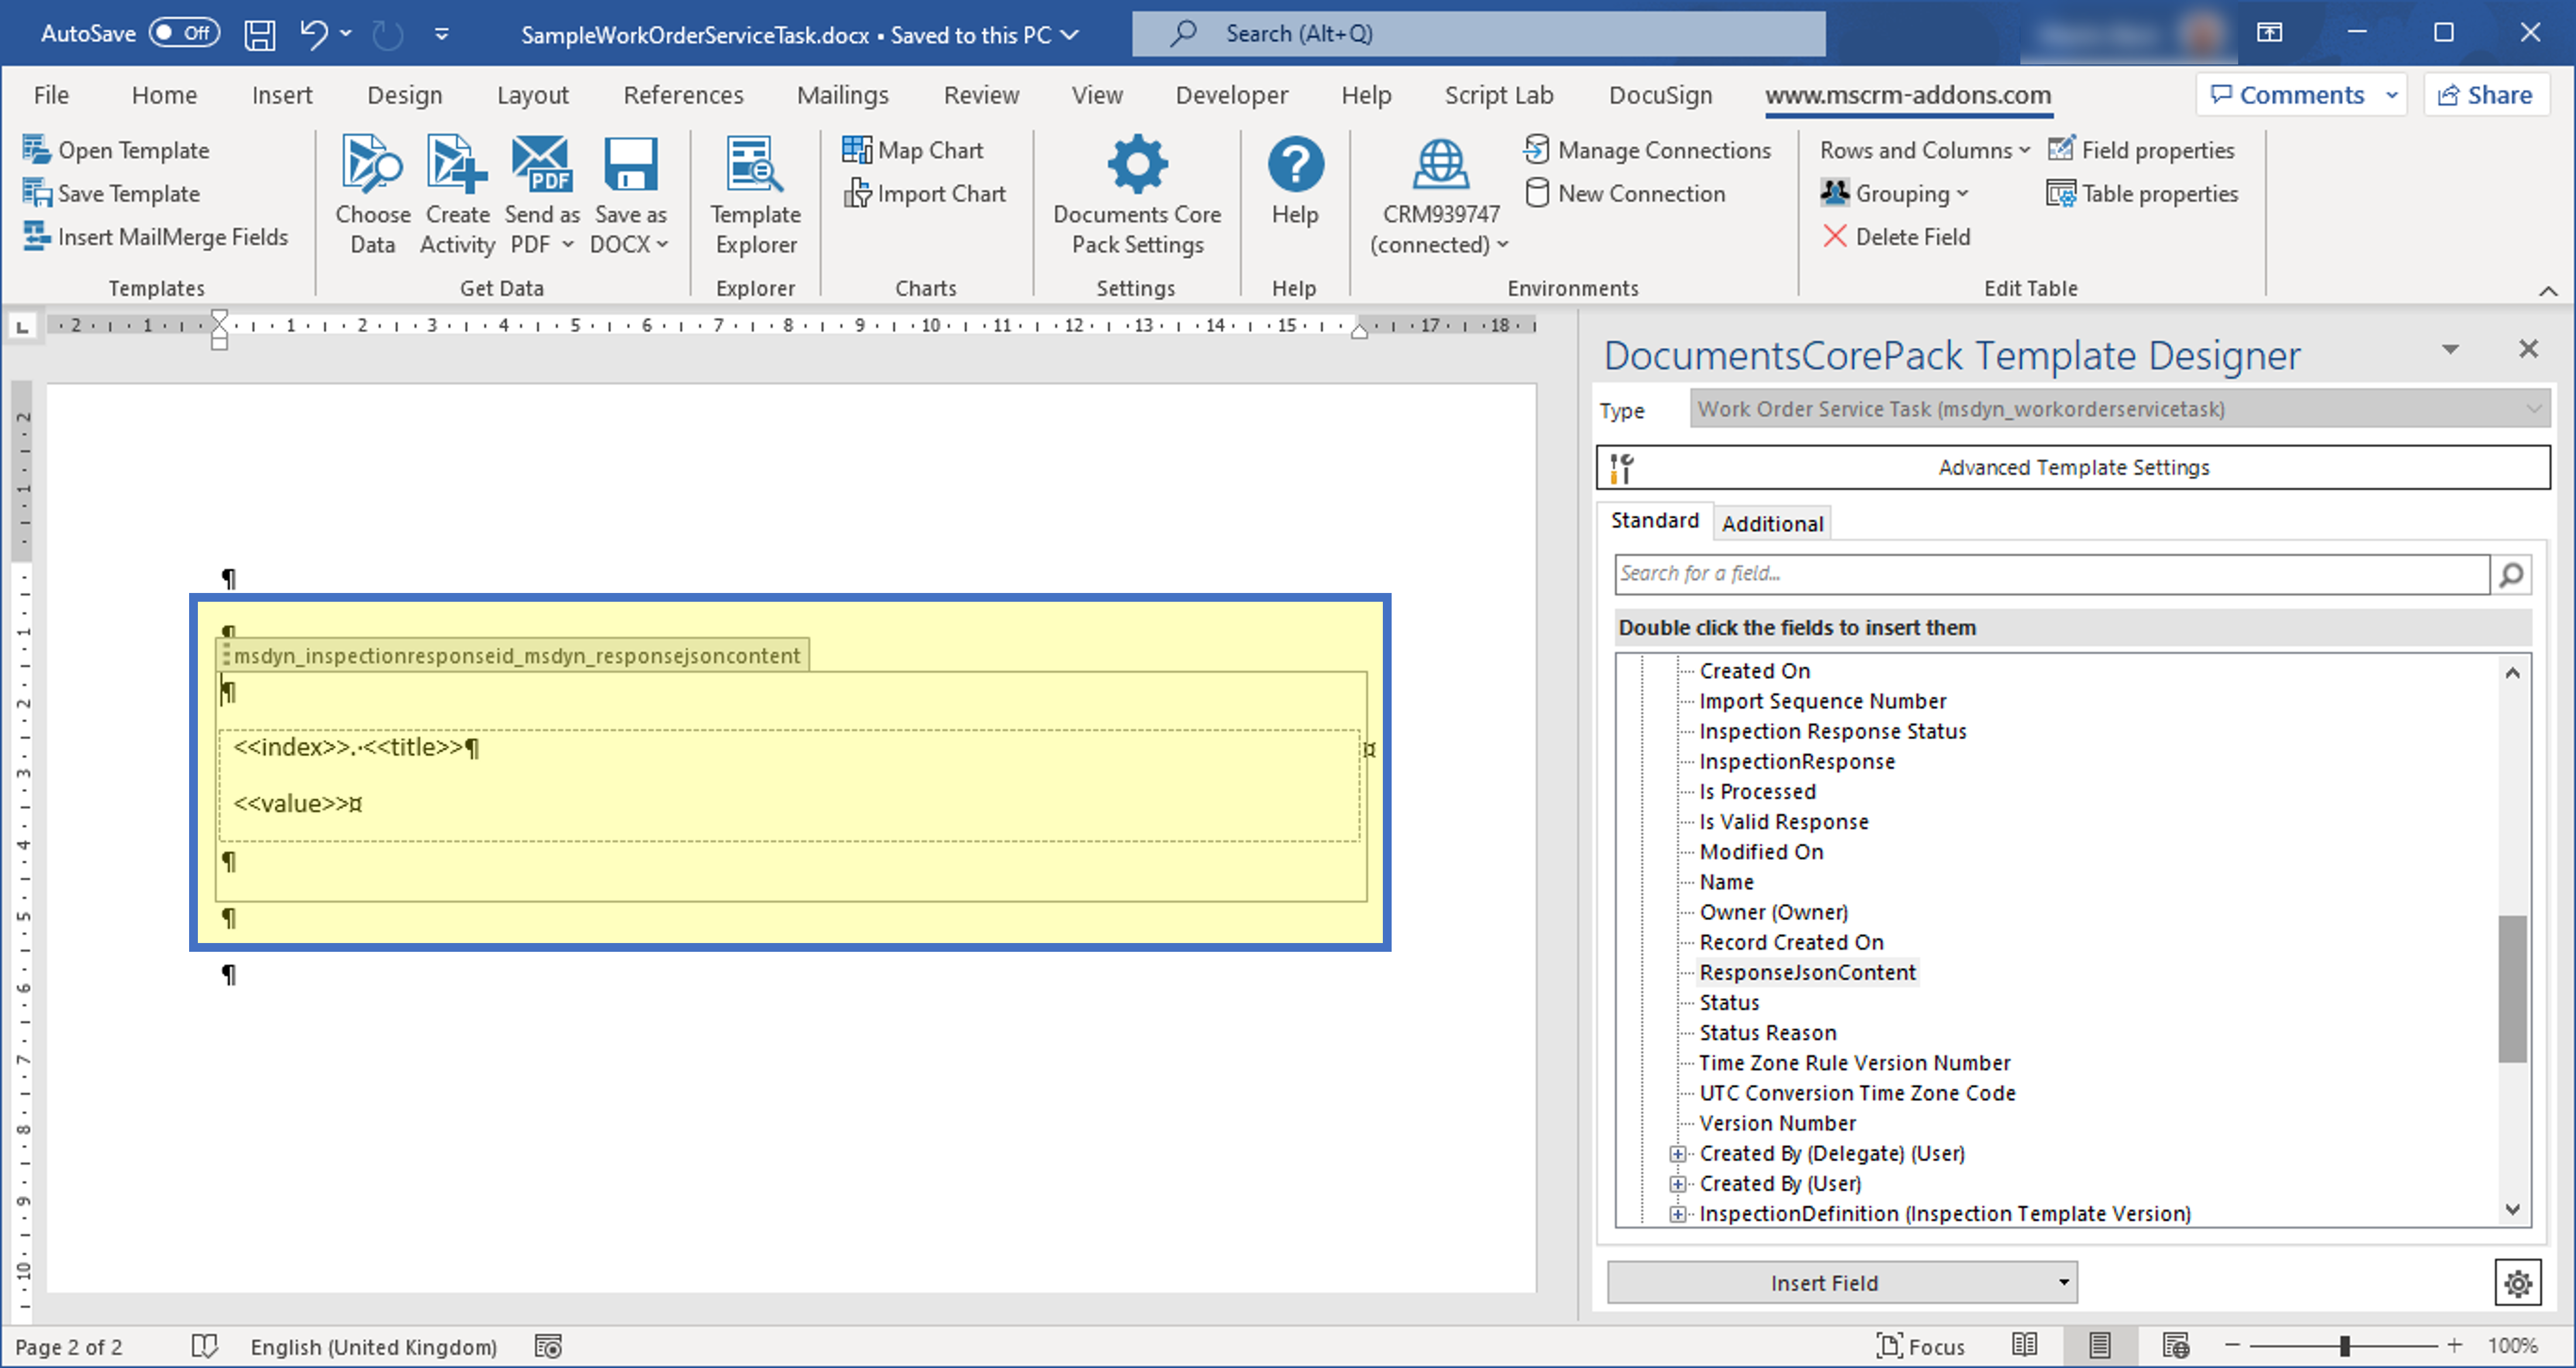
Afterwards several content controls will appear in your document. The wrapping content control represents the whole inspection. The table row represents a question with an answer. The <<index>> field is the number of the question and the <<title>> field contains the question itself. The <<value>> field contains the answers.

Sample of the inserted fields related to inspection
Figure 4: Sample of the inserted fields related to inspection

For the normal text formatting, you can simply format the fields with the standard word formatting options, the same way as for DCP Fields. For more details about the additional formatting options, have a look at this article about Inspection response formatting and advanced settings.

Next you can test your template. Each question has its own row with corresponding data.

Template (left) and merged document
Figure 5: Template (left) and merged document

That’s all on how to create inspection reports for Work Order Service Tasks. We appreciate your feedback! Please share your thoughts by sending us an email to support@mscrm-addons.com!

Downloads

BaseTemplate_WorkOrderServiceTaskDownload

Related Articles

How do I create relationships using DocumentsCorePack Template Designer

External Links

Export inspection responses as PDF

Known limitations with exporting inspection response

Tags:inspectionwork order

Was this helpful?

Yes  No
Related Articles
  • How to update the metadata in the DocumentsCorePack Template Designer
  • Working with Product Properties in DocumentsCorePack
  • How to work with the Relationship Manager
  • Using virtual tables in DocumentsCorePack
  • DocumentsCorePack Template Designer Settings
  • How to solve: Failed to connect to an IPC Port
Latest Articles
  • How to share the Connection of the DocumentsCorePack Connector
  • How to update the metadata in the DocumentsCorePack Template Designer
  • Working with Product Properties in DocumentsCorePack
  • How to work with the Relationship Manager
  • Using virtual tables in DocumentsCorePack
Popular Articles
  • Where do I find the Unique Organization name in Microsoft Dynamics 365?
  • DocumentsCorePack Template Designer – Getting Started
  • mscrm-addons.com Application Access for Dynamics 365 (App Access) – DocumentsCorePack
  • DocumentsCorePack Online Service Configuration
  • Step-by-Step: How to configure a One-Click-Action
Top Rated Articles
  • IMPORTANT information for Dynamics 365 online customers using DocumentsCorePack and/or AttachmentExtractor
  • How to activate the DocumentsCorePack connector for PowerApps & Microsoft Flow
  • Step-by-Step: How to configure a One-Click-Action
  • Online Services: Required Application Permissions
  • Where do I find the Unique Organization name in Microsoft Dynamics 365?
Categories
  • *News and General Infos* 51
  • Webinars 35
  • Template Designer(DCP 179
  • DocumentsCorePack(DCP 192
  • TelephoneIntegration (TI 65
  • AttachmentExtractor (AE 62
  • PowerSearch (PS 48
  • ActivityTools (AT 59
  • SmartBar (SB 53
  • GroupCalendar (GC 46
Our Vision

“We see it as our purpose to provide products that simplify and speed up our customers’ Microsoft Dynamics 365 experience.”

Knowledgebase
LogIn
mscrm-addons.com
  • Products
  • Online Shop
  • Downloads
  • My Account
About Us
  • About Us
  • Case Studies
  • Newsletter
  • Partner Program
  • Contact
Support
  • Support
  • Terms & Conditions
  • Documentation
  • Webinars
  • Legal Documents
  • Impressum
  • © 2022 www.mscrm-addons.com. All Rights Reserved.