This article covers how to insert an inspection response for a Work Order into a DocumentsCorePack (DCP) template.
If you have not heard about inspections before, we recommend looking at this article about the Field Service Inspection responses feature before continuing. If you want to build your template based on the table “Work Order Service Task”, have a look at this post. If you have not worked with DCP before, we recommend viewing the following: Getting Started.
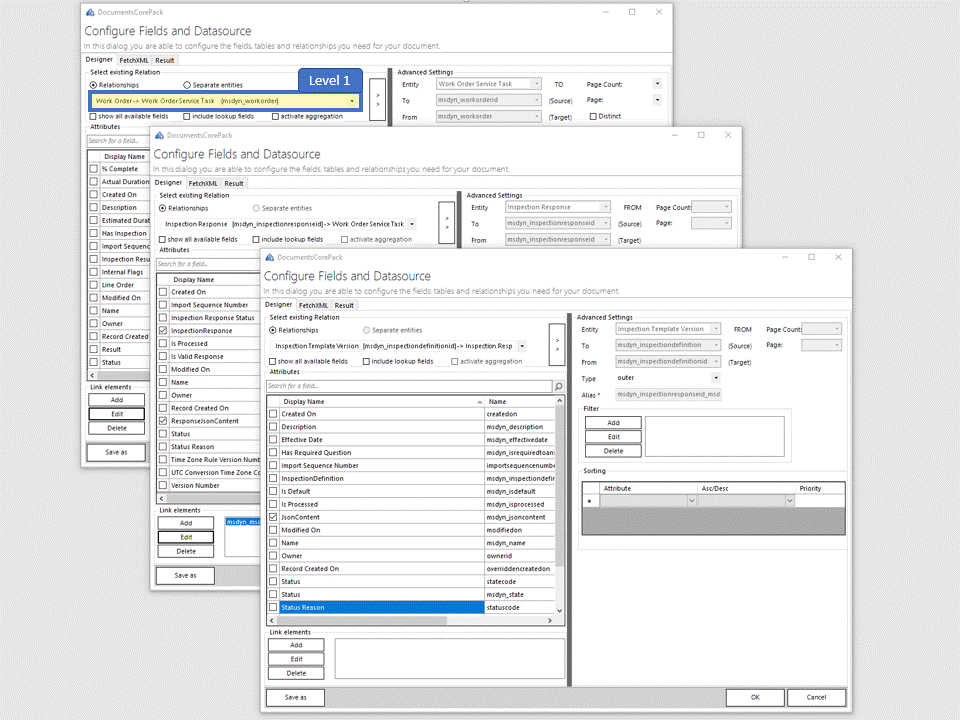
The following step is necessary for obtaining required data, as the questions and answers do not follow the standard table-row-model (entity-record-model) of MS Dataverse. The actual data is stored in fields as blocks of JSON data and these two elements are only loosely bound.
Resolve the required relationships
First you must resolve the relationship between the work order, the inspection and the inspection result. If you have not worked with relationships before, have a look at this article before continuing.
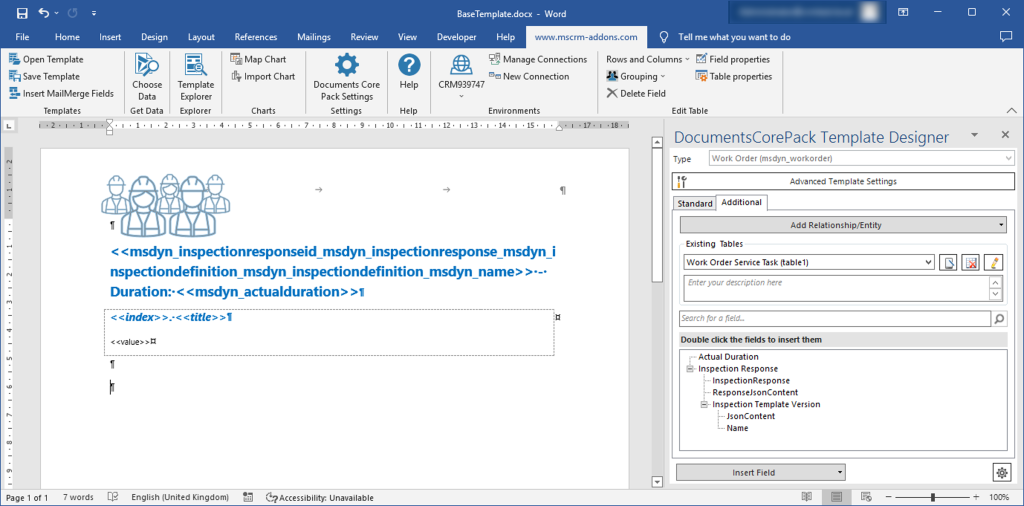
Your template must be based on the table (entity) “Work Order”, and you have to create a nested relationship with specific fields.
The first level is from “Work Order” to “Work Order Service Task” (1:n). There are no mandatory fields on this level. However, you can insert additional fields if needed for your document.
From there you have to add a link element from “Inspection Response” to “Work Order Service Task” (n:1). The required fields on this level are “InspectionResponse” [sic] and “ResponseJsonContect” [sic].
The last level is “Inspection Template Version” to “Inspection Response” (n:1) with the field “JsonContent” [sic].
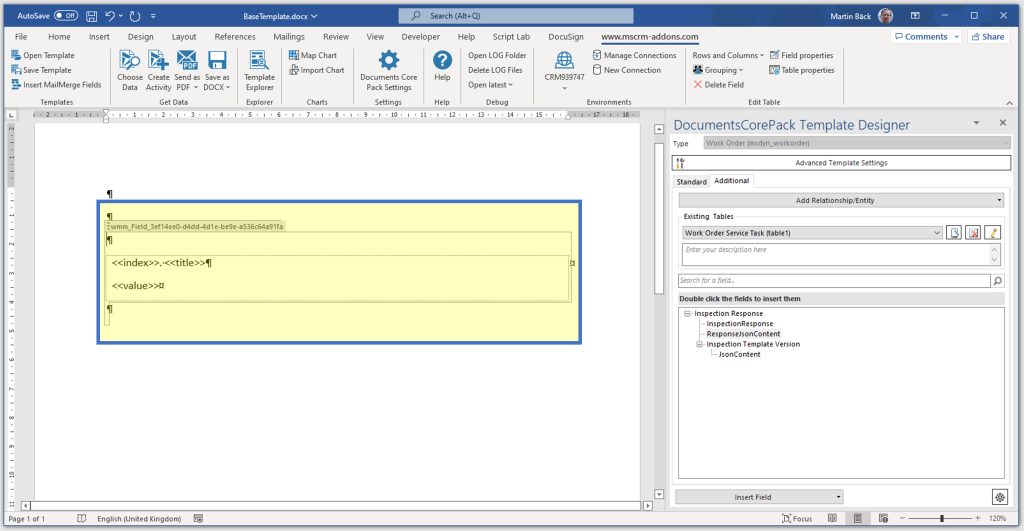
Any additional filters or fields that you require can be added on any of the levels. After adding the relationships, the minimum tree of the available fields will appear as in the picture below.
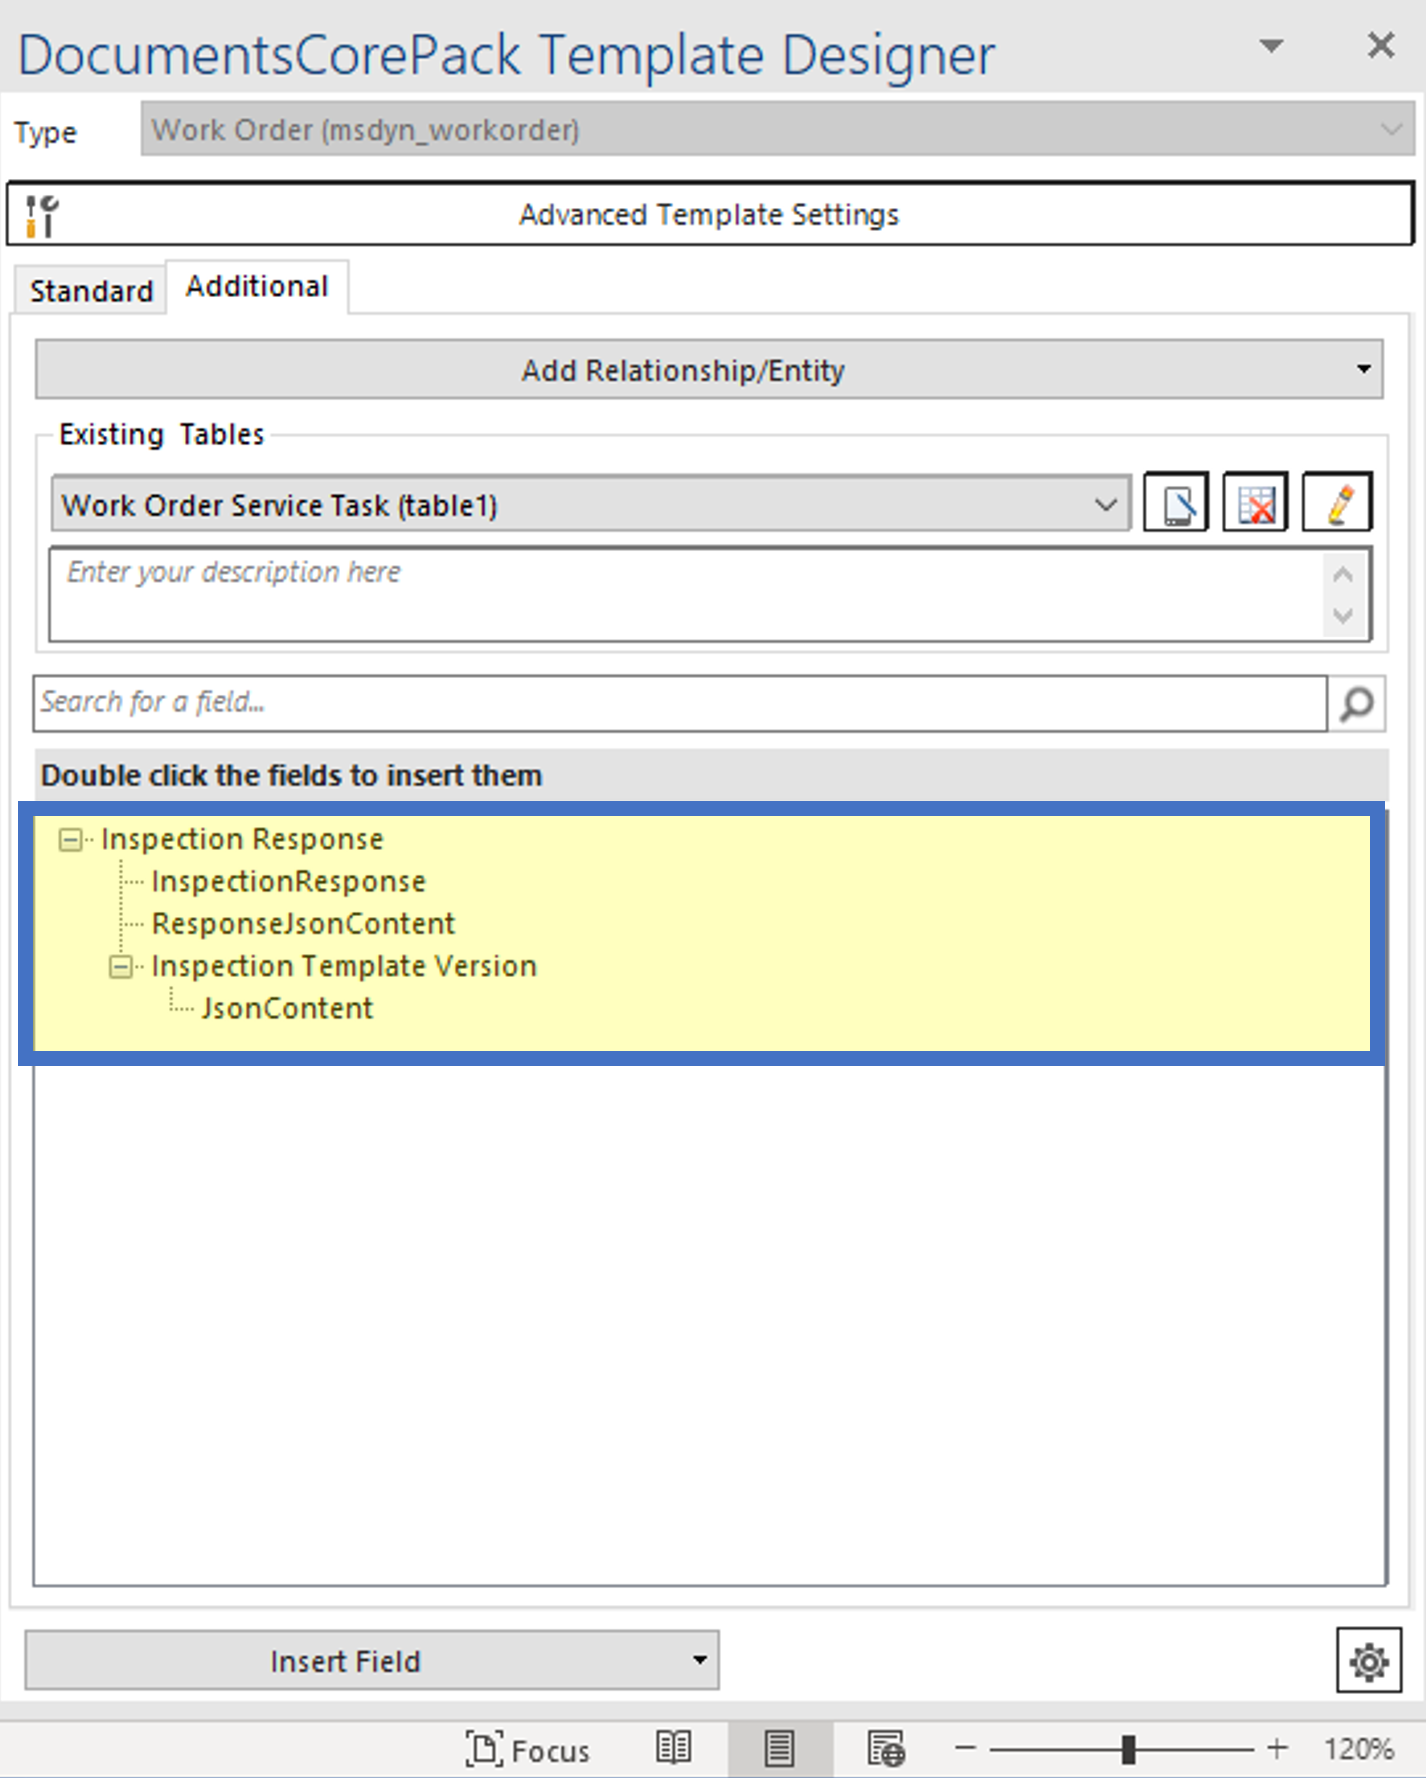
The “ResponseJsonContent” [sic] field contains the answers as plain JSON data, and the “JsonContent” [sic] field holds the JSON data of the inspection template. The “InspectionResponse” [sic] itself holds an important ID. These fields are mandatory as part of this relationship and they are all used internally.
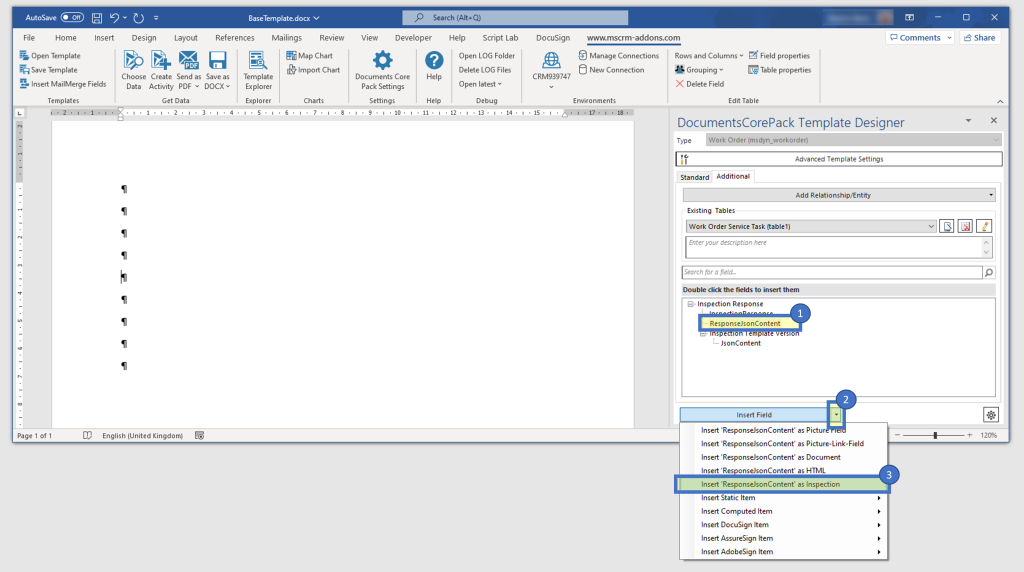
Insert field as Inspection
To insert the inspection response, you must select the field “ResponseJsonContent” [sic] ❶. Then expand the Insert Fields drop down ❷ and select “Insert ‘ResponseJsonContent’ as Inspection” ❸.
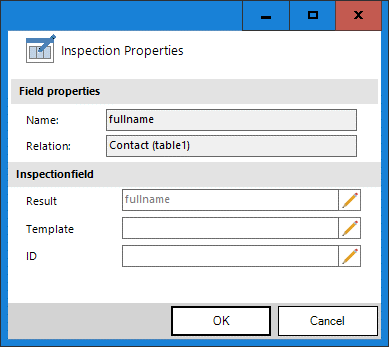
If you see a dialog like the one below, you most likely selected a wrong field that is not suitable for an inspection field. As the inspection field is a special case that also requires specific fields from the system, we automatically try to fill this dialog for you. If we find all the correct fields, we fill it automatically and you will not see this dialog.
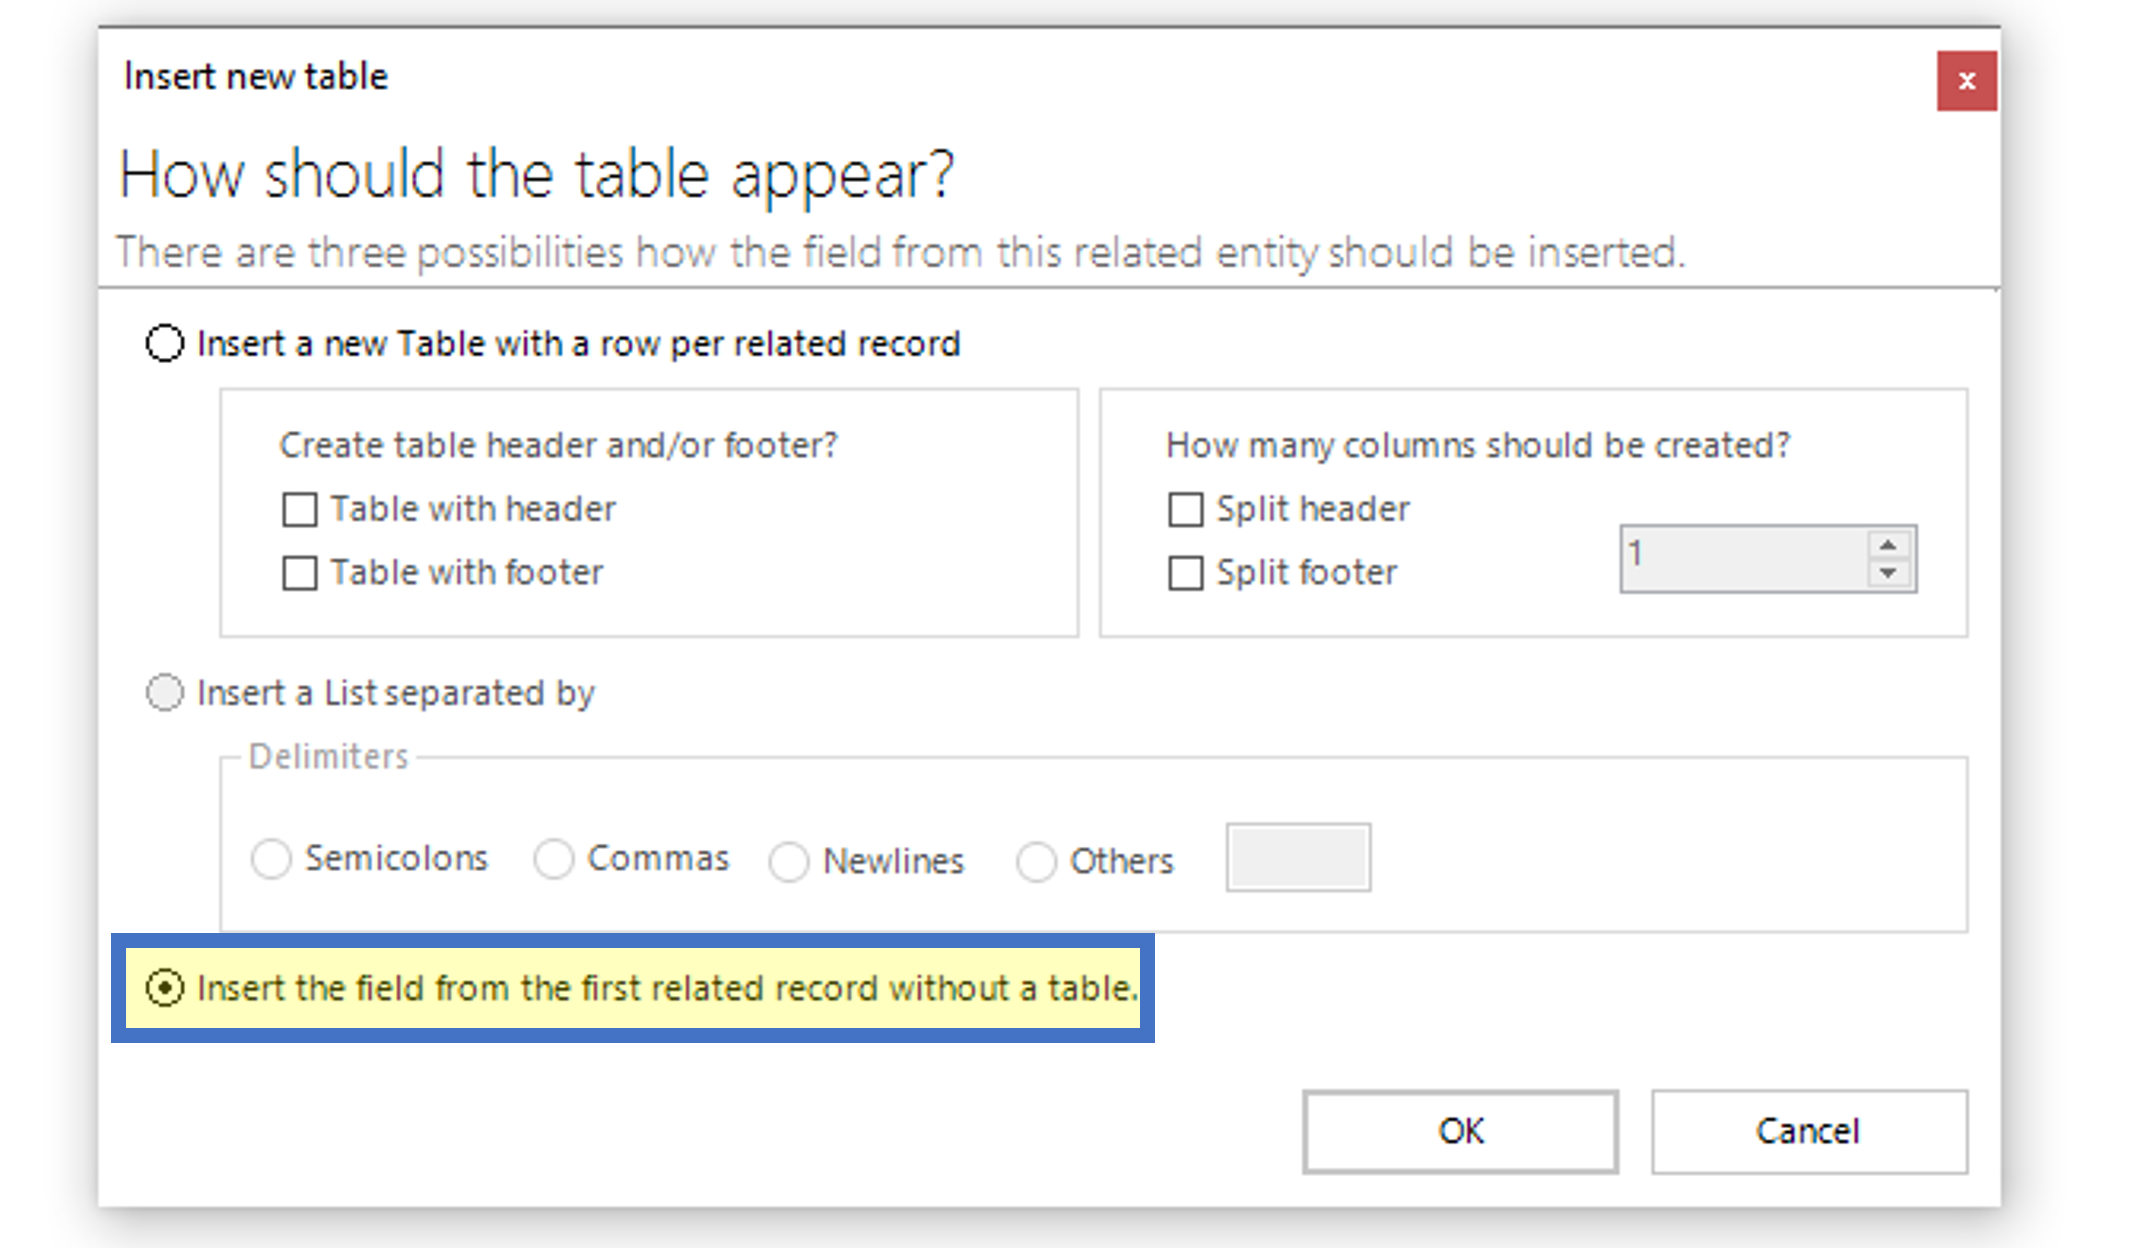
For this example, we have one related inspection response, so we select “Insert the field from the first related record without a table”. But, of course, this would also work as part of a table.
Afterwards several content controls will appear in your document. The wrapping content control represents the whole inspection. The table row represents a question with an answer. The <<index>> field is the number of the question and the <<title>> field contains the question itself. The <<value>> field contains the answers.
For the normal text formatting, you can simply format the fields with the standard word formatting options, the same way as for DCP Fields. For more details about the additional formatting options, have a look at this article about Inspection response formatting and advanced settings.
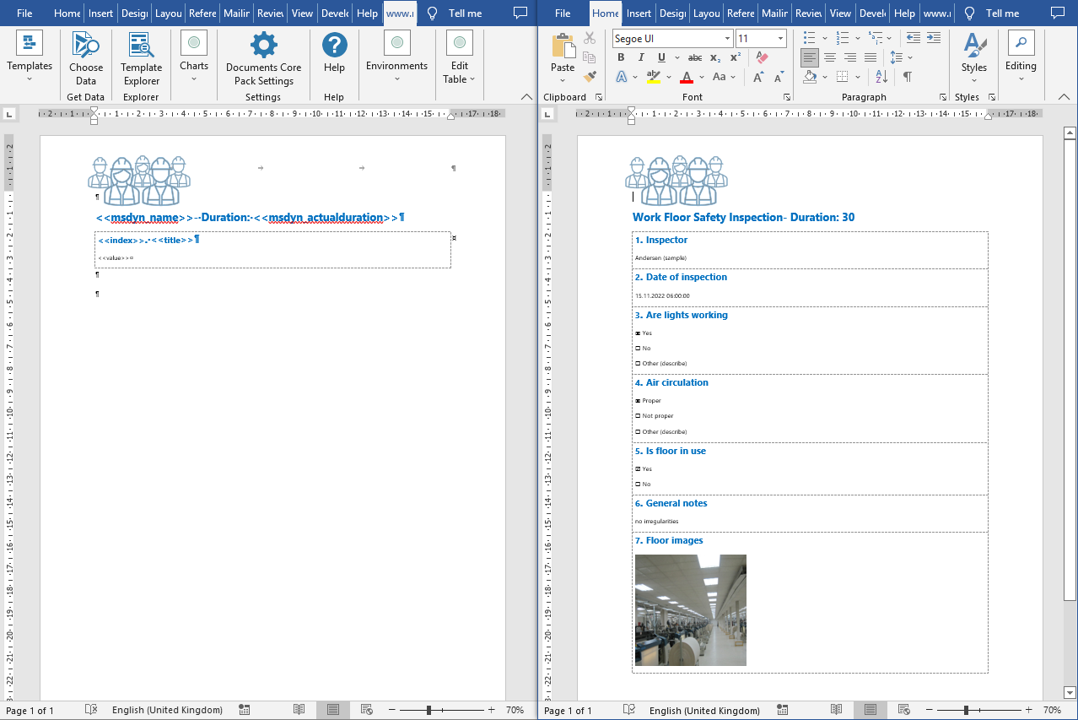
Next you can test your template. Each question will have its own row with corresponding data.
That’s all on how to work with inspection responses for Work Orders. We appreciate your feedback! Please share your thoughts by sending us an email to support@mscrm-addons.com!
Downloads
Related Articles
Working with Field Service Inspection responses
External Links
Add inspections to work orders in Dynamics 365 Field Service