By leveraging JSON format data, you can include information that goes beyond the confines of your Dataverse (Dynamics 365 environment) into your documents. This article covers preparing templates to support your JSON schema and integrating JSON data into documents using the Create document action of our Connector for PowerAutomate.
To begin, we will walk through the steps needed to add your schema to your template and insert your data into a Flow. Later, an example will demonstrate these steps in practice.
Prerequisites:
- DocumentsCorePack Template Designer version 10.40 or higher
- DocumentsCorePack Server version 2020.134 or higher.
- A SettingsKey must be added to your environment with the following values:
- Name: EnableExternalJsonDesigner
- Value: true
- Product: DocumentsCorePack
NOTE: For more information on how to create a SettingsKey, please click here.
Step-by-Step tutorial: Integrating JSON data into documents
Step 1: Prepare your template by adding a JSON schema
The JSON tab can be found in the DocumentsCorePack Template Designer.
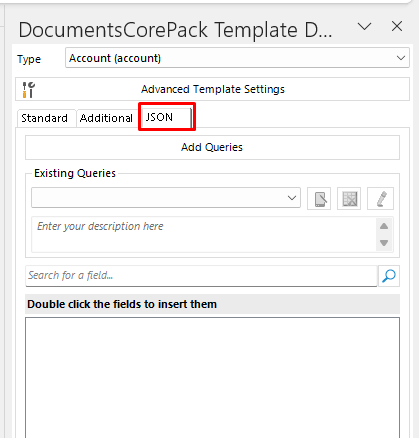
Under this tab, you can add your schema by clicking the Add Queries button. In this window, you can either manually enter your schema, or you can click on Open schema file to open up a file on your computer. The Single Row Query can be enabled if the schema represents only a single row of data. Leaving it disabled will indicate that the schema should represent a table.
NOTE: Enter only the schema here. Add the JSON data into a Flow, as shown in a later step.

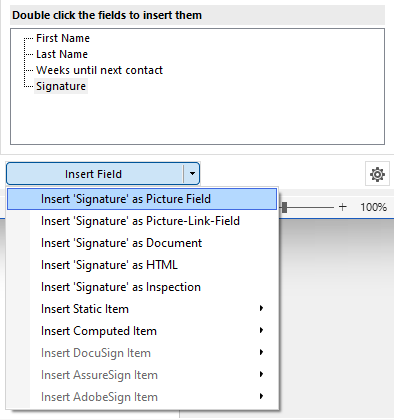
Adding the schema updates the field list to include your new fields. You can add these fields into your template just like normal fields.

With this, your template is now able to accept data based upon your specified JSON schema.
Step 2: Generate documents including external JSON data via a Flow
JSON data can be passed to your document in a Flow throught our DocumentsCorePack Connecter. After adding the Create document (sync) (V3) step to your Flow, clicking on Show advanced options will display the JSON Datasource field. Add your JSON data here.

Example
We want to create a template that contains a small message to address a customer. This template will include fields that will come from our JSON schema.
To begin, we will open Word and bring up the Template Designer. Under the JSON tab, we will select Add Query and enter our desired JSON schema. Adding the schema updates the fields list.

We can then add our fields to our template. Our First Name, Last Name, and Weeks until next contact fields can be added normally. Our Signature field, however, is an image field, as we will be passing in a Base64 string to represent our image in our data later. To add this field properly, we can add this field using the Insert as Picture Field option under the Insert Field submenu.
With our fields added in, we can save our template.

In the Flow, we specify the data we want to pass in the Create document (sync) (V3) step.
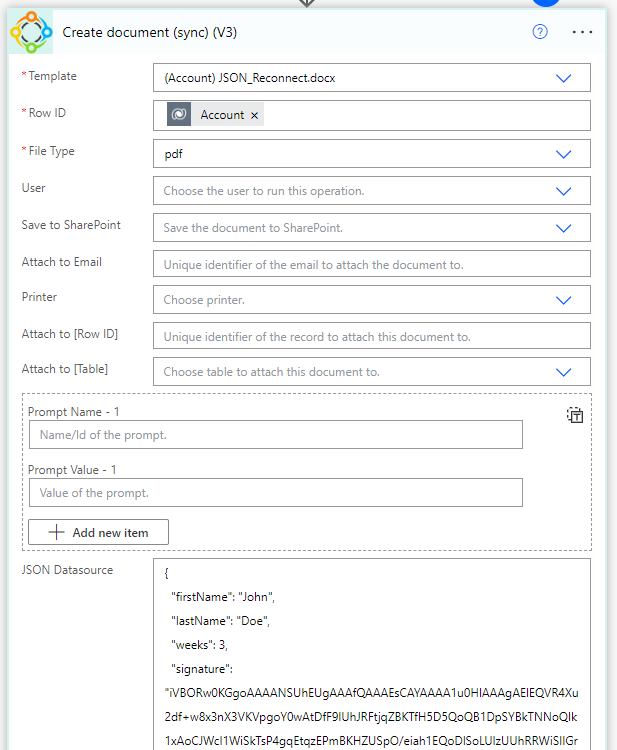
Finally, we run our Flow in our environment. The resulting document contains the data we passed in from the JSON Datasource field.

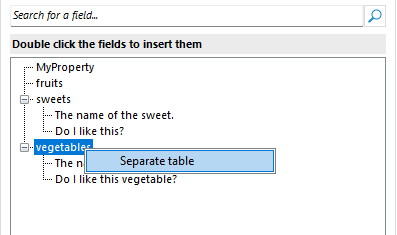
Separate Tables
JSQN Queries (data sources) that contain tables as part of their schema can have those tables separated from the original query for organizational purposes inside the “insert Fields” taskbar.
In the following example, we have a query that contains two tables, “sweets” and “vegetables”. The ❶ query defines the tables and the tables are shown as ❷ nodes in the fields list.
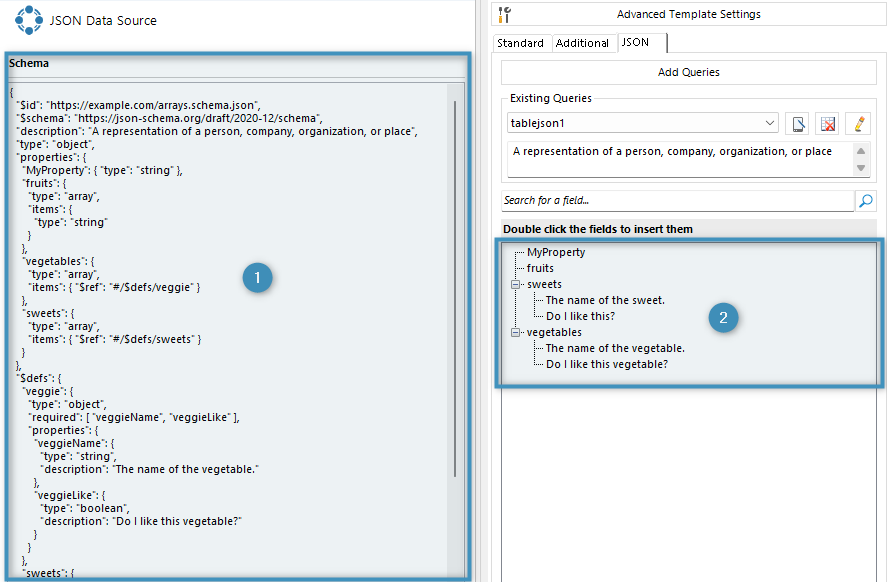
To split a table from the query, right click on the table node and select Separate table.
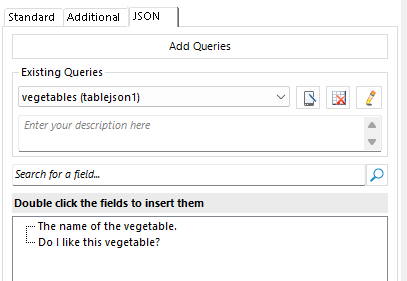
This will then split the node into its own table.
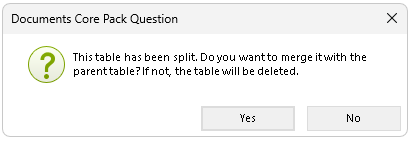
The table can be merged back into the original query by clicking the delete button. The user will be prompted to either merge the table or delete it entirely.
That’s it! We appreciate your feedback! Please share your thoughts by sending an E-mail to support@mscrm-addons.com.