This blog article is intended to guide you through the usage of the License Manager for Dynamics 365. The License Manager allows you to manage your existing licenses and is part of the MSCRM-ADDONS installation.
There are two ways to get the License information:
The Web License Manager – Has been designed to facilitate the installation of license keys within Dynamics 365.
The Local License Manager – Is accessible as a standalone application or from the main configuration tool of the addon.
The Web License Manager
Open your Dynamics 365 Settings, navigate to MSCRM-ADDONS-section and click on the addon you want to manage the license for e. g. ActivityTools.


(New Look)
The main configuration window provides you with a few tabs that allow you to configure your addon in general, in this example ActivityTools. Please navigate to the Licensing-tab (highlighted).
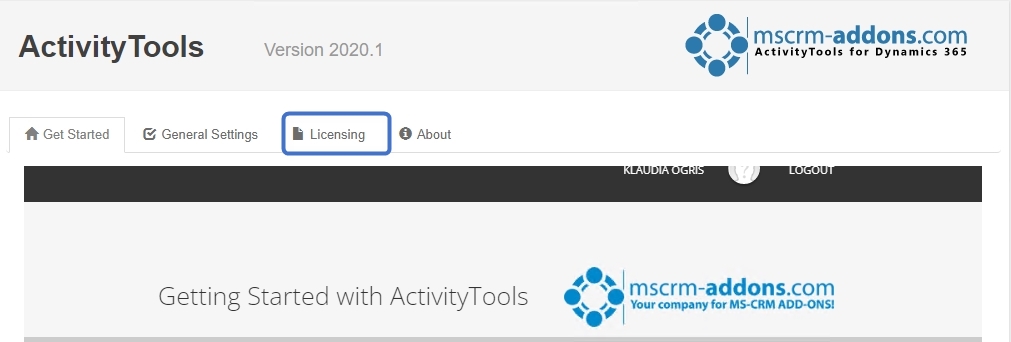
Figure 2: Licensing – ActivityTools
In the so opened ActivityTools Web License Manager, you are provided with all information regarding your license.
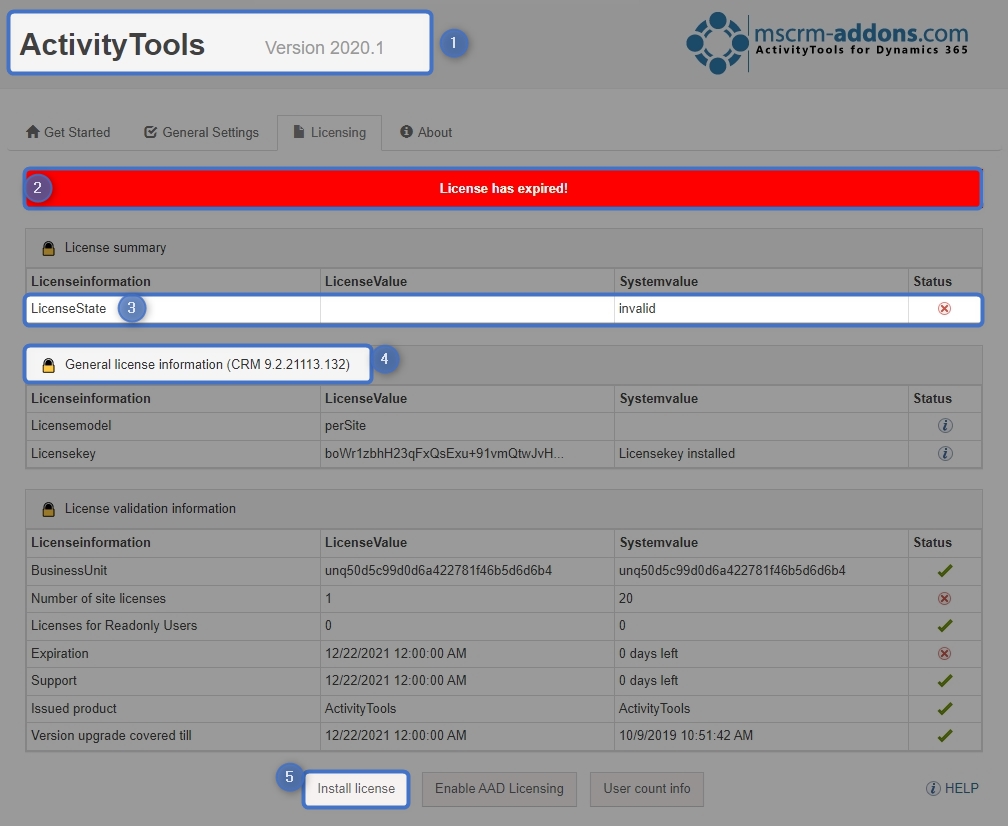
Figure 3: Licensing window – ActivityTools
❶ Product information: Provides you with the current version number of your selected addon, in this case, ActivityTools.
❷ Current system information: Summary of your current license state. The red background indicates an issue with your license. In this example, your license has expired. For more information to possible license state, have a look at the corresponding Licensing Guide documentation.
❸ License status: Provides you with a deeper insight into your license status. In this case, it is invalid because the license has expired.
❹ General license information: Displays details about the expiration date, version and user count.
❺ Install license: Please click the [Install license]-button to install a new license.
How to install a license
By clicking the [Install license]-button, you are provided with the Install license dialog (Figure 4). Follow the instructions carefully and insert your license key, which can be found in the e-mail you have received from our support team.
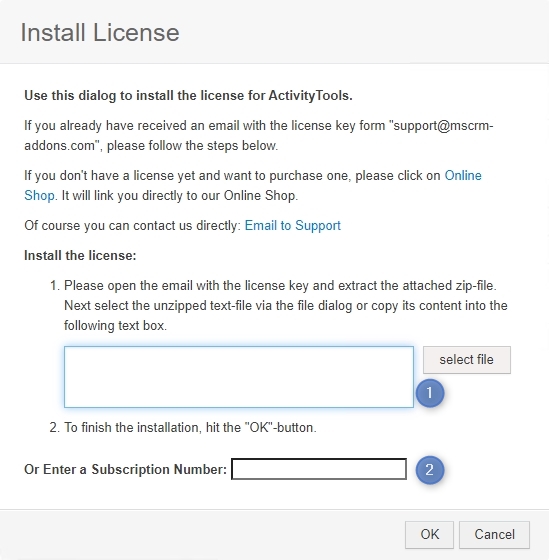
There are 2 different kinds of licenses:
❶ Perpetual license and
❷ Subscription license.
Depending on which license you choose, please follow the instructions. More information about the different licenses can be found here or in the Licensing Guide documentation in the corresponding chapter.
The Local License Manager
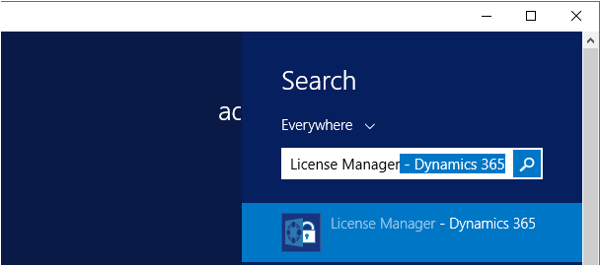
The local license manager is accessible as a standalone application or from the main configuration tool of the addon. There are two ways to open the License Manager:
1) Search for “License Manager – Dynamics 365” in the start pane and press [Enter] to start the program.
OR
2) Open the Organization overview, select an organization and click on License Manager (highlighted).
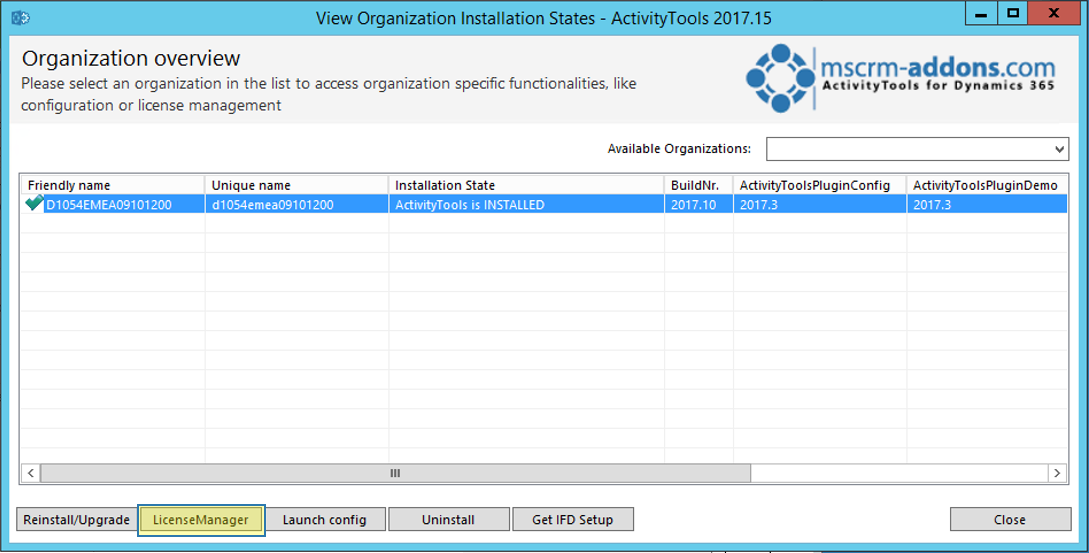
After the starting process, this window pops up:
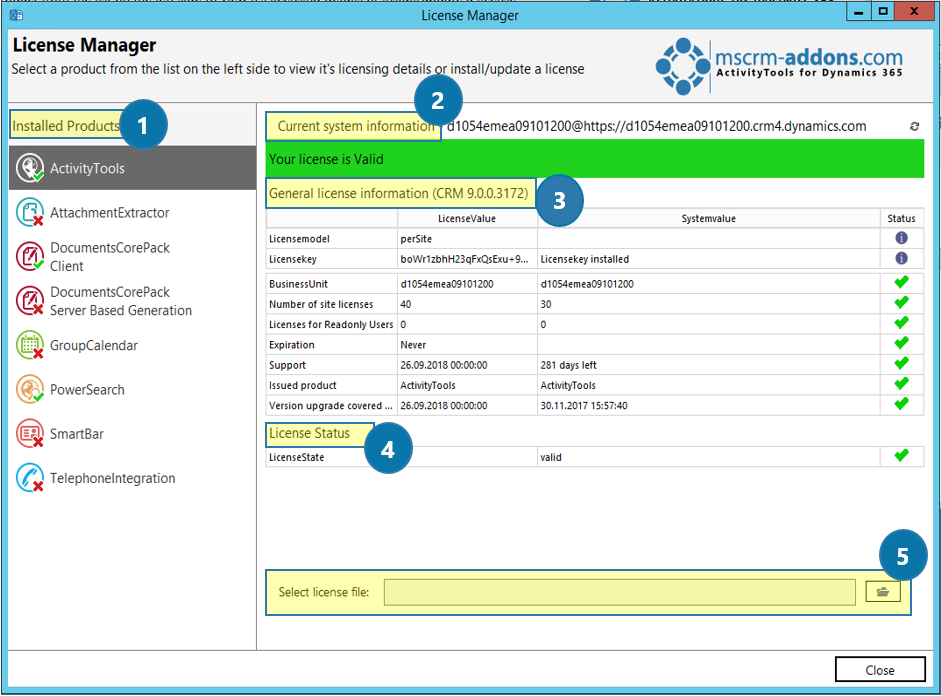
❶ Installed products: This list provides you with an overview of all the MSCRM-ADDONS products you have installed. Select a product to get the license details on the right side. In this case for ActivityTools. A green check, next to an add-on icon, means that its license is valid. A cross symbolizes an invalid license.
❷Current system information: Summary of your current license state. The green background indicates a valid license.
❸ General license information: Displays details about the expiration date, version and user count.
❹ License status: Provides you with a deeper insight into your license status.
❺ Select license file: On click, a file dialog will open which allows you selecting a license file. After selecting a file, the License Manager will analyze the license and show its information in a new dialog, like you can see below. To finish the installation, click on the [Install this]-button.

Upgrading your license
To update or upgrade your license, you have two options:
1) Purchase a new license or an upgrade license directly in our online shop.
OR
2) Contact our support
That’s it! We appreciate your feedback! Please share your thoughts by sending an email to support@mscrm-addons.com.