In this article, you’ll learn how to set up an mscrm-addons.com Application User for your Dynamics 365 organization and connect it to DocumentsCorePack using Application Access. These instructions will help you integrate and manage your documents efficiently within Dynamics 365.
Note: It is recommended that you first create your service via the Office 365 connection type to download the needed solution files to your Dynamics 365 organization. Once this service is saved, you can change the connection profile to AppAccess. This article applies only to Dynamics 365.
Prerequisites:
- DocumentsCorePack version at least 2020.114
- MSCRMADDONScom General solution at least 2020.49
If you are not sure which version you have, please see this article.
Table of contents:
- Registering and creating the application user
- Connecting to DocumentsCorePack via the App
- Troubleshooting
.
Application Access for Dynamics 365
1. Registering and creating the application user
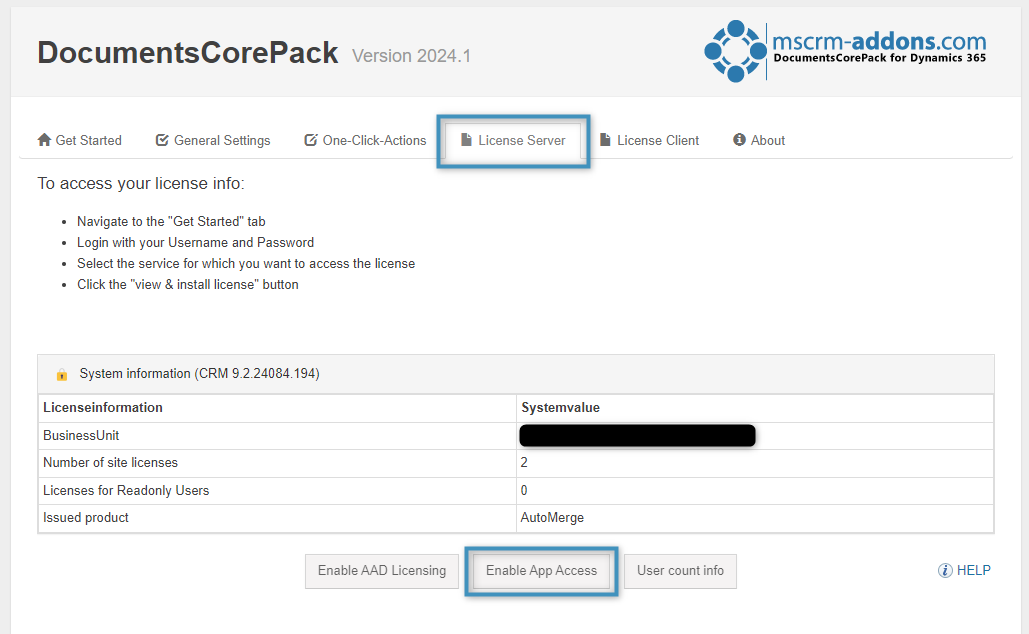
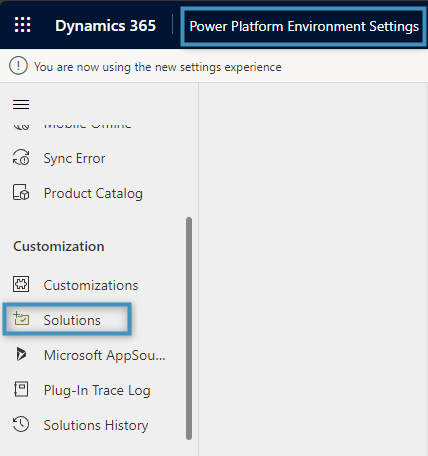
After installing DocumentsCorePack, navigate to Dynamics 365 > Power Platform Environment Settings > MSCRM-ADDONS > DocumentsCorePack.

On the following page, navigate to the License Server tab and select Enable Application Access.
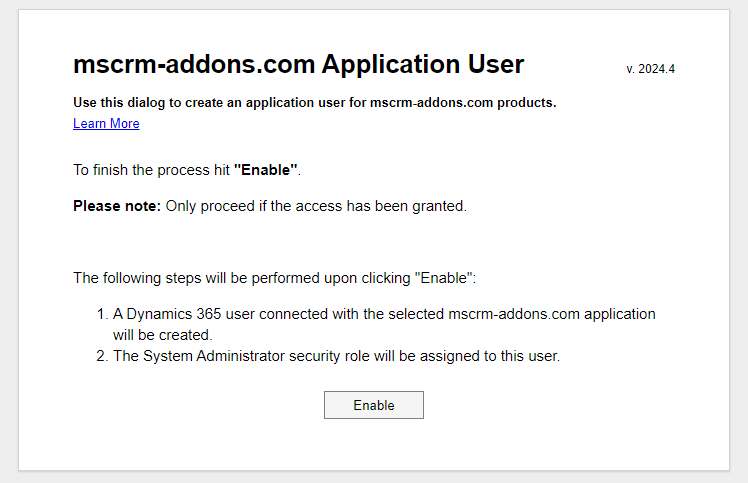
The mscrm-addons.com Application User page opens. To create the application user, you will need to provide the email address of your Dynamics 365 Administrator. Then, click the Start button.
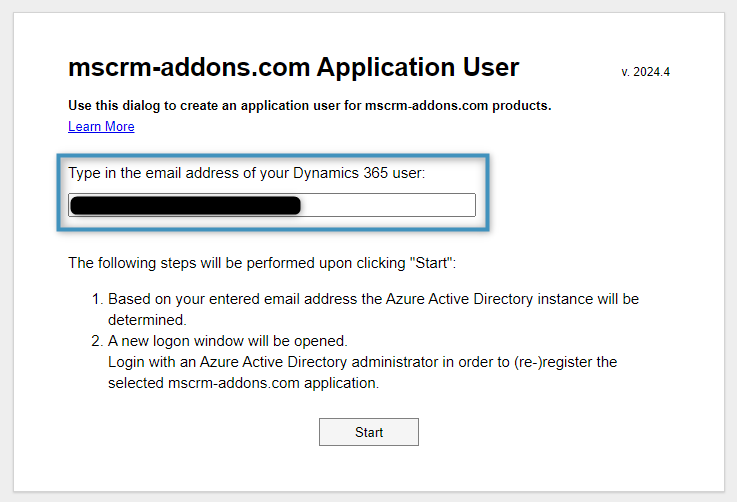
To proceed, you must enter the credentials of an Microsoft Entra ID administrator account. This account must be a Dynamics 365 administrator as well.
Please note: If the window does not open, you should check your popup blocker.

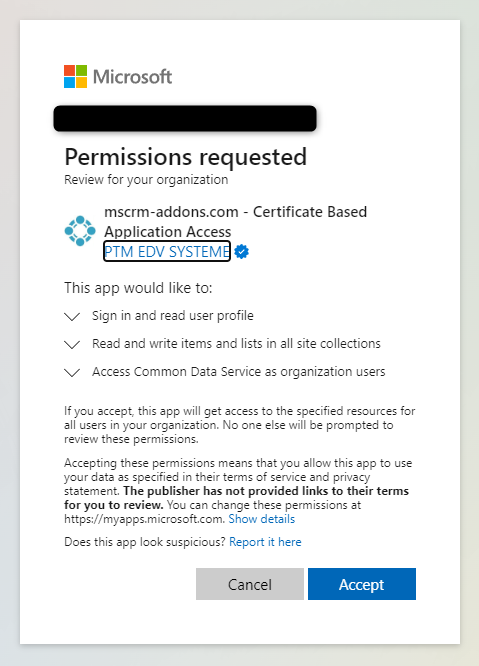
Accept the required permissions to register the App.
After accepting the permissions, you will be redirected to this window, confirming that the process has been successful.
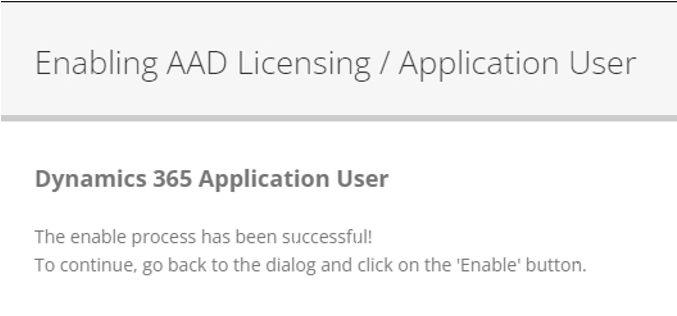
Return to the dialog and click Enable to continue.
Once enabled, the following overview is shown, displaying the ❶ username, ❷ AzureAD Domain (Microsoft Entra ID), and ❸ Security Token of the newly created application user.
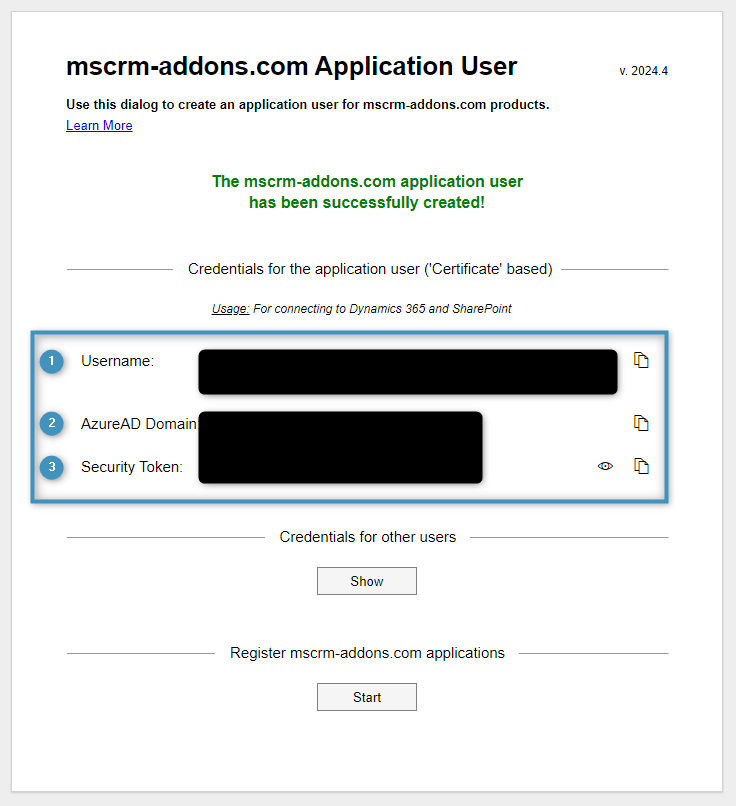
Note: It is recommended that the application user should have system administrator roles. While it is not always needed, this is required when updating your solution.
Note: You can always access this information again by navigating to the License Server and clicking on the App Access Info button (which replaces the Enable App Access button as shown in Figure 2 above).
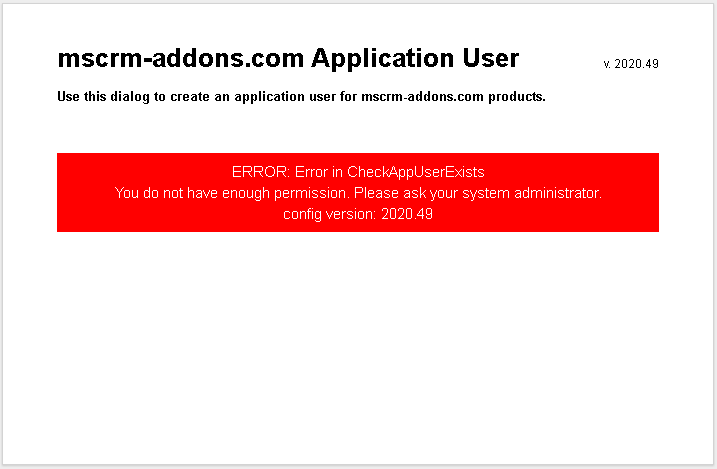
Do keep in mind that admin user rights are requested. If the current user does not have this privilege, the page will show an error:
2. Connecting to DocumentsCorePack via the Application Access for Dynamics 365
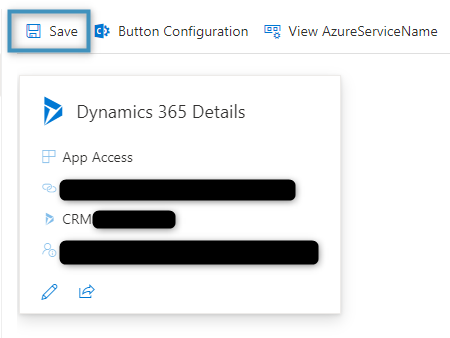
To connect to DocumentsCorePack via AppAccess, you must first either create a new online service or access an existing one (for information on configuring an online service, see here). Then, navigate to the service’s connection profile.
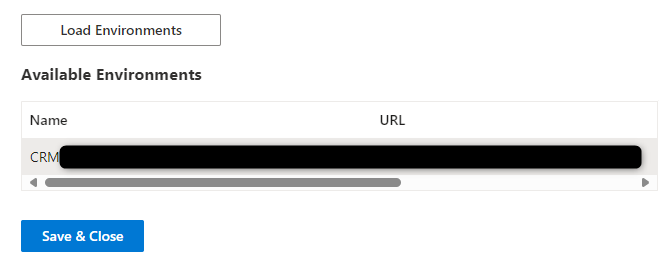
You must enter the ❶ username, ❷ AzureAD Domain (Microsoft Entra ID), and ❸ Security Token received from Figure 8 into their respective fields in the connection profile. It is recommended to enable the ❹ Use certificate-based App Access setting.

Click the Load Environments button once all fields and settings have been configured. Then, select your environment and click on Save & Close.
Finally, Save your service details. Your AppAccess configuration settings will be applied.
.
3. Troubleshooting
Checking if the required Dynamics 365 Solution is installed
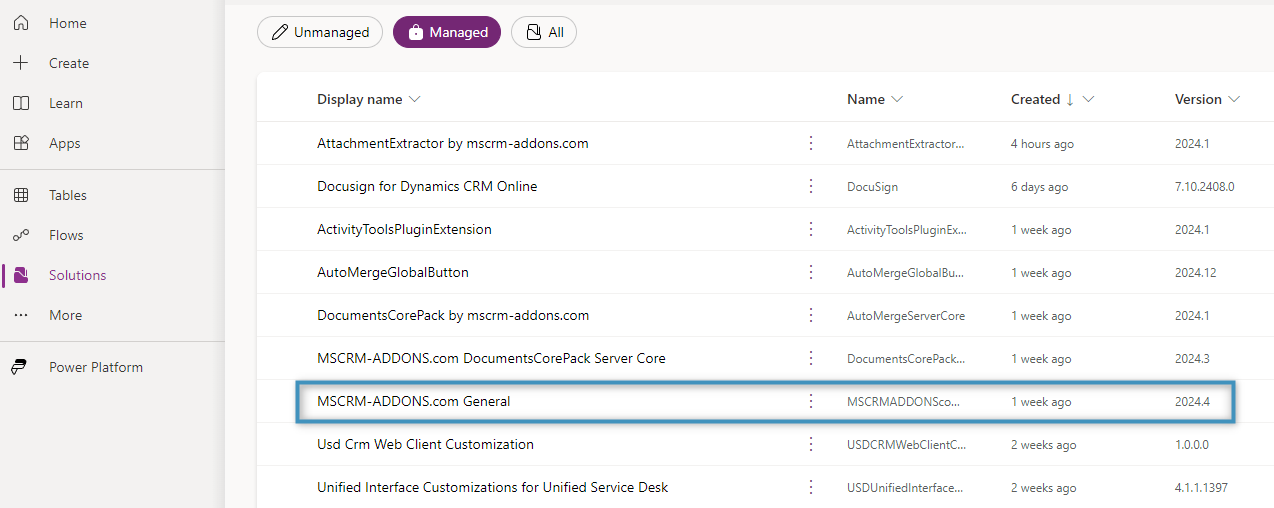
To ensure that the MSCRMADDONScomGeneral solution solution is installed, navigate to Dynamics 365 > Power Platform Environment Settings > Solutions.
Check if a solution named MSCRM-ADDONS.com General exists within this section and if it is version is 2020.49 or higher.
Note: If you are in trial mode, you can skip this section.
Obtaining the required Dynamics 365 Solution
If the version is too old, you can download the solution file here. After the download, hit the Import solution button in Solutions, select the downloaded .zip file (MSCRMADDONScomGeneral.zip) and follow the prompt.

What should I do if I installed the General Solution only and do not have access to the application user page?
Open the CreateAppUser.html web resource by replacing the Dynamics365ServerURL placeholder of the following link with your Dynamics 365 server URL:
[Dynamics365ServerURL]/webresources/ptm_general/applicationuser/CreateAppUser.html]
Example:
https://orgXXXXXXX.crm4.dynamics.com/webresources/ptm_general/applicationuser/CreateAppUser.html
This will open the mscrm-addons.com Application User configuration.
What should I do if there is no Microsoft Entra ID (Azure Active Directory) administrator account available?
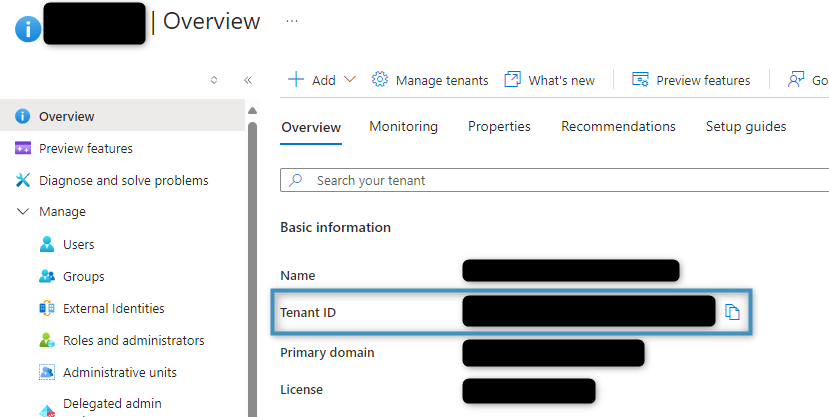
If you do not have an Microsoft Entra ID (Azure Active Directory) administrator account available, you can ask your admin to consent by having them open the following link:
https://login.microsoftonline.com/[AAD TenantId]/adminconsent?client_id=7b92eea5-1022-406b-b750-3325713c916e&state=appuser&redirect_uri=https://graphapi.mscrm-addons.com
Your administrator must replace the placeholder [AAD TenantId] with the actual ID of your AAD Tenant or with the domain name of the tenant. Once done, you will be redirected to our mscrm-addons.com website. If the page displays “The enable process has been successful,” return to the DocumentsCorePack dialog.
Please note: You can find all the relevant information here.
How to activate user impersonation
If you want your mail traffic personalized after creating an AppAccess user, it is necessary to add a Settingskey with the following values:
- Name: ImpersonateServiceCall
- Value: true
- Product: AutoMerge
Adding SharePoint metadata in SharePoint
To add SharePoint Metadata (for example, OnBehalfOfColumn) in SharePoint, you must give the “Manage” permission to your application in Entra ID. For more information, please see here.
That’s it! We appreciate your feedback! Please share your thoughts by sending an email to support@mscrm-addons.com.