• Release History
  • Documentation
  • Back to www.mscrm-addons.com
  • Release History
  • Documentation
  • Back to www.mscrm-addons.com
home/Knowledge Base/DocumentsCorePack(DCP)/PrintNode – Printer Configuration for DocumentsCorePack

PrintNode – Printer Configuration for DocumentsCorePack

320 views 1 Updated on December 20, 2022

This blog article explains how to configure PrintNode printers to be used for printing with DocumentsCorePack (DCP).

PrintNode Prerequisites:

You have to be a PrintNode customer to use this service. Information on how to configure Printnode can be found here.
Once configured, you need to get the API Keys. To do this, open the PrintNode Dashboard.

❶ Select in the menu on the left side Print Something and then click on API Keys. 

The PrintNode dashboard.
Figure 1: PrintNode Dashboard

Provide a name for your API Key and press the [Create] button.
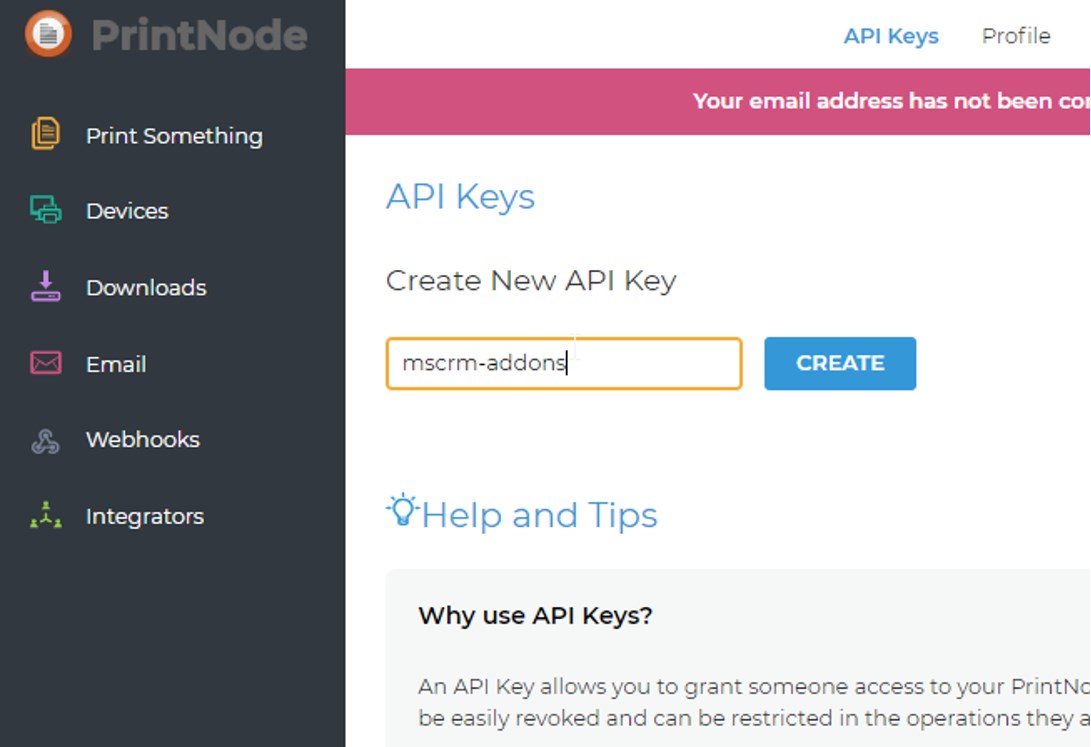
Name your API Key.
Figure 2: API Keys

Your API Key is generated. This Key is needed in the next step, as outlined below.

The generated API Key.
Figure 3: Generated API Key

Configure a new PrintNode Printer for DocumentsCorePack

First, log into the DocumentsCorePack Service Configuration.

Please note: Your DCP Service needs to be configured to handle both Document and Print Jobs. Double click on your service and ensure the Job Type is set to “Both”.

Set the Job Type in the DCP Service Configuration.
Figure 4: Service configuration

Once confirmed, you can start by clicking [configure cloud print].

"Configure cloud print" option in the DCP Service Configuration.
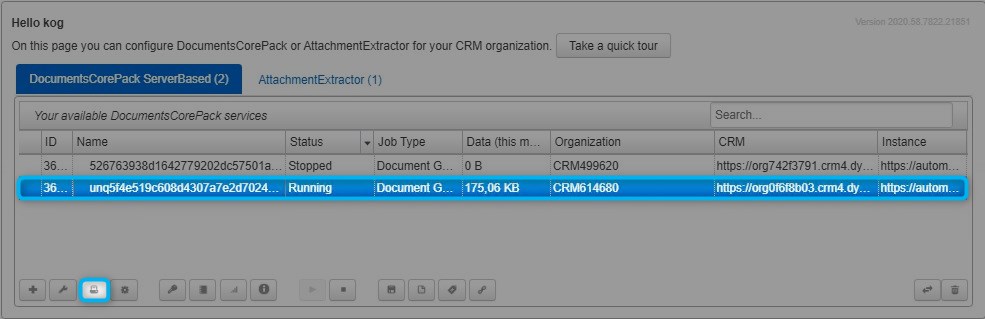
Figure 5: DCP-Service Configuration

This Cloudprint Configuration opens. Press the [+] button to continue.

The CloudPrint Configuration.
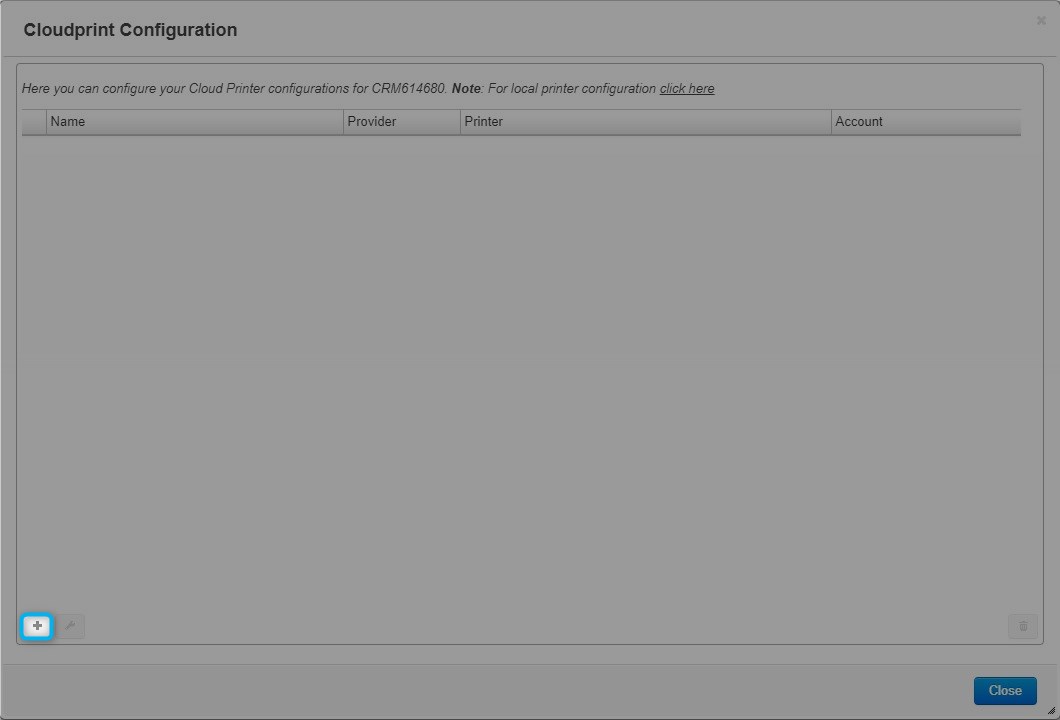
Figure 6: Cloudprint configuration

The Configure Cloud Printer Configuration site is shown. To configure your PrintNode – Cloud Printer, you have to:

❶ Select PrintNode.
❷ Name your configuration.
❸ Enter the API Key you generated earlier.
❹ Press Get available printers. 

The Configure Cloud Printer Configuration site for PrintNode.
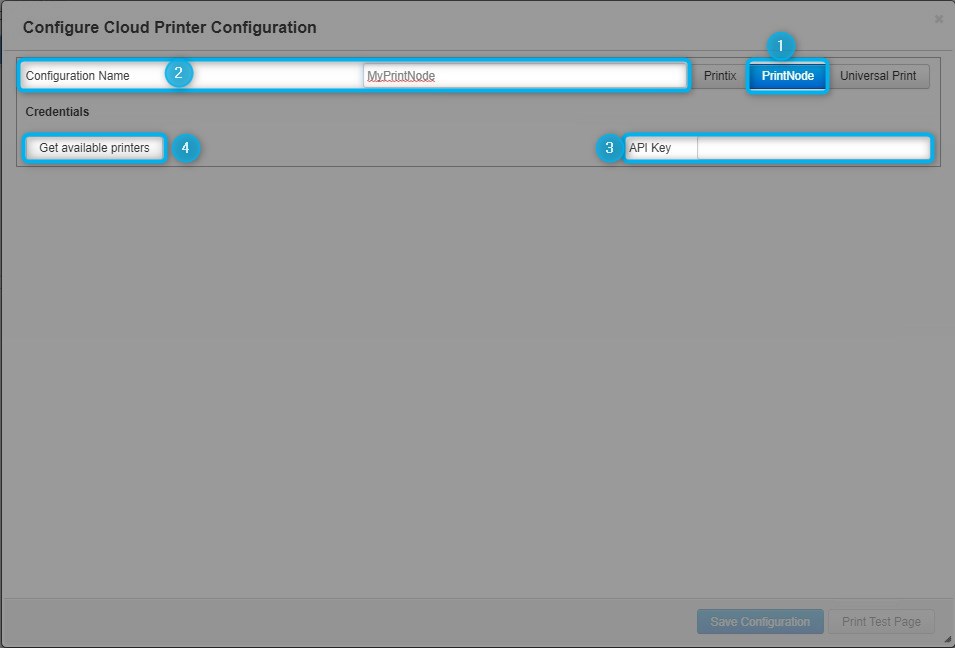
Figure 7: Configure PrintNode

The Available Printer drop-down lists all printers received from PrintNode. Select the printer you want to configure.

The Available Printer drop-down list.
Figure 8: Available printers

Printer Settings: Here you can find a list of all configurable capabilities of your printer. Options listed depend on your printer and/or print driver.

Please note: If you want to change a specific setting, untick the checkbox to unlock. Then you are able to modify the value.

If the settings correspond with what you need, press the [Save Configuration] button.

Save the configuration.
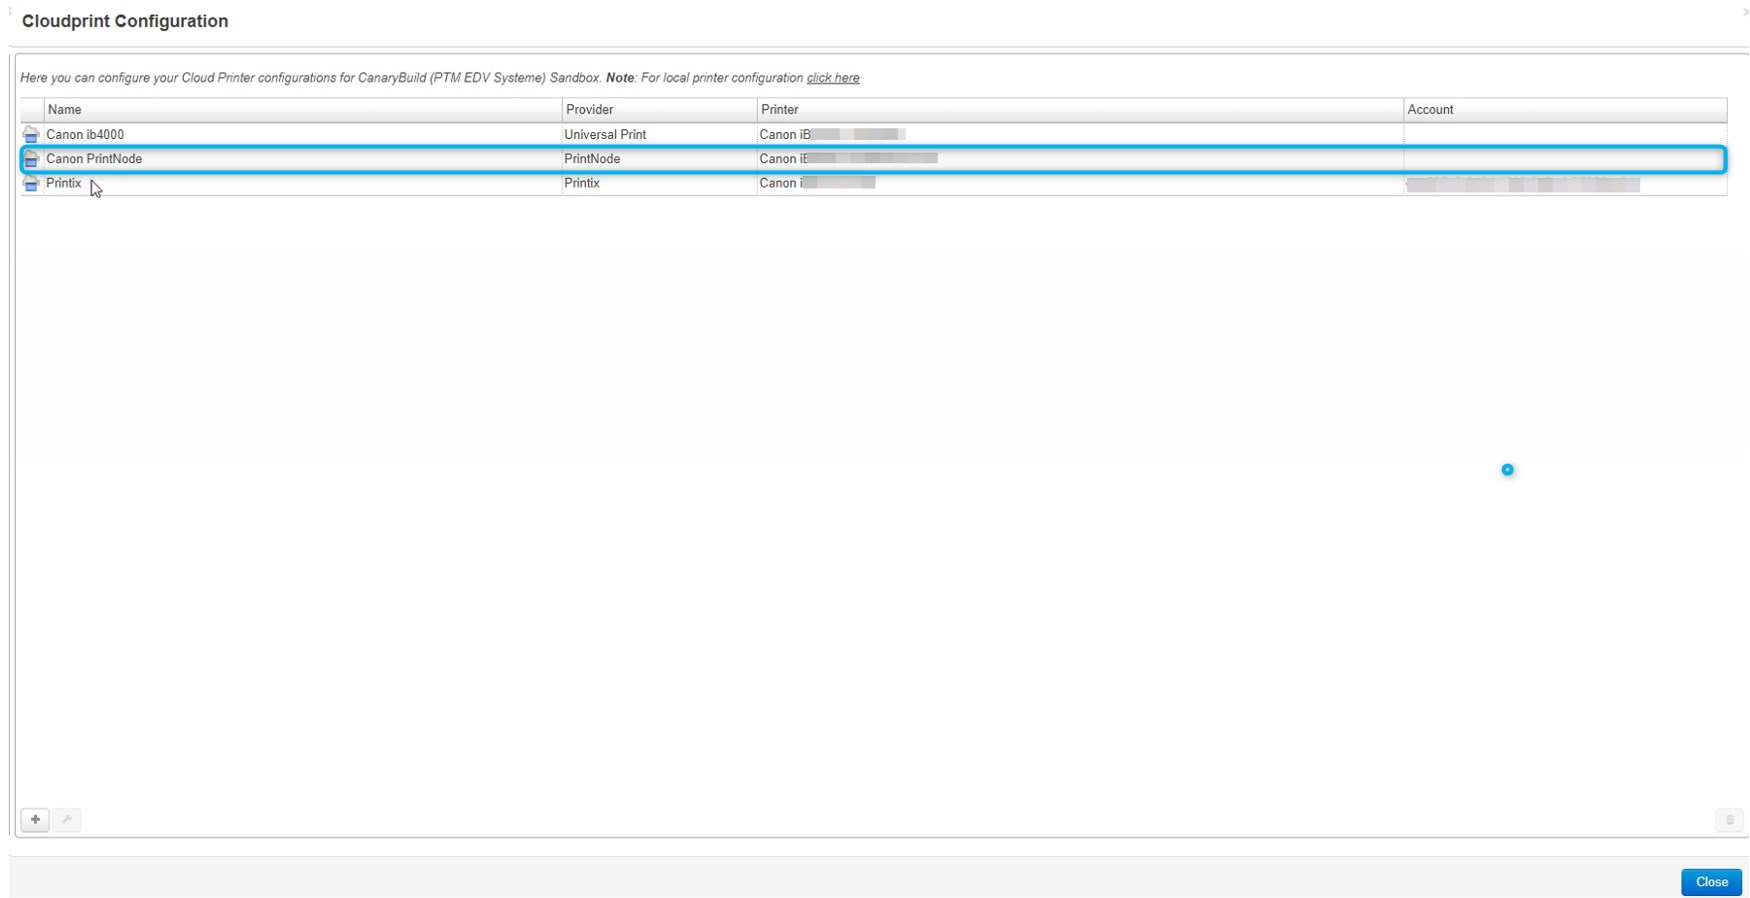
Figure 9: Successfully installed PrintNode Printer

Your printer is now configured and good to go!

Back to Printing with DocumentsCorePack.

That´s it! We appreciate your feedback. Please share your thoughts by sending an email to support@mscrm-addons.com.

Was this helpful?

1 Yes  No
Related Articles
  • How to share the Connection of the DocumentsCorePack Connector
  • AssureSign for DocumentsCorePack
  • How to conditionally remove a watermark in DocumentsCorePack templates
  • Document Processing with DocumentsCorePack (DCP)
  • How to activate SharePoint in DocumentsCorePack
  • Fillable PDF forms
Leave A Comment Cancel reply

You must be logged in to post a comment.

Latest Articles
  • How to share the Connection of the DocumentsCorePack Connector
  • How to update the metadata in the DocumentsCorePack Template Designer
  • Working with Product Properties in DocumentsCorePack
  • How to work with the Relationship Manager
  • Using virtual tables in DocumentsCorePack
Popular Articles
  • Where do I find the Unique Organization name in Microsoft Dynamics 365?
  • DocumentsCorePack Template Designer – Getting Started
  • mscrm-addons.com Application Access for Dynamics 365 (App Access) – DocumentsCorePack
  • DocumentsCorePack Online Service Configuration
  • Step-by-Step: How to configure a One-Click-Action
Top Rated Articles
  • IMPORTANT information for Dynamics 365 online customers using DocumentsCorePack and/or AttachmentExtractor
  • How to activate the DocumentsCorePack connector for PowerApps & Microsoft Flow
  • Step-by-Step: How to configure a One-Click-Action
  • Online Services: Required Application Permissions
  • Where do I find the Unique Organization name in Microsoft Dynamics 365?
Categories
  • *News and General Infos* 51
  • Webinars 35
  • Template Designer(DCP 179
  • DocumentsCorePack(DCP 192
  • TelephoneIntegration (TI 65
  • AttachmentExtractor (AE 62
  • PowerSearch (PS 48
  • ActivityTools (AT 59
  • SmartBar (SB 53
  • GroupCalendar (GC 46
Our Vision

“We see it as our purpose to provide products that simplify and speed up our customers’ Microsoft Dynamics 365 experience.”

Knowledgebase
LogIn
mscrm-addons.com
  • Products
  • Online Shop
  • Downloads
  • My Account
About Us
  • About Us
  • Case Studies
  • Newsletter
  • Partner Program
  • Contact
Support
  • Support
  • Terms & Conditions
  • Documentation
  • Webinars
  • Legal Documents
  • Impressum
  • © 2022 www.mscrm-addons.com. All Rights Reserved.