This blog article explains how to configure Printix printers to be used for printing with DocumentsCorePack (DCP).
Prerequisites
You must be a Printix customer to use this service and printers have to be available in the Printix portal. Learn how to configure your printer here.
Retrieving information from Printix
You will need a Client ID, a Client Secret and a Tenant ID to enable printing via DCP. This information can be retrieved from Printix.
To get this information, log in to your Printix dashboard via the following link:
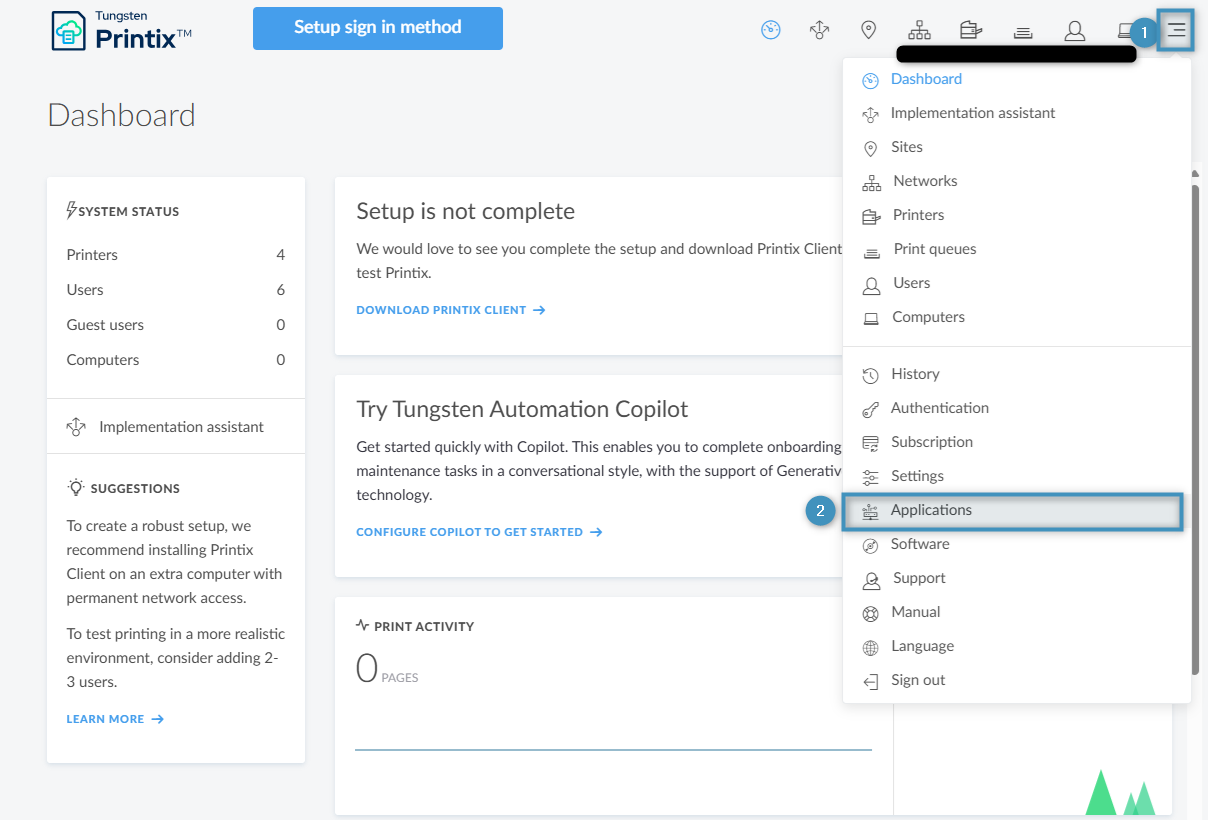
https://[customername].printix.net/admin/#/dashboardThen, open the dropdown in the ❶ right corner and select ❷ Applications.
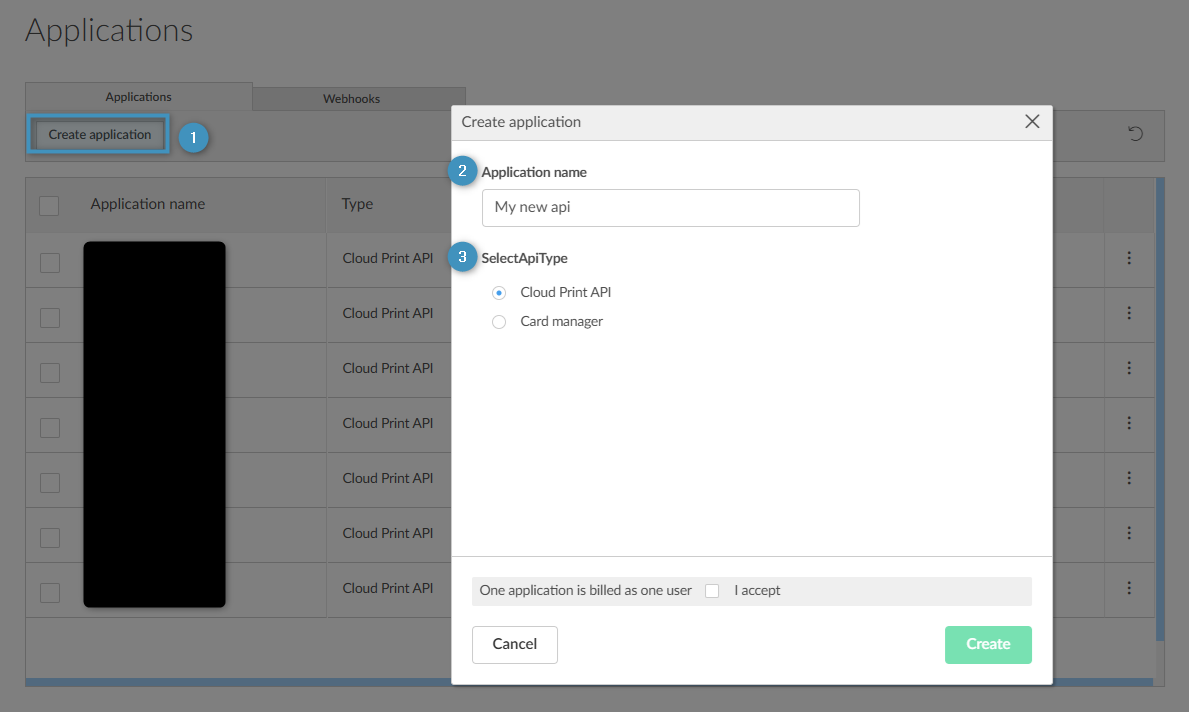
Applications will open. Select ❶ Create Application and fill in an ❷ application name. Then, set the ❸ SelectApiType to Cloud Print API and click Create.
After creating the application, you will be able to access your Tenant ID, Client ID, and Client Secret. This information is needed in the next step as outlined below.

Configure a new “Printix” Printer for DocumentsCorePack
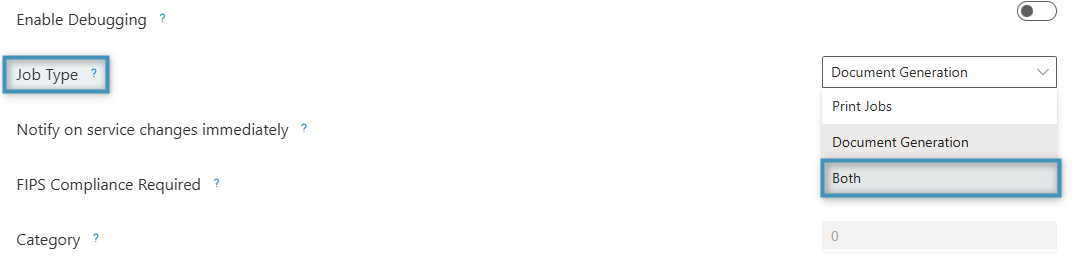
First, log into your DCP Service Configuration and make sure that your service has been set to handle both Print Jobs and Document Generation under Job Type.
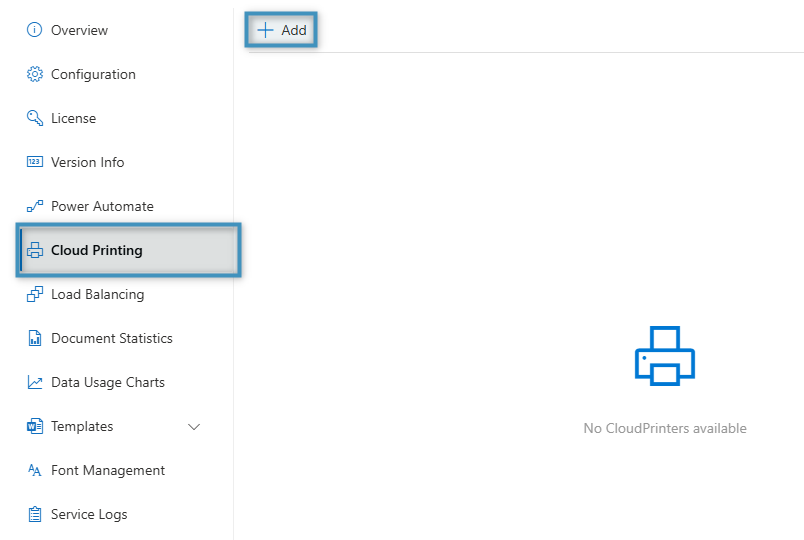
Once confirmed, navigate to the Cloud Printing tab and click Add.
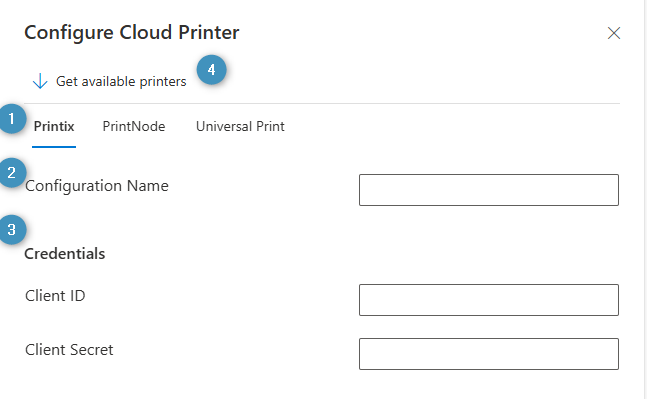
The Configure Cloud Printer dialog is displayed. To configure your cloud printer, you will need to do the following:
❶ Select Printix
❷ Name your configuration
❸ Type in your credentials (such as Client ID and Client Secret)
❹ Click Get available printers
After these steps, the dialog will expand, allowing you to choose a printer under Available Printers and configure further settings dependant on the printer chosen.
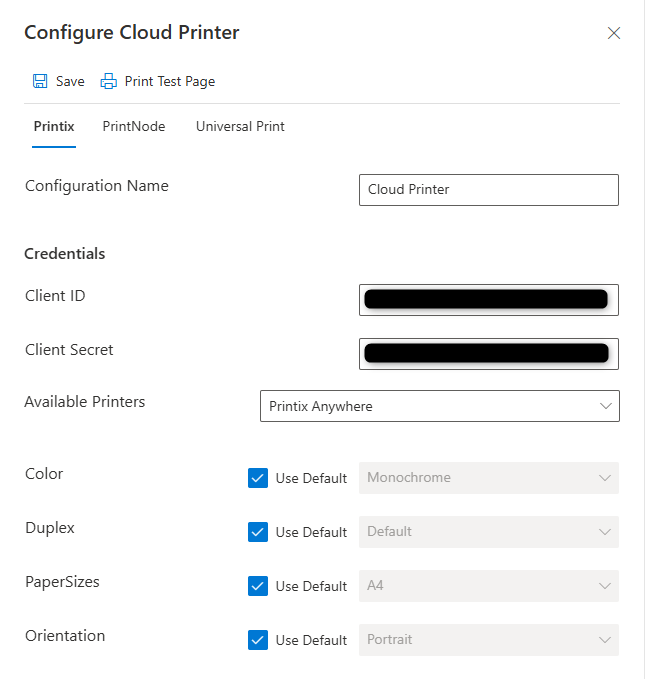
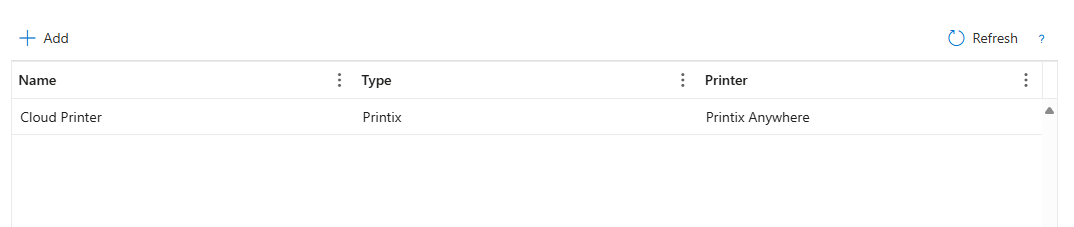
Save your settings once you are finished. Your cloud printer will be listed as shown below.
Back to Printing with DocumentsCorePack
That´s it! We appreciate your feedback. Please share your thoughts by sending an email to support@mscrm-addons.com.